Ubuntu2Go production, use and information description (LinuxtoGo)
Origin: windowsstogo or win2go, portable windows operating system. Emails, private messages, messages, etc. often receive such messages, and reply to the production process in a unified manner.
**Only one method is listed here. If there is any fallacy, bear with me. **
The advantage of using this method is that you can carry the system with you. As long as the computer supports USB boot, you can use your own dedicated system.
Notebook/desktop/industrial computer/ultrabook are all available.
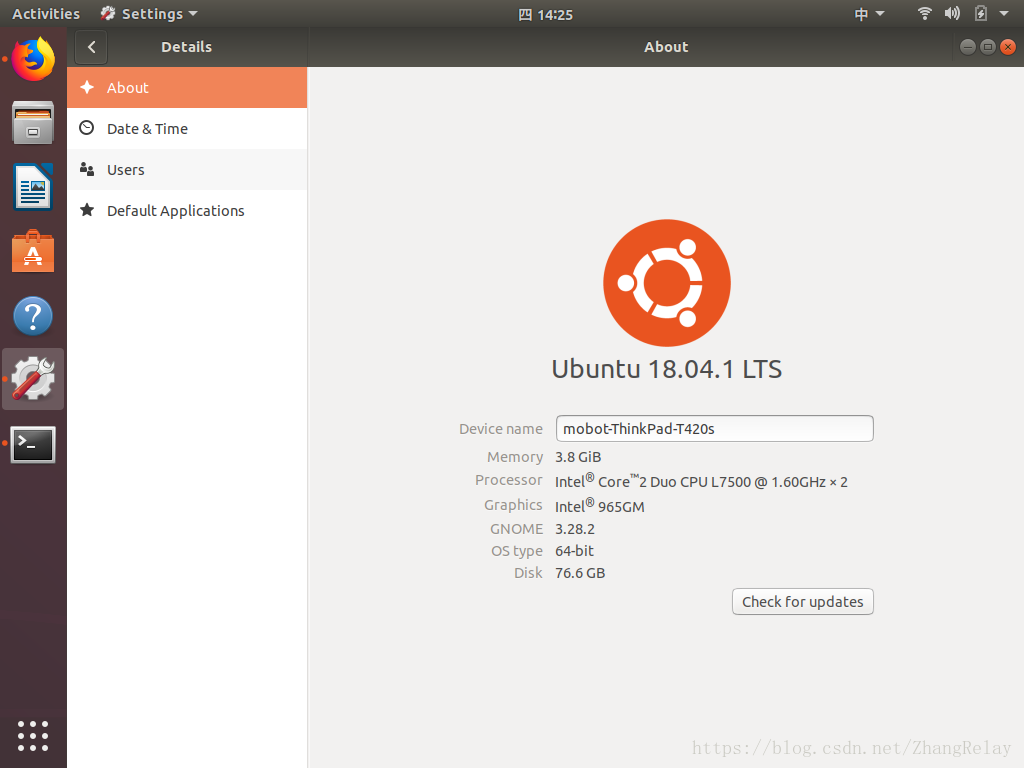
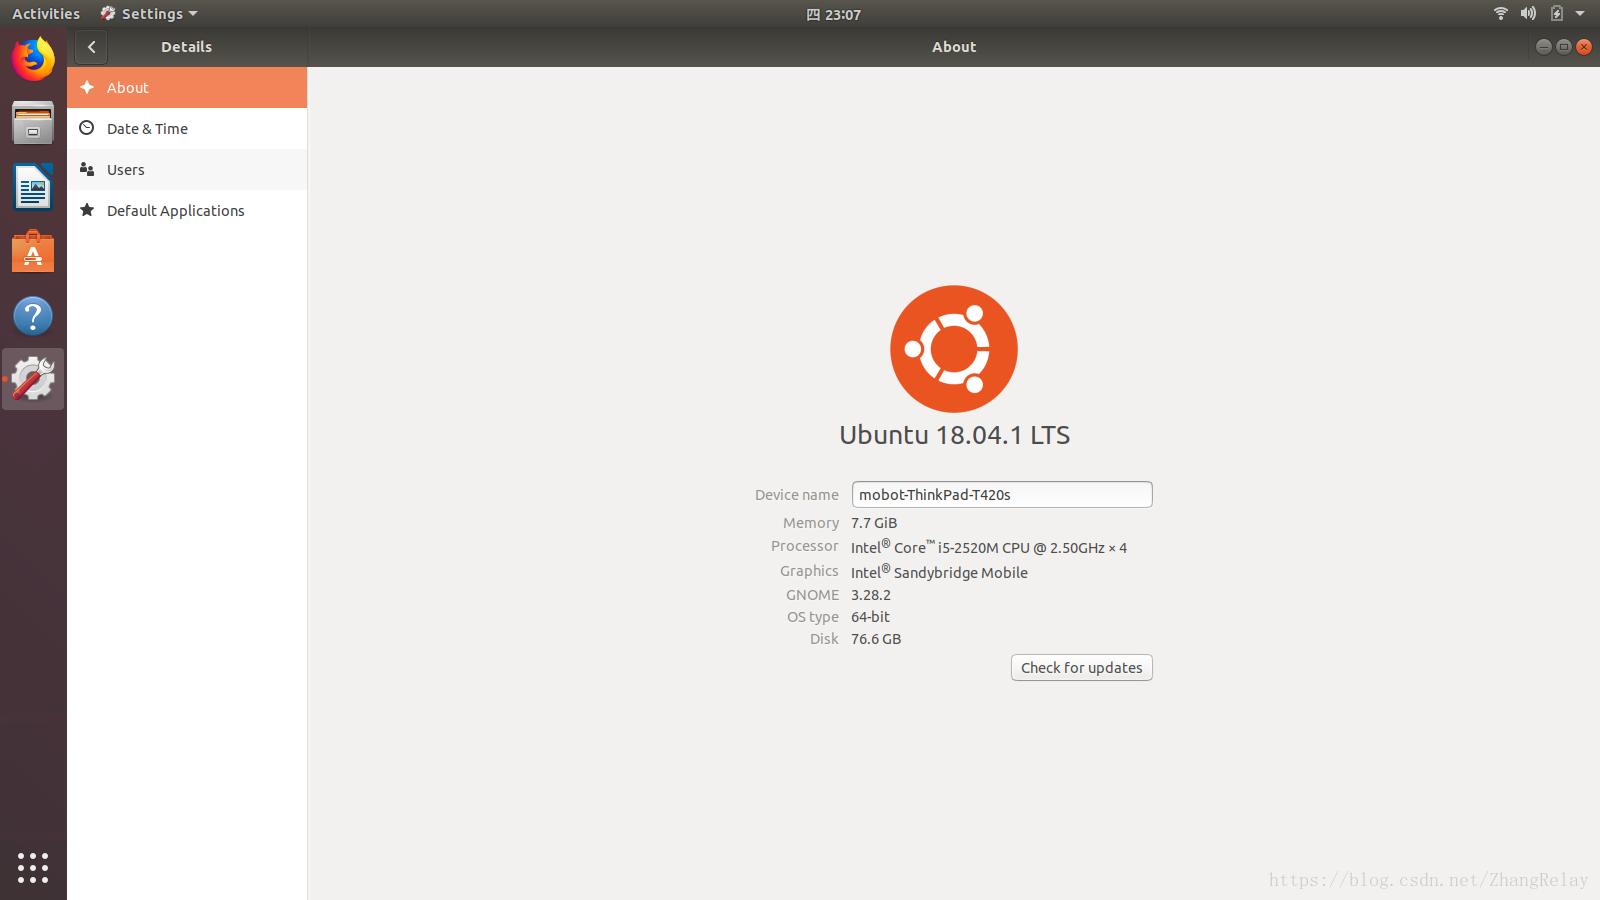
As shown in the picture above, this is Ubuntu 18.04 installed on T420s, plug in antique books like X61T, just like plug and play~
Tested 3+ different types of classroom and laboratory podium computers, 20+ different types of laptop computers (from 2008 to 18 years), all started normally without any problems~
As long as the computers supported by Ubuntu 18.04 have no driver problems, some hardware information diagrams are as follows:
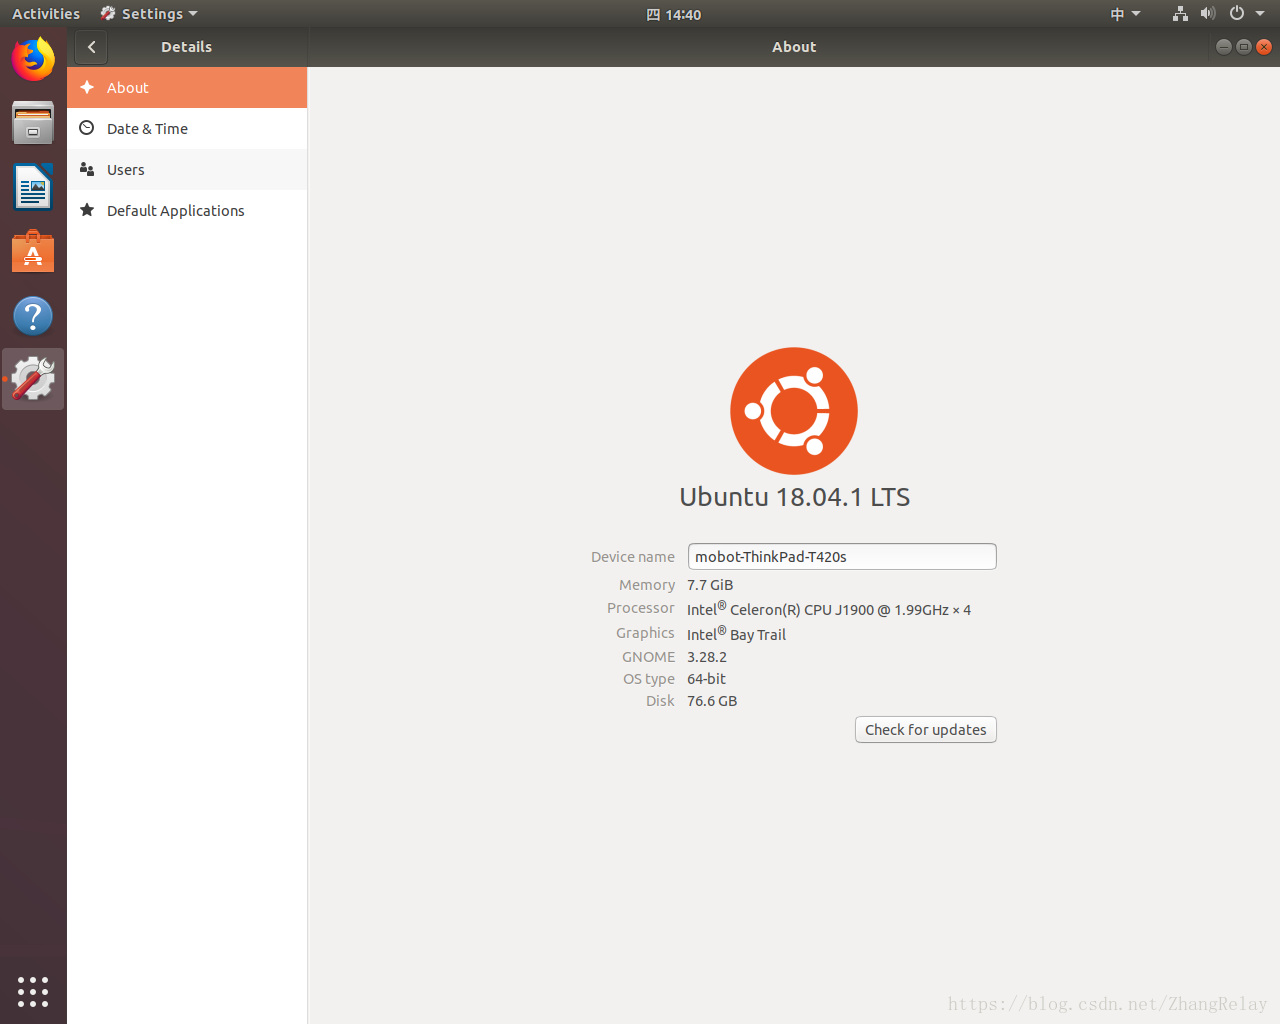
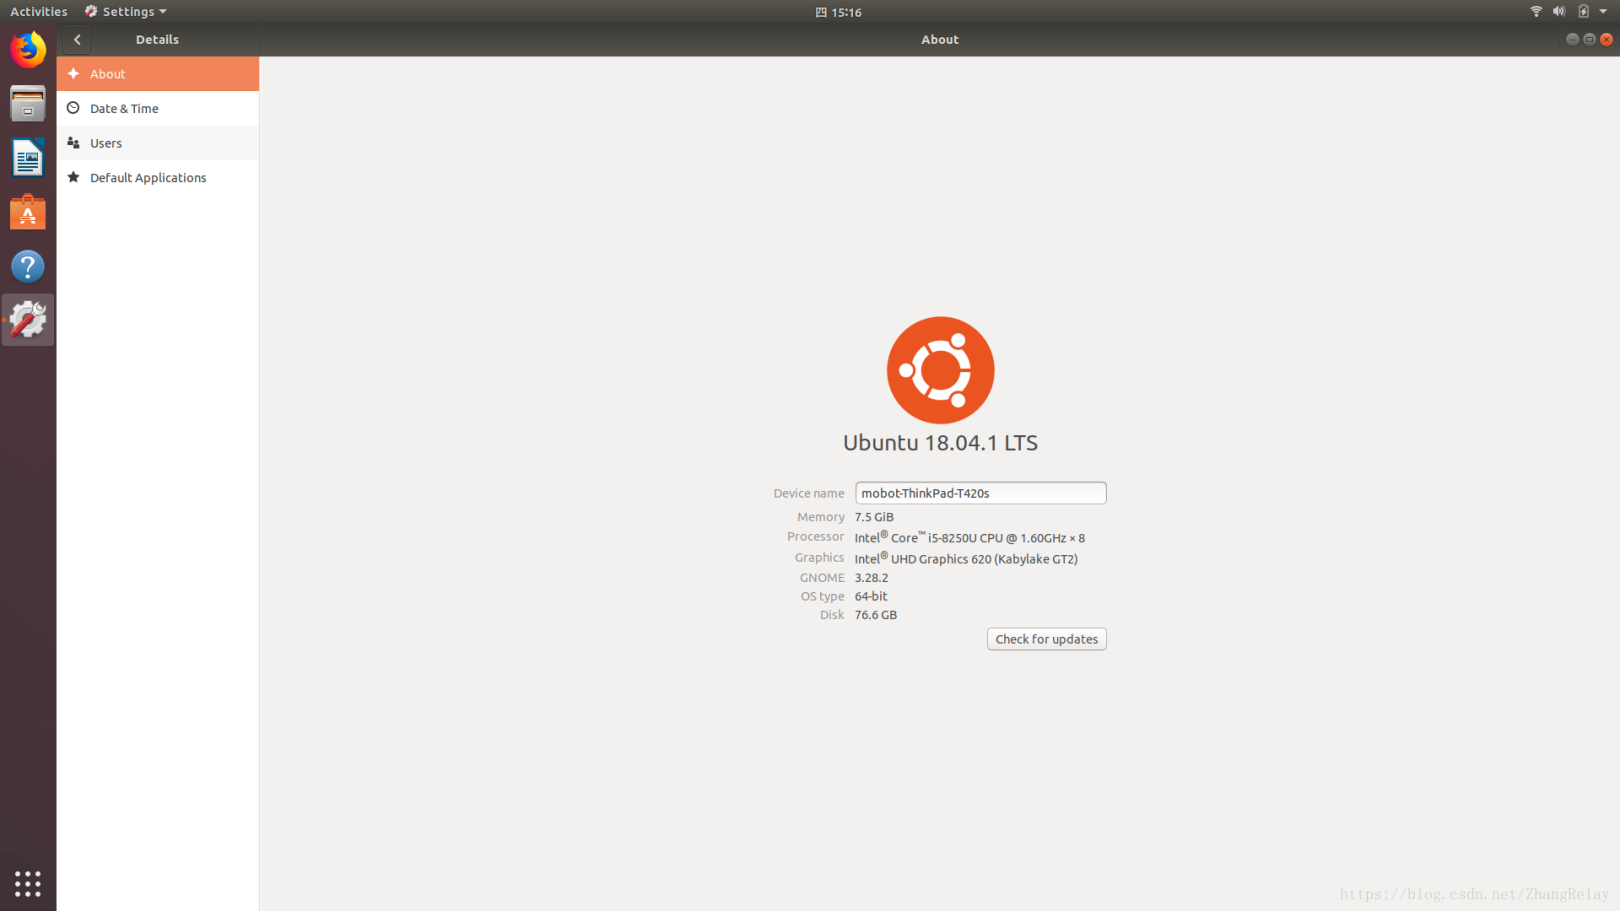
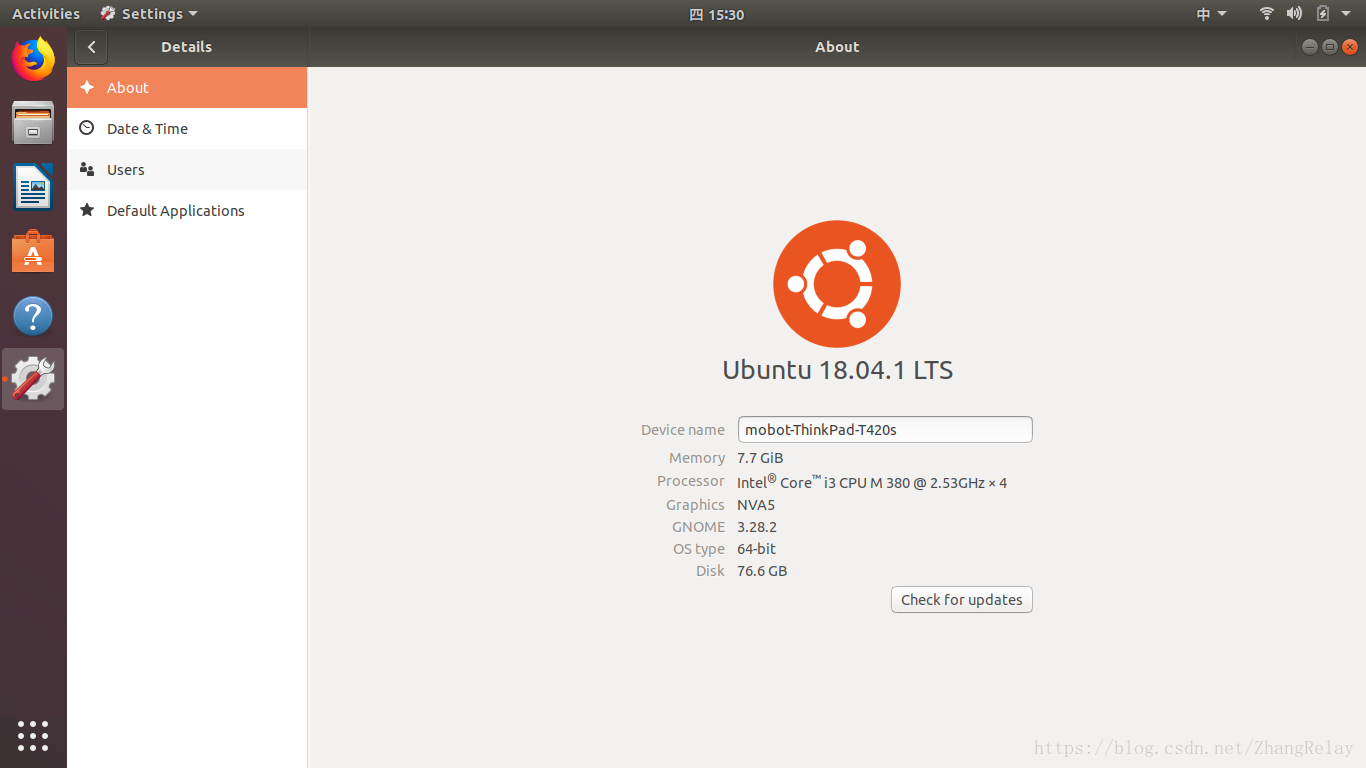
If you don’t want to make it, you can refer to the finished product that needs to be tested (ROS2Go):
https://blog.csdn.net/ZhangRelay/article/details/83096996
Graphic video introduction link: https://mp.weixin.qq.com/s/x2ow0ABgj6PJWugCn0TqPg
Chinese tutorial on Baidu Tieba: http://tieba.baidu.com/p/2931186318
After testing this kind of method, it supports Ubuntu 18.04 16.04 14.04 and other LTS systems, USB interface mobile hard disk and U disk.
If you want to toss, you can refer to the following brief description, there are two specific steps:
-
Install Ubuntu on a removable storage device
-
If you cannot boot, you can use BootRepair to repair
**This method is only suitable for playing, not for batch production! **
A. Installation
How to install a real Ubuntu system on a USB flash drive, ** The process is similar, but not necessarily the same! ! ! **
This is a step-by-step tutorial showing how to install a real Ubuntu operating system on a USB stick to create a'Windows To Go' style USB drive. Tested with Ubuntu 18.04 16.04 14.04 etc.
Claim:
Before starting, you need to prepare a few things:
- An 8GB + USB drive. (16GB, 32GB, or 64GB are all available) 32GB+ is recommended, which can meet daily needs.
- An Ubuntu Live CD/DVD/USB. In the example below, a bootable Ubuntu Live USB is created from an .iso image.
- A computer with an operating system installed.
And always back up the data to a USB flash drive!
Start:
First of all, you need a 16GB USB memory stick, an old 4GB USB memory stick and a multi-boot laptop based on Ubuntu or windows.
**1.**There is no Ubuntu CD/DVD, so you need to burn the Ubuntu .iso image into an old USB memory stick. to this end:
- Download the Ubuntu image: releases.ubuntu.com
- Download UNetbootin: unetbootin.sourceforge.net. For Ubuntu, please install it from the Software Center.
- Plug in the USB memory stick.
- Start UNetbootin and burn the .iso image to USB
- The method of making a Linux boot U disk in windows system is similar.
This step is to create a bootable Ubuntu Live USB device!
**2.**Insert the bootable USB drive into the computer and boot to the Live Ubuntu system.
**Important information: **For pre-installed computers such as Windows 8 or 10, the "Quick Start" and "Safe Start" functions must be disabled.
To disable "Fast Startup", go to "*Control Panel"> "Hardware and Sound"> "Power Options"> "System Settings"> "Select what the power button does" and uncheck the "Enable Fast Startup" box. *
To disable "safe boot", you can refer to the BIOS to modify after booting.
Tip: The difference between BIOS and CMOS
| 1. BIOS is software and program; CMOS is chip and hardware; through the BIOS program, the parameters in CMOS can be set; 2. CMOS is a chip, on the motherboard, important boot parameters are stored, and CMOS button batteries are used to maintain power; The parameters are stored in CMOS, and the set parameters are written into CMOS through the program to set it; 3.BIOS is (Basic Input/Output System, abbreviation of Basic Input/Output System) which plays the most basic and most important role in the computer The role of. It is the most basic and most important program in a computer. Put this program in the memory (chip) BIOS that does not require power supply; it provides the lowest and most direct hardware control for the computer. The original operation of the computer is completed according to the content solidified in the BIOS; 4 .BIOS is an interface or converter between hardware and software programs. It is responsible for solving the immediate needs of the hardware and executing it according to the operating requirements of the software on the hardware. It plays a very important role in the computer system. CMOS, namely: Complementary Metal Oxide Semiconductor-Complementary Metal Oxide Semiconductor (intentionally refers to complementary metal oxide semiconductor memory, is a large-scale application of raw materials for integrated circuit chip manufacturing), is a readable piece on the motherboard of a microcomputer Write RAM chip; 5. Mainly used to save the current system hardware configuration and the operator's setting of certain parameters. The CMOS RAM chip is powered by the system through the backup battery. In the shutdown state, the CMOS information will not be lost when the system is powered off; 6. The difference and connection between BIOS and CMOS: BIOS is like the soul of a person, CMOS is likened to The human body is the relationship between the soul and the body; 7. RIOS and CMOS are both related and different: the system setting program in BIOS is the means to complete the CMOS parameter setting; 13. CMOS RAM is the storage place for the BIOS setting system parameters, It is also the result of BIOS setting system parameters. Therefore, the complete statement should be "CMOS parameters are set through the BIOS setup program". Since both BIOS and CMOS are closely related to the system settings, the statement that BIOS settings and CMOS settings are caused in actual use actually refers to the same thing, but BIOS and CMOS are two completely different concepts. Don't be confused. |
|---|
**3.**Now enter the Ubuntu Live system. Plug in the 8GB + USB memory stick. Then launch Gparted Disk Partition Tool from Unity Dash.
Select the USB drive (16GB in my case) in the drop-down box in the upper right corner, you should see something like the following:
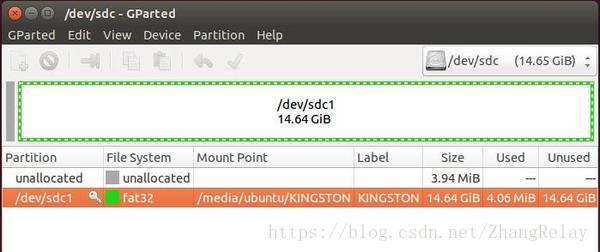
If there are two USB flash drives plugged into the computer, note the distinction, the hard disk is /dev/sda, the 4GB Live USB is /dev/sdb, and the 16GB USB drive is /dev/sdc.
**4.**From the right-click context menu, unmount the partition on the USB drive, and then delete it.
Click the green check mark button to apply the changes and you will get an unallocated flash drive like:
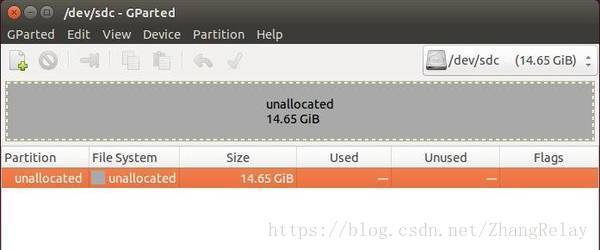
When finished, close the Gparted partition manager.
**5.**Click on the desktop shortcut "Install Ubuntu" to open the Ubuntu installation wizard.
Follow the wizard until you are asked to choose where to install Ubuntu. Select the last option "Other", and click "Continue" to display the partition table.
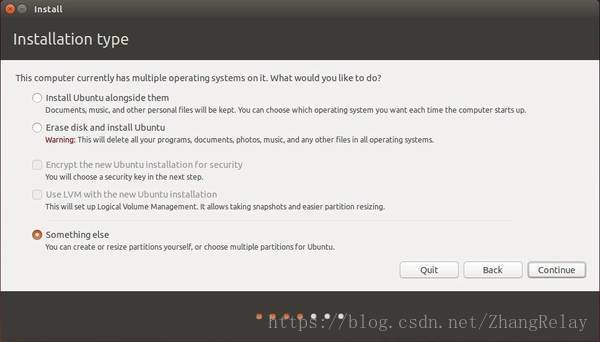
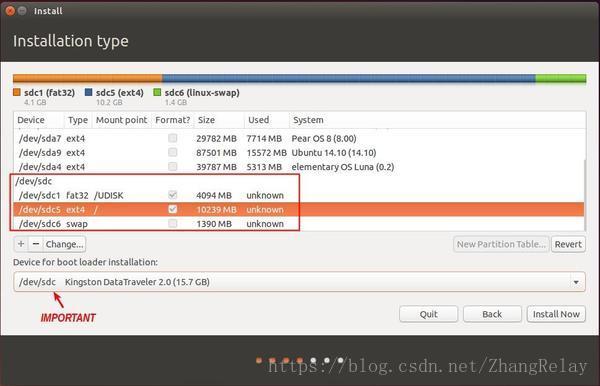
**6.**In the partition table, scroll down and highlight the "free space" under the USB drive (/dev/sdc in the case), and click the plus sign to create the following partitions one by one:
-
FAT32 (or fat16) partition (Required)
-
Must be /dev/sdc1 (or sdX1)
-
Mount point /NAME_HERE (/UDISK in this case)
-
Set the memory size by yourself, which can be used for general data storage.
-
Let others default.
-
Ubuntu's EXT4 partition (Required)
-
Mount point "/" (without quotes)
-
Memory size 5G +
-
Let others default.
-
Exchange partition (optional).
-
If the RAM is large enough and you don't need the hibernation function, you can skip this step.
And it is very important to choose to install the boot-loader to the USB flash drive** (/dev/sdc in this case).
**7.**After completing all operations, click Install Now and confirm to format the partition (note the partition to be formatted).
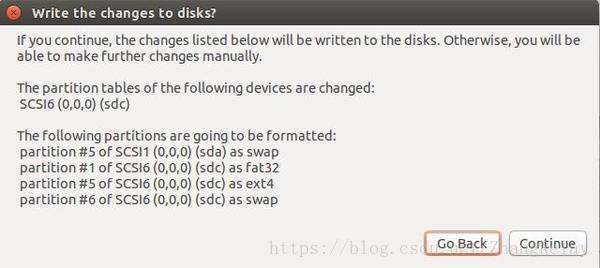
Click "Continue" and complete the wizard. After the installation is complete, restart your computer and use the "Ubuntu To Go" USB drive to boot up and have fun!
B. Repair
If an error occurs during the installation process, or you cannot boot from the mobile device, enter the Ubuntu2Go system, you can refer to the following:
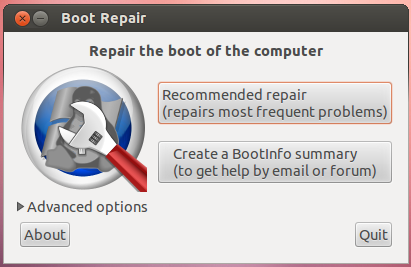
Boot-Repair is a simple tool to repair frequent startup problems you may encounter in Ubuntu, such as unable to start Ubuntu after installing Windows or other Linux distributions, or unable to start Windows after installing Ubuntu, or Displayed when GRUB is not installed, some upgrades will destroy GRUB, etc.
Boot-Repair allows you to fix these problems with a simple click, which usually reinstalls GRUB and restores access to the operating system installed before the problem occurred.
Boot-Repair also has advanced options for backing up table partitions, backing up bootsectors, creating Boot-Info (get help via email or forum) or changing the default repair parameters: configure GRUB, add kernel options (acpi = off. ..), clear GRUB, change the default operating system, restore MBR compatible with Windows, repair damaged file systems, specify the disk where GRUB should be installed, etc.
**In order to help forum and IRC members to help you diagnose startup settings problems, Boot-Repair (if it has a network connection) will create an Ubuntu pastebin link for you to share, allowing experienced members to view your error boot. Ubuntu's Pastebin is not easy to index or search. The purpose of the tool that created this page (Boot-Info) is to provide a very benign and useful solution to this problem. The intention is not to invade your privacy, nor to make you a target. This tool is completely aimed at Ubuntu newbies who want to go beyond their startup problems and like to use Linux. If you wish, you can completely opt out of all Internet usage, including generating pasted links, by viewing the "Advanced Options" section below. **
Boot-Repair is a free software, licensed under GNU-GPL.
installation:
The first option: Get the disk containing Boot-Repair##
The easiest way to use Boot-Repair is to create a disk that contains the tool (for example, Boot-Repair-Disk, a disk that automatically starts Boot-Repair), and boot on it.
Note: It is recommended to install ISO on live-USB (for example, via UnetBootin or LiliUSB or Universal USB Installer). If your computer is pre-installed with Windows 8 or your boot is in [EFI] (https://help.ubuntu.com/community/UEFI) mode, please do not burn it on DVD.
The second option: Install Boot-Repair in Ubuntu
-
From an Ubuntu live session (boot computer on Ubuntu live-CD or boot on live-USB, and select "Try Ubuntu") or from an installed Ubuntu session (if you can access it)
-
Connect to the internet
-
Open a new [Terminal] (https://help.ubuntu.com/community/Terminal), and enter the following commands (press Enter after each line):
sudo add-apt-repository ppa:yannubuntu / boot-repair
sudo apt-get update
sudo apt-get install -y boot-repair && boot-repair
Using boot repair#
Recommended maintenance##
-
Start Boot-Repair from any of the following:
-
Dash (Ubuntu logo in the upper left corner of the screen)
-
Or type "boot-repair" in the terminal
-
Then click the "Recommended Repair" button. After the repair is complete, please write down the URL displayed on the **paper (paste.ubuntu.com/XXXXX), then restart and check if the access to the operating system is restored.
-
If the repair fails, please indicate the URL to the person helping you via email or forum.
Warning: The default setting is the setting used for "Recommended Repair". Changing them may worsen your problem. Do not modify them before creating BootInfo URL, and ask for advice in the Ubuntu forum Absolute Beginner Part or Installing and Upgrading.
advanced options##
-
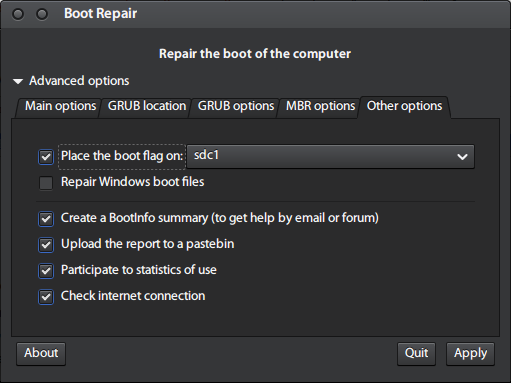
If you want to opt-out of paste.ubuntu.com link creation (not recommended to inexperienced users seeking help from forums or IRC members), you can. Just click on "Advanced Options" and find the "Other Options" tab. Uncheck "Upload report to pastebin".
-
The log may include UUID, LUKS header, hexadecimal dump of the first sector of the drive, device serial number, user name, etc.
Here the solution if anybody else needs it:
Original Partition Layout:
/dev/sda1 (EFI Partition)
/dev/sda2 (Boot Partition)
/dev/sda3 (LVM2/LUKS encrypted Root & Swap)
Convertig to BIOS boot:
I deleted the EFI Partition and created a new partition with the bios_grub flag instead of it.
Using this tutorial I mounted the encrypted file system, chrooted into it and installed GRUB
Remove the EFI Partition from /etc/fstab
If you don't care about it, then the saying "if it ain't broke, don't fix it" applies. Absent a compelling reason to do so, switching from EFI-mode to BIOS-mode booting offers no benefits, but poses several drawbacks, including:
Risk -- Such a conversion runs the risk of creating new problems you're not experiencing now. These risks include damage to installed files and the possibility that you'll end up with an unbootable (or even completely trashed) system.
Time -- It will take time to perform such a conversion. You'd probably be better off doing something else.
Slower boot -- Although this isn't universally true, EFI-mode booting is usually slightly faster than BIOS-mode booting.
Reduced functionality -- You might not care about it, but booting in EFI mode provides you with some minor features that BIOS-mode booting does not provide. Most importantly, you can install multiple boot loaders and change which one is active with a single command. EFI boot variables and access to EFI system calls provide the potential to do more, although these features have yet to provide significant benefits in Ubuntu.
Lack of Secure Boot -- This much-maligned feature actually provides some modest benefits because it can prevent pre-boot malware from running. To be sure, not all EFI-based computers support Secure Boot, but just about any desktop or laptop computer that shipped with Windows 8 or later does.
Complications to current and future multi-boot configurations -- If you're currently multi-booting with other OS(es), switching from EFI-mode to BIOS-mode booting requires converting all your OSes. (Well, there are ways to boot different OSes in different modes, but they're tedious.) If you're currently booting only Ubuntu, enabling the Compatibility Support Module (CSM) in the firmware, which is required to boot in BIOS mode, makes it more likely that you'll run into problems when installing new OSes. See my page on this topic for all the gory details.
To be sure, there are scenarios in which switching to BIOS-mode booting makes sense. You, however, have provided no such compelling reason; you "just don't care about it," to repeat your words. Given the preceding list of drawbacks to such a conversion, "just don't care about it" does not qualify as a compelling reason to take the risks and accept the drawbacks of switching to BIOS-mode booting.
If you insist on ignoring my advice, you can do the conversion. In brief, you must enable your computer's CSM and install a BIOS-mode boot loader for Linux. The most common of these is the BIOS-mode version of GRUB. The Boot Repair tool will do this in a semi-automated way; however, you must boot the OS used to run Boot Repair in BIOS/CSM/legacy mode, and this in turn requires either luck or that you understand how to control the boot mode. See my page on the CSM, referenced earlier, for information on this topic. If you use GRUB, you should also create a BIOS Boot Partition on your disk (it probably does not exist now).
Related Links#
-
"Boot Repair: One-click to repair a graphical tool for PC boot!"-Any questions/comments on the Ubuntu forum.
**Supplement dd backup: **
It is very important to backup hard disk data: sudo dd if=/dev/sdi of=/dev/sdo bs=xxxx
**If you need a quick backup, bs can be set larger, such as 8192. **
dd if=/dev/sdc of=/dev/sda conv=noerror status=progress
If you need to observe the speed: https://askubuntu.com/questions/215505/how-do-you-monitor-the-progress-of-dd
-
- Fin--
Recommended Posts