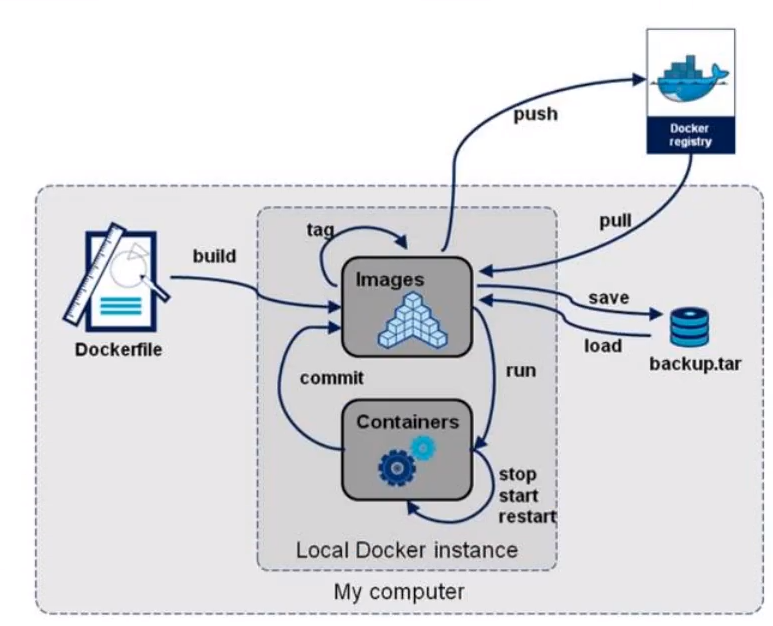
docker (first acquaintance with Dockerfile)
Initial Dockerfile
Dockerfile is the build file used to build the docker image! Command script! Experience it first!
Mirror can be generated through this script, the mirroring is layer by layer, the script is a command, and each command is a layer!
# Create a dockerfile file, the name can suggest Dockerfile
# Contents of the file: Instructions(capital)+parameter
$ vim dockerfile1
 FROM centos 					#Currently this mirror is based on centos

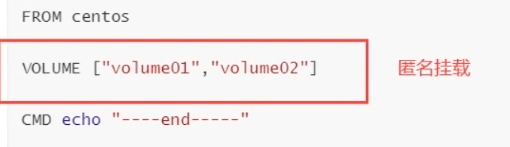
 VOLUME ["volume01","volume02"] 	#List of volume directories for mounted volumes(Multiple directories)

 CMD echo "-----end-----"		#Output for testing
 CMD /bin/bash					#Default to bash console

# Each command here is a layer of mirroring!
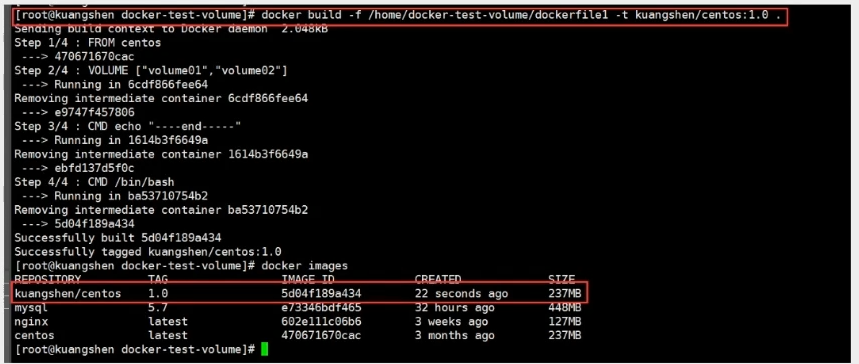
# Build this image
- f dockerfile1 			#f stands for file, which refers to the address of the current file(Here is the dockerfile1 in the current directory)-t caoshipeng/centos 	#t stands for target, which refers to the target directory(Note that you cannot add a slash before the caoshipeng mirror name/’)Indicates generated in the current directory
$ docker build -f dockerfile1 -t caoshipeng/centos .
Sending build context to Docker daemon   2.56kB
Step 1/4: FROM centos
latest: Pulling from library/centos
8 a29a15cefae: Already exists
Digest: sha256:fe8d824220415eed5477b63addf40fb06c3b049404242b31982106ac204f6700
Status: Downloaded newer image for centos:latest
 - - - > 470671670 cac
Step 2/4: VOLUME ["volume01","volume02"] 			#List of volume names
 - - - > Running in c18eefc2c233
Removing intermediate container c18eefc2c233
 - - - > 623 ae1d40fb8
Step 3/4: CMD echo "-----end-----"					#Output script command
 - - - > Running in 70e403669f3c
Removing intermediate container 70e403669f3c
 - - - > 0 eba1989c4e6
Step 4/4: CMD /bin/bash
 - - - > Running in 4342feb3a05b
Removing intermediate container 4342feb3a05b
 - - - > f4a6b0d4d948
Successfully built f4a6b0d4d948
Successfully tagged caoshipeng/centos:latest

# View the image built by yourself
$ docker images
REPOSITORY          TAG          IMAGE ID            CREATED              SIZE
caoshipeng/centos   latest       f4a6b0d4d948        About a minute ago   237MB
Start the container image written by yourself
$ docker run -it f4a6b0d4d948 /bin/bash	#Run your own image
$ ls -l 								#View catalog
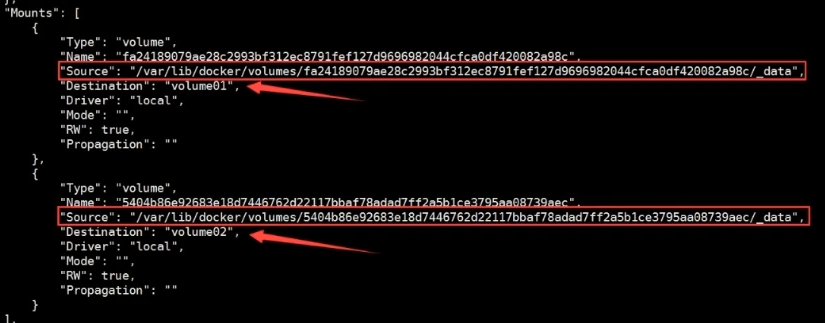
Check the volume mount
# docker inspect container id
$ docker inspect ca3b45913df5
Test whether the file just now has been synchronized!

This method is used a lot, because we usually build our own image!
Assuming that the volume is not mounted when building the image, manually mount the image -v Volume name: path in the container!
Data volume container#
**Multiple **MySQLSynchronized data!
Mount the data volume in the named container!
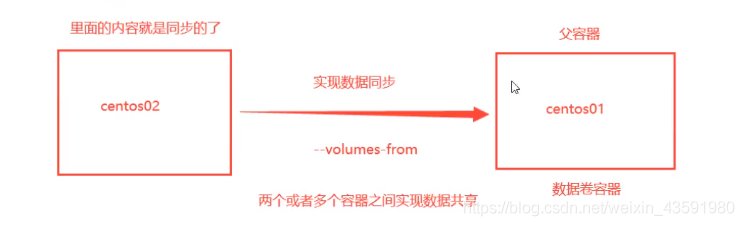
# Test to start 3 containers, and start them from the mirror that I wrote just now
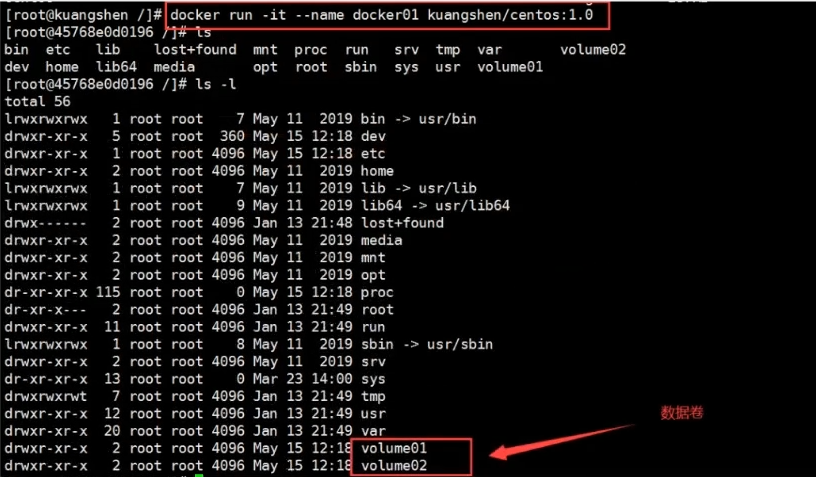
# Create docker01: Because my machine is the latest version, so I use latest here, and the teacher used 1.0 as shown below
$ docker run -it --name docker01 caoshipeng/centos:latest

# View container docekr01 content
$ ls
bin  home   lost+found	opt   run   sys  var
dev  lib    media	proc  sbin  tmp  volume01
etc  lib64  mnt		root  srv   usr  volume02

# Exit without closing the container
CTRL + Q + P

# Create docker02:And let docker02 inherit docker01
$ docker run -it --name docker02 --volumes-from docker01 caoshipeng/centos:latest

# View container docker02 content
$ ls
bin  home   lost+found	opt   run   sys  var
dev  lib    media	proc  sbin  tmp  volume01
etc  lib64  mnt		root  srv   usr  volume02
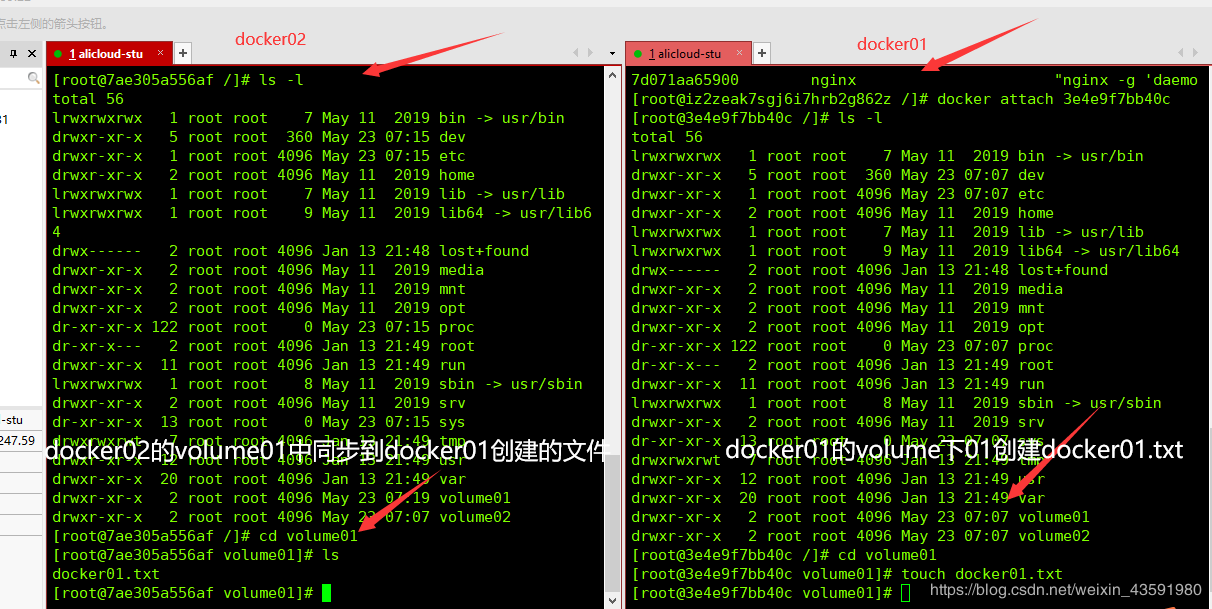
# Create a new docker03 and inherit docker01
$ docker run -it --name docker03 --volumes-from docker01 caoshipeng/centos:latest
$ cd volume01	#Enter volume01 to see if the data of docker01 is also synchronized
$ ls
docker01.txt

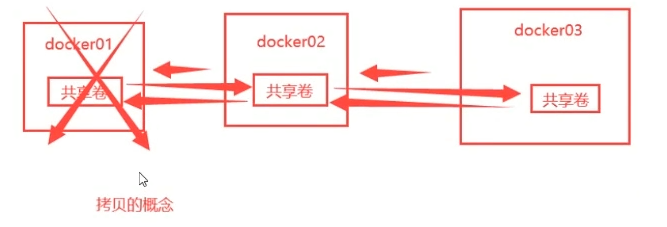
# Test: You can delete docker01 and check whether docker02 and docker03 can access this file
# The test found that the data is still retained in docker02 and docker03 and has not been deleted
Multiple mysql realize data sharing
$ docker run -d -p 3306:3306-v /home/mysql/conf:/etc/mysql/conf.d -v /home/mysql/data:/var/lib/mysql -e MYSQL_ROOT_PASSWORD=123456--name mysql01 mysql:5.7

$ docker run -d -p 3307:3306-e MYSQL_ROOT_PASSWORD=123456--name mysql02 --volumes-from mysql01 mysql:5.7

# At this time, data synchronization between the two containers can be achieved!
in conclusion:
The transfer of configuration information between containers, the life cycle of the data volume container continues until there is no container in use.
But once you persist to the local, at this time, the local data will not be deleted!
Build DockerFile
1、 Write a dockerfile file
2、 docker build build is called a mirror
3、 docker run run the image
4、 Docker push release image (DockerHub, Alibaba Cloud warehouse)
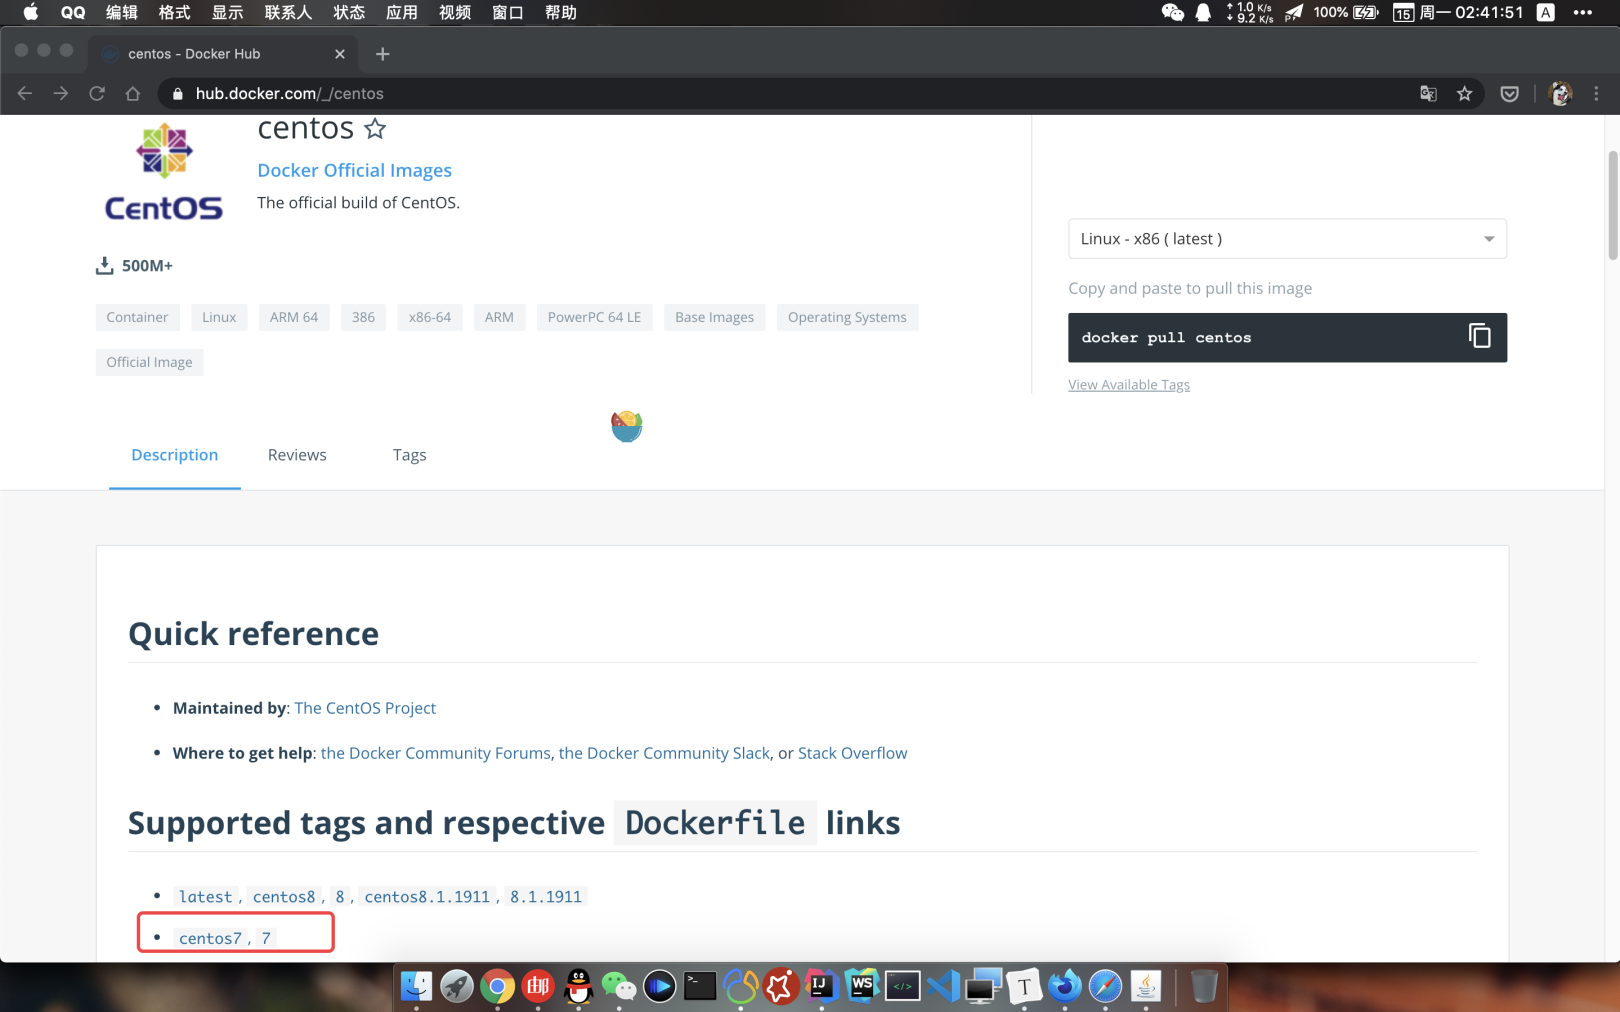
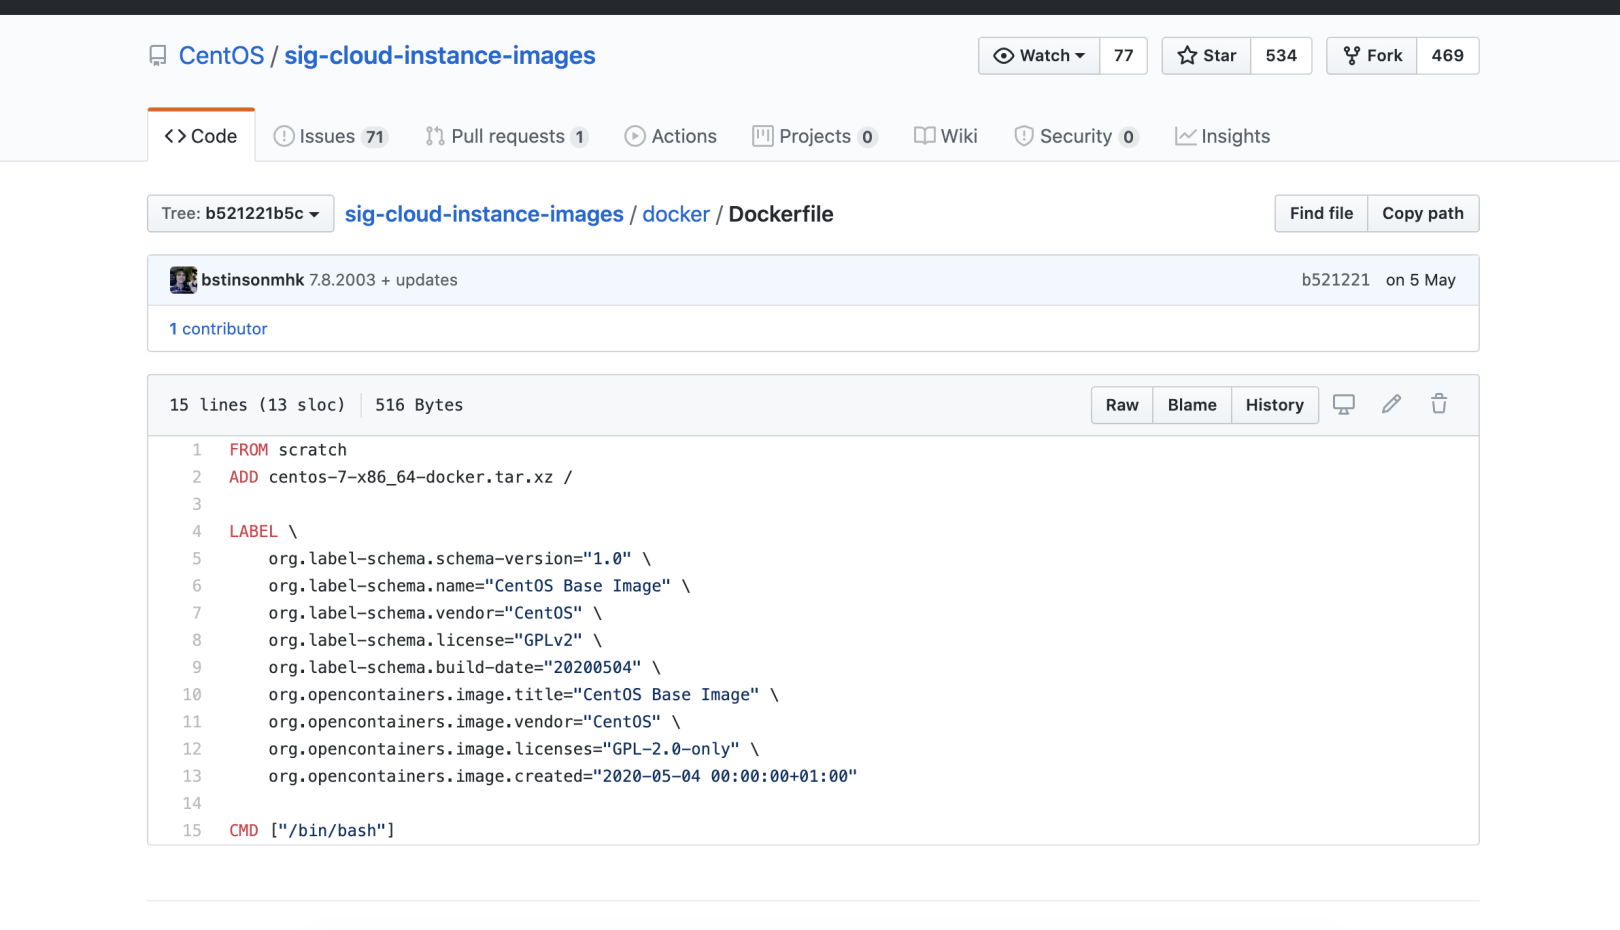
Many official images are basic packages, many functions are not available, we usually build our own images!
Since the official can make mirror images, so can we!
DockerFile build process##
Basic knowledge:
1、 Each reserved keyword (command) must be in uppercase letters
2、 Execute top to bottom order
3、# Indicates a comment
4、 Every instruction will create and submit a new mirror once, and submit!
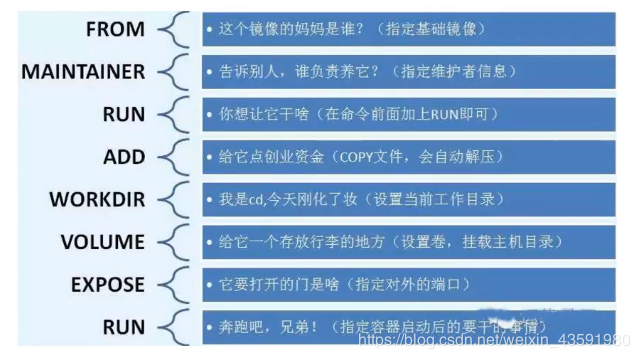
DockerFile instructions##
FROM				# from:Basic image, everything starts from here
MAINTAINER			# maintainer:Who wrote the mirror, name+mailbox
RUN					# run:Commands that need to be run when the image is built
ADD					# add:Step, tomcat mirror, this tomcat compressed package! Add content to add the same directory
WORKDIR				# workdir:Mirrored working directory
VOLUME				# volume:Mounted directory
EXPOSE				# expose:Keep port configuration
CMD					# cmd:Specify the command to run when this container is started, only the last one will take effect and can be replaced
ENTRYPOINT			# entrypoint:Specify the command to run when this container is started, you can add commands
ONBUILD				# onbuild:When constructing an inherited DockerFile, the onbuild instruction will be run to trigger the instruction
COPY				# copy:Similar to ADD, copy our files to the mirror
ENV					# env:Set environment variables when building!
Practical test###
scratch mirror
FROM scratch
ADD centos-7-x86_64-docker.tar.xz /

LABEL \
 org.label-schema.schema-version="1.0" \
 org.label-schema.name="CentOS Base Image" \
 org.label-schema.vendor="CentOS" \
 org.label-schema.license="GPLv2" \
 org.label-schema.build-date="20200504" \
 org.opencontainers.image.title="CentOS Base Image" \
 org.opencontainers.image.vendor="CentOS" \
 org.opencontainers.image.licenses="GPL-2.0-only" \
 org.opencontainers.image.created="2020-05-04 00:00:00+01:00"

CMD ["/bin/bash"]
99% of the images in Docker Hub are FROM scratch from this base image, and then configure the required software and configuration to build.
Create centos
# 1. /Create a new dockerfile directory under home
$ mkdir dockerfile

# 2. Create a new mydockerfile in the dockerfile directory-centos file
$ vim mydockerfile-centos

# 3. Write Dockerfile configuration file
FROM centos							#The base image is the official native centos
MAINTAINER cao<[email protected]> 	#Author

ENV MYPATH /usr/local				#Directory for configuring environment variables
WORKDIR $MYPATH						#Set the working directory to MYPATH

RUN yum -y install vim				#Add vim commands to the official native centos
RUN yum -y install net-tools		#Add the ifconfig command to the official native centos

EXPOSE 80							#The exposed port number is 80

CMD echo $MYPATH					#Output MYPATH path
CMD echo "-----end----"
CMD /bin/bash						#Enter after startup/bin/bash

# 4. Build a mirror from this file
# Command: docker build-f file path-t mirror name:[tag].
$ docker build -f mydockerfile-centos -t mycentos:0.1.

# 5. After the following figure appears, the build is successful

$ docker images
REPOSITORY          TAG                 IMAGE ID            CREATED             SIZE
mycentos            0.1                 cbf5110a646d        2 minutes ago       311MB

# 6. Test run
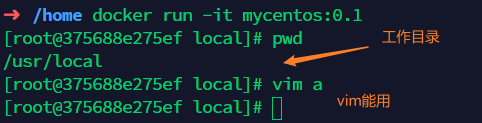
$ docker run -it mycentos:0.1 		#Pay attention to bring the version number, otherwise you will go back to find the latest version every time

$ pwd
/usr/local							#Consistent with MYPATH set by WORKDIR in Dockerfile
$ vim								#vim command can be used
$ ifconfig     						#The ifconfig command can be used

# docker history mirror id to view the history steps of mirror construction
$docker history mirror id
We can list the history of changes made locally
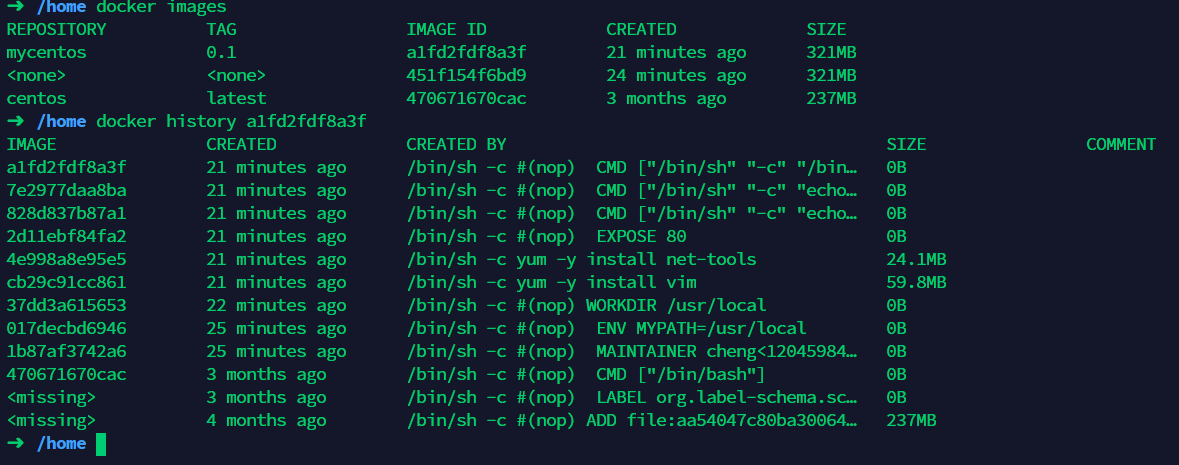
We usually get a mirror, you can use "docker history mirror id" to study what it is made of
The difference between CMD and ENTRYPOINT##
CMD					#Specify the command to run when this container is started. Only the last one will take effect and can be replaced.
ENTRYPOINT			#Specify the command to run when this container is started, you can add commands
Test cmd
# Write dockerfile file
$ vim dockerfile-test-cmd
FROM centos
CMD ["ls","-a"]					#Execute ls after startup-a command

# Build image
$ docker build  -f dockerfile-test-cmd -t cmd-test:0.1.

# Run mirror
$ docker run cmd-test:0.1		#The results are available, and ls is executed after running-a command
.... dockerenv
bin
dev
etc
home

# Want to append a command-l becomes ls-al: Display detailed data of the list
$ docker run cmd-test:0.1-l
docker: Error response from daemon: OCI runtime create failed: container_linux.go:349: starting container process caused "exec: \"-l\":
executable file not found in $PATH": unknown.
ERRO[0000] error waiting for container: context canceled

# In the case of cmd-l Replaced CMD["ls","-l"]and-l Not a command, so an error is reported
Test ENTRYPOINT
# Write dockerfile file
$ vim dockerfile-test-entrypoint
FROM centos
ENTRYPOINT ["ls","-a"]

# Build image
$ docker build  -f dockerfile-test-entrypoint -t cmd-test:0.1.

# Run mirror
$ docker run entrypoint-test:0.1....dockerenv
bin
dev
etc
home
lib
lib64
lost+found ...

# Our command is directly spliced after our ENTRYPOINT command
$ docker run entrypoint-test:0.1-l
total 56
drwxr-xr-x   1 root root 4096 May 1606:32.
drwxr-xr-x   1 root root 4096 May 1606:32..-rwxr-xr-x   1 root root    0 May 1606:32.dockerenv
lrwxrwxrwx   1 root root    7 May 112019 bin -> usr/bin
drwxr-xr-x   5 root root  340 May 1606:32 dev
drwxr-xr-x   1 root root 4096 May 1606:32 etc
drwxr-xr-x   2 root root 4096 May 112019 home
lrwxrwxrwx   1 root root    7 May 112019 lib -> usr/lib
lrwxrwxrwx   1 root root    9 May 112019 lib64 -> usr/lib64 ....
Tomcat mirror##
$ docker exec -it custom container id/bin/bash
$ cul localhost:8080
Publish your own mirror#
Publish to Docker Hub
Address: https://hub.docker.com/
$ docker login --help
Usage:  docker login [OPTIONS][SERVER]

Log in to a Docker registry.
If no server is specified, the default is defined by the daemon.

Options:-p,--password string   Password
  - - password-stdin    Take the password from stdin
 - u,--username string   Username

$ docker login -u your username-p your password
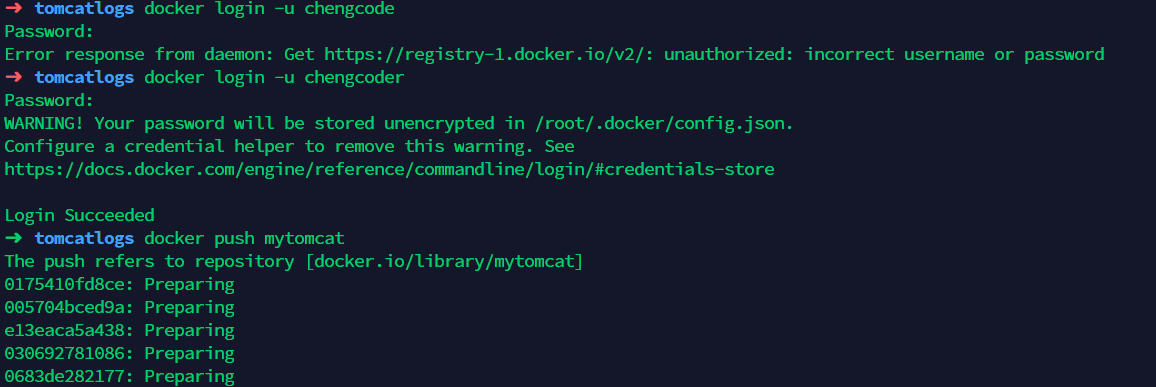
# You will find that push cannot go up, because if there is no prefix, the default is to push to the official library
# Solution:
# Add your dockerhub username during the first build, and then you can put it in your own warehouse in push
$ docker build -t kuangshen/mytomcat:0.1.

# The second use docker tag#Then push again
$docker tag container id kuangshen/mytomcat:1.0 #Then push again
$ docker push kuangshen/mytomcat:1.0
Publish to Alibaba Cloud##
Look at the official website in detail: https://cr.console.aliyun.com/repository/
$ sudo docker login --username=zchengx registry.cn-shenzhen.aliyuncs.com
$ sudo docker tag [ImageId] registry.cn-shenzhen.aliyuncs.com/dsadxzc/cheng:[Mirror version number]

# Modify id and version
sudo docker tag a5ef1f32aaae registry.cn-shenzhen.aliyuncs.com/dsadxzc/cheng:1.0
# A modified version
$ sudo docker push registry.cn-shenzhen.aliyuncs.com/dsadxzc/cheng:[Mirror version number]
summary##