Introduction to Android source code compilation (ubuntu16.04+android P)
Introduction#
- vmware+ubuntu+openjdk+git environment configuration
- Source download
- Source code compilation
1 Environment configuration###
First look at the configuration of my computer
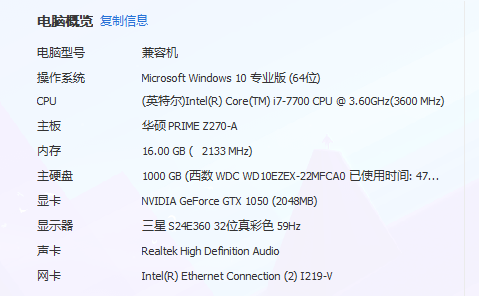
computer.png
1.1 Install VMware
Here we use a virtual machine to install ubuntu. As for the specific installation method of VMware, you can Baidu yourself. The version I use is posted here.
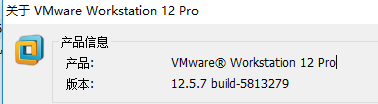
vmware.png
After installing VMware, install ubuntu. First download the system image ubuntu
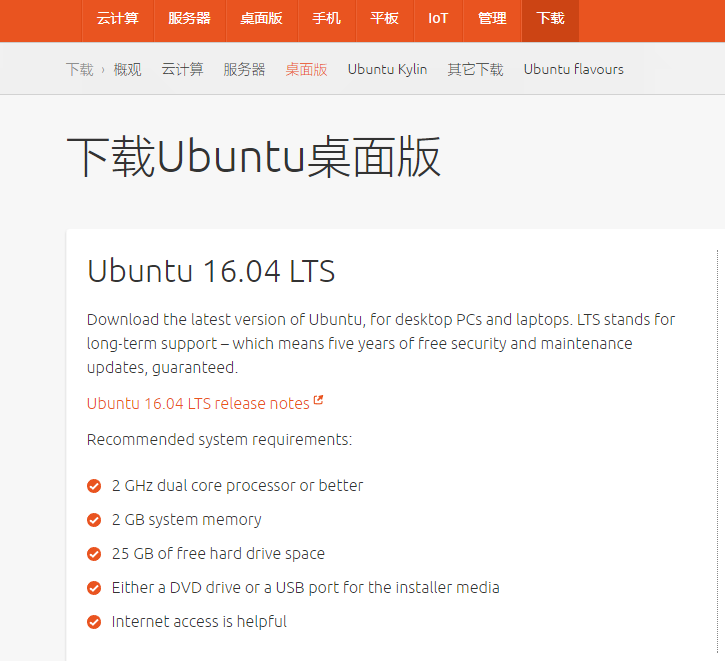
ubuntu.png
1.2 Install ubuntu
The next step is to install ubuntu in vmware. You can Baidu the steps yourself, so I won’t repeat them here. But one thing to pay attention to ** the space allocated for ubuntu should be sufficient. I suggest more than 150G**, otherwise half of the compilation will be done by then, and it will be embarrassing if there is not enough space. I have suffered this loss, so everyone try to skip this pit. Post my configuration here:
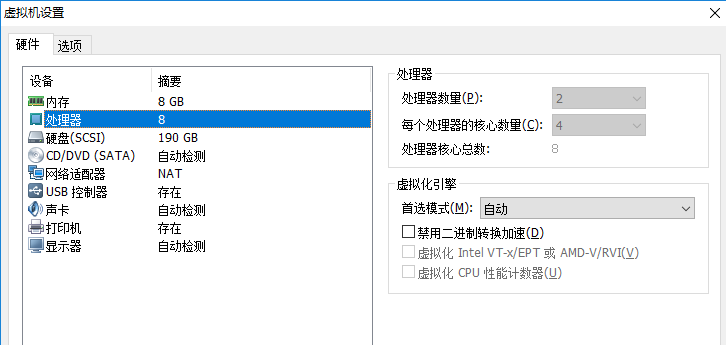
ubuntu_set.png
After installing ubuntu above. We start ubuntu and begin to install the necessary software.
1.3 Install git
sudo apt-get install git
Then configure user information
$ git config [--global] user.name "[name]"
$ git config [--global] user.email "[email address]"
For more operations, please refer to Git Common Commands
1.4 Install openjdk
The installation source of Ubuntu 16.04 has no openjdk by default, so you have to manually add the warehouse yourself
sudo add-apt-repository ppa:openjdk-r/ppa
sudo apt-get update
start installation
sudo apt-get install openjdk-8-jdk
Since we are compiling the latest android source code here, jdk8 is installed. If it is to compile other versions, install the corresponding version as needed.
1.5 Install necessary dependencies
sudo apt-get install libx11-dev:i386 libreadline6-dev:i386 libgl1-mesa-dev g++-multilib
sudo apt-get install -y git flex bison gperf build-essential libncurses5-dev:i386
sudo apt-get install tofrodos python-markdown libxml2-utils xsltproc zlib1g-dev:i386
sudo apt-get install dpkg-dev libsdl1.2-dev libesd0-dev
sudo apt-get install git-core gnupg flex bison gperf build-essential
sudo apt-get install zip curl zlib1g-dev gcc-multilib g++-multilib
sudo apt-get install libc6-dev-i386
sudo apt-get install lib32ncurses5-dev x11proto-core-dev libx11-dev
sudo apt-get install libgl1-mesa-dev libxml2-utils xsltproc unzip m4
sudo apt-get install lib32z-dev ccache
Here I have personally tested that there is no problem during installation. Up to now, our compilation environment has been prepared, the next step is to download the source code
2 Download source code###
Because the source code of android is very large, and some places need to visit foreign websites. So we use the mirror image of Tsinghua University. The detailed steps [Android mirroring help] (https://link.jianshu.com/?t=https://mirrors.tuna.tsinghua.edu.cn/help/AOSP/) have detailed instructions. Here I will briefly write down the steps.
2.1 Configure repo tool:
mkdir ~/bin
PATH=~/bin:$PATH
curl https://storage.googleapis.com/git-repo-downloads/repo >~/bin/repo
chmod a+x ~/bin/repo
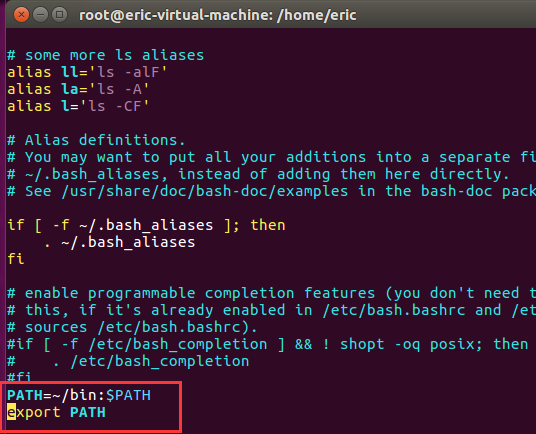
It’s best to add it to the environment variable, so that you don’t need to set the PATH every time you start
vim ~/.bashrc
bashrc.png
Set PATH in the last two lines. Finally refresh.
source ~/.bashrc
2.2 Download the initialization package
Due to the large source code, direct downloading may fail or be slow in the middle, so here first download initialization package. About 30 gigabytes
2.3 After downloading, unzip and get the aosp folder#####
2.4 Synchronization code
All codes are checked out from the hidden .repo directory, so only the .repo directory after aosp decompression. Enter the aosp synchronization to get the code.
repo sync
3 Compile###
3.1 Initialize the compilation environment#####
Go to the root directory of the source code
source build/envsetup.sh
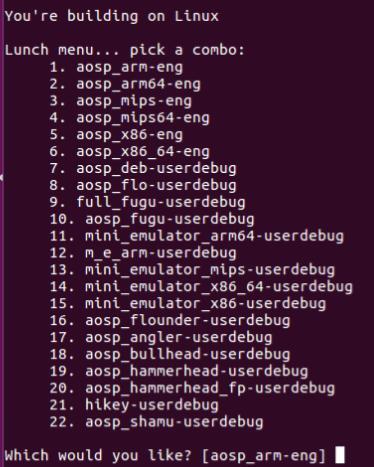
3.2 Select the compilation option
lunch aosp_arm64-eng
Or enter lunch directly.
142377- 030890 ab8be7bc46.jpg
Then choose the type you want. Here we choose the first aosp_arm-eng.
3.3 Start to compile
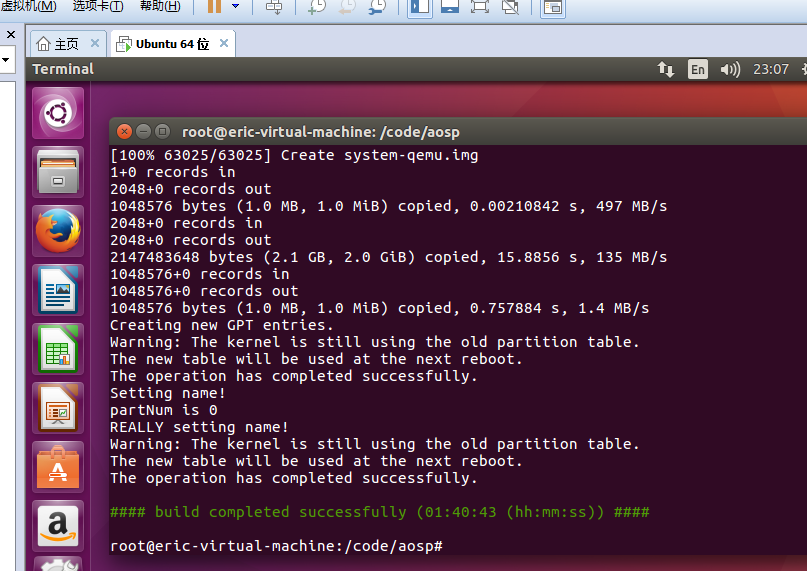
make -j4
Note that the -j4 here depends on the number of cpu cores of your machine. I use 4 threads here. Then enter the compilation process. This will be a long process. The time consumed is not necessarily according to the configuration of your machine, and I spent nearly 1 hour and 40 minutes here (it seems that my machine is still pretty awesome, haha!). When you see the last string of green #### build completed successfully **** #### it means you have succeeded
QQ screenshot 20170929230721.png
3.4 Start the simulator
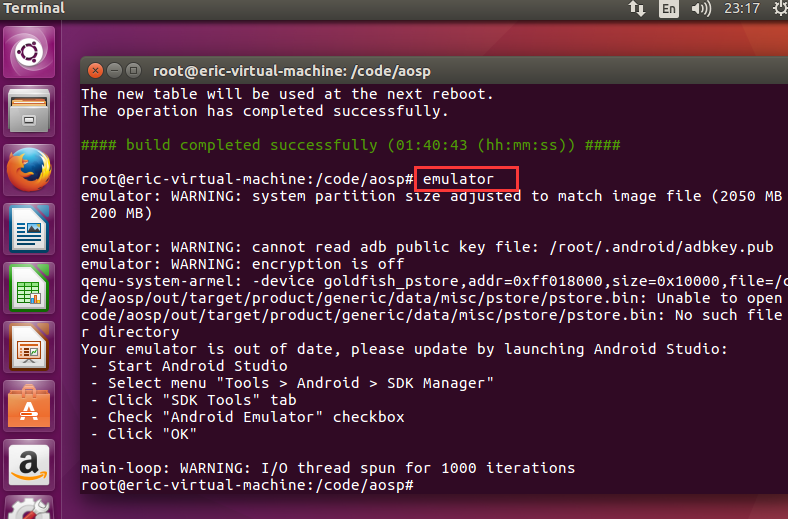
Type directly in the current terminal
emulator
- png
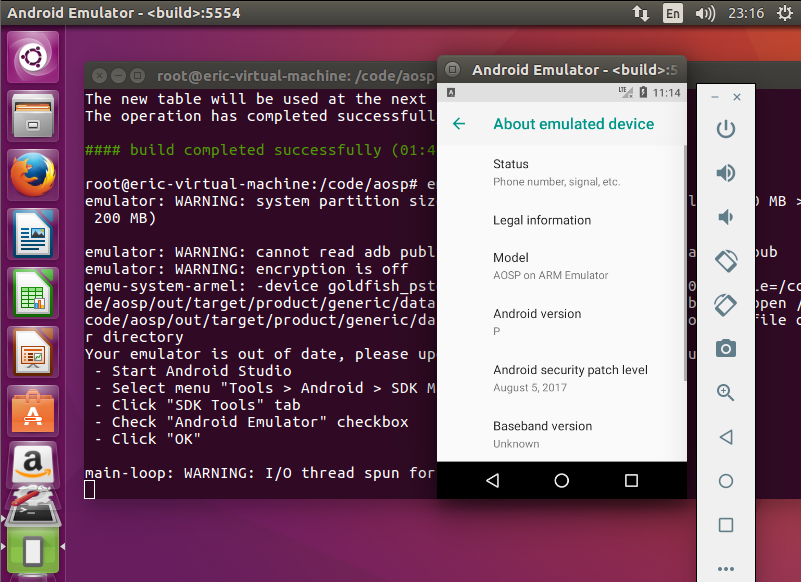
QQ screenshot 20170929231629.png
That's it.
3.5 Mirror file
The compiled files are in the out directory. The final three image files ramdisk.img, system.img, userdata.img and their corresponding directory tree root are under out/target/product/generic
- ramdisk.img is the root file system
- system.img includes the main packages, libraries and other files
- userdata.img contains some user data. After android loads these 3 image files, it will load system and userdata into the system and data directories in the ramdisk file system respectively.
The generation relationship between the three mirror files and the three directory trees is the basis for our ROM production
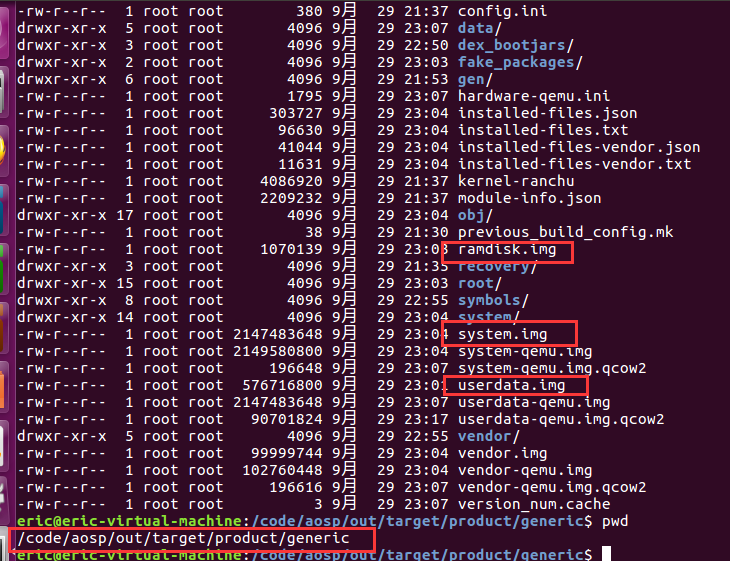
img.png
3.6 Clean up files generated by compilation
make clobber
That is, the out directory and all the files below are deleted.