CentOS 7 Apache Multi-port Deployment Web Apps Guide
Reprinted from Jianshu, the original author xuyan0, link https://www.jianshu.com/p/b34c78bf9bf0, if there is any infringement, please contact to delete
Introduction
The Apache web server runs more than half of the active web sites on the Internet. It is popular for its flexible and powerful functions.
Apache decomposes its functions and components into units that can be independently customized and configured. We call the basic unit representing a single web site a virtual host. With the help of the matching system, virtual hosting provides the server with the possibility of running multiple web sites at the same time. This is closely related to anyone trying to run multiple web sites on the same server.
No need to care about other web sites that may be running on the same server. Any configured web site address will lead the visitor to the directory where the specific content is stored. As long as your server can handle the visitor flow brought by the web site, this solution can be continuously expanded without being restricted by software.
In this guide, we will demonstrate how to deploy multiple Apache virtual hosts on CentOS 7 server. In this process, you will learn how to provide content requested by visitors to different web sites.
Prerequisites
Before continuing to read this guide, please make sure you have completed the first step in the "CentOS 7 Installation Apache, MySQL, PHP Guide"-Install Apache.
Note: This guide uses 8.8.8.8 as an example server address. We will deploy a web site at addresses 8.8.8.8:8080 and 8.8.8.8:8086 respectively. During the actual operation, please replace 8.8.8.8 with the IP address of your server, and replace 8080 and 8086 with the port number used when you actually deploy the web site.
The first step-create the directory structure
First, we need to create a directory structure to support the web site to provide data services.
The document root of the virtual host we are about to deploy (Apache uses this top-level directory to look up and find out the content used to provide services) will be set to the directory where each web site itself is located under the /var/www directory. Therefore, we will create a directory for each virtual host under the /var/www directory.
In each virtual host directory, we will create an html directory to store the actual content of the web site. This provides some additional flexibility for our server.
Suppose we now have two web sites that need to provide external services, webapp1 and webapp2. We can create these directories using the mkdir command (with a -p flag to enable us to nest new directories within the new directory):
$ sudo mkdir –p /var/www/webapp1/html
$ sudo mkdir –p /var/www/webapp2/html
Note: You need to replace webapp1 and webapp2 in the above path with the name of the actual web app that needs to be deployed.
Step two-grant permissions
Now we have created a directory structure for the files, but these directory structures are owned by the root user. If we want ordinary users on the server to be able to modify the files in the web directory, we can use the chown command to transfer the owner of the directory:
$ sudo chown –R
$ sudo chown –R
When you submit the chown command above, the $USER variable will take the value of the user currently logged in to the server. In this way, our ordinary users have obtained the ownership of the html subdirectory.
In addition, we also need to modify the directory permissions here to ensure that the general web directory and its internal subdirectories and files are allowed to be read, so that the web page can normally provide services to visitors:
$ sudo chmod –R 755 /var/www
Your server should now have the necessary permissions to provide content to visitors to the web site, and users on the server should now be able to create content in the appropriate folders.
Step 3-Create a sample page for each virtual host
Now that the directory structure is ready, we can start to create some content for external services.
For demonstration purposes, our page will be very simple. We only intend to create an index.html page for each site.
We will start with webapp1. With this command, we can create an index.html file:
$ sudo vi /var/www/webapp1/html/index.html
This will open a blank file and hit the lowercase letter I to edit it. We can type HTML code in the file to indicate the web site to which this page is connected. In this guide, our site file looks like this:
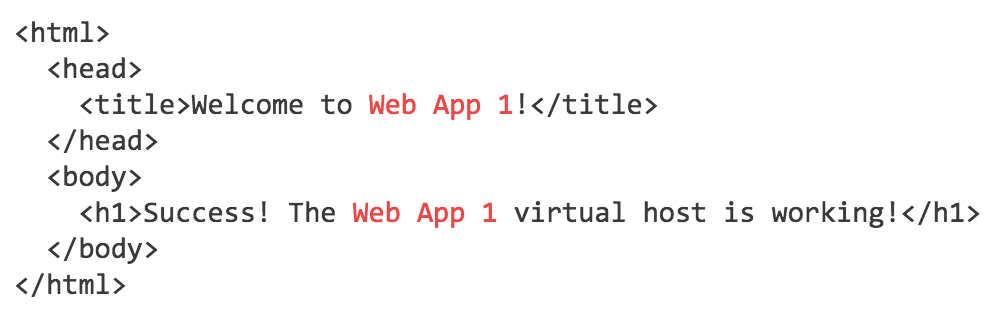
Then, hit ESC and type: wq! to save and close the file.
Using the following command, we can copy the template file created above as the index.html file of the second site:
$ sudo cp /var/www/webapp1/html/index.html /var/www/webapp2/html/index.html
Now we open the file and modify the information related to the site:
$ sudo vi /var/www/webapp2/html/index.html
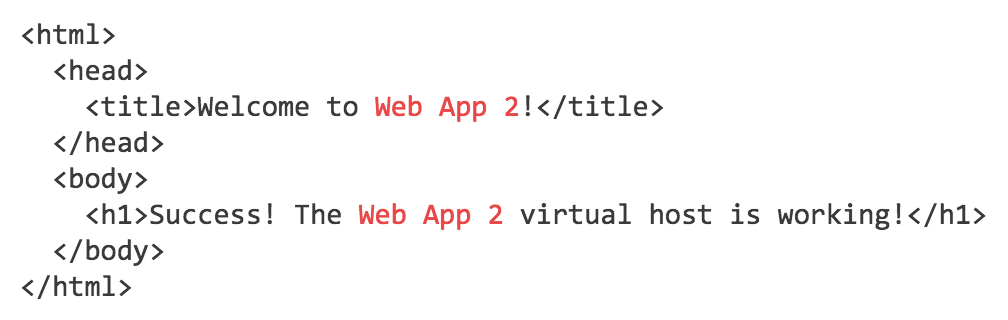
Save and exit this file. Now you have prepared the pages needed to test the virtual host configuration.
Step 4-Create a new virtual host file
A virtual host file is a type of file that specifies the configuration of each web site and determines how the Apache web server responds to visitors' requests for different sites.
First, we need to create a directory to store virtual hosts and a directory to indicate to Apache that a virtual host is ready to provide services to visitors. The sites-available directory will store all virtual host files, and the sites-enabled directory will store the symbolic links of the hosts we want to provide services to. We can create these two directories with the help of the following commands:
$ sudo mkdir /etc/httpd/sites-available
$ sudo mkdir /etc/httpd/sites-enabled
Note: The directory layout here was introduced by contributors from the Debian community. For the sake of adding flexibility to virtual hosts, we adopt this scheme here (it is easier to temporarily enable and disable virtual hosts).
Next, we need to tell Apache to look for virtual hosts in the sites-enabled directory. To achieve this, we will edit the main Apache configuration file and add a line to declare the optional directory where additional configuration files are located:
$ sudo vi /etc/httpd/conf/httpd.conf
Add the following line to the end of the file:
IncludeOptional sites-enabled/*.conf
After adding the above line, save and close the file. Now we are ready to create the first virtual host file.
Create the first virtual host file
We start by creating a webapp1 virtual host file with root permissions:
$ sudo vi /etc/httpd/sites-available/webapp1.conf
Note: According to the overview in our configuration file above, all host file names must end with .conf.
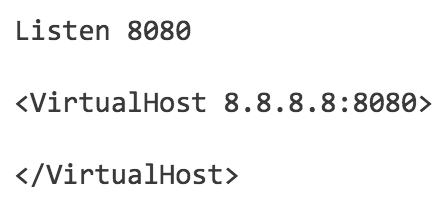
In the file webapp1.conf, we first specify that the port number monitored by the virtual host webapp1 is 8080, and a sequence pair indicating that the content in the file is the virtual host configuration:
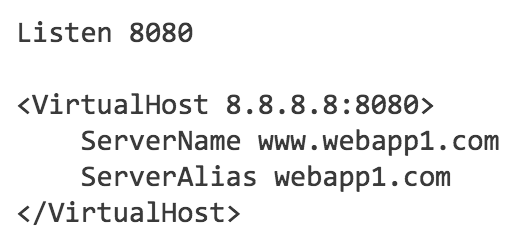
Next, in order to facilitate future use of domain names to access virtual hosts, we will declare the name of the server as www.webapp1.com. At the same time, we also assigned an alias webapp1.com to the server, so that the content of the request sent to www.webapp1.com and webapp1.com is the same.
Finally, we end the creation of the first host file by specifying the root directory where the web files accessible to the outside world are stored. We will also tell Apache where to store error messages and request records on this web site:
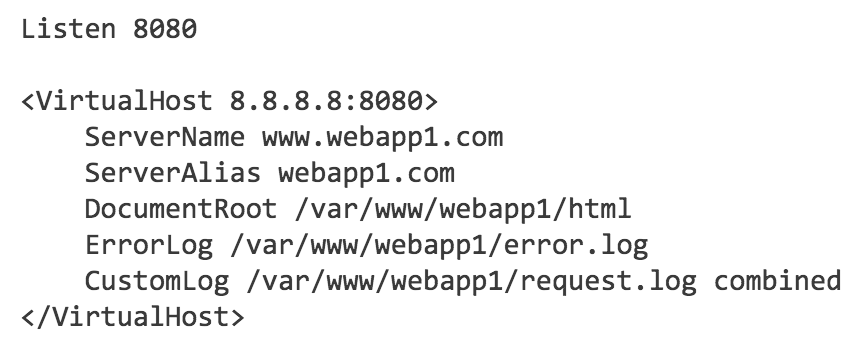
After writing these entries, you can save and close the file.
Copy and customize the remaining virtual host files
Now that we have created the first virtual host file, we can copy that file to create and modify as needed to get the second virtual host file.
We start by copying files using the cp command:
$ sudo cp /etc/httpd/sites-available/webapp1.conf /etc/httpd/sites-available/webapp2.conf
Then open and edit this new file with root privileges:
$ sudo vi /etc/httpd/sites-available/webapp2.conf
Now we need to modify all the configuration information in the new file to point to the second web site. When you finish editing, your second virtual host file might look like this:
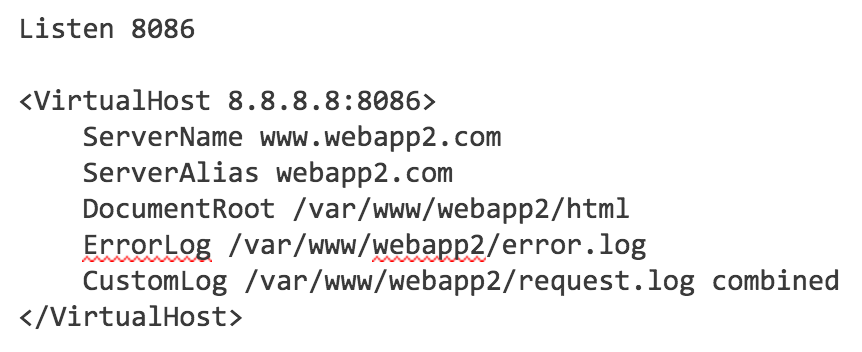
After making these changes, you can save and exit this file.
Step 5-Enable the new virtual host file
Now that we have created the virtual host files, we need to enable them so that Apache knows to use them to provide services to visitors. To this end, we can create a symbolic link for each virtual host under the sites-enabled directory:
$ sudo ln -s /etc/httpd/sites-available/webapp1.conf /etc/httpd/sites-enabled/webapp1.conf
$ sudo ln -s /etc/httpd/sites-available/webapp2.conf /etc/httpd/sites-enabled/webapp2.conf
After you complete these steps, restart Apache to make these changes take effect.
Step 6-Allow Apache to pass through the firewall
Now we need to use FirewallD to allow Apache to pass through the network firewall on ports 8080 and 8086:
$ sudo firewall-cmd --permanent --add-port=8080/tcp
$ sudo firewall-cmd --permanent --add-port=8086/tcp
Restart the network firewall service for the changes to take effect:
$ sudo firewall-cmd --reload
Step 7-Test your results
Now that you have set up the virtual host, you can enter the following address in your browser to test your results:
http://8.8.8.8:8080
You should see a page like the following:

Similarly, if you visit another virtual host address (http://8.8.8.8:8086), you should see the content created for it before.
If you can access the sites we configured above normally, then you have successfully configured a new Apache virtual host for the CentOS 7 server.
in conclusion
Now, with different port numbers, you can use one CentOS 7 server to run multiple web sites. Following the above steps, within the load range of the server, you can expand any number of virtual hosts without software constraints.
Reference link:
https://www.digitalocean.com/community/tutorials/how-to-set-up-apache-virtual-hosts-on-centos-7
https://devops.profitbricks.com/tutorials/how-to-set-up-ip-and-port-based-virtual-hosting-vhosts-with-apache-web-server-on-centos-7/
https://httpd.apache.org/docs/2.4/vhosts/examples.html#port
Author: xuyan0
Link: https://www.jianshu.com/p/b34c78bf9bf0
Source: Brief Book
The copyright of the short book belongs to the author. For any form of reprint, please contact the author for authorization and indicate the source.