Python implements SSL sending based on QQ mailbox
1. QQ mailbox SSL sending
Get QQ authorization code
The ssl sending method does not use a mailbox password, but an authorization code. The specific steps are as follows:
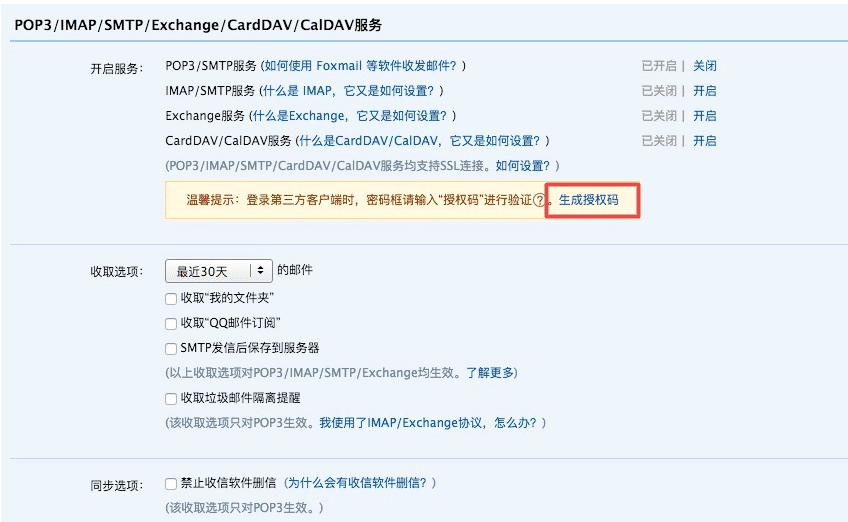
Log in to the sender's QQ mailbox, set up an account, POP3/STMP service is enabled, and generate an authorization code
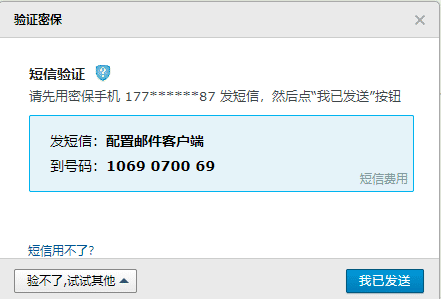
Verify secret
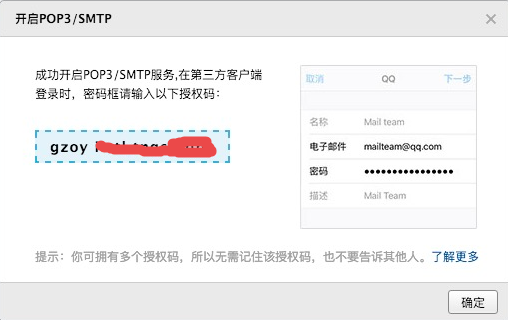
Copy the 16-digit authorization code
qq mailbox sending source code
#! /usr/bin/python3
# encoding:utf-8'''
Created on 2020-04-2412:15
@ author: Administrator
'''
# coding:utf-8import smtplib
from email.mime.text import MIMEText #Introduce smtplib and MIMEText
from email.mime.multipart import MIMEMultipart
# Set SMTP address
host ='smtp.qq.com'
# Set the port number of the outgoing server. Note that there are two forms of SSL and non-SSL. The qq SSL port is 465, and the non-SSL port is 25 by default.
port ="465"
# Set up email
sender ="[email protected]"
# Set the authorization code of the sending mailbox,qq mailbox ssl sending needs to open stmp and get the password
pwd ='sqmqweertyuiioplk' #16 authorization code
# Set mail recipient,Send to multiple people, separate
receiver ='[email protected],[email protected]'
# Set email cc,Send to multiple people, separate
cc ='[email protected]''''Send email without attachment
# Set html format mail
# body ='<h1 This is a python test mail</h1 <p test</p '
# msg =MIMEText(body,'html') #Set the body to HTML content that conforms to the email format
# Send normal format mail
msg =MIMEText('Python normal format, mail sending test...','plain','utf-8')'''
# Examples of methods that need to send attachments
msg =MIMEMultipart()
# Set send header information
msg.add_header('subject','Test mail') #Set the message title
msg.add_header('from', sender) #Set sender
msg.add_header('to', receiver) #Set recipient
msg.add_header('Cc',cc) #Cc
# Set body content
msg.attach(MIMEText('Python mail sending test...','plain','utf-8'))
# Set attachment 1, D://cs.txt file
att1 =MIMEText(open('D://cs.txt','rb').read(),'base64','utf-8')
att1.add_header('Content-Type','application/octet-stream')
# The filename here can be written arbitrarily, what name to write, the name of the attachment is displayed in the email
att1.add_header('Content-Disposition','attachment', filename='cs.txt')
msg.attach(att1)try:
# note! If you are using a non-SSL port, change it to SMTP here
smtpObj = smtplib.SMTP_SSL(host, port)
# Log in your email
smtpObj.login(sender, pwd)
# send email,Note that the second parameter is the sender's CC address
smtpObj.sendmail(sender, receiver.split(',')+ cc.split(','), msg.as_string())print("Sent successfully")
except smtplib.SMTPException as e:print("Failed to send")print(e)finally:
smtpObj.quit()
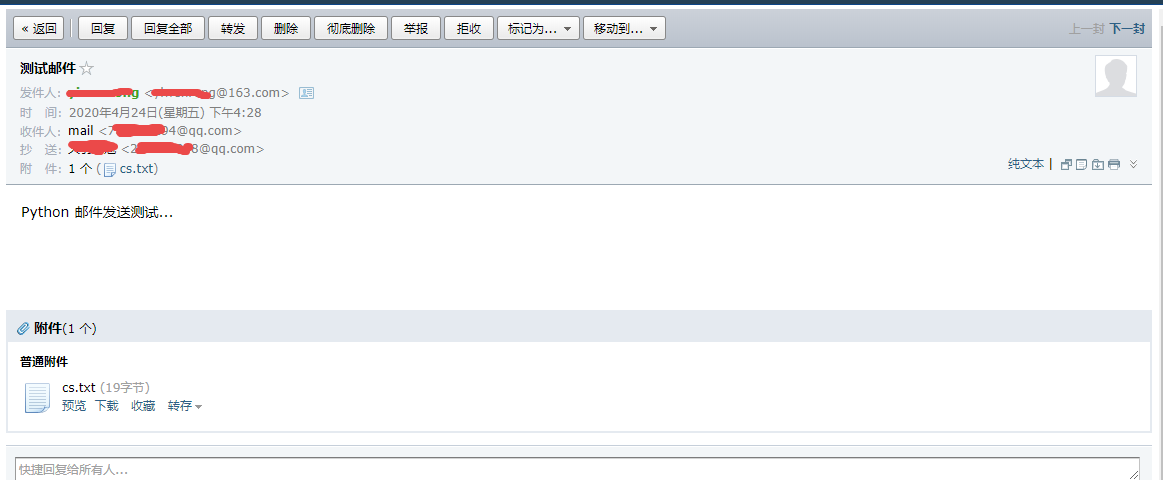
Screenshot of the result after sending
Two, 163 mailbox non-SSL sending
Non-ssl does not need to obtain the authorization code, just configure the email password directly
163 Email source code
#! /usr/bin/python3
# encoding:utf-8'''
Created on 2020-04-2412:15
@ author: Administrator
'''
# coding:utf-8import smtplib
from email.mime.text import MIMEText #Introduce smtplib and MIMEText
from email.mime.multipart import MIMEMultipart
# Set SMTP address
host ='smtp.163.com'
# Set the port number of the sending server. Note that there are two forms of SSL and non-SSL, non-SSL default port 25
port =25
# Set up email
sender ="[email protected]"
# Set the sender mailbox password
pwd ='xxxx'
# Set mail recipient,Send to multiple people, separate
receiver ='[email protected]'
# Set email cc,Send to multiple people, separate
cc ='[email protected]''''Send email without attachment
# Set html format mail
# body ='<h1 This is a python test mail</h1 <p test</p '
# msg =MIMEText(body,'html') #Set the body to HTML content that conforms to the email format
# Send normal format mail
msg =MIMEText('Python normal format, mail sending test...','plain','utf-8')'''
# Attachment method example
msg =MIMEMultipart()
# Set header information
msg.add_header('subject','Test mail') #Set the message title
msg.add_header('from', sender) #Set sender
msg.add_header('to', receiver) #Set recipient
msg.add_header('Cc',cc) #Cc
# Set body content
msg.attach(MIMEText('Python mail sending test...','plain','utf-8'))
# Set attachment 1, D://cs.txt file
att1 =MIMEText(open('D://cs.txt','rb').read(),'base64','utf-8')
att1.add_header('Content-Type','application/octet-stream')
# The filename here can be written arbitrarily, what name to write, the name of the attachment is displayed in the email
att1.add_header('Content-Disposition','attachment', filename='cs.txt')
msg.attach(att1)try:
# note! If you are using the SSL port, you must change it to SMTP here_SSL
smtpObj = smtplib.SMTP(host, port)
# Log in your email
smtpObj.login(sender, pwd)
# send email,Note that the second parameter is the sender's CC address
smtpObj.sendmail(sender, receiver.split(',')+ cc.split(','), msg.as_string())print("Sent successfully")
except smtplib.SMTPException as e:print("Failed to send")print(e)finally:
smtpObj.quit()
Screenshot of the result after sending

Three, the problem
3.1 Python failed to send mail through qq mailbox, SMTP:
Problem description: Use qq account and password SSL to send email, error: (535, b'Login Fail. Please enter your authorization code to login. More information in http://service.mail.qq.com/cgi-bin/ help?subtype=1&&id=28&&no=1001256′)
Solution: Turn on the POP3/SMTP service, get the authorization code, and change the mailbox password of the qq source code to the authorization code
3.2 html attachment changed to .bin file suffix
Problem description: Send an attachment in html format, and receive a file with a .bin suffix, as shown in the figure:
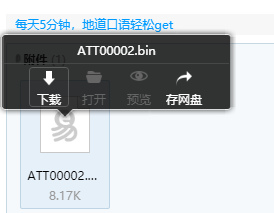
Solution: Change att1["Content-Disposition"] ='attachment; filename="' + "interface test report.html" to att1.add_header('Content-Disposition','attachment', filename='interface test report .html')
The above is the whole content of this article, I hope it will be helpful to everyone's study.
Recommended Posts