Centos7 builds hadoop 2.10 high availability (HA)
This article introduces building a hadoop2.10 high-availability cluster in centos7. First, prepare 6 machines: 2 nn (namenode); 4 dn (datanode); 3 jns (journalnodes)
| IP | hostname | process |
|---|---|---|
| 192.168.30.141 | s141 | nn1(namenode),zkfc(DFSZKFailoverController),zk(QuorumPeerMain) |
| 192.168.30.142 | s142 | dn(datanode), jn(journalnode),zk(QuorumPeerMain) |
| 192.168.30.143 | s143 | dn(datanode), jn(journalnode),zk(QuorumPeerMain) |
| 192.168.30.144 | s144 | dn(datanode), jn(journalnode) |
| 192.168.30.145 | s145 | dn(datanode) |
| 192.168.30.146 | s146 | nn2(namenode),zkfc(DFSZKFailoverController) |
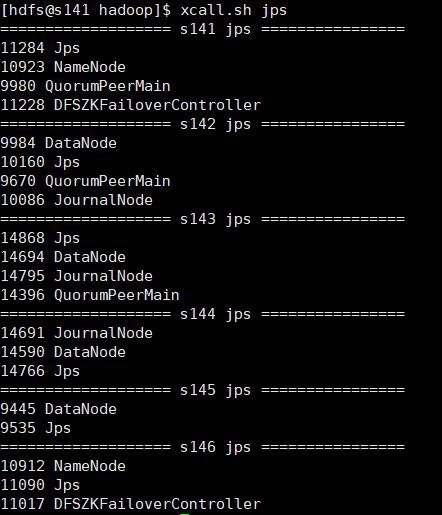
Each machine jps process:
Since I use a vmware virtual machine, after configuring a machine, clone the remaining machine and modify the hostname and IP, so that the configuration of each machine is unified. Each machine configuration adds hdfs users and users Group, configure the jdk environment, install hadoop, this time build a highly available cluster under hdfs users, you can refer to: centos7 build hadoop2.10 pseudo-distribution mode
Here are some steps and details for installing a highly available cluster:
1. Set the hostname and hosts of each machine
Modify the hosts file. After the hosts are set, you can use the hostname to access the machine. This is more convenient. Modify as follows:
127.0.0.1 locahost
192.168.30.141 s141
192.168.30.142 s142
192.168.30.143 s143
192.168.30.144 s144
192.168.30.145 s145
192.168.30.146 s146
- Set ssh secret login. Since both s141 and s146 are namenodes, it is better to log in to all machines secretly from these two machines. It is best to set secret login for both hdfs user and root user
We set s141 to nn1 and s146 to nn2. We need s141 and s146 to be able to log in to other machines without secret through ssh, so we need to generate a key pair under the hdfs user of s141 and s146 machines, and set the public keys of s141 and s146 Send it to other machines and put it in the ~/.ssh/authorized_keys file, to be more precise on all machines (including yourself) where you want to add the public key
Generate a key pair on s141 and s146 machines:
ssh-keygen -t rsa -P ''-f ~/.ssh/id_rsa
Add the content of the id_rsa.pub file to the /home/hdfs/.ssh/authorized_keys of the s141-s146 machine. Now that other machines do not have an authorized_keys file for the time being, we can rename id_rsa.pub to authorized_keys, if other machines already have authorized_keys After the file can append the content of id_rsa.pub to the file, remote replication can use the scp command:
s141 machine public key copied to other machines
scp id_rsa.pub hdfs@s141:/home/hdfs/.ssh/id_rsa_141.pub
scp id_rsa.pub hdfs@s142:/home/hdfs/.ssh/id_rsa_141.pub
scp id_rsa.pub hdfs@s143:/home/hdfs/.ssh/id_rsa_141.pub
scp id_rsa.pub hdfs@s144:/home/hdfs/.ssh/id_rsa_141.pub
scp id_rsa.pub hdfs@s145:/home/hdfs/.ssh/id_rsa_141.pub
scp id_rsa.pub hdfs@s146:/home/hdfs/.ssh/id_rsa_141.pub
Copy the s146 machine public key to other machines
scp id_rsa.pub hdfs@s141:/home/hdfs/.ssh/id_rsa_146.pub
scp id_rsa.pub hdfs@s142:/home/hdfs/.ssh/id_rsa_146.pub
scp id_rsa.pub hdfs@s143:/home/hdfs/.ssh/id_rsa_146.pub
scp id_rsa.pub hdfs@s144:/home/hdfs/.ssh/id_rsa_146.pub
scp id_rsa.pub hdfs@s145:/home/hdfs/.ssh/id_rsa_146.pub
scp id_rsa.pub hdfs@s146:/home/hdfs/.ssh/id_rsa_146.pub
On each machine, you can use cat to append the key to the authorized_keys file
cat id_rsa_141.pub >> authorized_keys
cat id_rsa_146.pub >> authorized_keys
At this time, the authorized_keys file permissions need to be changed to 644 (note that ssh secret login failures are often caused by this permission problem)
chmod 644 authorized_keys
- Configure hadoop configuration file (${hadoop_home}/etc/hadoop/)
Configuration details:
Note: s141 and s146 have exactly the same configuration, especially ssh.
- Configure nameservice
[ hdfs-site.xml]<property><name>dfs.nameservices</name><value>mycluster</value></property>
- dfs.ha.namenodes.[nameservice ID]
[ hdfs-site.xml]<!--Two ids of the name node under myucluster--><property><name>dfs.ha.namenodes.mycluster</name><value>nn1,nn2</value></property>
- dfs.namenode.rpc-address.[nameservice ID].[name node ID]
[ hdfs-site.xml]
Configure the rpc address of each nn.
< property><name>dfs.namenode.rpc-address.mycluster.nn1</name><value>s141:8020</value></property><property><name>dfs.namenode.rpc-address.mycluster.nn2</name><value>s146:8020</value></property>
- dfs.namenode.http-address.[nameservice ID].[name node ID]
Configure webui port
[ hdfs-site.xml]<property><name>dfs.namenode.http-address.mycluster.nn1</name><value>s141:50070</value></property><property><name>dfs.namenode.http-address.mycluster.nn2</name><value>s146:50070</value></property>
- dfs.namenode.shared.edits.dir
Name node shared editing directory. Choose three journalnode nodes, here choose s142, s143, s144 three machines
[ hdfs-site.xml]<property><name>dfs.namenode.shared.edits.dir</name><value>qjournal://s142:8485;s143:8485;s144:8485/mycluster</value></property>
- dfs.client.failover.proxy.provider.[nameservice ID]
Configure a java class for HA failover (the configuration is fixed), and the client uses it to determine which node is active.
[ hdfs-site.xml]<property><name>dfs.client.failover.proxy.provider.mycluster</name><value>org.apache.hadoop.hdfs.server.namenode.ha.ConfiguredFailoverProxyProvider</value></property>
- dfs.ha.fencing.methods
Script list or java class, nn. in the activated state of disaster recovery protection.
[ hdfs-site.xml]<property><name>dfs.ha.fencing.methods</name><value>sshfence</value></property><property><name>dfs.ha.fencing.ssh.private-key-files</name><value>/home/hdfs/.ssh/id_rsa</value></property>
- fs.defaultFS
Configure the hdfs file system name service. Mycluster here is the dfs.nameservices configured above
[ core-site.xml]<property><name>fs.defaultFS</name><value>hdfs://mycluster</value></property>
- dfs.journalnode.edits.dir
Configure the local path where JN stores edit.
[ hdfs-site.xml]<property><name>dfs.journalnode.edits.dir</name><value>/home/hdfs/hadoop/journal</value></property>
Complete configuration file:
core-site.xml
<? xml version="1.0" encoding="UTF-8"?><?xml-stylesheet type="text/xsl" href="configuration.xsl"?><configuration><property><name>fs.defaultFS</name><value>hdfs://mycluster/</value></property><property><name>hadoop.tmp.dir</name><value>/home/hdfs/hadoop</value></property></configuration>
hdfs-site.xml
<? xml version="1.0" encoding="UTF-8"?><?xml-stylesheet type="text/xsl" href="configuration.xsl"?><configuration><property><name>dfs.replication</name><value>3</value></property><property><name>dfs.hosts</name><value>/opt/soft/hadoop/etc/dfs.include.txt</value></property><property><name>dfs.hosts.exclude</name><value>/opt/soft/hadoop/etc/dfs.hosts.exclude.txt</value></property><property><name>dfs.nameservices</name><value>mycluster</value></property><property><name>dfs.ha.namenodes.mycluster</name><value>nn1,nn2</value></property><property><name>dfs.namenode.rpc-address.mycluster.nn1</name><value>s141:8020</value></property><property><name>dfs.namenode.rpc-address.mycluster.nn2</name><value>s146:8020</value></property><property><name>dfs.namenode.http-address.mycluster.nn1</name><value>s141:50070</value></property><property><name>dfs.namenode.http-address.mycluster.nn2</name><value>s146:50070</value></property><property><name>dfs.namenode.shared.edits.dir</name><value>qjournal://s142:8485;s143:8485;s144:8485/mycluster</value></property><property><name>dfs.client.failover.proxy.provider.mycluster</name><value>org.apache.hadoop.hdfs.server.namenode.ha.ConfiguredFailoverProxyProvider</value></property><property><name>dfs.ha.fencing.methods</name><value>sshfence</value></property><property><name>dfs.ha.fencing.ssh.private-key-files</name><value>/home/hdfs/.ssh/id_rsa</value></property><property><name>dfs.journalnode.edits.dir</name><value>/home/hdfs/hadoop/journal</value></property></configuration>
mapred-site.xml
<? xml version="1.0"?><?xml-stylesheet type="text/xsl" href="configuration.xsl"?><configuration><property><name>mapreduce.framework.name</name><value>yarn</value></property></configuration>
yarn-site.xml
<? xml version="1.0"?><configuration><!-- Site specific YARN configuration properties --><property><name>yarn.resourcemanager.hostname</name><value>s141</value></property><property><name>yarn.nodemanager.aux-services</name><value>mapreduce_shuffle</value></property></configuration>
- Deployment details
1 ) Start the jn process (s142, s143, s144) on the jn node respectively
hadoop-daemon.sh start journalnode
2 ) After starting jn, perform disk metadata synchronization between the two NNs
a) If it is a brand new cluster, first format the file system and only need to execute on one nn.
[s141|s146]
hadoop namenode -format
b) If you convert a non-HA cluster to an HA cluster, copy the metadata of the original NN to another NN.
- Step One
On the s141 machine, copy the hadoop data to the directory corresponding to s146
scp -r /home/hdfs/hadoop/dfs hdfs@s146:/home/hdfs/hadoop/
- Step two
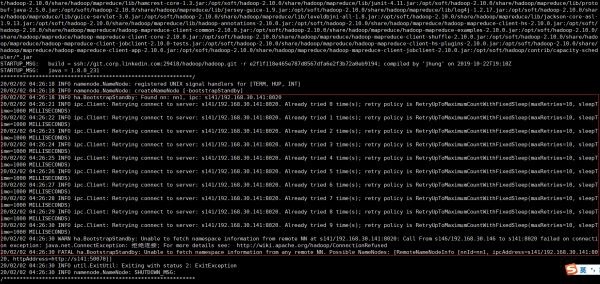
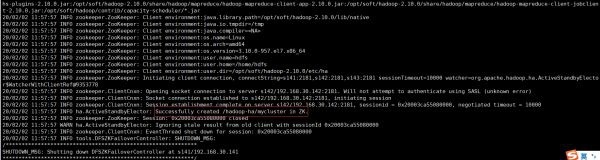
Run the following command on the new nn (unformatted nn, here is s146) to realize the standby state boot. Note: s141namenode needs to be in the start state (can be executed: hadoop-daemon.sh start namenode).
hdfs namenode -bootstrapStandby
If the s141 name node is not started, it will fail, as shown in the figure:
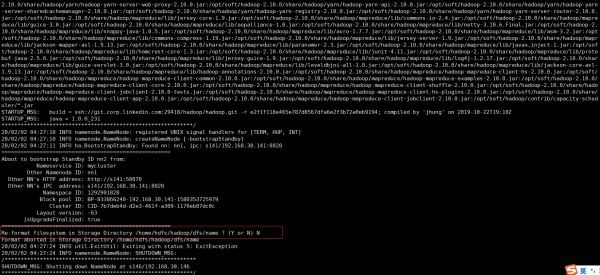
After starting the s141 name node, execute the command on s141
hadoop-daemon.sh start namenode
Then execute the standby boot command, note: prompt whether to format, select N, as shown in the figure:
- Step three
Execute the following command on one of the NNs to complete the transmission of the edit log to the jn node.
hdfs namenode -initializeSharedEdits
If a java.nio.channels.OverlappingFileLockException error is reported during execution:
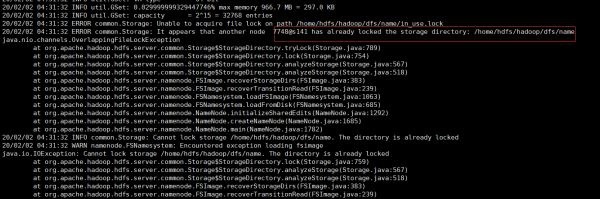
Explain that the namenode is starting, and the namenode node needs to be stopped (hadoop-daemon.sh stop namenode)
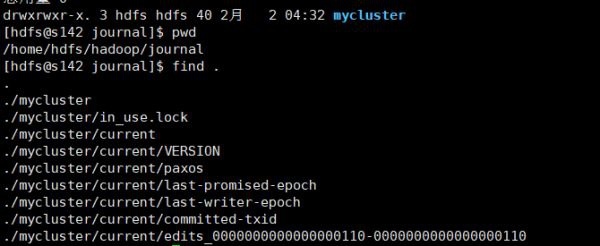
After execution, check whether there is edit data in s142, s143, and s144. Here, check the production mycluster directory, which contains edit log data, as follows:
- Step Four
Start all nodes.
Start the name node and all data nodes on s141:
hadoop-daemon.sh start namenode
hadoop-daemons.sh start datanode
Start the name node on s146
hadoop-daemon.sh start namenode
At this time, visit http://192.168.30.141:50070/ and http://192.168.30.146:50070/ in the browser and you will find that both namenodes are standby

At this time, you need to manually use the command to switch one of them to the active state, here set s141 (nn1) to active
hdfs haadmin -transitionToActive nn1
S141 is active at this time

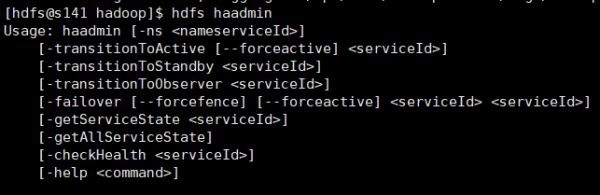
hdfs haadmin commonly used commands:
So far, the manual disaster recovery high availability configuration is completed, but this method is not smart and cannot automatically sense disaster recovery, so the automatic disaster recovery configuration is introduced below
- Automatic disaster recovery configuration
Need to introduce two components, zookeeperquarum and zk disaster recovery controller (ZKFC)
Set up a zookeeper cluster, choose s141, s142, s143 three machines, download zookeeper: http://mirror.bit.edu.cn/apache/zookeeper/zookeeper-3.5.6
- Unzip zookeeper:
tar -xzvf apache-zookeeper-3.5.6-bin.tar.gz -C /opt/soft/zookeeper-3.5.6
- Configure environment variables, add zk environment variables in /etc/profile, and recompile /etc/profile file
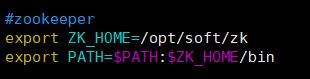
Copy the code code as follows:
source /etc/profile
- Configure the zk configuration file, the configuration files of the three machines are unified
# The number of milliseconds of each tick
tickTime=2000
# The number of ticks that the initial
# synchronization phase can take
initLimit=10
# The number of ticks that can pass between
# sending a request and getting an acknowledgement
syncLimit=5
# the directory where the snapshot is stored.
# do not use /tmp for storage,/tmp here is just
# example sakes.
dataDir=/home/hdfs/zookeeper
# the port at which the clients will connect
clientPort=2181
# the maximum number of client connections.
# increase thisif you need to handle more clients
# maxClientCnxns=60
#
# Be sure to read the maintenance section of the
# administrator guide before turning on autopurge.
#
# http://zookeeper.apache.org/doc/current/zookeeperAdmin.html#sc_maintenance
#
# The number of snapshots to retain in dataDir
# autopurge.snapRetainCount=3
# Purge task interval in hours
# Set to "0" to disable auto purge feature
# autopurge.purgeInterval=1
server.1=s141:2888:3888
server.2=s142:2888:3888
server.3=s143:2888:3888
- Respectively
Create a myid file in the /home/hdfs/zookeeper (dataDir path configured in the zoo.cfg configuration file) directory of s141 with a value of 1 (corresponding to server.1 in the zoo.cfg configuration file)
Create a myid file in the /home/hdfs/zookeeper (dataDir path configured in the zoo.cfg configuration file) directory of s142 with a value of 2 (corresponding to server.2 in the zoo.cfg configuration file)
Create a myid file in the /home/hdfs/zookeeper (dataDir path configured in the zoo.cfg configuration file) directory of s143 with a value of 3 (corresponding to server.3 in the zoo.cfg configuration file)
- Start zk on each machine separately
zkServer.sh start
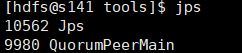
The zk process will appear after successful startup:
Configure hdfs related configuration:
- Stop all processes of hdfs
stop-all.sh
- Configure hdfs-site.xml to enable automatic disaster recovery.
[ hdfs-site.xml]<property><name>dfs.ha.automatic-failover.enabled</name><value>true</value></property>
- Configure core-site.xml and specify the connection address of zk.
< property><name>ha.zookeeper.quorum</name><value>s141:2181,s142:2181,s143:2181</value></property>
-
Distribute the above two files to all nodes.
-
In one of the NN (s141), initialize the HA state in ZK
hdfs zkfc -formatZK
The following results indicate success:
You can also check in zk:

- Start hdfs cluster
start-dfs.sh
View each machine process:
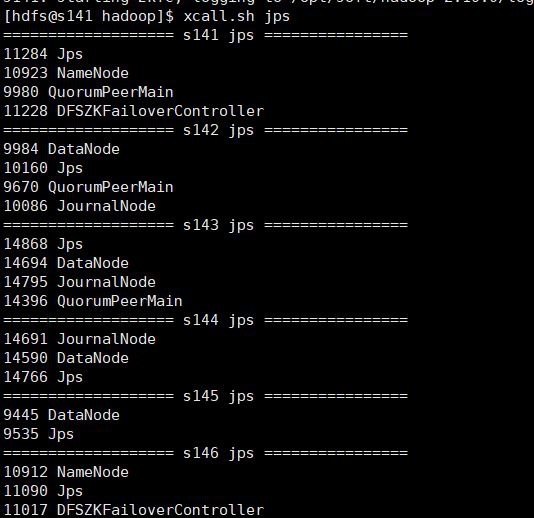
Start successfully, take a look at webui
s146 is active

s141 is on standby

So far, hadoop automatic disaster recovery HA is built
to sum up
The above is the introduction of centos7 to build Hadoop 2.10 high availability (HA), I hope it will be helpful to everyone!