Ubuntu Opencv image smoothing
Ubuntu Opencv image smoothing
1 background knowledge
Smoothing, also known as blur, is a simple and frequently used image processing method. A filter is required for smoothing. The most commonly used filter is a linear filter. The output pixel value (g(i,j)) of the linear filter process is the weighted sum of the input pixel value (f(i+k,j+l)):

Called a kernel, it is just a weighting coefficient. Think of the filter as a window containing weighting coefficients. When using this filter to smooth the image, slide this window across the image.
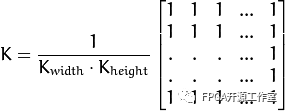
1.1 Mean filter
The simplest filter, the output pixel value is the mean value of the pixel value in the kernel window (all pixels have equal weighting coefficients), the kernel is as follows:
1.2 Gaussian filter
Gaussian filtering is to convolve each pixel of the input array with the Gaussian kernel and use the convolution sum as the output pixel value.
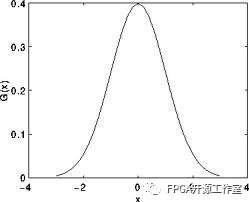
Assuming that the image is one-dimensional, looking at the above figure, it is not difficult to find that the weighting coefficient of the middle pixel is the largest, and the weighting coefficient of the surrounding pixels gradually decreases as the distance between them increases.
1.3 Median filter
Median filtering replaces each pixel of the image with the median value of the neighborhood (square area with the current pixel as the center) pixel.
1.4 Bilateral filter
The filters we currently understand are all for smoothing the image. The problem is that sometimes these filters not only attenuate the noise, but also smooth out the edges. To avoid this situation (at least to a certain extent), we can use bilateral filtering. Similar to the Gaussian filter, the bilateral filter also assigns a weighting coefficient to each neighboring pixel. These weighting coefficients consist of two parts. The first part has the same weighting method as Gaussian filtering, and the second part's weight depends on the grayscale difference between the neighboring pixel and the current pixel.
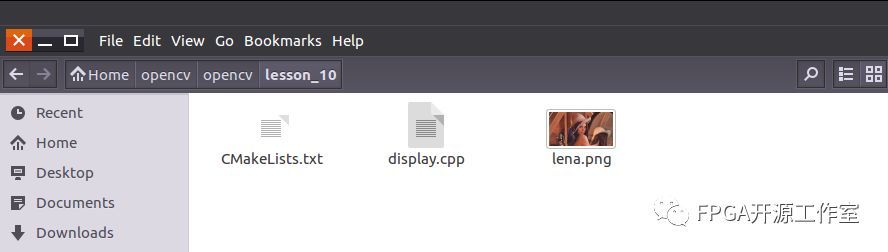
2 Opencv implementation
The first step: write C++ source program.
include "opencv2/imgproc/imgproc.hpp"#include "opencv2/highgui/highgui.hpp"
using namespace std;using namespace cv;
/// Global variables int DELAY_CAPTION = 1500; int DELAY_BLUR = 100; int MAX_KERNEL_LENGTH = 31;
Mat src; Mat dst;char window_name[] = "Filter Demo 1";
/// Function declaration int display_caption( char* caption ); int display_dst( int delay );
/** * main function*/
int main( int argc, char** argv )
{
namedWindow( window_name, CV_WINDOW_AUTOSIZE );
/// Load the original image
src = imread( "../images/lena.jpg", 1 );
if( display_caption( "Original Image" ) != 0 ) { return 0; }
dst = src.clone();
if( display_dst( DELAY_CAPTION ) != 0 ) { return 0; }
/// Use mean smoothing
if( display_caption( "Homogeneous Blur" ) != 0 ) { return 0; }
for ( int i = 1; i < MAX_KERNEL_LENGTH; i = i + 2 )
{ blur( src, dst, Size( i, i ), Point(-1,-1) );
if( display_dst( DELAY_BLUR ) != 0 ) { return 0; } }
/// Use Gaussian smoothing
if( display_caption( "Gaussian Blur" ) != 0 ) { return 0; }
for ( int i = 1; i < MAX_KERNEL_LENGTH; i = i + 2 )
{ GaussianBlur( src, dst, Size( i, i ), 0, 0 );
if( display_dst( DELAY_BLUR ) != 0 ) { return 0; } }
/// Use median smoothing
if( display_caption( "Median Blur" ) != 0 ) { return 0; }
for ( int i = 1; i < MAX_KERNEL_LENGTH; i = i + 2 )
{ medianBlur ( src, dst, i );
if( display_dst( DELAY_BLUR ) != 0 ) { return 0; } }
/// Use bilateral smoothing
if( display_caption( "Bilateral Blur" ) != 0 ) { return 0; }
for ( int i = 1; i < MAX_KERNEL_LENGTH; i = i + 2 )
{ bilateralFilter ( src, dst, i, i*2, i/2 );
if( display_dst( DELAY_BLUR ) != 0 ) { return 0; } }
/// Waiting for user input
display_caption( "End: Press a key!" );
waitKey(0);
return 0;
}
int display_caption( char* caption )
{
dst = Mat::zeros( src.size(), src.type() );
putText( dst, caption,
Point( src.cols/4, src.rows/2),
CV_FONT_HERSHEY_COMPLEX, 1, Scalar(255, 255, 255) );
imshow( window_name, dst );
int c = waitKey( DELAY_CAPTION );
if( c >= 0 ) { return -1; }
return 0;
}
int display_dst( int delay )
{
imshow( window_name, dst );
int c = waitKey ( delay );
if( c >= 0 ) { return -1; }
return 0;
}
The second step is to write CMmakeLists.txt
Next we compile the program.
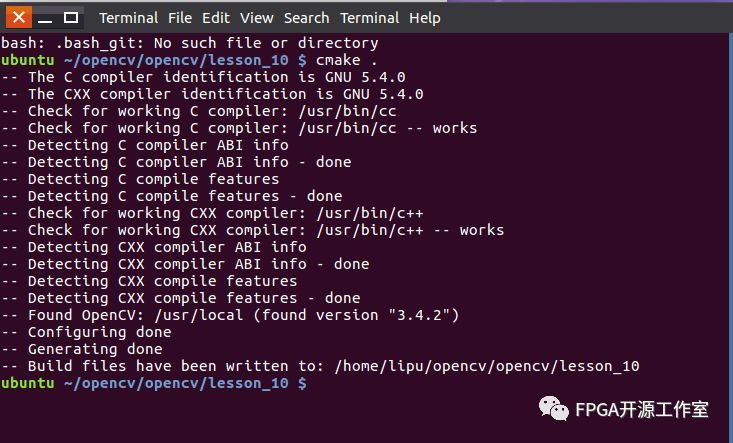
Step 3: Compile the program
1> Run cmake.
cmake .
2> Run make
Make
3> Run ./display
4> Results (video display)
Video content
3 to sum up
The Opencv experiment aims to deepen or facilitate everyone's understanding of the software image processing process, and provide methods or ideas for hardware implementation.