Install and configure the latest version of RabbitMQ-3.8.5 (with video)
引子###
3.7.x has been installed before, and the latest one has reached 3.8.5. The disgusting thing about RabbitMQ is that the version is too confusing, and every few versions, the installation method is slightly different. Let's update it this time.
Install RabbitMQ
- See the official website: https://www.rabbitmq.com/install-rpm.html
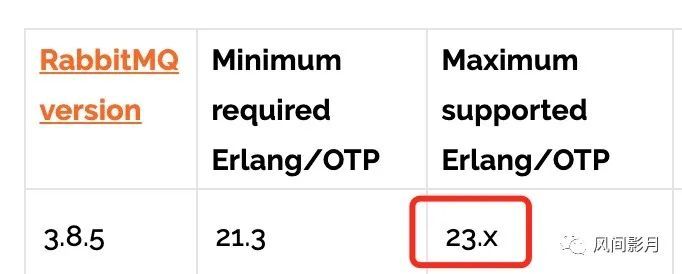
- See the matching version: https://www.rabbitmq.com/which-erlang.html
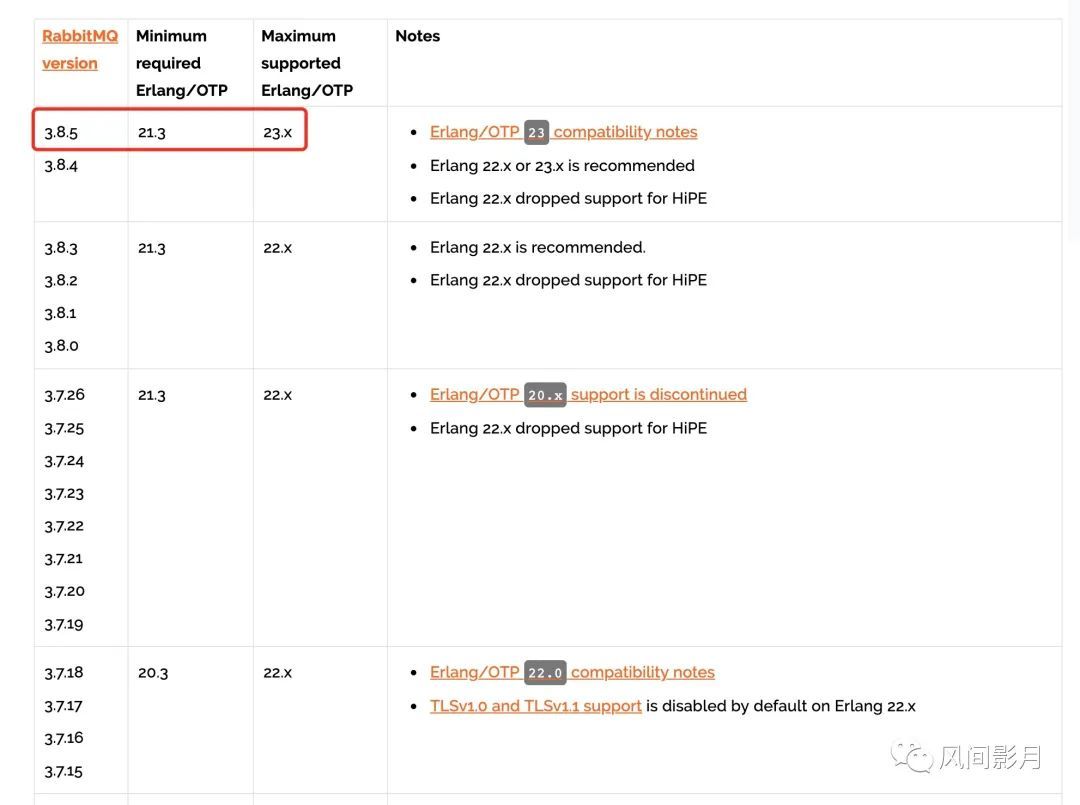
Then the corresponding erlang version interval of 3.8.5 is as shown in the figure above, this must match. Both the rabbitmq and erlang versions need to match before installing rabbitmq, which means that there must be an erlang environment, just like java needs jvm.
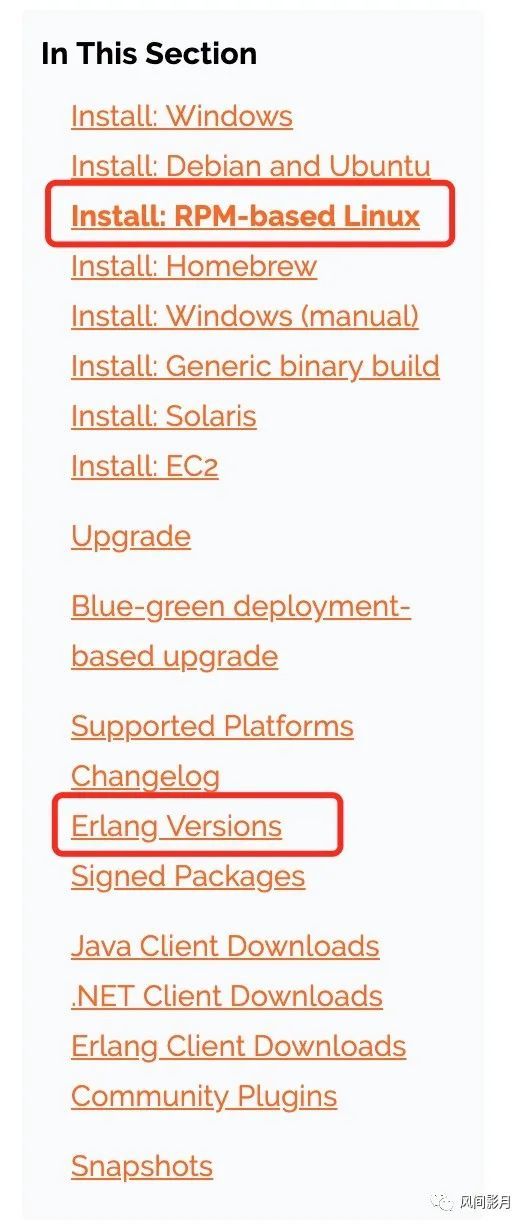
- Then click the first red box link
Install: RPM-based Linuxin step 1, and enter the installation. Windows and mac installation is relatively simple, so I won't say more, we mainly talk about the installation in Linux. After opening this link, it’s actually quite messy. You have to read them one by one. There is no title or serial number. It feels unfriendly to developers who come in for the first time, especially if the English is not good. But it doesn't matter, you can install it step by step. FindInstall RabbitMQ Server, as shown below:
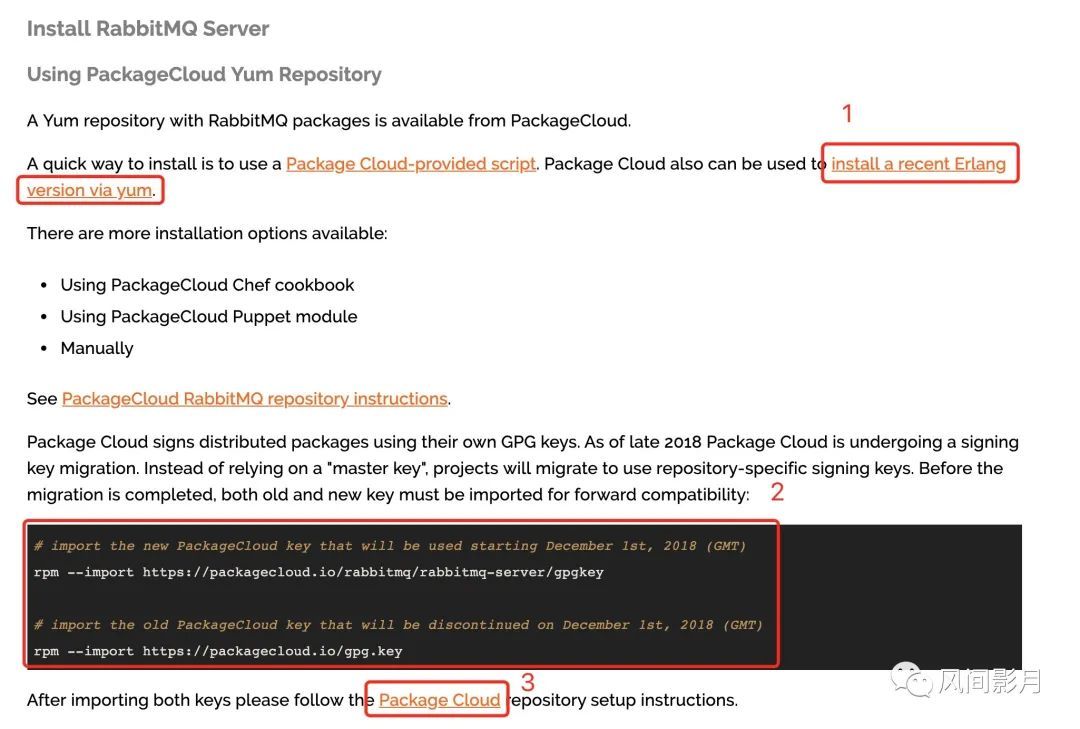
Click on the first link install a recent Erlang version via yum in the figure above to enter the following page:
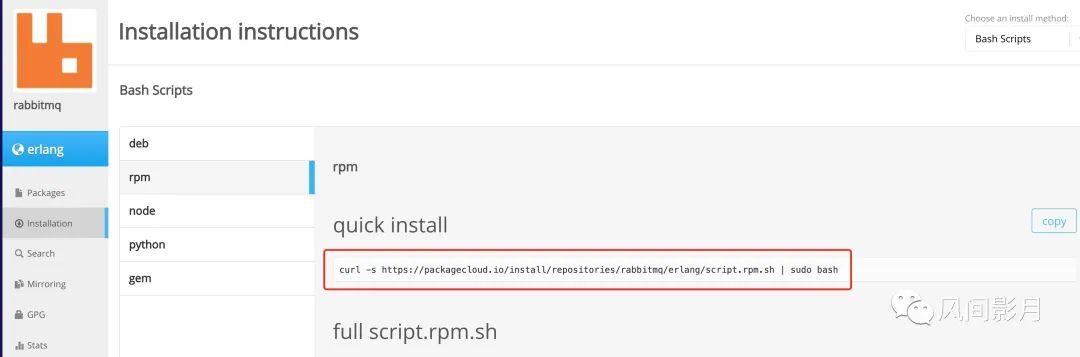
This is the pre-script file used to install erlang, copy it to your own linux system to run:
curl -s https://packagecloud.io/install/repositories/rabbitmq/erlang/script.rpm.sh | sudo bash
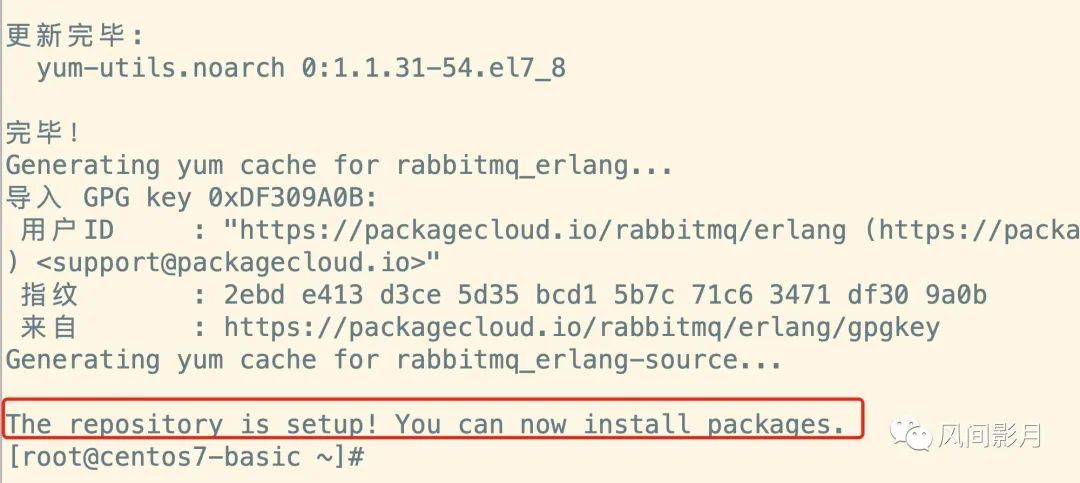
After running, you see the following prompt, indicating that the file dependency library has been configured, and you can continue to install it now.
- Install erlang environment in linux:
yum install erlang
Successful installation after running
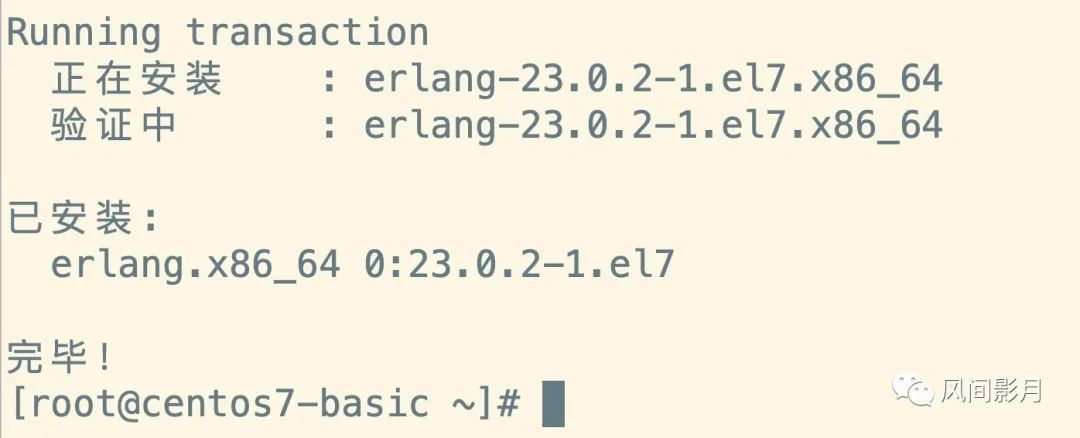
- After installing erlang, you can check the version number and other information, as follows:


- Through the above script detection, you can see that the version of erlang conforms to 23.x
- Then we need to install rabbitmq-server. In the previous screenshot, there is the following black block. Two keys need to be imported and copied directly to Linux to run:

rpm --import https://packagecloud.io/rabbitmq/rabbitmq-server/gpgkey``rpm --import https://packagecloud.io/gpg.key

If the key is imported successfully, it will be OK if no error is reported.
- Then make a pre-preparation for installing
rabbitmq-server:

Click the Package Cloud in the red box, and open it as follows:

Copy this command to Linux and run:
curl -s https://packagecloud.io/install/repositories/rabbitmq/rabbitmq-server/script.rpm.sh | sudo bash

Prompt that the installation is successful, and then you can formally install the rabbitmq installation package!
- Install RabbitMQ-Server, find
Download the Server, and download the rpm in the red box. This needs to be installed. When downloading, download it according to your own centos version. I use centos7 here, then centos6 is a bit old, centos8 is too new .

- Upload the rpm file downloaded in the above picture to your Linux system:

- Install rabbitmq-server and run the following script:
rpm -ivh rabbitmq-server-3.8.5-1.el7.noarch.rpm
Error after running:

In the picture, this means that there is no key and no socat, it doesn't matter, just install it. Find this location, then copy the key to the command line and run:

Copy to the command line to run the import:
rpm --import https://www.rabbitmq.com/rabbitmq-release-signing-key.asc
- Run the script to install
rabbitmq-serveragain:
rpm -ivh rabbitmq-server-3.8.5-1.el7.noarch.rpm

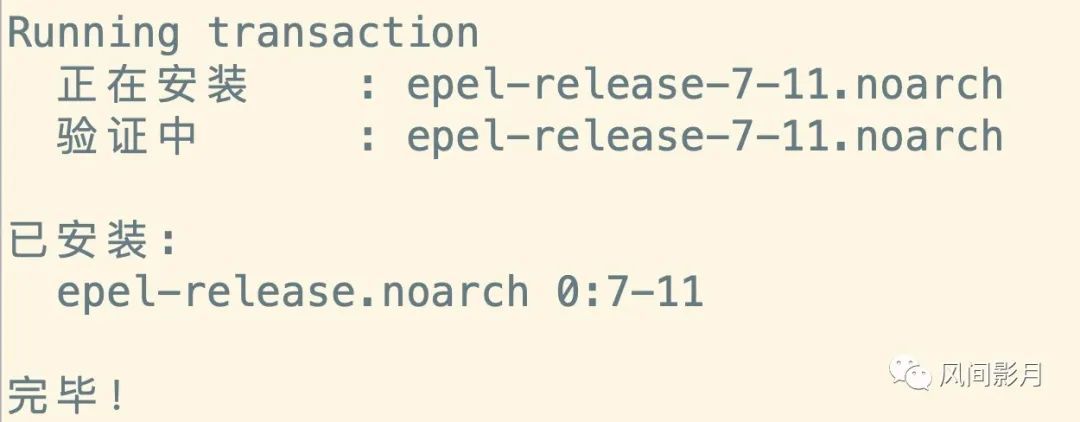
At this time, you are prompted to install socat, run the following script to install, the installation process is relatively slow, just wait patiently:
yum -y install epel-release``yum -y install socat

- After the above two installations are OK, then install rabbitmq-server again
rpm -ivh rabbitmq-server-3.8.5-1.el7.noarch.rpm

At this time, as shown above, rabbitmq is installed! !
Configure RabbitMQ
- RMQ has been installed, but it needs to be configured before it can be used.
- The previous version can be found directly, now you have to copy it manually, https://github.com/rabbitmq/rabbitmq-server/blob/master/docs/rabbitmq.conf.example, this connection example configuration file
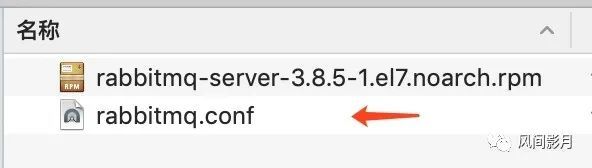
- Copy the configuration content inside to the local and rename it to
rabbitmq.confas follows:
- Then modify the content of the file, be sure to note that there is no
commaat the end of the braces:

This means that the default user who runs the guest can log in in a non-local environment
- Upload the configuration file to the rabbitmq directory:


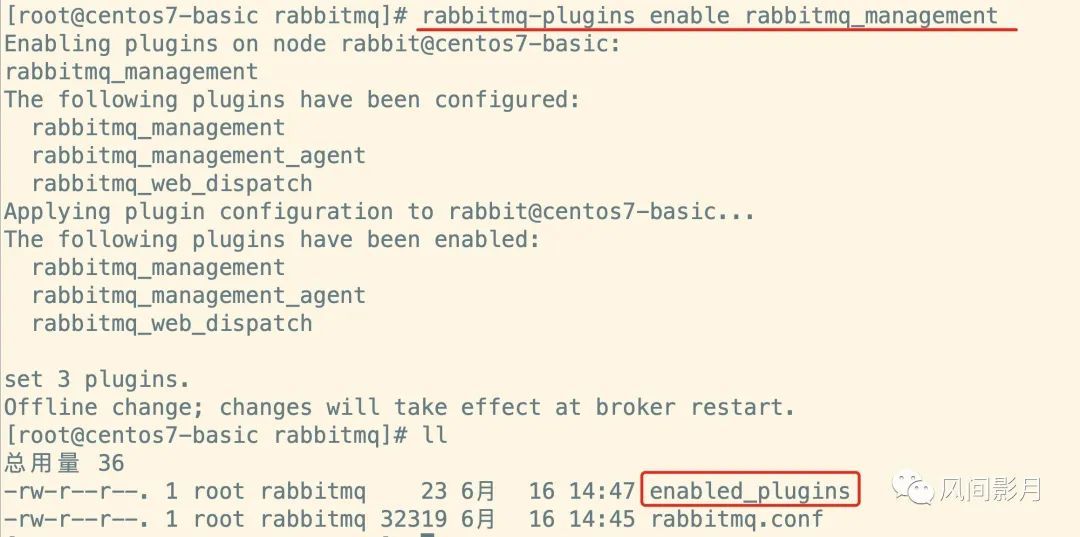
- Then enable the rabbitmq management platform plug-in. After enabling it, there will be an additional enabled_plugins in the /etc/rabbitmq directory. The literal meaning should be understandable, not to mention, it is to open the plug-in
- At this point, the configuration is all over, the last step is to start the rabbitmq server
service rabbitmq-server start
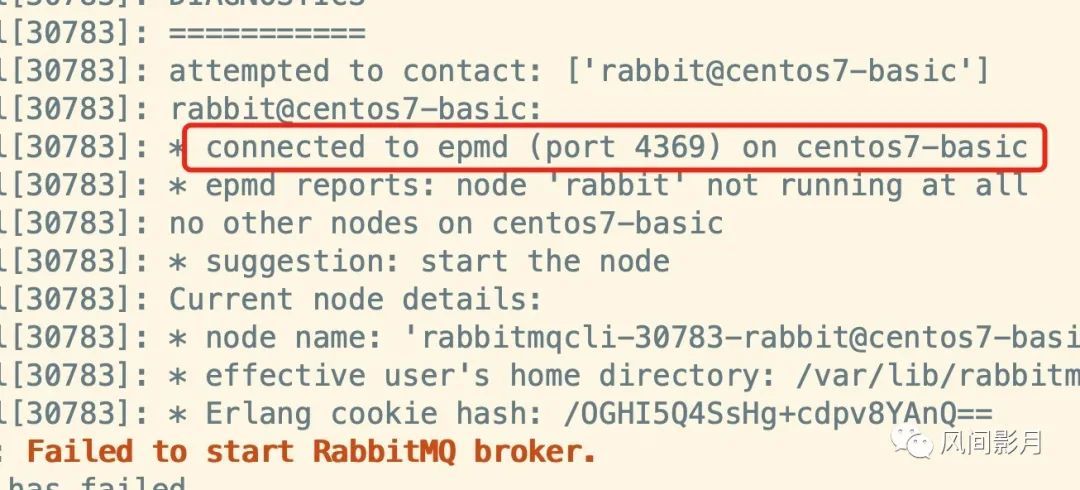
An error is reported after the startup, which is really a pit. . .

- Don't be afraid when you encounter a pit, just try to solve it yourself, enter the command line:
journalctl -xe
Then there is a sentence saying that the node rabbit is not started and cannot be connected. Look at the content in the figure. Connecting to a certain port does not work. The first reaction to seeing the port is port occupied, check it
Check the port:

Then kill the process

- Finally restart RabbitMQ again
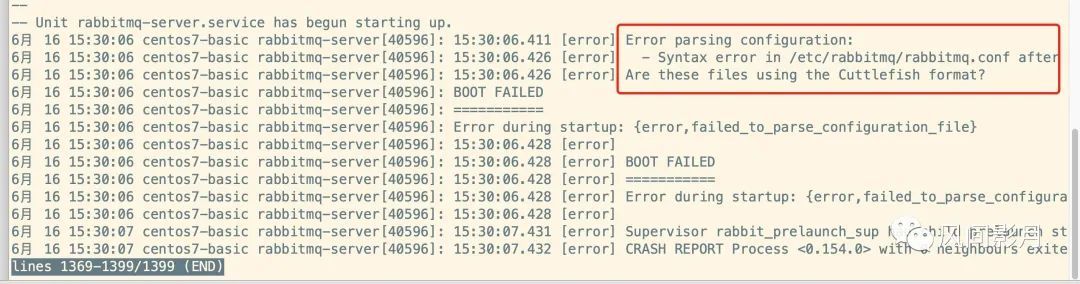
service rabbitmq-server start - At this time an error was reported again,,, let’s take a look, there is a problem with the configuration file format, we have added a line of configuration before, using guest, so now we comment out
- Note that after restarting, Ayoil can start successfully:


- Open the default mq management interface, the user name and password are both guest by default, and the login prompt says that the user can only log in in localhost, that is, only in the virtual machine.

- See this sentence in the configuration file. If you want to allow the guest user to have permission to access anywhere, leave the comment, then go and try it now, don’t forget to restart the mq service


- OK, you can log in at this time, which means that the new version of mq's open access to guest is different from the past. It is a pitfall. You need to pay attention to this.

- Add a new administrator user admin:
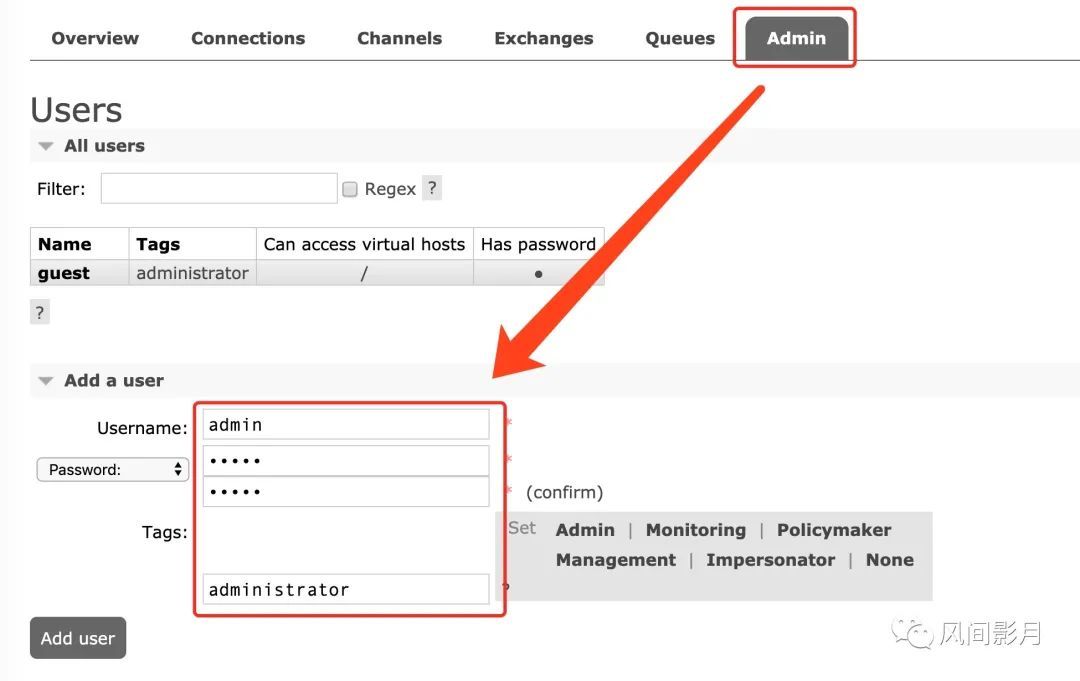
- Provide permissions to admin

- Just click set


Section###
Oh, RabbitMQ has been installed. Installing mq has always been a horrible thing, and it fails accidentally. A video will be sent out if it is empty for recording.
In addition, for more configuration information about rabbitmq, please refer to the following link: https://www.rabbitmq.com/configure.html
Recommended Posts