Tutorial for setting up FTP server in Ubuntu 16.04 environment
Ubuntu16.04 build FTP server
Install ftp
Install ftp:
sudo apt-get update
sudo apt-get install vsftpd
Check if ftp is installed:
vsftpd --version
Change configuration file
Pay attention to use the sudo command to obtain root privileges
Open the configuration file:
sudo vim /etc/vsftpd.conf
Make the following changes:
# Example config file /etc/vsftpd.conf
#
# The default compiled in settings are fairly paranoid. This sample file
# loosens things up a bit, to make the ftp daemon more usable.
# Please see vsftpd.conf.5for all compiled in defaults.
#
# READ THIS: This example file is NOT an exhaustive list of vsftpd options.
# Please read the vsftpd.conf.5 manual page to get a full idea of vsftpd's
# capabilities.
#
#
# Run standalone? vsftpd can run either from an inetd or as a standalone
# daemon started from an initscript.
listen=NO
#
# This directive enables listening on IPv6 sockets. By default, listening
# on the IPv6 "any"address(::) will accept connections from both IPv6
# and IPv4 clients. It is not necessary to listen on *both* IPv4 and IPv6
# sockets. If you want that(perhaps because you want to listen on specific
# addresses) then you must run two copies of vsftpd with two configuration
# files.
listen_ipv6=YES
#
# Allow anonymous FTP?(Disabled by default).
anonymous_enable=NO
#
# Uncomment this to allow local users to log in.
local_enable=YES
#
# Uncomment this to enable any form of FTP write command.
write_enable=YES
#
# Default umask for local users is 077. You may wish to change this to 022,
# if your users expect that(022 is used by most other ftpd's)
local_umask=022
#
# Uncomment this to allow the anonymous FTP user to upload files. This only
# has an effect if the above global write enable is activated. Also, you will
# obviously need to create a directory writable by the FTP user.
# anon_upload_enable=YES
#
# Uncomment thisif you want the anonymous FTP user to be able to create
# newdirectories.
# anon_mkdir_write_enable=YES
#
# Activate directory messages - messages given to remote users when they
# go into a certain directory.
dirmessage_enable=YES
#
# If enabled, vsftpd will display directory listings with the time
# in your local time zone. The default is to display GMT. The
# times returned by the MDTM FTP command are also affected by this
# option.
use_localtime=YES
#
# Activate logging of uploads/downloads.
xferlog_enable=YES
#
# Make sure PORT transfer connections originate from port 20(ftp-data).
connect_from_port_20=YES
#
# If you want, you can arrange for uploaded anonymous files to be owned by
# a different user. Note! Using "root"for uploaded files is not
# recommended!
# chown_uploads=YES
# chown_username=whoever
#
# You may override where the log file goes if you like. The default is shown
# below.
xferlog_file=/var/log/vsftpd.log
#
# If you want, you can have your log file in standard ftpd xferlog format.
# Note that the default log file location is /var/log/xferlog inthiscase.
xferlog_std_format=YES
#
# You may change the default value for timing out an idle session.
# idle_session_timeout=600
#
# You may change the default value for timing out a data connection.
# data_connection_timeout=120
#
# It is recommended that you define on your system a unique user which the
# ftp server can use as a totally isolated and unprivileged user.
# nopriv_user=ftpsecure
#
# Enable this and the server will recognise asynchronous ABOR requests. Not
# recommended forsecurity(the code is non-trivial). Not enabling it,
# however, may confuse older FTP clients.
# async_abor_enable=YES
#
# By default the server will pretend to allow ASCII mode but in fact ignore
# the request. Turn on the below options to have the server actually do ASCII
# mangling on files when in ASCII mode.
# Beware that on some FTP servers, ASCII support allows a denial of service
# attack(DoS) via the command "SIZE /big/file"in ASCII mode. vsftpd
# predicted this attack and has always been safe, reporting the size of the
# raw file.
# ASCII mangling is a horrible feature of the protocol.
# ascii_upload_enable=YES
# ascii_download_enable=YES
#
# You may fully customise the login banner string:
ftpd_banner=Welcome to blah FTP service.
#
# You may specify a file of disallowed anonymous e-mail addresses. Apparently
# useful for combatting certain DoS attacks.
# deny_email_enable=YES
# ( default follows)
# banned_email_file=/etc/vsftpd.banned_emails
#
# You may restrict local users to their home directories. See the FAQ for
# the possible risks inthis before using chroot_local_user or
# chroot_list_enable below.
# chroot_local_user=YES
#
# You may specify an explicit list of local users to chroot() to their home
# directory. If chroot_local_user is YES, then this list becomes a list of
# users to NOT chroot().
# ( Warning! chroot'ing can be very dangerous. If using chroot, make sure that
# the user does not have write access to the top level directory within the
# chroot)
chroot_local_user=YES
chroot_list_enable=YES
# ( default follows)
chroot_list_file=/etc/vsftpd.chroot_list
#
# You may activate the "-R" option to the builtin ls. This is disabled by
# default to avoid remote users being able to cause excessive I/O on large
# sites. However, some broken FTP clients such as"ncftp" and "mirror" assume
# the presence of the "-R" option, so there is a strong casefor enabling it.
# ls_recurse_enable=YES
#
# Customization
#
# Some of vsftpd's settings don't fit the filesystem layout by
# default.
#
# This option should be the name of a directory which is empty. Also, the
# directory should not be writable by the ftp user. This directory is used
# as a secure chroot() jail at times vsftpd does not require filesystem
# access.
secure_chroot_dir=/var/run/vsftpd/empty
#
# This string is the name of the PAM service vsftpd will use.
pam_service_name=ftp
#
# This option specifies the location of the RSA certificate to use for SSL
# encrypted connections.
rsa_cert_file=/etc/ssl/certs/ssl-cert-snakeoil.pem
rsa_private_key_file=/etc/ssl/private/ssl-cert-snakeoil.key
ssl_enable=NO
#
# Uncomment this to indicate that vsftpd use a utf8 filesystem.
utf8_filesystem=YES
After exiting the editing mode, use :wq to save and exit vim.
Create ftp user
The operation here requires root privileges. If the operation is rejected, use sudo:
sudo mkdir /home/ftpdir
sudo useradd ftpdir -d /home/ftpdir -m
sudo passwd ftpdir
sudo mkdir /home/ftpdir/ftp
sudo chmod 777-R /home/ftpdir/ftp
usermod -s /sbin/nologin ftpdir
After the configuration is complete, add users:
sudo vim /etc/vsftpd.chroot_list
Add ftpdir to the file.
ftpdir
So far, the entire ftp construction process is complete, and the next step is about how to use it.
Start or restart ftp
Start or restart ftp:
service vsftpd startservice vsftpd restart
View ftp status:
service vsftpd status
To close the ftp service, you can use the following command:
service vsftpd stop
View server ip
Open the command side
robot@robot:~$ ifconfig
enp4s0f2 Link encap:Ethernet HWaddr 74:d0:2b:ec:fa:f9
UP BROADCAST MULTICAST MTU:1500 Metric:1
RX packets:0 errors:0 dropped:0 overruns:0 frame:0
TX packets:0 errors:0 dropped:0 overruns:0 carrier:0
collisions:0 txqueuelen:1000
RX bytes:0(0.0 B) TX bytes:0(0.0 B)
lo  Link encap:Local Loopback
inet addr:127.0.0.1 Mask:255.0.0.0
inet6 addr:::1/128 Scope:Host
UP LOOPBACK RUNNING MTU:65536 Metric:1
RX packets:12840 errors:0 dropped:0 overruns:0 frame:0
TX packets:12840 errors:0 dropped:0 overruns:0 carrier:0
collisions:0 txqueuelen:1000
RX bytes:1174976(1.1 MB) TX bytes:1174976(1.1 MB)
wlp3s0 Link encap:Ethernet HWaddr 24:fd:52:85:42:0c
inet addr:192.168.1.110 Bcast:192.168.1.255 Mask:255.255.255.0
inet6 addr: fe80::c13c:b38e:69c7:cdf2/64 Scope:Link
UP BROADCAST RUNNING MULTICAST MTU:1500 Metric:1
RX packets:99764 errors:0 dropped:0 overruns:0 frame:0
TX packets:95225 errors:0 dropped:0 overruns:0 carrier:0
collisions:0 txqueuelen:1000
RX bytes:98718687(98.7 MB) TX bytes:14326894(14.3 MB)
Since the connection here is wifi, the corresponding ip address found in wlp3s0 is 192.168.1.110 (if you connect the network cable, find the ip in the first paragraph, the configuration of each computer is different, you can consider it according to the actual situation)
Login
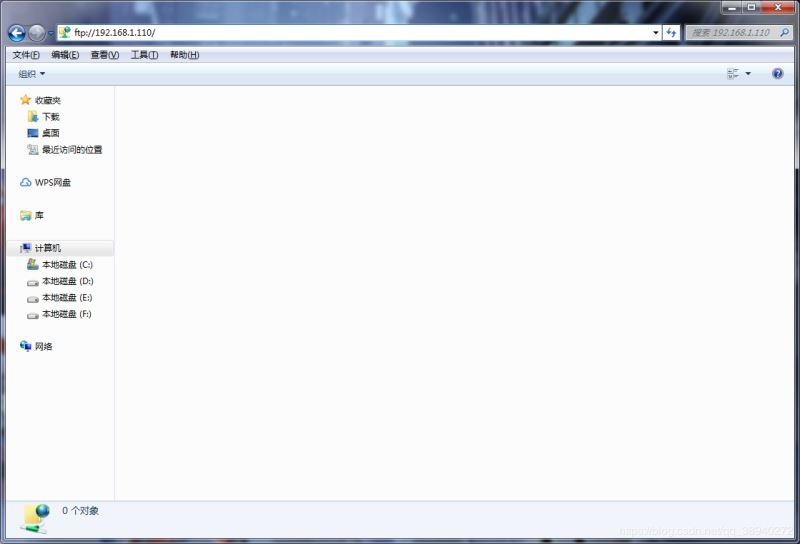
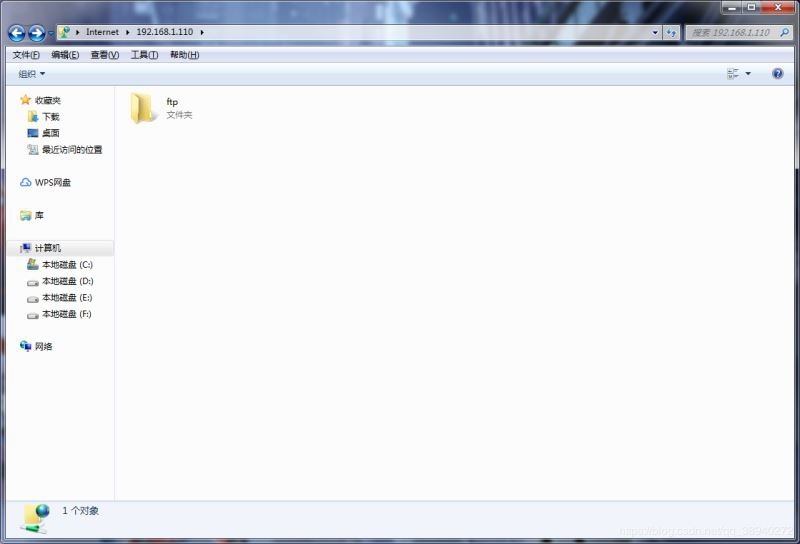
Use filezilla or open the file manager and enter ftp://ipaddress
Turn on the computer and enter the ip address of the server ftp://192.168.1.110
Enter the username and password. The username used here is ftpdir and the password is 123456

Finally, you can see the folder created on the server.
File location on ubuntu
After completing the construction and testing of the ftp server, where are the files stored in the service, and how do I find these files?
In the section of creating users, a folder called ftpdir is created in the /home directory, and a readable and writable folder ftp is created in the ftpdir folder. In the subsequent file transfer, you can Switch to the ftp folder to search for files, here you need to use sudo to obtain permissions.
robot@robot:~$ cd /home/ftpdir/ftp
robot@robot:/home/ftpdir/ftp$ ls
Rubik's Cube.zip
At this point, the whole process is over. In the process of building, I refer to the experience of other predecessors on the Internet. This is only a note on the learning path. If the things mentioned are wrong, you are welcome to point out!
to sum up
The above is the tutorial for building FTP server in Ubuntu 16.04 environment introduced by the editor. I hope it will be helpful to you. If you have any questions, please leave me a message. The editor will reply to you in time. Thank you very much for your support to the ZaLou.Cn website!
If you think this article is helpful to you, welcome to reprint, please indicate the source, thank you!
Recommended Posts