Ubuntu16.04でPostgreSQLの起動を設定する方法

[PostgreSQL](https://cloud.tencent.com/product/postgresql?from=10680)はコンパイルおよびインストールされているため、起動するように設定する必要があります。 Ubuntuシステムの場合、RedHatなどのシステムとは少し異なります。

まず、最初のステップです。RedHatのようなシステムの使用に慣れているため、chkconfigを取得する必要があります。このコマンドは、Red Hatサービスを開始および停止するように構成するコマンドですが、Ubuntuでは使用できません。 sysv-rc-confを使用できます。

sudo apt install sysv-rc-conf

sysv-rc-confをインストールした後、chkconfigに置き換えました。結局のところ、このコマンドは覚えるのが難しすぎます。

sudo cp /usr/sbin/sysv-rc-conf /usr/sbin/chkconfig

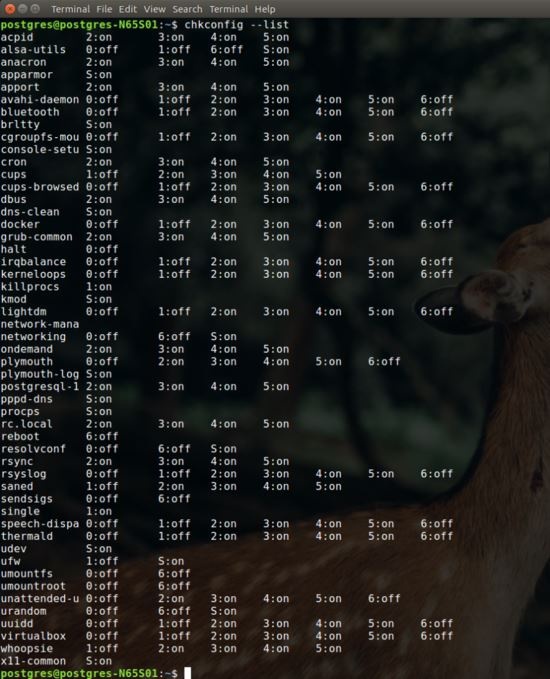
次に、chkconfigコマンドを使用して表示を試みることができます

これが完了したら、PostgreSQLインストール圧縮パッケージの/postgresql-10.3/contrib/start-scriptsディレクトリに移動する必要があります。ディレクトリの下にいくつかのシステム構成ファイルがあります。ここではUnuntuを使用し、linuxを選択して、このファイルを/etc/init.d/にコピーします。そして、実行可能なx権限を与えます。

postgres@postgres-N65S01:~/postgresql-10.3/contrib/start-scripts$ ls
freebsd linux macos osx
postgres@postgres-N65S01:~/sudo cp linux /etc/init.d/
postgres@postgres-N65S01:/etc/init.d$sudo mv linux postgresql-10.0
postgres@postgres-N65S01:/etc/init.d$chmod a+x postgresql-10.0

上記の操作を行った後、ファイルを変更する必要があります。主に次の2つの場所を変更します。

プレフィックスはpostgreSQLインストールディレクトリであり、PGDATAはデータベースファイルが配置されているディレクトリです。変更後に保存します。次のコマンドを実行して、サービスが自動的に開始するように設定します。

postgres@postgres-N65S01:/etc/init.d$ sudo chkconfig postgresql-10.0 on
postgres@postgres-N65S01:/etc/init.d$ sudo chkconfig --list | grep postgres
postgresql-12:on 3:on 4:on 5:on

ホストを再起動すると、postgreSQLデータベースを自動的に起動できることがわかります。

postgres@postgres-N65S01:/etc/init.d$ ps -ef | grep pgdata
postgres 24601019:19?00:00:00/opt/PostgreSQL-10/bin/postmaster -D /pgdata/data
postgres 46832853019:43 pts/1800:00:00 grep --color=auto pgdata

総括する

以上が、紹介したPostgreSQLのUbuntu16.04の起動方法です。お役に立てば幸いです。ご不明な点がございましたらメッセージを残してください。返信させていただきます。 ZaLou.Cnのウェブサイトをご支援いただきありがとうございます。

Recommended Posts

Ubuntu16.04でPostgreSQLの起動を設定する方法
Ubuntu20.04にPostgreSQLをインストールする方法
Ubuntu14.04でGogsを設定する方法
Ubuntu14.04でRを設定する方法
Ubuntu14.04でShinyServerをセットアップする方法
Ubuntu18.04サーバーで静的IPを設定する方法
ubuntu14.04で静的IPを設定する方法を詳しく説明します
Ubuntu16.04にPostgreSQLをインストールして使用する方法
Ubuntu18.04で時刻同期を設定する方法
Ubuntu18.04でDNSサーバーを設定する方法
Ubuntu16.04に基づいて固定IPを設定する方法
Ubuntu20.04にRubyをインストールする方法
Ubuntu20.04にMemcachedをインストールする方法
Ubuntu20.04にJavaをインストールする方法
Ubuntu20.04にMySQLをインストールする方法
Ubuntu20.04にVirtualBoxをインストールする方法
Ubuntu20.04にElasticsearchをインストールする方法
UbuntuにProtobuf3をインストールするための詳細なチュートリアル
Ubuntu20.04にApacheをインストールする方法
Ubuntu20.04にGitをインストールする方法
Ubuntu16.04にNode.jsをインストールする方法
Ubuntu20.04にMySQLをインストールする方法
Ubuntu20.04にVagrantをインストールする方法
Ubuntu14.04にBacula-Webをインストールする方法
Ubuntu18.04にAnaconda3をインストールする方法
Ubuntu18.04にMemcachedをインストールする方法
Ubuntu16.04にJenkinsをインストールする方法
Ubuntu14.04にMemSQLをインストールする方法
Ubuntu20.04にGoをインストールする方法
Ubuntu16.04にMongoDBをインストールする方法
Ubuntu14.04にMailpileをインストールする方法
Ubuntu16.04にPrestaShopをインストールする方法
Ubuntu14.04でPHP7にアップグレードする方法
Ubuntu20.04にSkypeをインストールする方法
Ubuntu20.04にJenkinsをインストールする方法
Ubuntu18.04にPython3.8をインストールする方法
Ubuntu18.04にKVMをインストールする方法
Ubuntu20.04にKVMをインストールする方法
ubuntu14.04にopencv3.0.0をインストールする方法
Ubuntu20.04にAnacondaをインストールする方法
Ubuntu16.04にPrometheusをインストールする方法
Ubuntu18.04にJenkinsをインストールする方法
Ubuntu14.04にDjangoをデプロイする方法
Ubuntu20.04にApacheをインストールする方法
Ubuntu20.04にRをインストールする方法
Ubuntu16.04にMoodleをインストールする方法
Ubuntu14.04にSolr5.2.1をインストールする方法
Ubuntu16.04にTeamviewerをインストールする方法
Ubuntu14.04でNginxを保護する方法
CentOS8にPostgresqlをインストールする方法
Ubuntu20.04にMariaDBをインストールする方法
Ubuntu20.04にNginxをインストールする方法
Ubuntu20.04にMonoをインストールする方法
Ubuntu20.04にGoをインストールする方法
Ubuntu20.04にZoomをインストールする方法
Ubuntuでソフトウェアをアンインストールする方法
Ubuntu16.04にNginxをインストールする方法
Ubuntu20.04にOpenCVをインストールする方法
Ubuntu20.04にSpotifyをインストールする方法
Ubuntu18.04にPostmanをインストールする方法