CentOS7.2はWebサイトアクセスログアナライザーを展開します-Piwik
著作権表示:この記事はShaonPuppetによるオリジナル記事です。転載の元のアドレスを教えてください。ありがとうございます。 https://blog.csdn.net/wh211212/article/details/52996699
1.Piwikの紹介##
-
Piwikは、PHPおよび[MySQL](https://cloud.tencent.com/product/cdb?from=10680)のオープンソースWeb統計ソフトウェアです。Web訪問者の数など、Webサイトに関するいくつかの有用な統計レポートを提供します。
最も訪問されたページ、検索エンジンのキーワードなど...
Piwikには、さまざまな機能を持つ多くのプラグインがあります。新しい機能を追加したり、不要な機能を削除したりできます。Piwikをサーバーにインストールして、データを独自のサーバーに保存することもできます。統計グラフをブログ、Webサイト、またはバックエンドのコントロールパネルに簡単に挿入できます。インストールが完了したら、カウントするWebページに小さなコードを配置するだけで済みます。 -
Piwik公式ウェブサイト:[https://piwik.org/](https://piwik.org/)
-
Piwikデモ:[http://piwik.org/what-is-piwik/](http://piwik.org/what-is-piwik/)
-
Piwikダウンロード:[https://piwik.org/download/](https://piwik.org/download/)

2、Piwikのインストール##
- ウェブサイトアクセスアナライザー「Piwik」をインストールし、
PiwikはAWStatsや他のソフトウェアとは異なり、Webサイトを分析するため、分析してアクセスするWebサイトにJavaスクリプトコードを追加する必要があります。
- PHPをインストールします。参照:[http://blog.csdn.net/wh211212/article/details/52982917](http://blog.csdn.net/wh211212/article/details/52982917)
- [MariaDB](https://cloud.tencent.com/product/tdsql?from=10680)サーバーをインストールします
MariaDB 5.5(CentOS 7のデフォルトバージョン)をインストールして、データベースサーバーを構成します
[1] MariaDB5をインストールします.5.[root@linuxprobe ~]# yum -y install mariadb-server
[ root@linuxprobe ~]# vi /etc/my.cnf
# add follows within [mysqld] section
[ mysqld]
character-set-server=utf8
[ root@linuxprobe ~]# systemctl start mariadb
[ root@linuxprobe ~]# systemctl enable mariadb
Created symlink from/etc/systemd/system/multi-user.target.wants/mariadb.service to /usr/lib/systemd/system/mariadb.servi
#[ MaribDBを初期化します][root@linuxprobe ~]# mysql_secure_installation

NOTE: RUNNING ALL PARTS OF THIS SCRIPT IS RECOMMENDED FOR ALL MariaDB
  SERVERS IN PRODUCTION USE!  PLEASE READ EACH STEP CAREFULLY!

In order to log into MariaDB to secure it, we'll need the current
password for the root user.  If you've just installed MariaDB, and
you haven't set the root password yet, the password will be blank,
so you should just press enter here.

Enter current password forroot(enter for none):
OK, successfully used password, moving on...

Setting the root password ensures that nobody can log into the MariaDB
root user without the proper authorisation.

# set root password

Set root password?[Y/n] y

New password:
Re-enter newpassword:
Password updated successfully!
Reloading privilege tables..... Success!

By default, a MariaDB installation has an anonymous user, allowing anyone
to log into MariaDB without having to have a user account created for
them.  This is intended only for testing, and to make the installation
go a bit smoother.  You should remove them before moving into a
production environment.

# remove anonymous users

Remove anonymous users?[Y/n] y

 ... Success!

Normally, root should only be allowed to connect from'localhost'.  This
ensures that someone cannot guess at the root password from the network.

# disallow root login remotely

Disallow root login remotely?[Y/n] y

 ... Success!

By default, MariaDB comes with a database named 'test' that anyone can
access.  This is also intended only for testing, and should be removed
before moving into a production environment.

# remove test database

Remove test database and access to it?[Y/n] y

 - Dropping test database...... Success!- Removing privileges on test database...... Success!

Reloading the privilege tables will ensure that all changes made so far
will take effect immediately.

# reload privilege tables

Reload privilege tables now?[Y/n] y

 ... Success!

Cleaning up...

All done!  If you've completed all of the above steps, your MariaDB
installation should now be secure.

Thanks for using MariaDB!
ルートとしてMariaDBに接続します
[ root@linuxprobe ~]# mysql -u root -p
Enter password:
Welcome to the MariaDB monitor.  Commands end with; or \g.
Your MariaDB connection id is 12
Server version:5.5.50-MariaDB MariaDB Server

Copyright(c)2000,2016, Oracle, MariaDB Corporation Ab and others.

Type 'help;' or '\h'for help. Type '\c' to clear the current input statement.

MariaDB [(none)]> select user,host,password from mysql.user;+------+-----------+-------------------------------------------+| user | host      | password                                  |+------+-----------+-------------------------------------------+| root | localhost |*F1DAE8BCDFCA7A57F246E0F834AC35830A3D640E || root |127.0.0.1|*F1DAE8BCDFCA7A57F246E0F834AC35830A3D640E || root |::1|*F1DAE8BCDFCA7A57F246E0F834AC35830A3D640E |+------+-----------+-------------------------------------------+3 rows inset(0.00 sec)

MariaDB [(none)]> show databases;+--------------------+| Database           |+--------------------+| information_schema || mysql              || performance_schema |+--------------------+3 rows inset(0.00 sec)
MariaDB [(none)]> exit
Bye
[3] Firewalldが実行されていて、MariaDBがリモートホストから使用されている場合は、以下に示すようにサービスを許可してください。 MariaDBは3306 / TCPを使用します
[ root@linuxprobe ~]# firewall-cmd --add-service=mysql --permanent
success
[ root@linuxprobe ~]# firewall-cmd --reload
success
**Piwik **のデータベースを作成します
[ root@linuxprobe ~]# mysql -u root -p
Enter password:
Welcome to the MariaDB monitor.  Commands end with; or \g.
Your MariaDB connection id is 13
Server version:5.5.50-MariaDB MariaDB Server

Copyright(c)2000,2016, Oracle, MariaDB Corporation Ab and others.

Type 'help;' or '\h'for help. Type '\c' to clear the current input statement.

MariaDB [(none)]> create database piwik;
Query OK,1 row affected(0.00 sec)

MariaDB [(none)]> grant all privileges on piwik.* to piwik@'localhost' identified by 'password';
Query OK,0 rows affected(0.01 sec)

MariaDB [(none)]> flush privileges;
Query OK,0 rows affected(0.00 sec)

MariaDB [(none)]> exit
Bye
**Piwik **をインストールします
[ root@linuxprobe ~]# yum -y install php-mysql php-pdo php-gd php-xml
[ root@linuxprobe ~]# vi /etc/php.ini
# line 405: increase memory limit
memory_limit = 512M
[ root@linuxprobe ~]# wget http://piwik.org/latest.zip -P /var/www/html
[ root@linuxprobe ~]# unzip /var/www/html/latest.zip -d /var/www/html
[ root@linuxprobe ~]# chown -R apache./var/www/html/piwik/tmp
[ root@linuxprobe ~]# chown -R apache./var/www/html/piwik/config
[ root@linuxprobe ~]# chmod +w /var/www/html/piwik/piwik.js
[ root@linuxprobe ~]# chown apache:apache /var/www/html/piwik/piwik.js
SELinuxが有効になっている場合は、次のルールを変更してください。
[ root@linuxprobe ~]# setsebool -P httpd_can_network_connect_db on
[ root@linuxprobe ~]# chcon -R -t httpd_sys_rw_content_t /var/www/html/piwik/tmp
[ root@linuxprobe ~]# chcon -R -t httpd_sys_rw_content_t /var/www/html/piwik/config
[ root@linuxprobe ~]# semanage fcontext -a -t httpd_sys_rw_content_t /var/www/html/piwik/tmp
[ root@linuxprobe ~]# semanage fcontext -a -t httpd_sys_rw_content_t /var/www/html/piwik/config
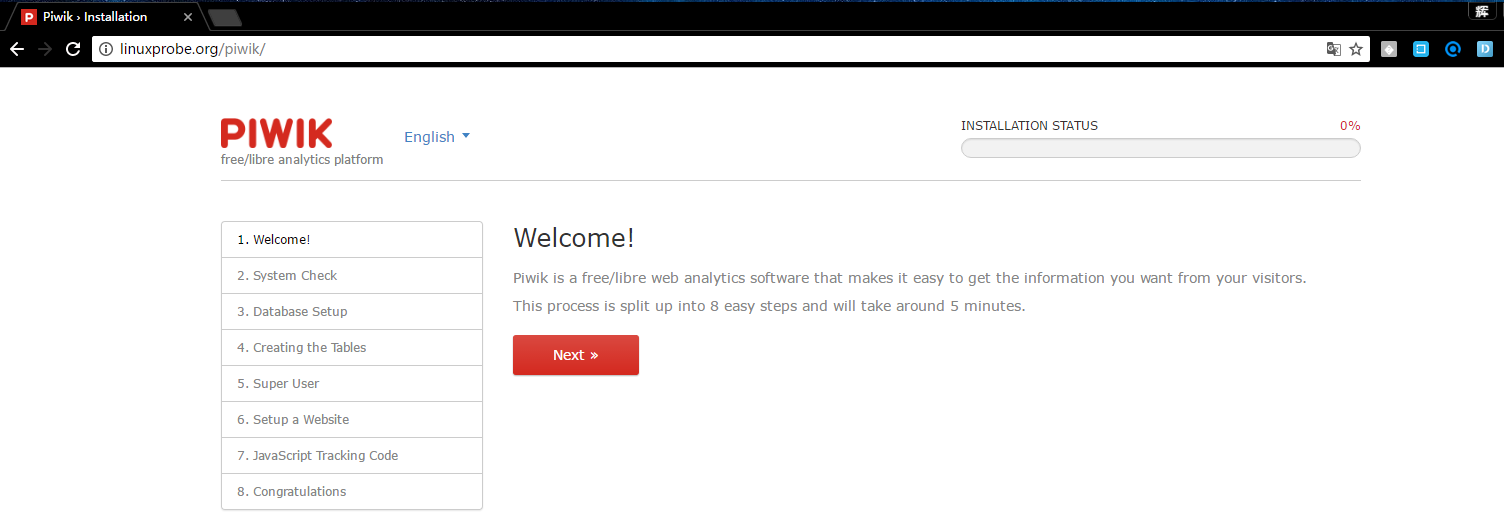
「http://(サーバーのホスト名またはIPアドレス)/ piwik /」にアクセスし、「次へ」をクリックします。
システム要件を確認します。すべて問題がない場合は、次の手順に進みます。
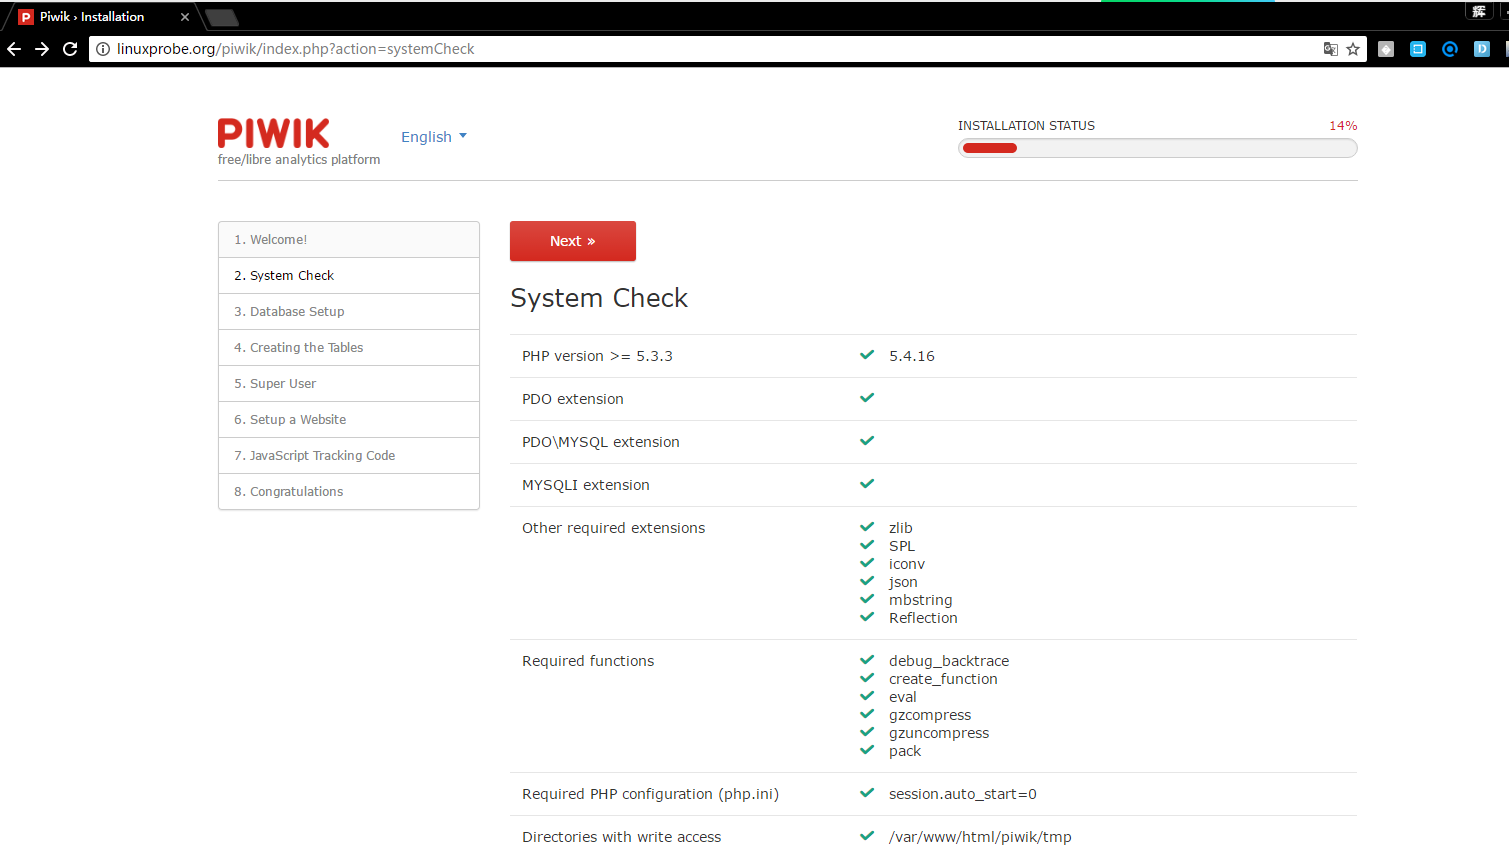
注:システムが検出されたときにエラーが報告された場合は、プロンプトに従ってphp.iniを変更し、変更後にphp-fpmを再起動します。[root @ linuxprobe〜] #systemctl restart php-fpm
データベース情報を入力します
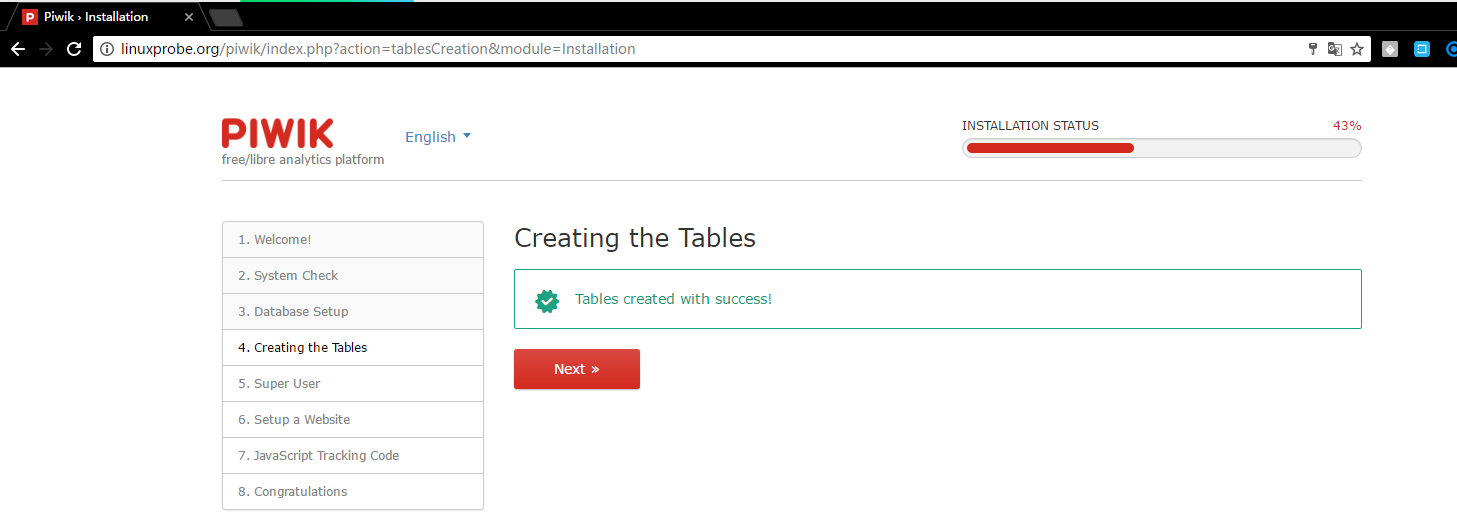
データベース内の情報が正しければ、テーブルは正常に作成されます。
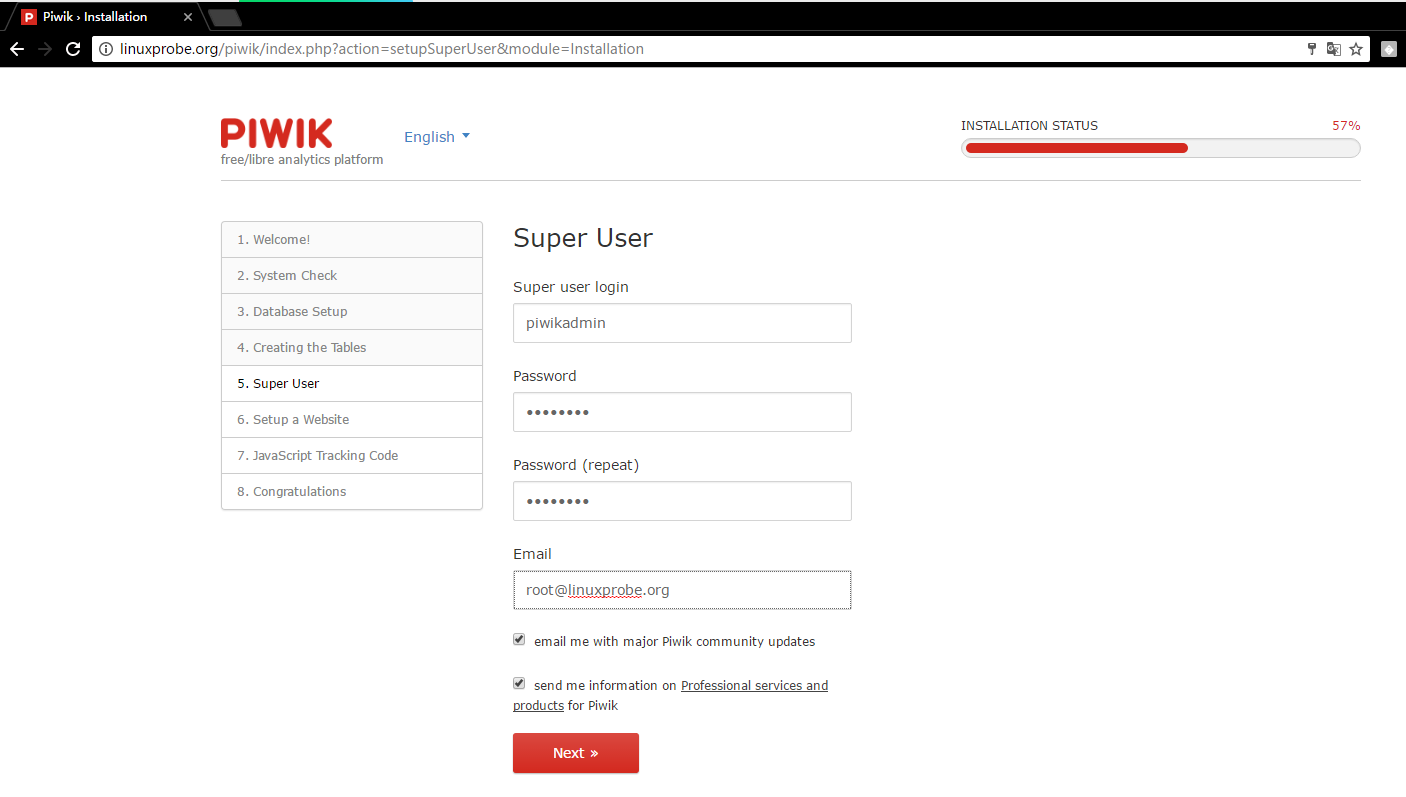
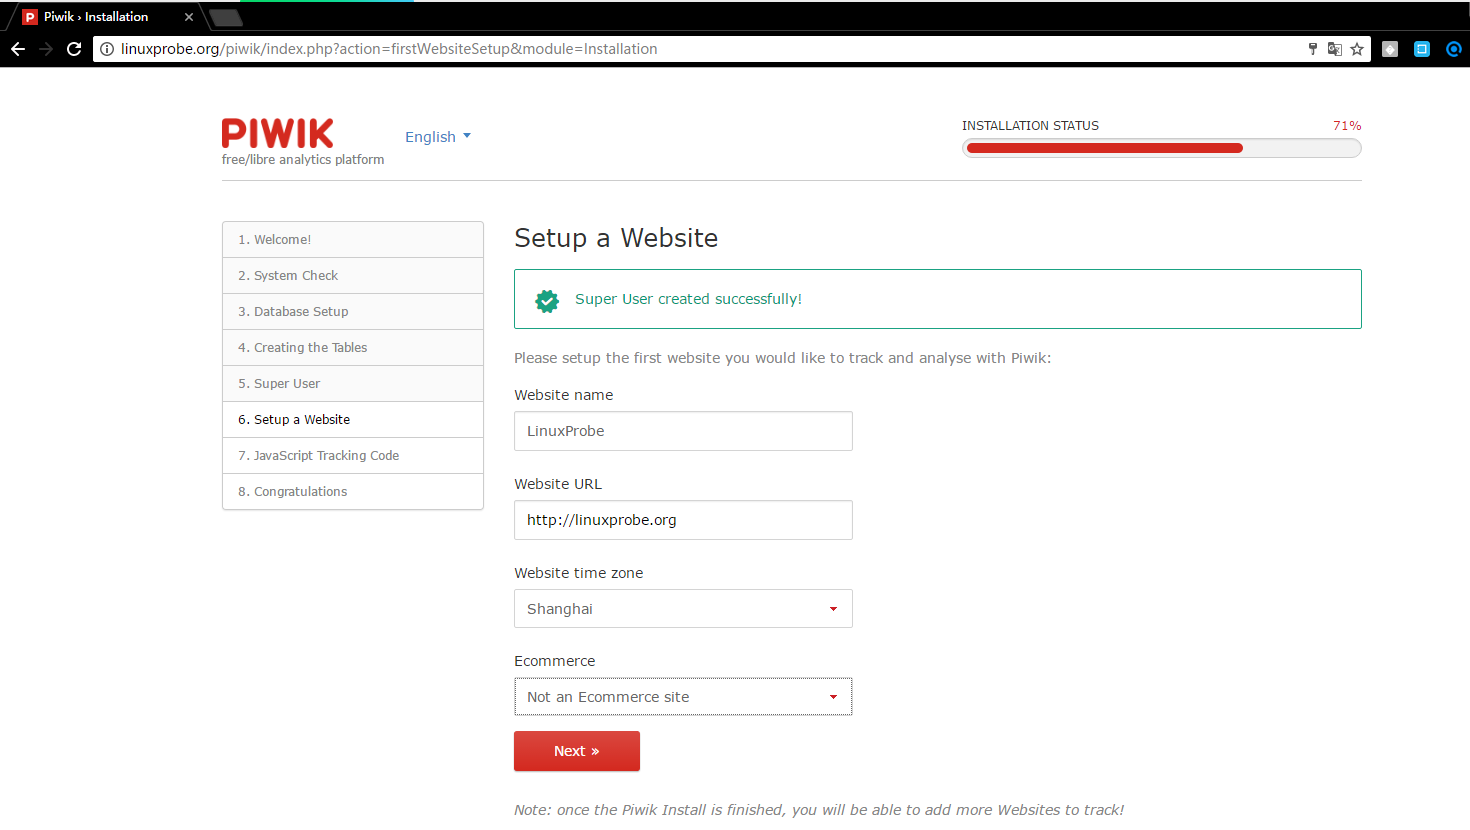
adminユーザーを設定します。好きな名前とパスワードを入力してください。 [メールアドレス]フィールドに、インターネット上の実際のメールアドレスを入力します。
分析したいウェブサイト情報を入力してください
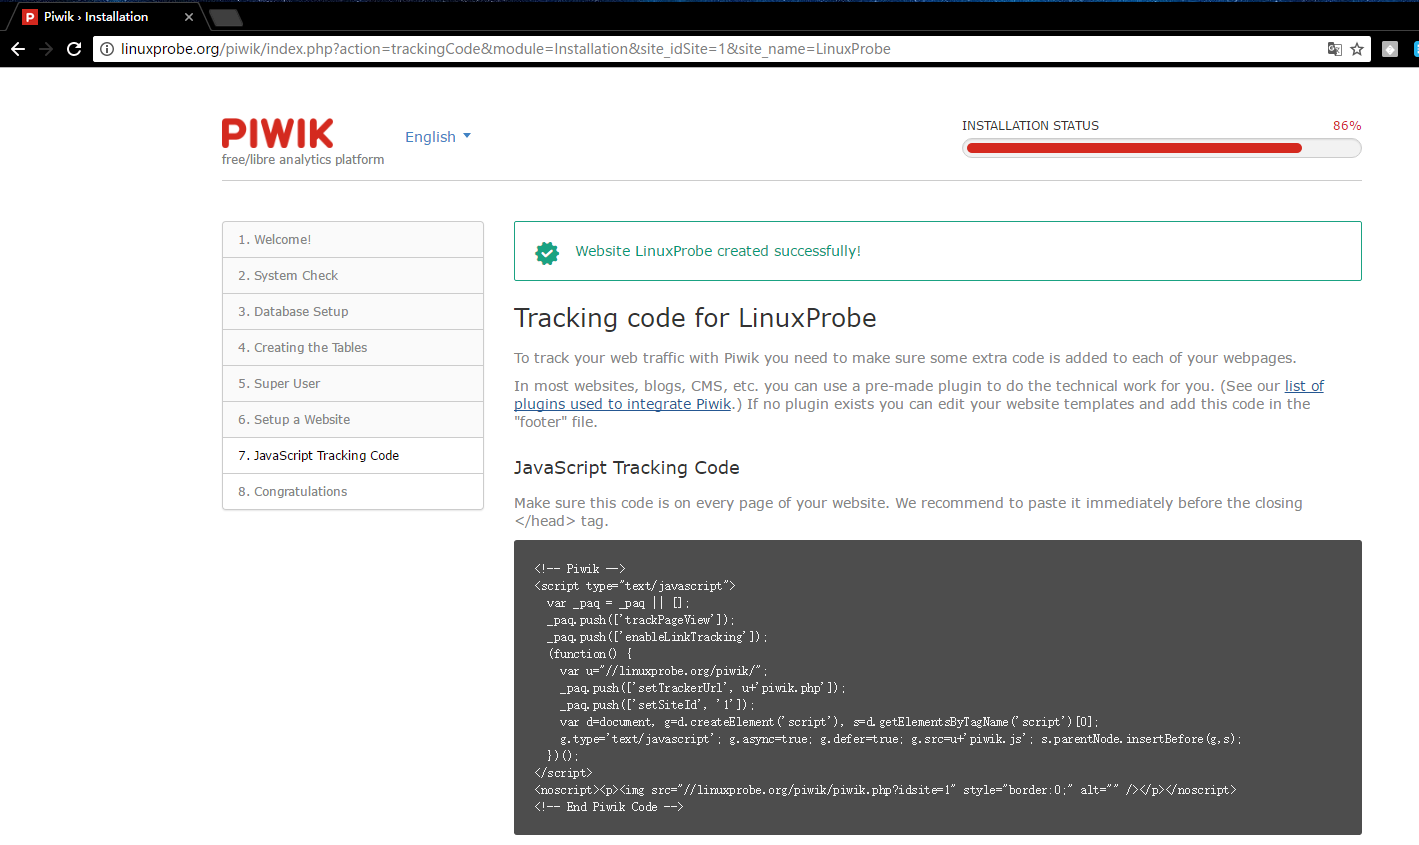
JavaScriptコードは次のように生成されます。あなたはそれをあなたのウェブサイトに追加する必要があります
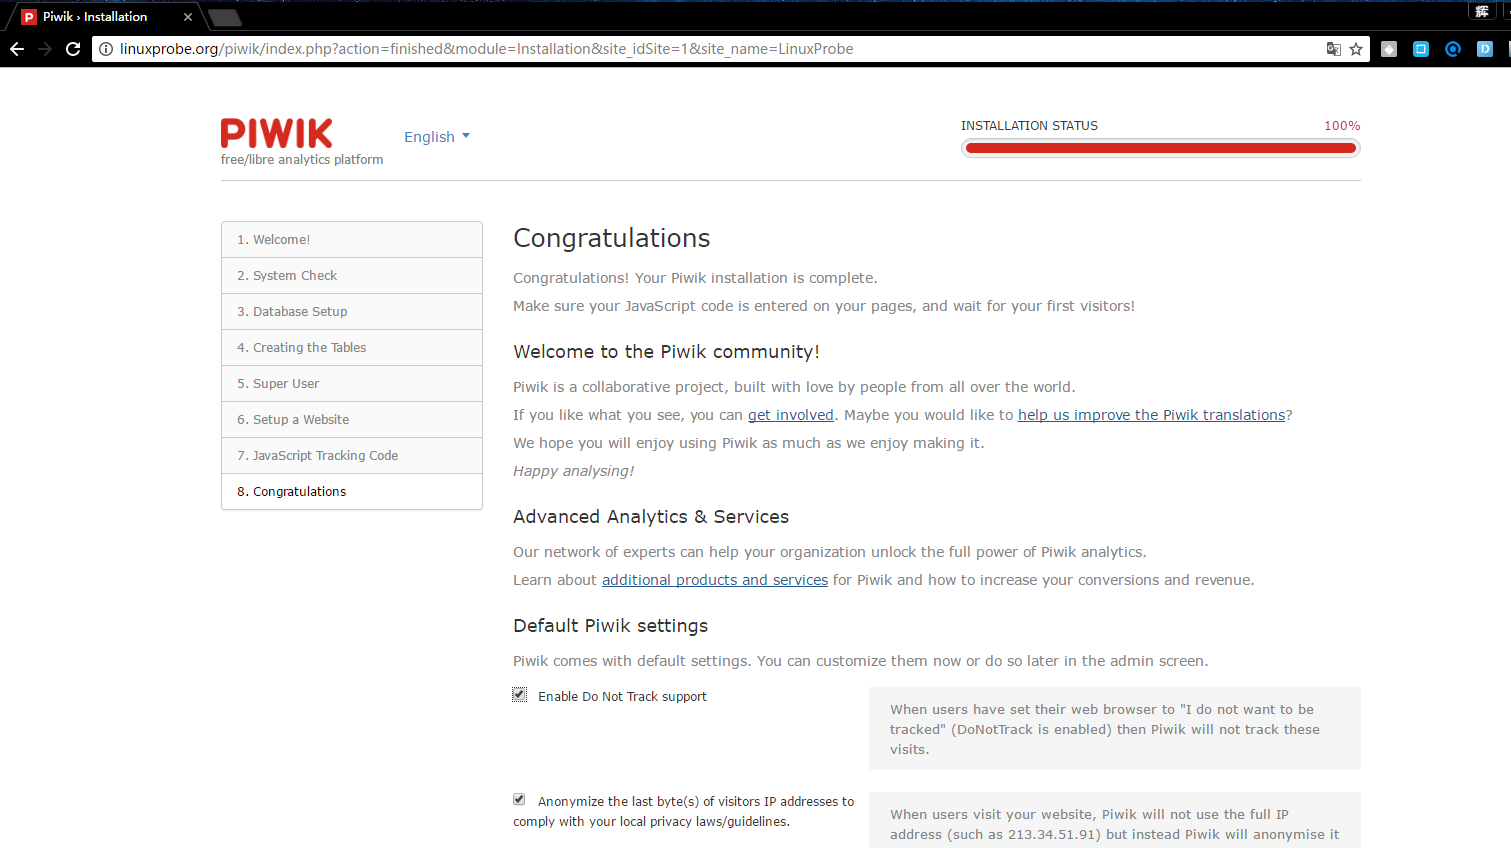
初期設定が完了しました。 「Piwikを続行」をクリックして続行します。
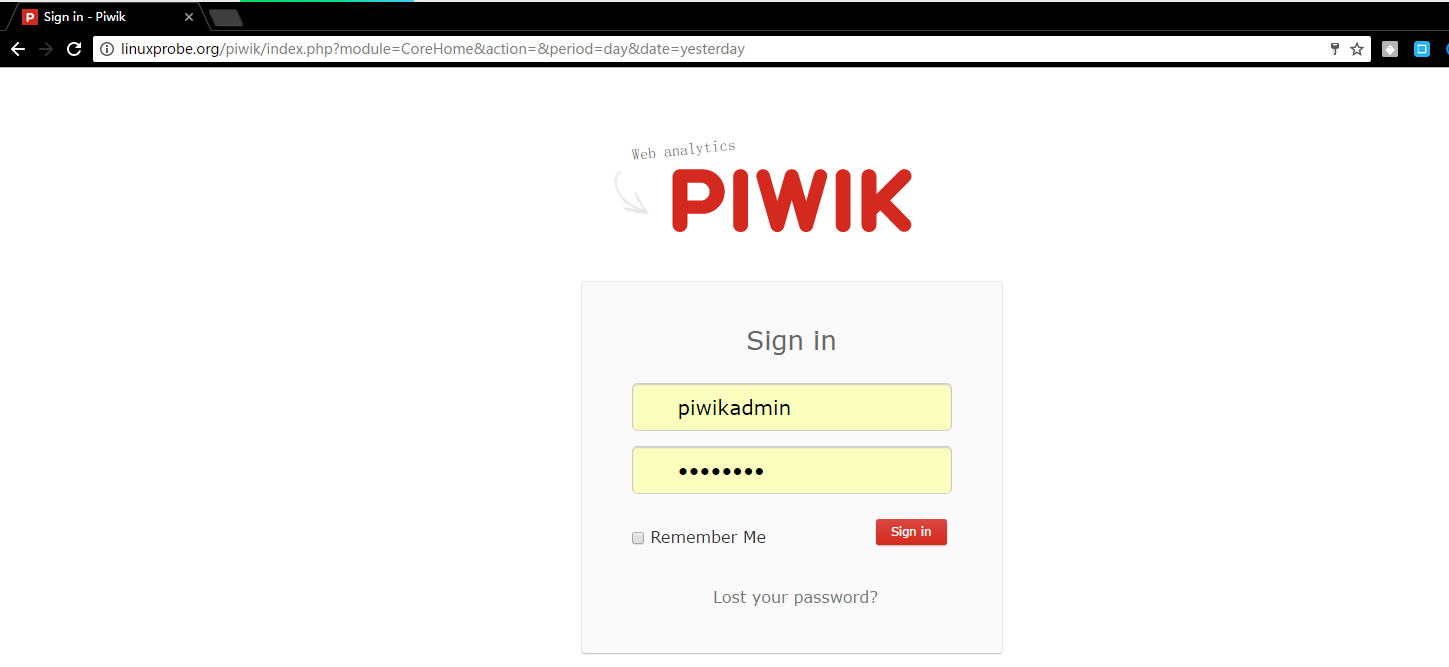
これはログイン画面です。追加したユーザー、piwikadmin、your_passwordで認証します。
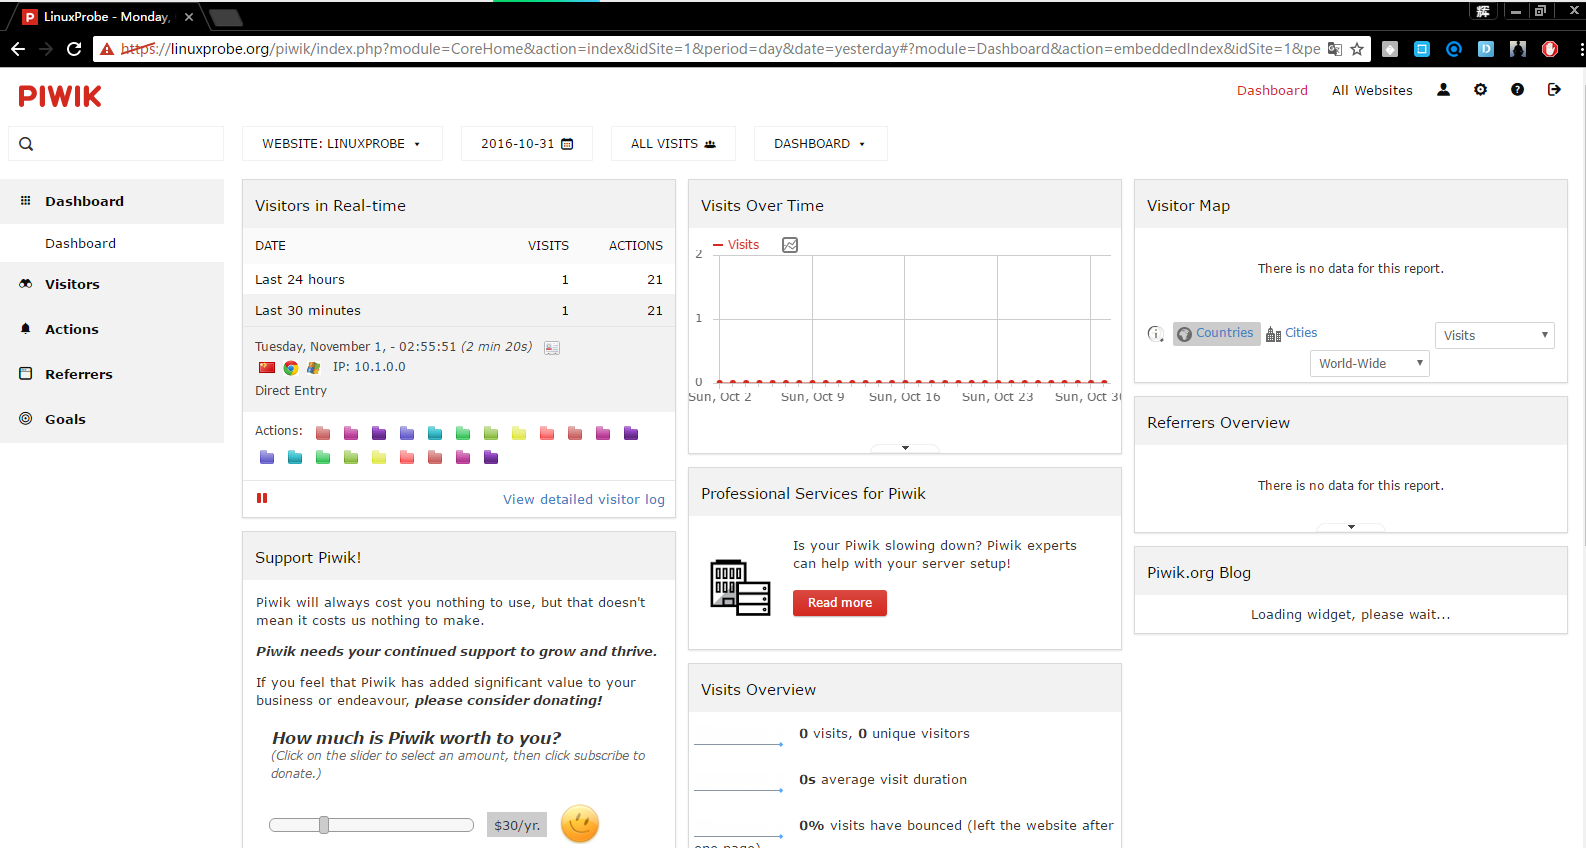
piwikにログインし、次のように表示します。
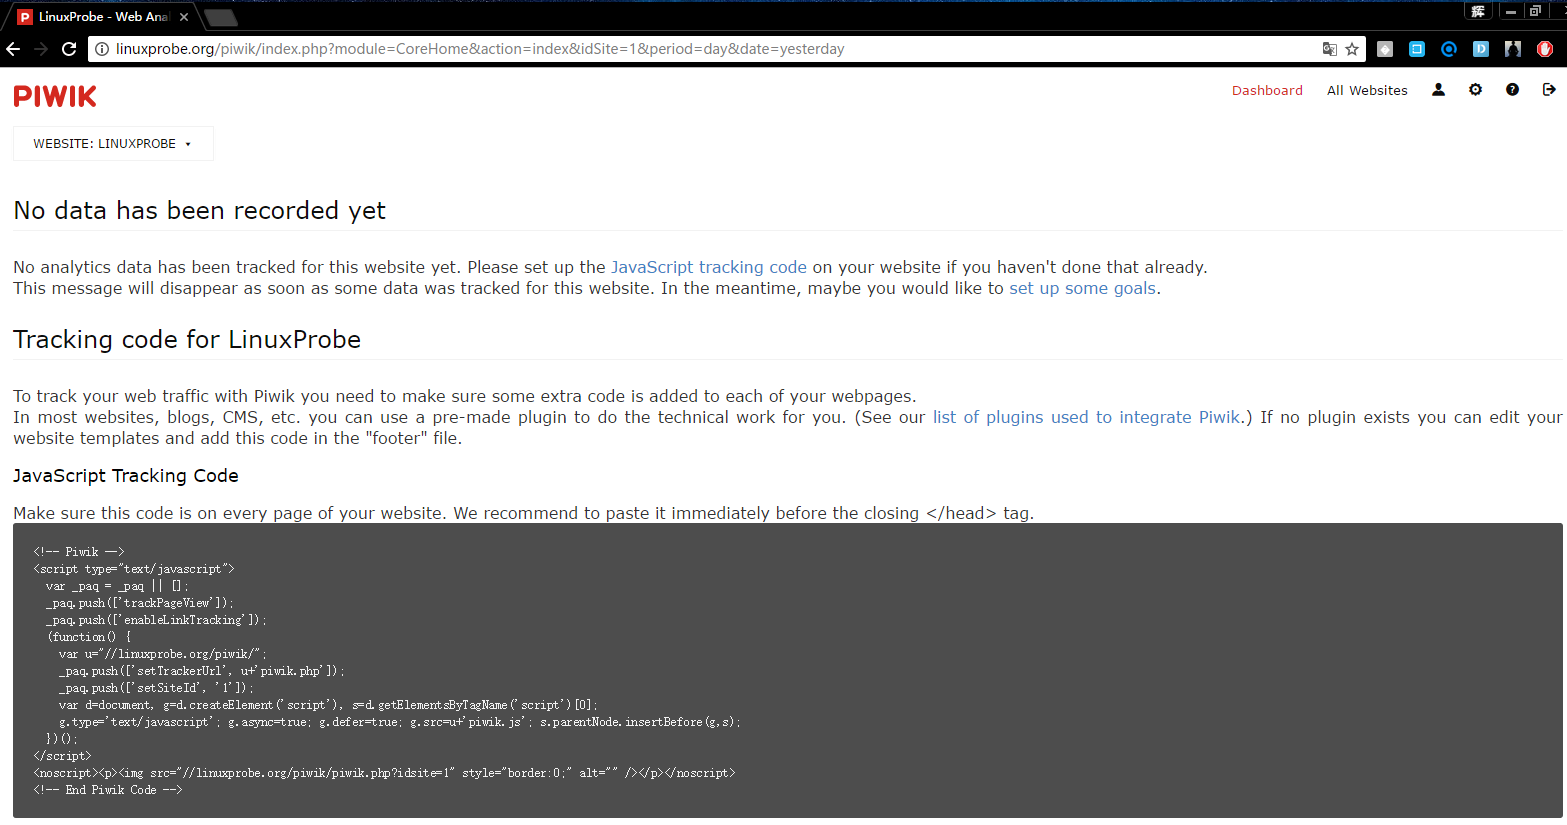
生成されたJavaコードをHtmlファイルの先頭に追加して、各静的ページが先頭のヘッダーファイルを呼び出せるようにする必要があります。追加が完了したら、クライアントブラウザーを使用してドメイン名にアクセスし、piwikを更新します。次を参照してください。
実験のまとめ##
Piwikのインストールは、LNMPまたはLAMP環境に基づいています。インストール中、LANMPアーキテクチャは、piwikが下位バージョンのサポートを提供しないように、各ソフトウェアが比較的安定した新しいバージョンになるように設計されています。
Piwik FAQ:https://piwik.org/faq/
Recommended Posts