Centos7.6はseleniuをインストールします
- Linuxのバージョンを確認する
[ root@penguin selenium]# cat /etc/redhat-release
CentOS Linux release 7.6.1810(Core)
- セレミウムをインストールする
2.1 pipを介してセレンをインストールし、最初にpipをインストールします。
[ root@penguin selenium]#yum -y install epel-release
[ root@penguin selenium]#yum -y install python-pip
2.2 pipを更新するように求められた場合は、次のコマンドを実行します。
[ root@penguin selenium]#pip install --upgrade pip
2.3 ピップインストールセレン
[ root@penguin src]# pip install selenium
2.4 Centosに付属のMozillafirefoxをアンインストールします
 mv /etc/firefox//etc/firefox.bak
 mv /usr/lib64/firefox//usr/lib64/firefox.bak
 mv /usr/bin/firefox /usr/bin/firefox.old
2.5 firefoxをダウンロードして解凍します
[ root@penguin src]# ls -l /usr/local/src/firefox-66.0.3.tar.bz2
- rw-r--r--1 root root 62089056 Apr 3016:47/usr/local/src/firefox-66.0.3.tar.bz2
[ root@penguin src]#tar xjvf firefox-66.0.3.tar.bz2
2.6 仮想ディスプレイを作成する
yum install Xvfb libXfont xorg-x11-fonts*
pip3 install  pyvirtualdisplay
2.7 新しいシンボリックリンクを作成し、firefoxをxshellでテストします
[ root@penguin src]#cd firefox/
[ root@penguin src]#ln -s /usr/lib64/firefox/firefox /usr/bin/firefox
[ root@penguin selenium]# firefox -version
Mozilla Firefox 66.0.3
[ root@penguin src]#firefoxここではエラーは報告されていません。firefoxは正常に起動します。エラーが発生した場合は、/etc/ホストには次の行が必要です。
127.0.0.1 localhost


2.8 google chromeをインストールし、rootがchromeを実行できないことを解決します
yum install https://dl.google.com/linux/direct/google-chrome-stable_current_x86_64.rpm
[ root@penguin selenium]# google-chrome -version
Google Chrome 74.0.3729.108
ルートを解決するとクロムを実行できません
vi /usr/bin/google-chrome
ファイルの最後に追加します。
if[[-n "$CHROME_USER_DATA_DIR"]]; then
 # Note: exec -a below is a bashism.
 exec -a "$0""$HERE/chrome"  \
 - - user-data-dir="$CHROME_USER_DATA_DIR""$@"else
 exec -a "$0""$HERE/chrome"--user-data-dir="/root/.config/google-chrome/"  \
 " $@"--no-sandbox
fi
2.9 firefoxに対応するwebdriver--geckodriverをダウンロードして構成します
cd /usr/local/src/
tar xzvf geckodriver-v0.24.0-linux64.tar.gz
cp /usr/local/bin/geckodriver /usr/bin/geckodriver
2.10 googlechrome--chromedriver_linux64に対応するWebドライバーをダウンロードして構成します
chromedriver_linux64.zipをダウンロードします
解凍します。構成は次のとおりです。
cp /usr/local/src/chromedriver_linux64/chromedriver /usr/bin/
root@penguin selenium]# chromedriver -version
ChromeDriver 74.0.3729.6 (255758eccf3d244491b8a1317aa76e1ce10d57e9-refs/branch-heads/3729@{#29})
- テスト
3.1 firefoxをテストするためのコードを書く
#! /usr/bin/env python3

from selenium import webdriver

driver = webdriver.Firefox()
driver.get('http://www.163.com')print(driver.title)
# driver.quit()

3.2 グーグルクロームをテストするためのコードを書く
#! /usr/bin/env python3

from selenium import webdriver

driver = webdriver.Chrome()
driver.get('https://www.baidu.com')print(driver.title)

driver.quit()
- 例外問題解決
firefox:
File "/root/.pyenv/versions/3.6.4/lib/python3.6/site-packages/selenium/webdriver/firefox/webdriver.py", line 174,in __init__
 keep_alive=True)
 File "/root/.pyenv/versions/3.6.4/lib/python3.6/site-packages/selenium/webdriver/remote/webdriver.py", line 157,in __init__
 self.start_session(capabilities, browser_profile)
 File "/root/.pyenv/versions/3.6.4/lib/python3.6/site-packages/selenium/webdriver/remote/webdriver.py", line 252,in start_session
 response = self.execute(Command.NEW_SESSION, parameters)
 File "/root/.pyenv/versions/3.6.4/lib/python3.6/site-packages/selenium/webdriver/remote/webdriver.py", line 321,in execute
 self.error_handler.check_response(response)
 File "/root/.pyenv/versions/3.6.4/lib/python3.6/site-packages/selenium/webdriver/remote/errorhandler.py", line 242,in check_response
 raise exception_class(message, screen, stacktrace)
selenium.common.exceptions.SessionNotCreatedException: Message: Unable to find a matching setof capabilities
Webdriverとfirefoxのバージョンが一致しません。解決する対応するWebdriverのバージョンを見つけることができます
Traceback(most recent call last):
 File "./test.py", line 8,in<module>
 driver = webdriver.Firefox()
 File "/root/.pyenv/versions/3.6.4/lib/python3.6/site-packages/selenium/webdriver/firefox/webdriver.py", line 164,in __init__
 self.service.start()
 File "/root/.pyenv/versions/3.6.4/lib/python3.6/site-packages/selenium/webdriver/common/service.py", line 104,in start
 raise WebDriverException("Can not connect to the Service %s"% self.path)
selenium.common.exceptions.WebDriverException: Message: Can not connect to the Service geckodriver
システムに付属のfirefoxをアンインストールし、再インストールしてrootとして設定し、開始します。手順2.7 / etc / hostsの設定を参照してください。
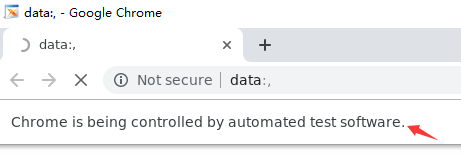
chrome:
主な問題は、rootがgoogle-chromeを起動できないことが原因です。サンドボックスなしのオプションを設定するだけです。詳細については、手順2.8を参照してください。
Recommended Posts