Tencent Cloud Ubuntu mounts new cloud disk
Buy cloud disk
Purchase a cloud disk in the same region and the same region as the server.
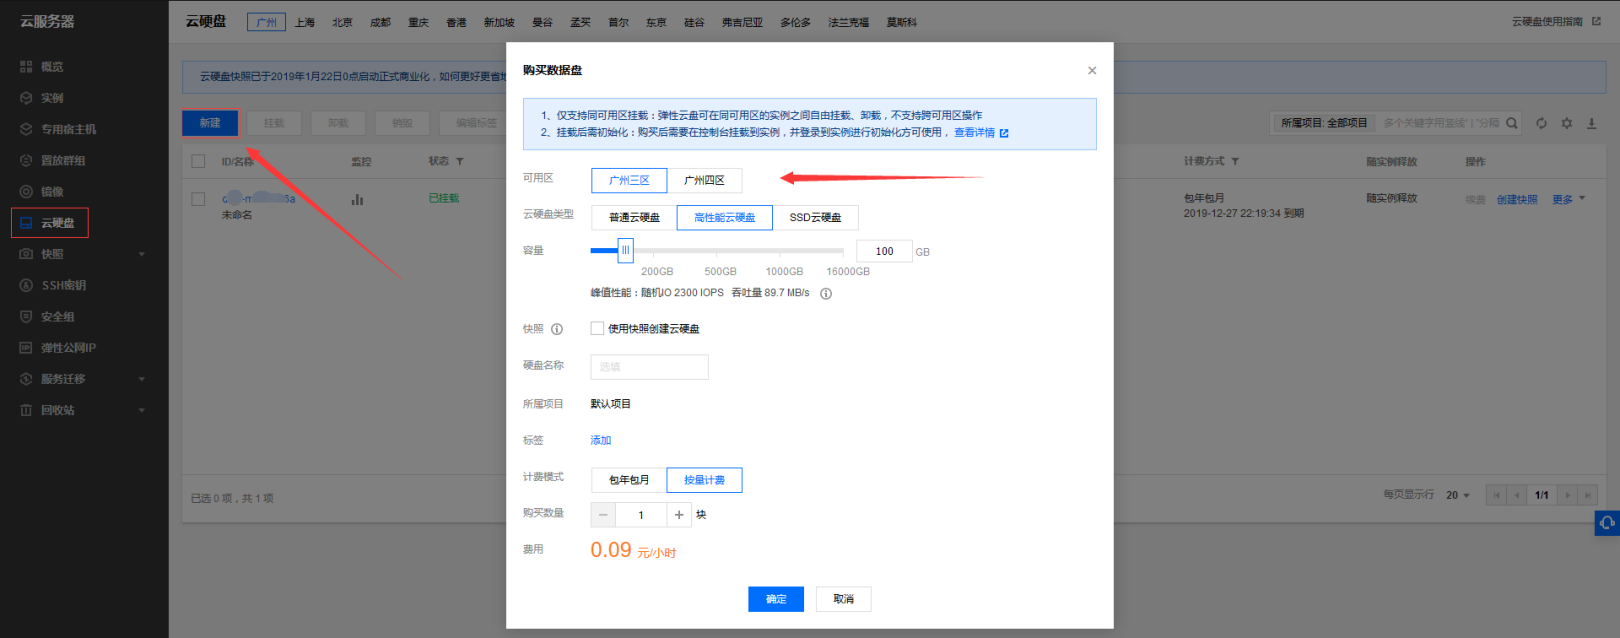 Purchase a new cloud disk
Mount (associate) cloud disk
After the console is successfully mounted, the status will change from orange [to be mounted] to green [mounted]
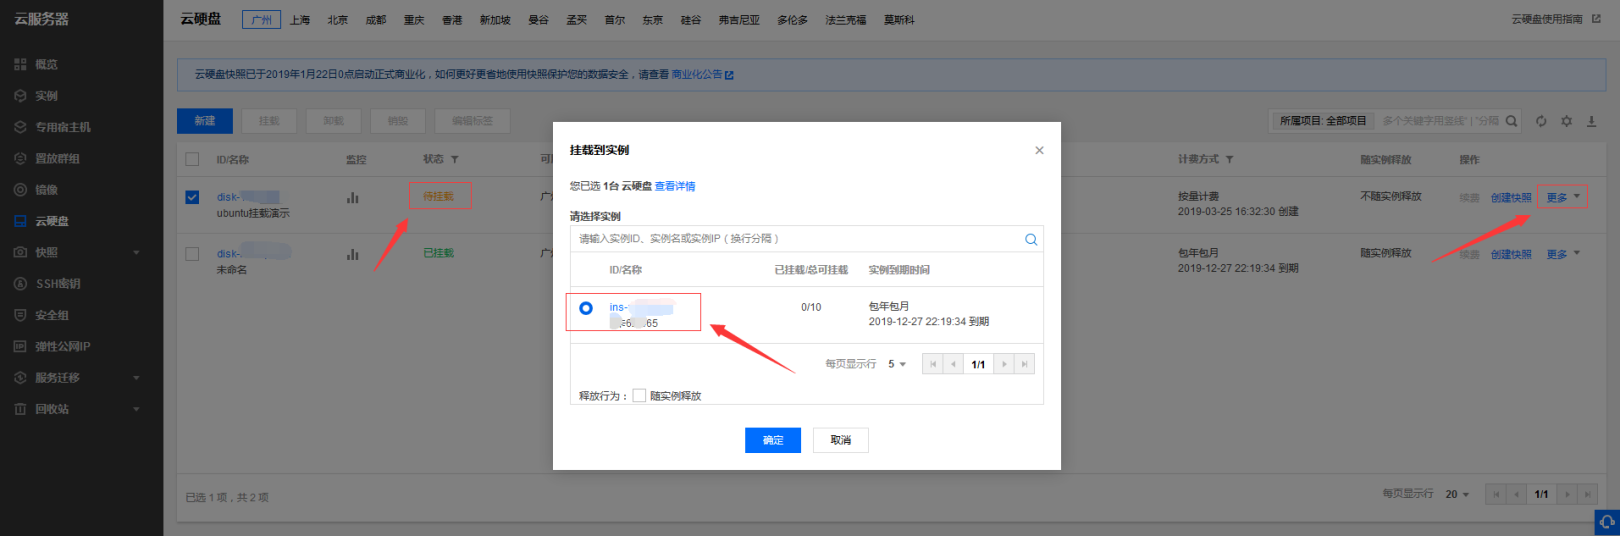 mounted to the instance
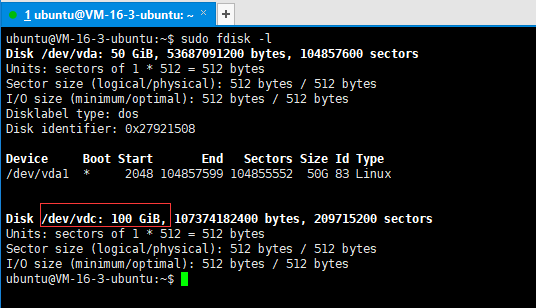
View information
Display the hard disk and its partition status. Enter the following command in the terminal window:
sudo fdisk -l
As shown in the figure /dev/vdc:100GiB
 View the cloud disk information
Hard disk partition
To partition the hard disk, enter the following command in the terminal window:
sudo fdisk /dev/vdc
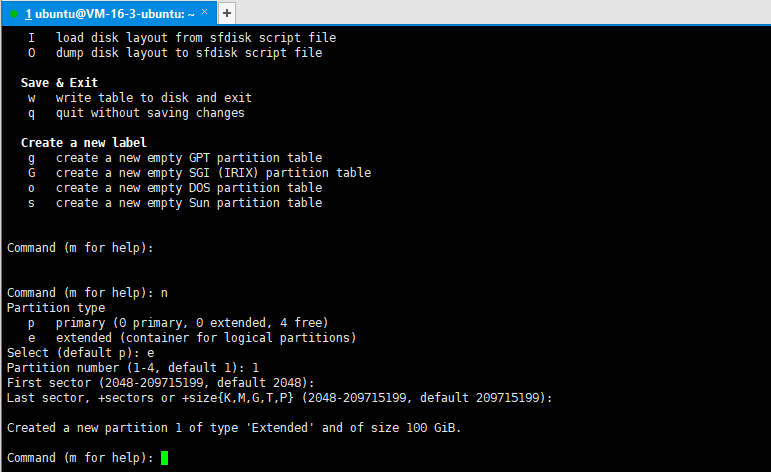
Enter m as shown in the figure to display a help menu
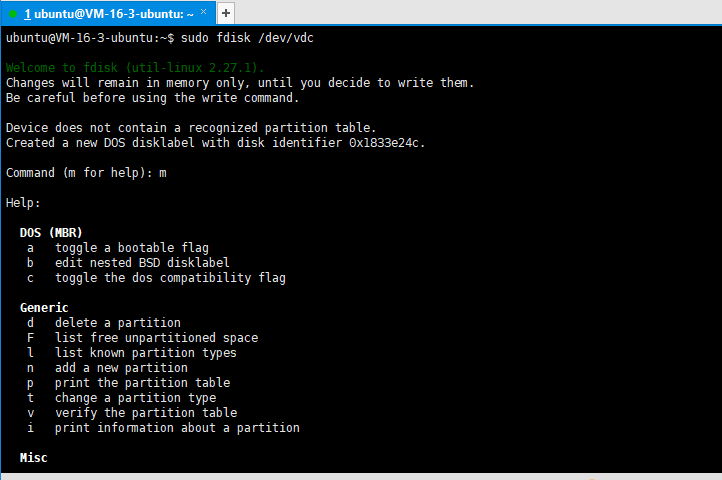 View help
Enter n after the Command (m for help) prompt and execute the add a new partition command to add a new partition to the hard disk.
When the Command action appears, enter e to specify that the partition is an extended partition (extended).
When the Partition number (1-4) appears, enter 1 to indicate that there is only one partition.
Then specify the cylinder number to complete the partition.
 designated partition
Enter p after the Command (m for help) prompt to display the partition table.
The system prompts as follows:
Device Boot Start End Sectors Size Id Type
/dev/vdc1 2048 209715199 209713152 100G 5 Extended
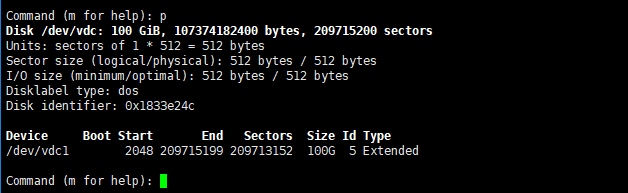 View the partition table
Enter w at the Command (m for help) prompt to save the partition table.
System prompt: The partition table has been altered!
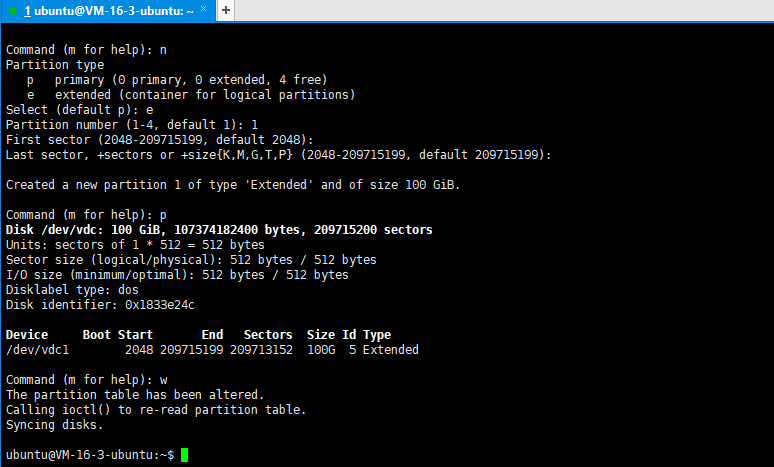 Save and exit
Hard Drive Format
1、 Display the hard disk and its partition status. Enter the following command in the terminal window:
sudo mkfs -t ext4 /dev/vdc
Note: ext4 means format the partition into ext4 file system type.
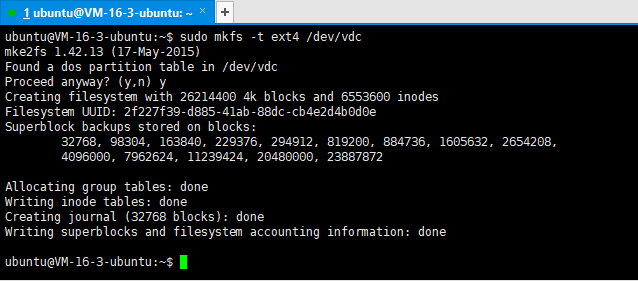 format
Mount use
1、 Display the hard disk mounting status. Enter the following command in the terminal window:
df -l
Create mount point
sudo mkdir /datayanshi
Manually mount
sudo mount /dev/vdc /datayanshi
The new hard disk partition has been mounted, as shown in the red box below the figure below.
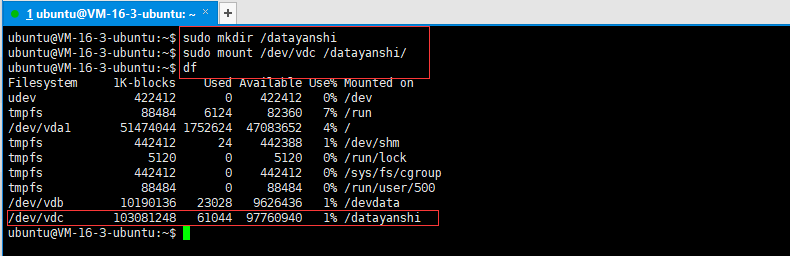 The mounting is complete
Configure the hard disk to be automatically mounted at system startup. Add the following configuration in the file /etc/fstab:
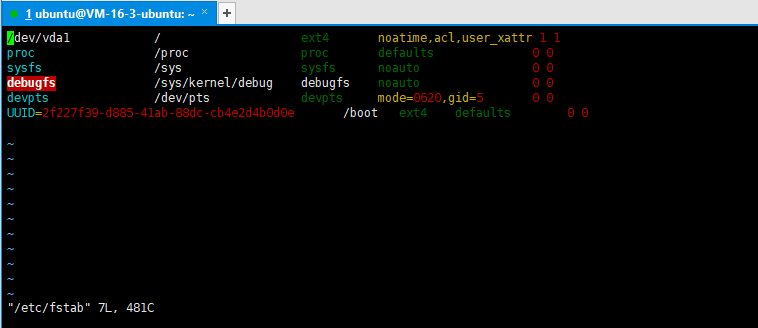 Configure auto mount at boot
This is the end of the Tencent Cloud Ubuntu system mounting a new hard disk.
Recommended Posts