Protect Apache with Let's Encrypt on CentOS 8
Let's Encrypt is a free, automatic, and open certificate provider. It is developed by the Internet Security Research Group (ISRG) that provides free [SSL certificate] (https://cloud.tencent.com/product/symantecssl?from=10680).
The certificate issued by Let's Encrypt is trusted by most browsers and is valid for 90 days from the date of issuance.
This guide explains how to install a free Let's Encrypt SSl certificate on CentOS 8 running the Apache web server. We will use certbot to obtain and refresh the certificate.
1. Prerequisites##
Please ensure the following prerequisites before proceeding to the next steps:
- There is a domain name pointing to the IP of the public server, we use
example.comhere. - On your server, Apache has been installed and running, and it has configured a virtual host that points to your domain name.
- Ports 80 and 443 are open on the firewall.
Install the following packages, which are necessary to configure an SSL encrypted web server:
sudo dnf install mod_ssl openssl
When mod_ssl package is installed, it should have created a self-signed key and certificate for the local host. If these files are not created automatically, you can use the openssl command to create them.
sudo openssl req -newkey rsa:4096-x509 -sha256 -days 3650-nodes \
- out /etc/pki/tls/certs/localhost.crt \
- keyout /etc/pki/tls/private/localhost.key
Two, install Certbot
Certbot is a terminal command tool, which simplifies the process of obtaining and refreshing Let's Encrypt SSL certificates, and can automatically enable HTTPS for your server.
The certbot package is not included in the standard CentOS 8 software source repository, but it can be downloaded from the vendor's website.
Run the following wget command as the root user or another user with sudo privileges to download a certbot script to the /usr/local/bin directory:
sudo wget -P /usr/local/bin https://dl.eff.org/certbot-auto
Once the download is complete, give the file executable permissions:
sudo chmod +x /usr/local/bin/certbot-auto
Three, generate a powerful Dh (Diffie-Hellman) group##
Diffie–Hellman key (DH) is a scheme for securely exchanging passwords in insecure communication channels. Generate a 2048-bit DH factor to enhance safety:
sudo openssl dhparam -out /etc/ssl/certs/dhparam.pem 2048
You can increase the size to 4096 bits, but depending on the system entropy, the generation process may take more than 30 minutes.
Fourth, obtain a Let's Encrypt SSL certificate##
To obtain an SSL certificate for a domain name, we must first use the WeBroot plugin to create a temporary file to verify the domain name in the ${webroot-path}/.well-known/acme-challenge directory. The Let's Encrypt server requests this temporary file to verify the domain name.
To make the steps easier, we put all HTTP requests of .well-known/acme-challenge into a simple folder, /var/lib/letsencrypt.
Run the following command to create the folder and make it writable by the Apache server.
sudo mkdir -p /var/lib/letsencrypt/.well-known
sudo chgrp apache /var/lib/letsencrypt
sudo chmod g+s /var/lib/letsencrypt
To avoid duplication of code and make the configuration maintainable, create the following two configuration code snippets:
/etc/httpd/conf.d/letsencrypt.conf
Alias /.well-known/acme-challenge/"/var/lib/letsencrypt/.well-known/acme-challenge/"<Directory "/var/lib/letsencrypt/">
 AllowOverride None
 Options MultiViews Indexes SymLinksIfOwnerMatch IncludesNoExec
 Require method GET POST OPTIONS
< /Directory>
/etc/httpd/conf.d/ssl-params.conf
SSLCipherSuite EECDH+AESGCM:EDH+AESGCM
# Requires Apache 2.4.36& OpenSSL 1.1.1
SSLProtocol -all +TLSv1.3+TLSv1.2
SSLOpenSSLConfCmd Curves X25519:secp521r1:secp384r1:prime256v1
# Older versions
# SSLProtocol All -SSLv2 -SSLv3 -TLSv1 -TLSv1.1
SSLHonorCipherOrder On
Header always set Strict-Transport-Security "max-age=63072000; includeSubDomains; preload"
Header always set X-Frame-Options DENY
Header always set X-Content-Type-Options nosniff
# Requires Apache >=2.4
SSLCompression off
SSLUseStapling on
SSLStaplingCache "shmcb:logs/stapling-cache(150000)"
# Requires Apache >=2.4.11
SSLSessionTickets Off

SSLOpenSSLConfCmd DHParameters "/etc/ssl/certs/dhparam.pem"
The above code snippet uses the encryption configuration recommended by Cipherli.st. It enables OCSP, HTTP Strict Transport Security (HSTS), Dh key, and mandatory addition of several HTTP headers focusing on security.
Reload the Apache configuration to make the changes take effect:
sudo systemctl reload httpd
Now you can run the certbot script with the webroot plug-in to obtain the SSL certificate file:
sudo /usr/local/bin/certbot-auto certonly --agree-tos --email [email protected] --webroot -w /var/lib/letsencrypt/-d example.com -d www.example.com
Once successful, certbot will print the following information:
IMPORTANT NOTES:- Congratulations! Your certificate and chain have been saved at:/etc/letsencrypt/live/example.com/fullchain.pem
 Your key file has been saved at:/etc/letsencrypt/live/example.com/privkey.pem
 Your cert will expire on 2020-01-26. To obtain a newor tweaked
 version ofthis certificate in the future, simply run certbot-auto
 again. To non-interactively renew *all*of your certificates, run
 " certbot-auto renew"- Your account credentials have been saved in your Certbot
 configuration directory at /etc/letsencrypt. You should make a
 secure backup ofthis folder now. This configuration directory will
 also contain certificates and private keys obtained by Certbot so
 making regular backups ofthis folder is ideal.- If you like Certbot, please consider supporting our work by:

 Donating to ISRG / Let's Encrypt:   https://letsencrypt.org/donate
 Donating to EFF:                    https://eff.org/donate-le
Now that all the settings are done, edit the virtual host configuration corresponding to your domain name as follows:
/etc/httpd/conf.d/example.com.conf
< VirtualHost *:80>
 ServerName example.com
 ServerAlias www.example.com

 Redirect permanent / https://example.com/</VirtualHost><VirtualHost *:443>
 ServerName example.com
 ServerAlias www.example.com

 Protocols h2 http:/1.1<If "%{HTTP_HOST} == 'www.example.com'">
 Redirect permanent / https://example.com/</If>

 DocumentRoot /var/www/example.com/public_html
 ErrorLog /var/log/httpd/example.com-error.log
 CustomLog /var/log/httpd/example.com-access.log combined

 SSLEngine On
 SSLCertificateFile /etc/letsencrypt/live/example.com/fullchain.pem
 SSLCertificateKeyFile /etc/letsencrypt/live/example.com/privkey.pem

 # Other Apache Configuration

< /VirtualHost>
The above configuration forces the use of HTTPS, and forces www to switch to the non-www version. It also enables HTTP/2, which can make your website faster and stronger. You can modify the configuration file at will according to your needs.
Restart the Apache service:
sudo systemctl restart httpd
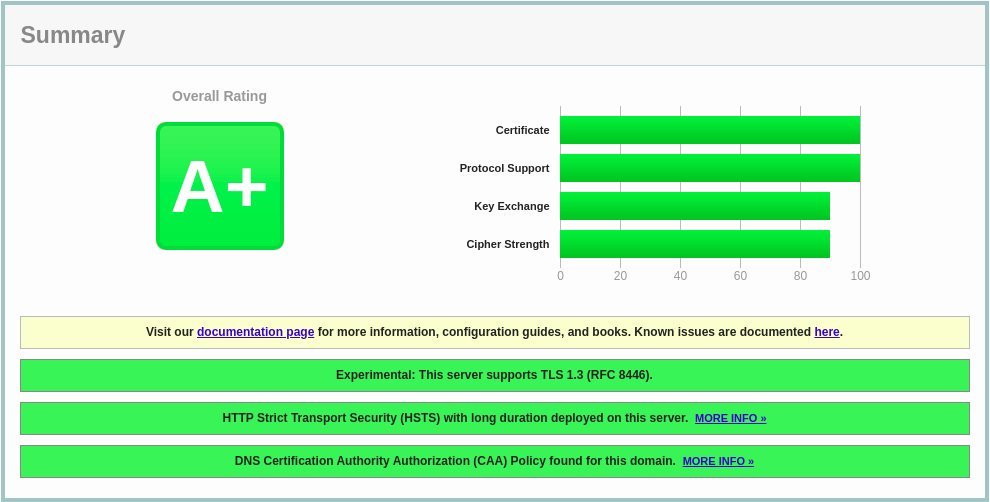
You can now open your website with https:// and you will see a green lock icon.
If you use SSL Labs Server Test to test your domain name, you will get an A+ level, like the following:
5. Automatic refresh of Let's Encrypt SSL certificate##
Let's Encrypt's certificate is only valid for 90 days. To automatically refresh the certificate before it expires, we need to create a cronjob, which will run twice a day and refresh the certificate about 30 days before the certificate expires.
Run the following command to create a new cronjob, which will refresh the certificate and restart Apache:
echo "0 0,12 * * * root python3 -c 'import random; import time; time.sleep(random.random() * 3600)' && /usr/local/bin/certbot-auto -q renew --renew-hook \"systemctl reload httpd\""| sudo tee -a /etc/crontab >/dev/null
To test the refresh process, use the certbot command with the --dry-run option:
sudo /usr/local/bin/certbot-auto renew --dry-run
If there is no error message, it means that the refresh process was successful.
Six, summary##
In this guide, we discussed how to use Let's Encrypt client certbot on CentOS to obtain an SSL certificate for a domain name. You also learned how to configure Apache, use certificates, and set up a cronjob periodic task to refresh certificates.
To learn more about Certbot script, browse: Certbot official document.
Recommended Posts