k8s practice (15): Centos7.6 deploys k8s v1.16.4 high-availability cluster (active and standby mode)
1. Deployment environment#
**Host list: **
| Host name | Centos version | ip | docker version | flannel version | Keepalived version | Host configuration | Remarks |
|---|---|---|---|---|---|---|---|
| master01 | 7.6.1810 | 172.27.34.3 | 18.09.9 | v0.11.0 | v1.3.5 | 4C4G | control plane |
| master02 | 7.6.1810 | 172.27.34.4 | 18.09.9 | v0.11.0 | v1.3.5 | 4C4G | control plane |
| master03 | 7.6.1810 | 172.27.34.5 | 18.09.9 | v0.11.0 | v1.3.5 | 4C4G | control plane |
| work01 | 7.6.1810 | 172.27.34.93 | 18.09.9 | / | / | 4C4G | worker nodes |
| work02 | 7.6.1810 | 172.27.34.94 | 18.09.9 | / | / | 4C4G | worker nodes |
| work03 | 7.6.1810 | 172.27.34.95 | 18.09.9 | / | / | 4C4G | worker nodes |
| VIP | 7.6.1810 | 172.27.34.130 | 18.09.9 | v0.11.0 | v1.3.5 | 4C4G | Floating on the control plane |
| client | 7.6.1810 | 172.27.34.234 | / | / | / | 4C4G | client |
There are 7 servers, 3 control planes, 3 work and 1 client.
**k8s version: **
| Host name | kubelet version | kubeadm version | kubectl version | Remarks |
|---|---|---|---|---|
| master01 | v1.16.4 | v1.16.4 | v1.16.4 | kubectl optional |
| master02 | v1.16.4 | v1.16.4 | v1.16.4 | kubectl optional |
| master03 | v1.16.4 | v1.16.4 | v1.16.4 | kubectl optional |
| work01 | v1.16.4 | v1.16.4 | v1.16.4 | kubectl optional |
| work02 | v1.16.4 | v1.16.4 | v1.16.4 | kubectl optional |
| work03 | v1.16.4 | v1.16.4 | v1.16.4 | kubectl optional |
| client | / | / | v1.16.4 | client |
Two, high availability architecture#
This article uses kubeadm to build a high-availability k8s cluster. The high availability of the k8s cluster is actually the high availability of the core components of k8s. The active standby mode is used here. The architecture is as follows:
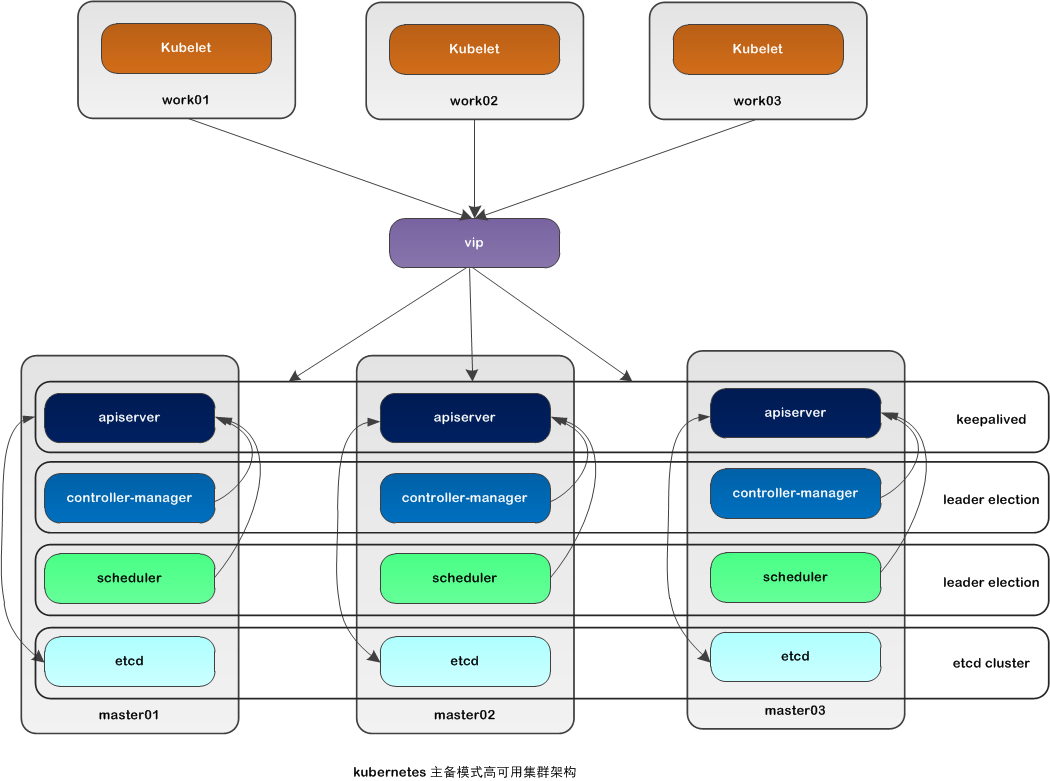
Description of high-availability architecture in active/standby mode:
| Core components | High availability mode | High availability implementation |
|---|---|---|
| apiserver | active and standby | keepalived |
| controller-manager | active/standby | leader election |
| scheduler | active and standby | leader election |
| etcd | cluster | kubeadm |
Apiserver achieves high availability through keepalived, which triggers keepalived vip transfer when a node fails;
controller-manager The leader is elected internally in k8s (controlled by --leader-elect selection, default is true), and only one controller-manager component runs in the cluster at the same time;
scheduler The leader is generated by election in k8s (controlled by --leader-elect selection, default is true), and only one scheduler component runs in the cluster at the same time;
etcd achieves high availability by running kubeadm to automatically create a cluster. The number of deployed nodes is an odd number. The 3-node method can tolerate at most one machine downtime.
Three, installation preparations#
Both control plane and work nodes perform this part of the operation.
**For Centos7.6 installation details, please refer to: **[Centos7.6 operating system installation and optimization record] (https://blog.51cto.com/3241766/2398136)
When installing Centos, firewall and selinux have been disabled and Ali source has been set.
1. Configure the host name##
1.1 Modify host name###
[ root@centos7 ~]# hostnamectl set-hostname master01
[ root@centos7 ~]# more /etc/hostname
master01
Exit and log in again to display the newly set host name master01
1.2 Modify the hosts file###
[ root@master01 ~]# cat >>/etc/hosts << EOF
172.27.34.3 master01
172.27.34.4 master02
172.27.34.5 master03
172.27.34.93 work01
172.27.34.94 work02
172.27.34.95 work03
EOF

2. Verify mac address uuid
[ root@master01 ~]# cat /sys/class/net/ens160/address
[ root@master01 ~]# cat /sys/class/dmi/id/product_uuid

Ensure that the mac and uuid of each node are unique
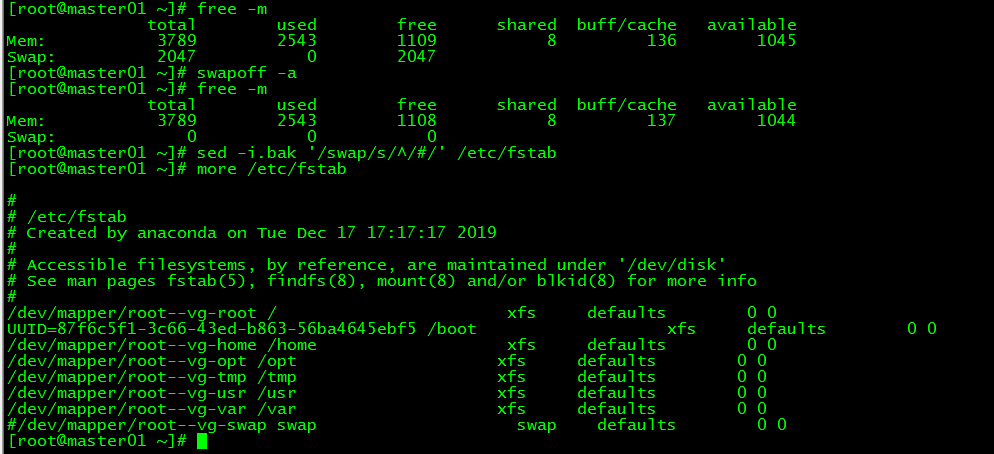
3. Disable swap
3.1 Temporarily disable
[ root@master01 ~]# swapoff -a
3.2 Permanently disable
If you need to restart and take effect, you need to modify the configuration file /etc/fstab after disabling swap, and comment swap
[ root@master01 ~]# sed -i.bak '/swap/s/^/#/'/etc/fstab
4. Kernel parameter modification##
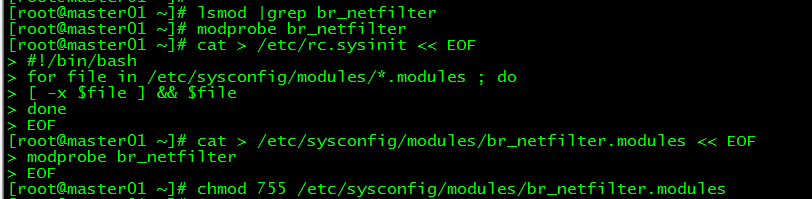
The k8s network in this article uses flannel. The network needs to set the kernel parameter bridge-nf-call-iptables=1. Modifying this parameter requires the system to have the br_netfilter module.
4.1 br_netfilter module loading
**View the br_netfilter module: **
[ root@master01 ~]# lsmod |grep br_netfilter
If the system does not have a br_netfilter module, execute the following new commands, if any, ignore them.
Temporarily add br_netfilter module:
[ root@master01 ~]# modprobe br_netfilter
This method will fail after restart
**Permanently add the br_netfilter module: **
[ root@master01 ~]# cat >/etc/rc.sysinit << EOF
#! /bin/bash
for file in/etc/sysconfig/modules/*.modules ; do
[ - x $file ] && $file
done
EOF
[ root@master01 ~]# cat > /etc/sysconfig/modules/br_netfilter.modules << EOF
modprobe br_netfilter
EOF
[ root@master01 ~]# chmod 755 /etc/sysconfig/modules/br_netfilter.modules
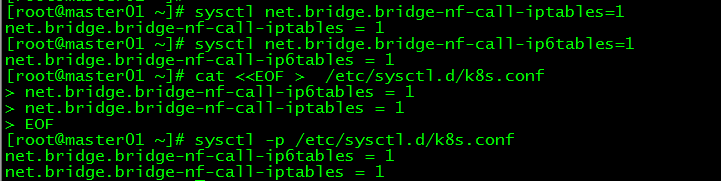
4.2 Temporary modification of kernel parameters###
[ root@master01 ~]# sysctl net.bridge.bridge-nf-call-iptables=1
net.bridge.bridge-nf-call-iptables =1[root@master01 ~]# sysctl net.bridge.bridge-nf-call-ip6tables=1
net.bridge.bridge-nf-call-ip6tables =1
4.3 Permanent modification of kernel parameters###
[ root@master01 ~]# cat <<EOF >/etc/sysctl.d/k8s.conf
net.bridge.bridge-nf-call-ip6tables =1
net.bridge.bridge-nf-call-iptables =1
EOF
[ root@master01 ~]# sysctl -p /etc/sysctl.d/k8s.conf
net.bridge.bridge-nf-call-ip6tables =1
net.bridge.bridge-nf-call-iptables =1
5. Set up kubernetes source##
5.1 Added kubernetes source###
[ root@master01 ~]# cat <<EOF >/etc/yum.repos.d/kubernetes.repo
[ kubernetes]
name=Kubernetes
baseurl=https://mirrors.aliyun.com/kubernetes/yum/repos/kubernetes-el7-x86_64/
enabled=1
gpgcheck=1
repo_gpgcheck=1
gpgkey=https://mirrors.aliyun.com/kubernetes/yum/doc/yum-key.gpg https://mirrors.aliyun.com/kubernetes/yum/doc/rpm-package-key.gpg
EOF
- [] The one in the brackets is the repository id, which is unique and used to identify different warehouses
- name Warehouse name, custom
- baseurl warehouse address
- enable Whether to enable the warehouse, the default is 1 means enable
- Whether gpgcheck verifies the legality of the package obtained from the warehouse, 1 is verification
- Whether repo_gpgcheck verifies the validity of metadata metadata is the package list, 1 is verification
- gpgkey=URL is the location of the public key file of the digital signature. If the gpgcheck value is 1, you need to specify the location of the gpgkey file here. If the gpgcheck value is 0, you don’t need this item.
5.2 refresh cache###
[ root@master01 ~]# yum clean all
[ root@master01 ~]# yum -y makecache
6. Password-free login##
Configure the password-free login from master01 to master02 and master03. This step is only performed on master01.
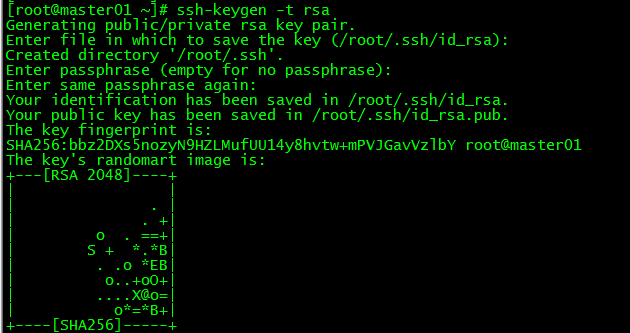
6.1 Create secret key###
[ root@master01 ~]# ssh-keygen -t rsa
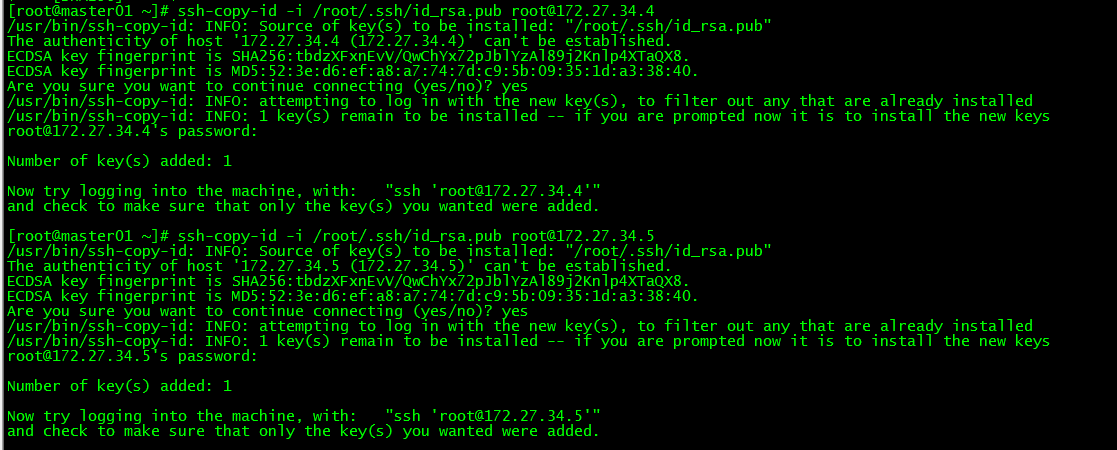
6.2 Sync the secret key to master02/master03
[ root@master01 ~]# ssh-copy-id -i /root/.ssh/id_rsa.pub [email protected][root@master01 ~]# ssh-copy-id -i /root/.ssh/id_rsa.pub [email protected]
6.3 Password-free login test###
[ root@master01 ~]# ssh 172.27.34.4[root@master01 ~]# ssh master03
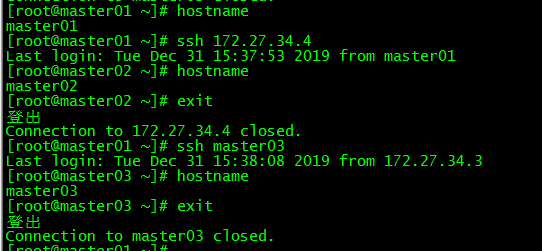
master01 can log in to master02 and master03 directly without entering a password.
Four, Docker installation#
Both control plane and work nodes perform this part of the operation.
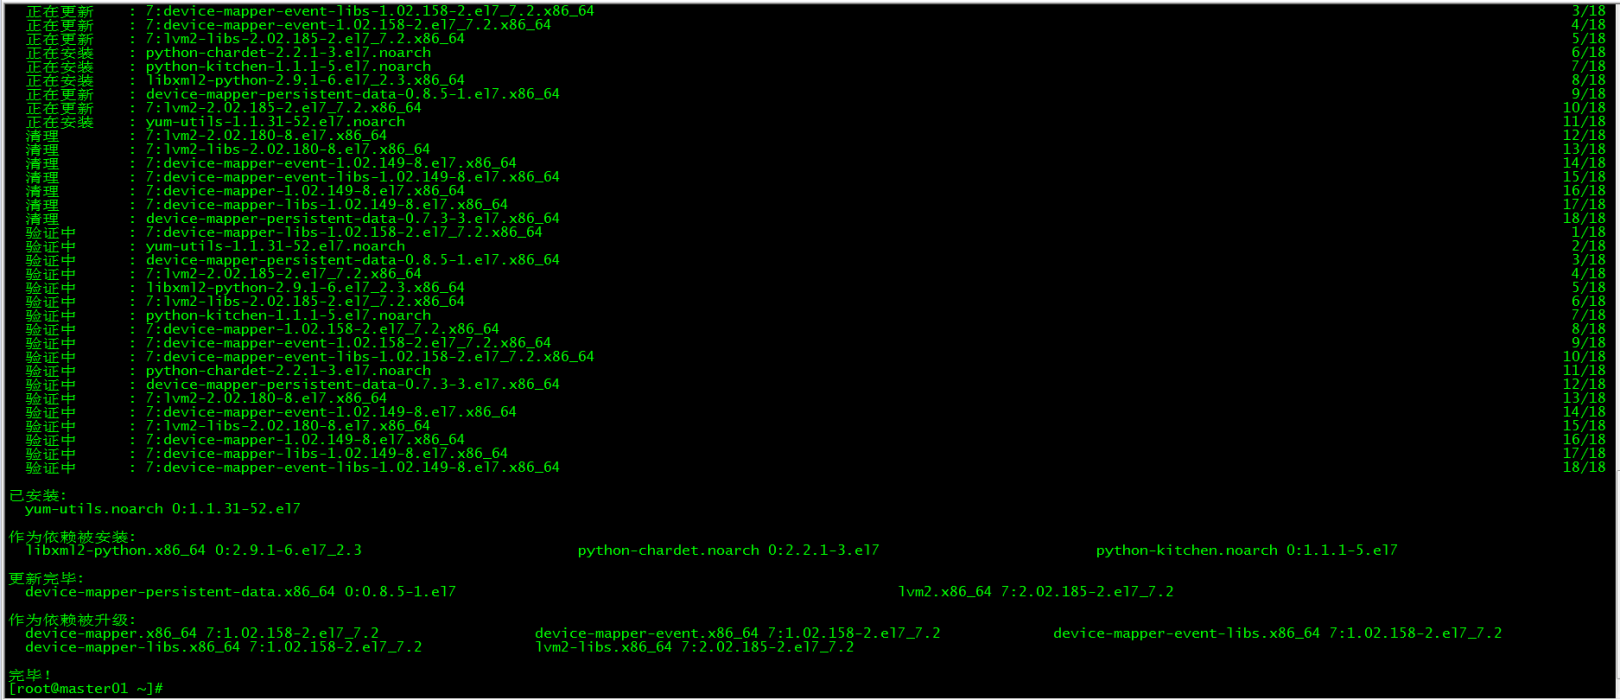
1. Install dependencies##
[ root@master01 ~]# yum install -y yum-utils device-mapper-persistent-data lvm2
2. Set up Docker source##
[ root@master01 ~]# yum-config-manager --add-repo https://download.docker.com/linux/centos/docker-ce.repo

3. Install Docker CE
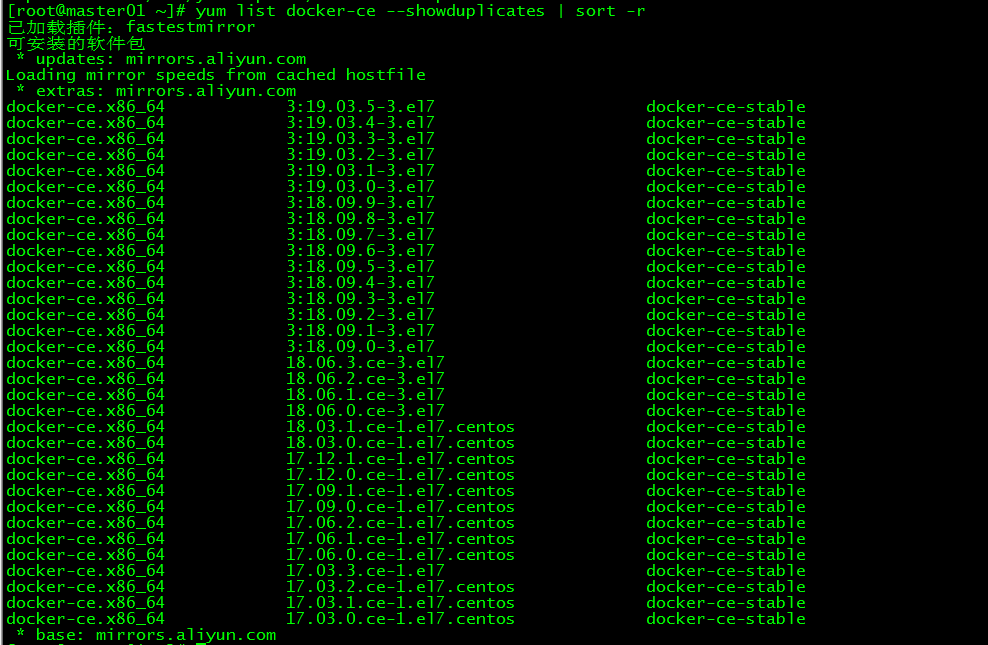
3.1 Docker installation version view###
[ root@master01 ~]# yum list docker-ce --showduplicates | sort -r
3.2 Install docker
[ root@master01 ~]# yum install docker-ce-18.09.9 docker-ce-cli-18.09.9 containerd.io -y
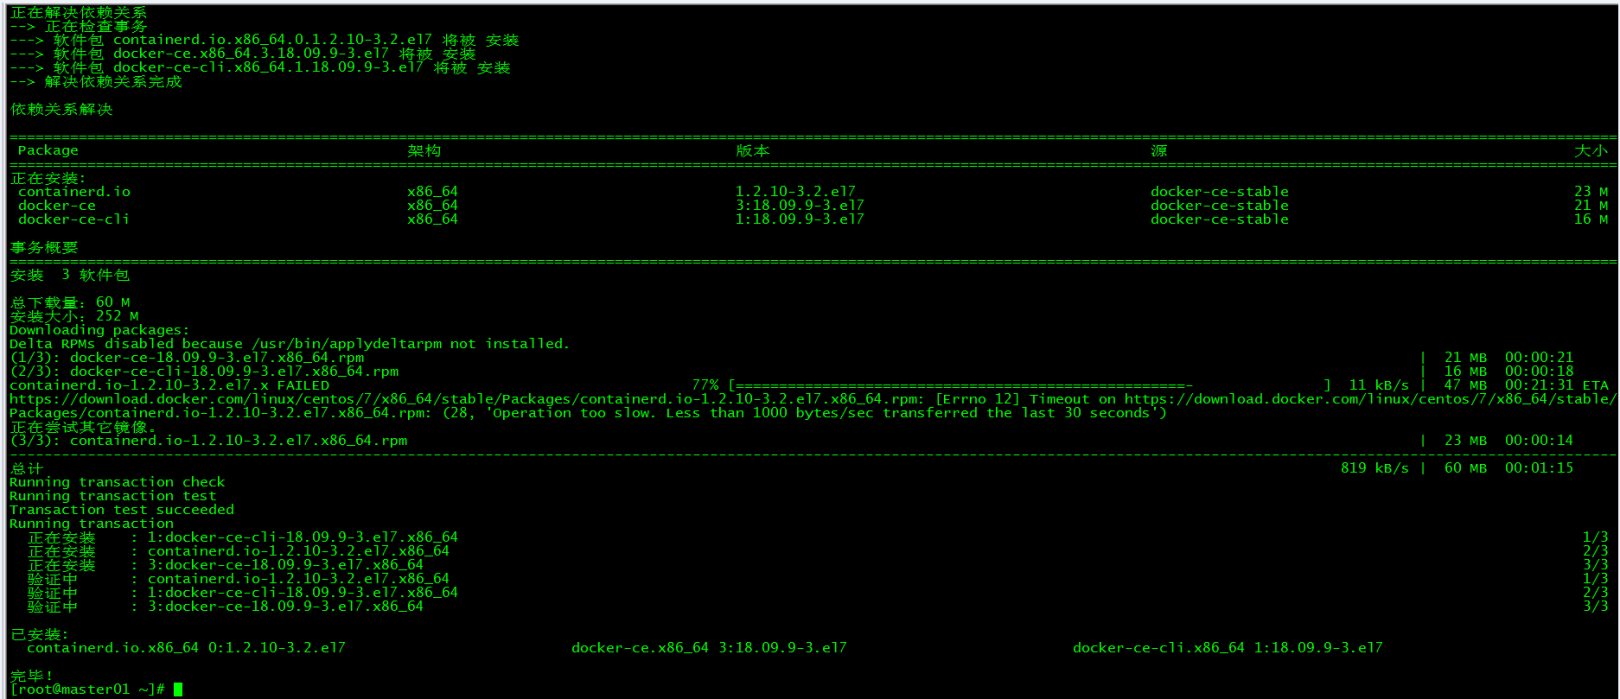
Specify the installed docker version as 18.09.9
4. Start Docker
[ root@master01 ~]# systemctl start docker
[ root@master01 ~]# systemctl enable docker

5. Command completion##
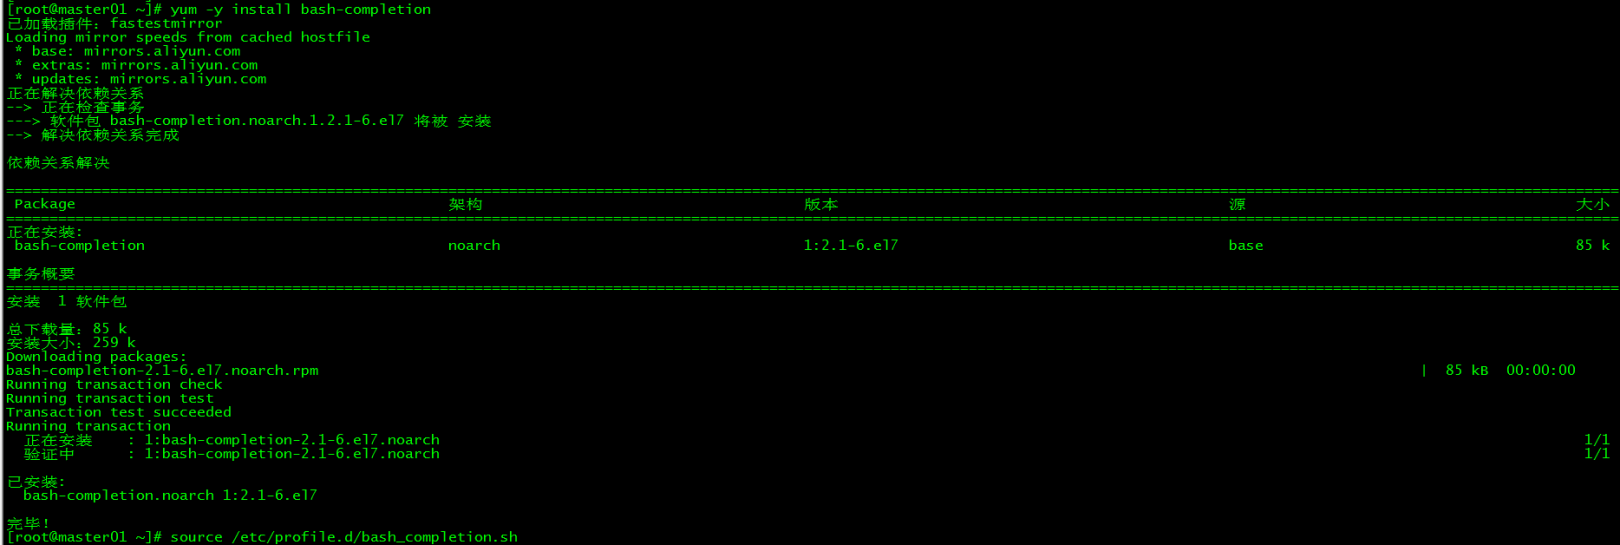
5.1 Install bash-completion
[ root@master01 ~]# yum -y install bash-completion
5.2 Load bash-completion
[ root@master01 ~]# source /etc/profile.d/bash_completion.sh
6. Mirror acceleration##
Since the Docker Hub server is located abroad, it will be slower to download the image, you can configure the image accelerator. The main accelerators are: China registry mirror, Alibaba Cloud accelerator, and DaoCloud accelerator officially provided by Docker. This article takes the configuration of Alibaba accelerator as an example.
6.1 Log in to Alibaba Cloud Container Module###
The login address is: https://cr.console.aliyun.com, if you have not registered, you can register an Alibaba Cloud account first

6.2 Configure Mirror Accelerator###
Configure the daemon.json file
[ root@master01 ~]# mkdir -p /etc/docker
[ root@master01 ~]# tee /etc/docker/daemon.json <<-'EOF'{"registry-mirrors":["https://v16stybc.mirror.aliyuncs.com"]}
EOF
Restart service
[ root@master01 ~]# systemctl daemon-reload
[ root@master01 ~]# systemctl restart docker
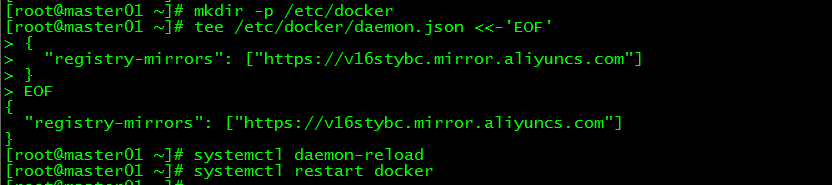
The accelerator configuration is complete
7. verification##
[ root@master01 ~]# docker --version
[ root@master01 ~]# docker run hello-world
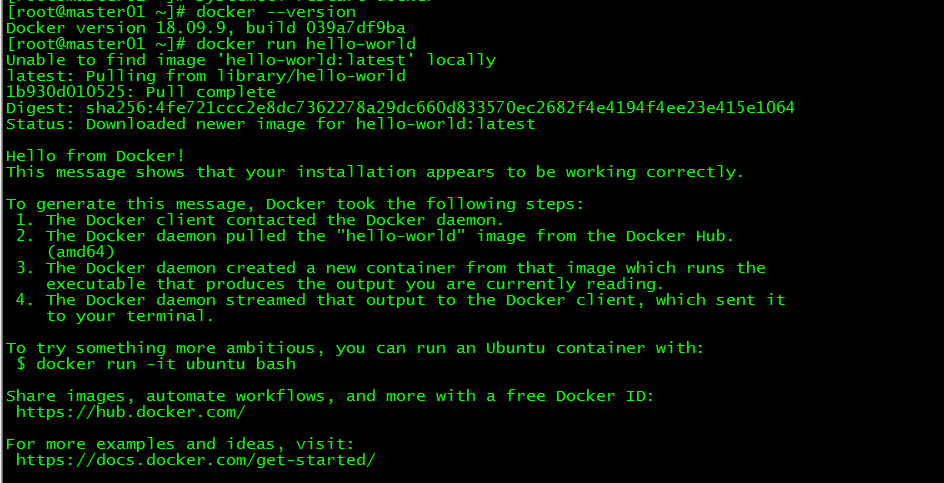
Verify whether docker is installed successfully by querying the docker version and running the container hello-world.
8. Modify Cgroup Driver
8.1 Modify daemon.json
Modify daemon.json, add'"exec-opts": ["native.cgroupdriver=systemd"'
[ root@master01 ~]# more /etc/docker/daemon.json
{" registry-mirrors":["https://v16stybc.mirror.aliyuncs.com"],"exec-opts":["native.cgroupdriver=systemd"]}
8.2 Reload docker
[ root@master01 ~]# systemctl daemon-reload
[ root@master01 ~]# systemctl restart docker
The cgroupdriver is modified to eliminate the warning:
WARNING IsDockerSystemdCheck: detected "cgroupfs" as the Docker cgroup driver. The recommended driver is "systemd". Please follow the guide at https://kubernetes.io/docs/setup/cri/
Five, keepalived installation#
The control plane nodes all perform this part of the operation.
1. Install keepalived
[ root@master01 ~]# yum -y install keepalived

2. keepalived configuration##
**Keepalived configuration on master01: **
[ root@master01 ~]# more /etc/keepalived/keepalived.conf
! Configuration File for keepalived
global_defs {
 router_id master01
}
vrrp_instance VI_1 {
 state MASTER
 interfaceens160
 virtual_router_id 50
 priority 100
 advert_int 1
 authentication {
  auth_type PASS
  auth_pass 1111}
 virtual_ipaddress {172.27.34.130}}
**Keepalived configuration on master02: **
[ root@master02 ~]# more /etc/keepalived/keepalived.conf
! Configuration File for keepalived
global_defs {
 router_id master02
}
vrrp_instance VI_1 {
 state BACKUP
 interfaceens160
 virtual_router_id 50
 priority 90
 advert_int 1
 authentication {
  auth_type PASS
  auth_pass 1111}
 virtual_ipaddress {172.27.34.130}}
**Keepalived configuration on master03: **
[ root@master03 ~]# more /etc/keepalived/keepalived.conf
! Configuration File for keepalived
global_defs {
 router_id master03
}
vrrp_instance VI_1 {
 state BACKUP
 interfaceens160
 virtual_router_id 50
 priority 80
 advert_int 1
 authentication {
  auth_type PASS
  auth_pass 1111}
 virtual_ipaddress {172.27.34.130}
3. Start keepalived
All control planes start keepalived services and set them to start
[ root@master01 ~]# service keepalived start
[ root@master01 ~]# systemctl enable keepalived

4. VIP View##
[ root@master01 ~]# ip a
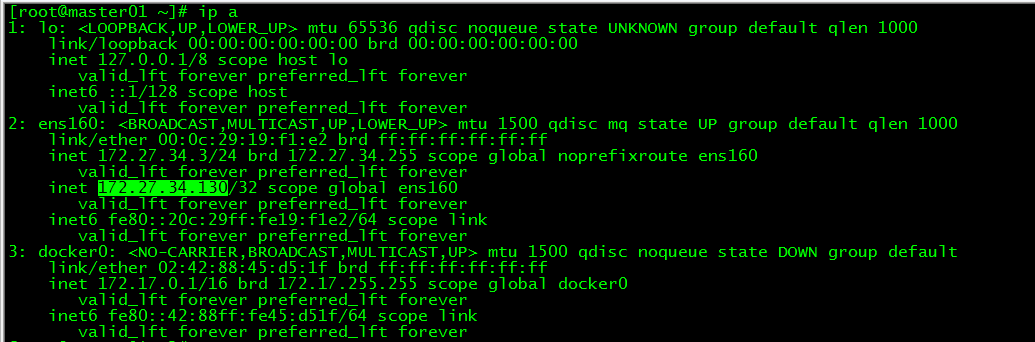
vip on master01
Six, k8s installation#
Both control plane and work nodes perform this part of the operation.
1. Version view##
[ root@master01 ~]# yum list kubelet --showduplicates | sort -r
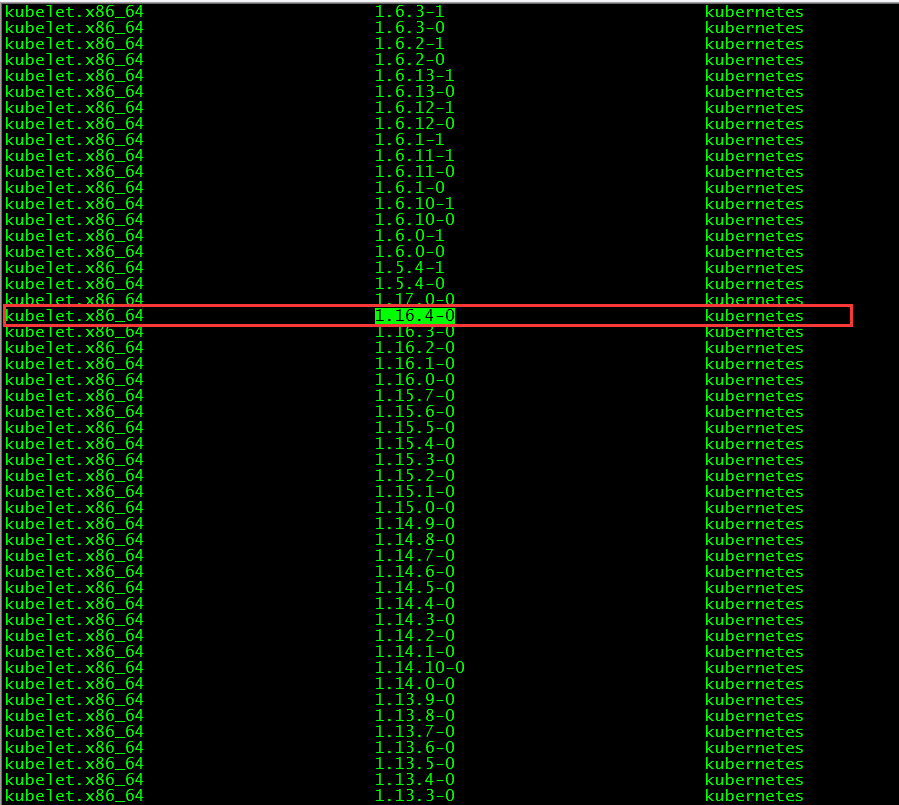
The kubelet version installed in this article is 1.16.4, and the docker versions supported by this version are 1.13.1, 17.03, 17.06, 17.09, 18.06, 18.09.
2. Install kubelet, kubeadm and kubectl
2.1 Install three packages###
[ root@master01 ~]# yum install -y kubelet-1.16.4 kubeadm-1.16.4 kubectl-1.16.4
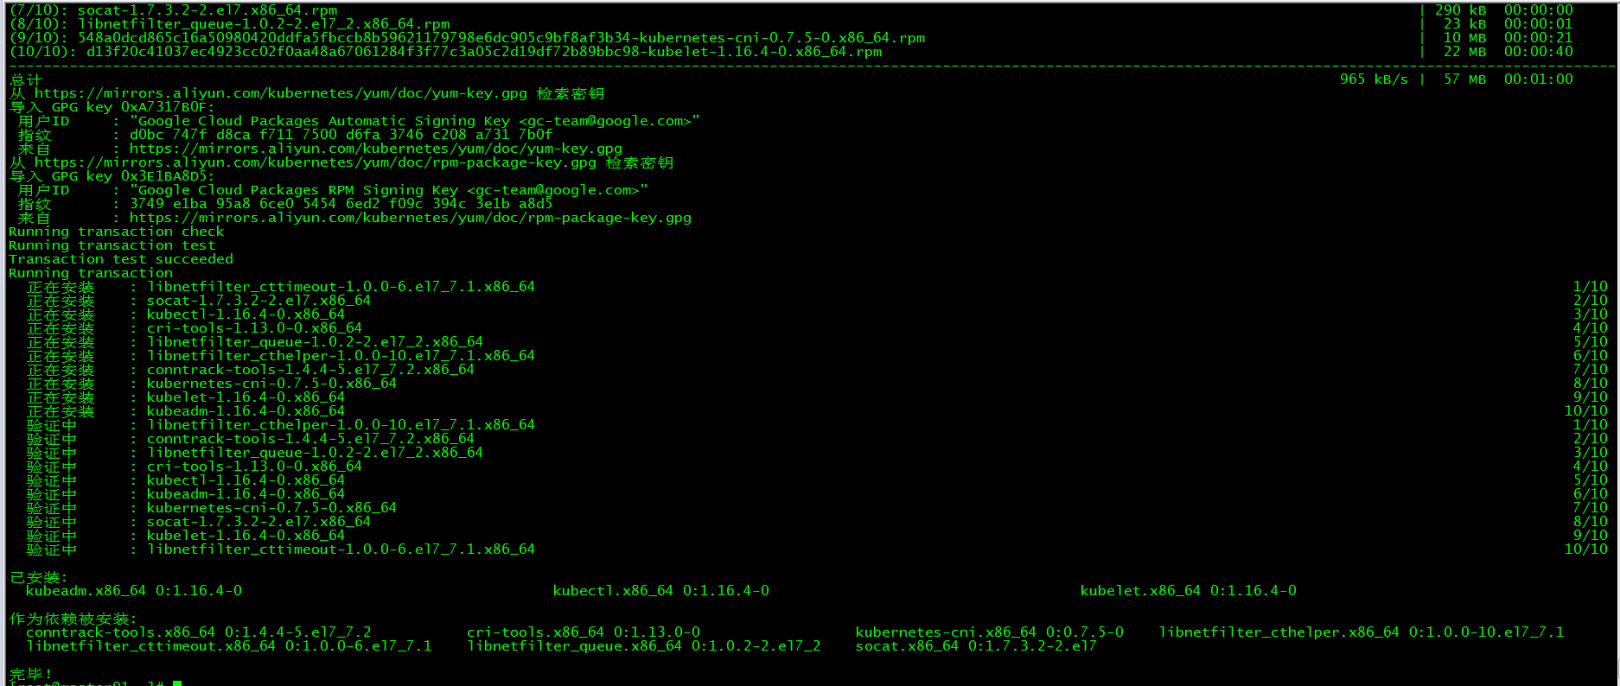
2.2 Installation package description###
- kubelet runs on all nodes in the cluster and is a tool used to start objects such as Pods and containers
- kubeadm A command tool used to initialize and start the cluster
- kubectl The command line used to communicate with the cluster. Through kubectl, you can deploy and manage applications, view various resources, and create, delete and update various components
2.3 Start kubelet
Start kubelet and set it to boot
[ root@master01 ~]# systemctl enable kubelet && systemctl start kubelet
2.4 kubectl command completion###
[ root@master01 ~]# echo "source <(kubectl completion bash)">>~/.bash_profile
[ root@master01 ~]# source .bash_profile
3. Download mirror##
3.1 Mirror download script###
Almost all Kubernetes installation components and Docker images are placed on goolge's own website. Direct access may cause network problems. The solution here is to download the image from the Alibaba Cloud mirror warehouse, pull it locally and change it back to the default image tag. . This article pulls the image by running the image.sh script.
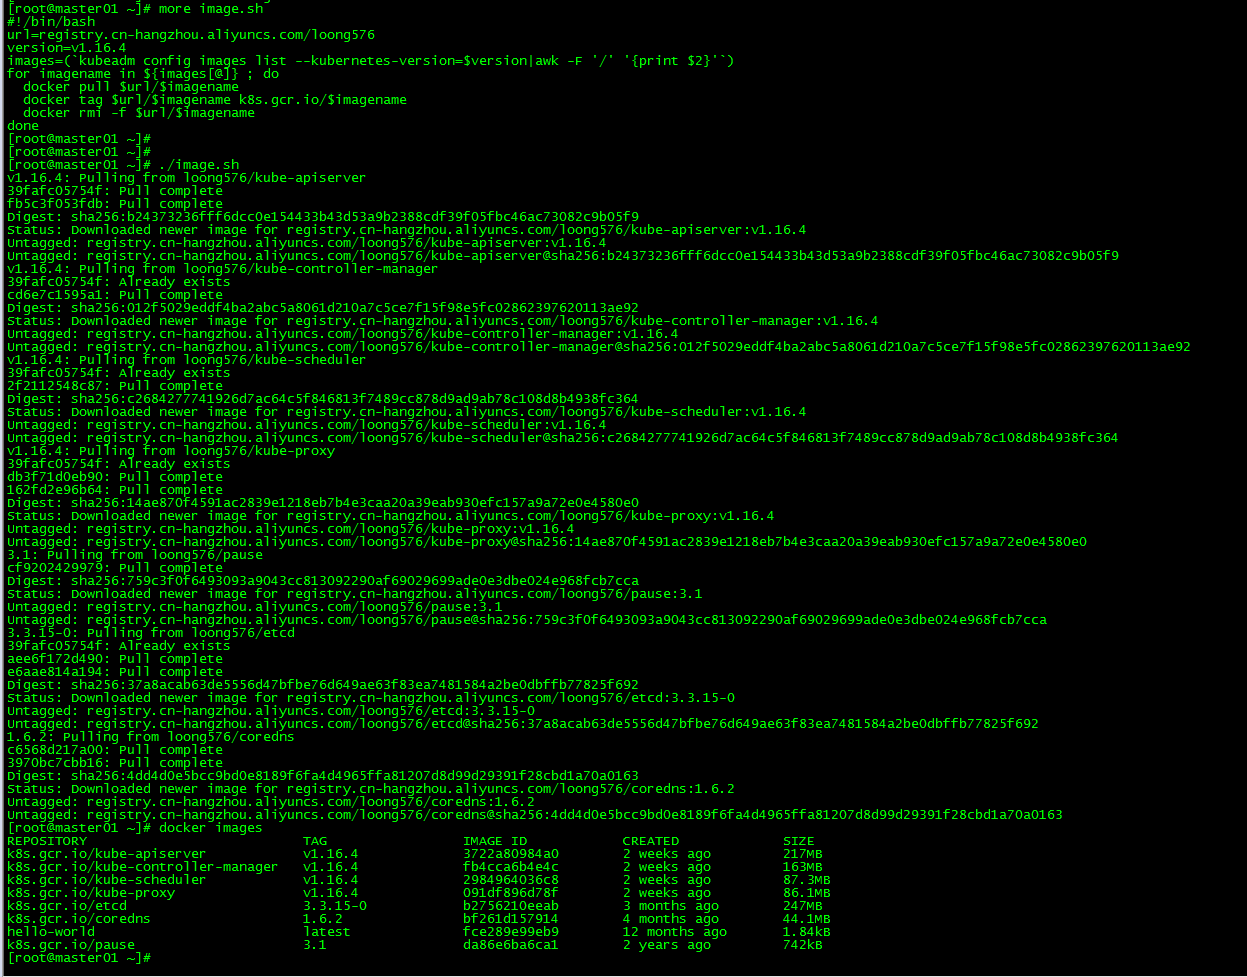
[ root@master01 ~]# more image.sh
#! /bin/bash
url=registry.cn-hangzhou.aliyuncs.com/loong576
version=v1.16.4
images=(`kubeadm config images list --kubernetes-version=$version|awk -F '/' '{print $2}'`)for imagename in ${images[@]};do
 docker pull $url/$imagename
 docker tag $url/$imagename k8s.gcr.io/$imagename
 docker rmi -f $url/$imagename
done
The url is the address of the Alibaba Cloud mirror warehouse, and the version is the installed version of kubernetes.
3.2 Download mirror###
Run the script image.sh to download the specified version of the image
[ root@master01 ~]# ./image.sh
[ root@master01 ~]# docker images
Seven, initialize the Master
The master01 node performs this part of the operation.
1. kubeadm.conf
[ root@master01 ~]# more kubeadm-config.yaml
apiVersion: kubeadm.k8s.io/v1beta2
kind: ClusterConfiguration
kubernetesVersion: v1.16.4
apiServer:
 certSANs:    #Fill in all kube-hostname, IP, VIP of apiserver node
 - master01
 - master02
 - master03
 - node01
 - node02
 - node03
  -172.27.34.3-172.27.34.4-172.27.34.5-172.27.34.93-172.27.34.94-172.27.34.95-172.27.34.130
controlPlaneEndpoint:"172.27.34.130:6443"
networking:
 podSubnet:"10.244.0.0/16"
kubeadm.conf is the initial configuration file
2. master initialization##
[ root@master01 ~]# kubeadm init --config=kubeadm-config.yaml
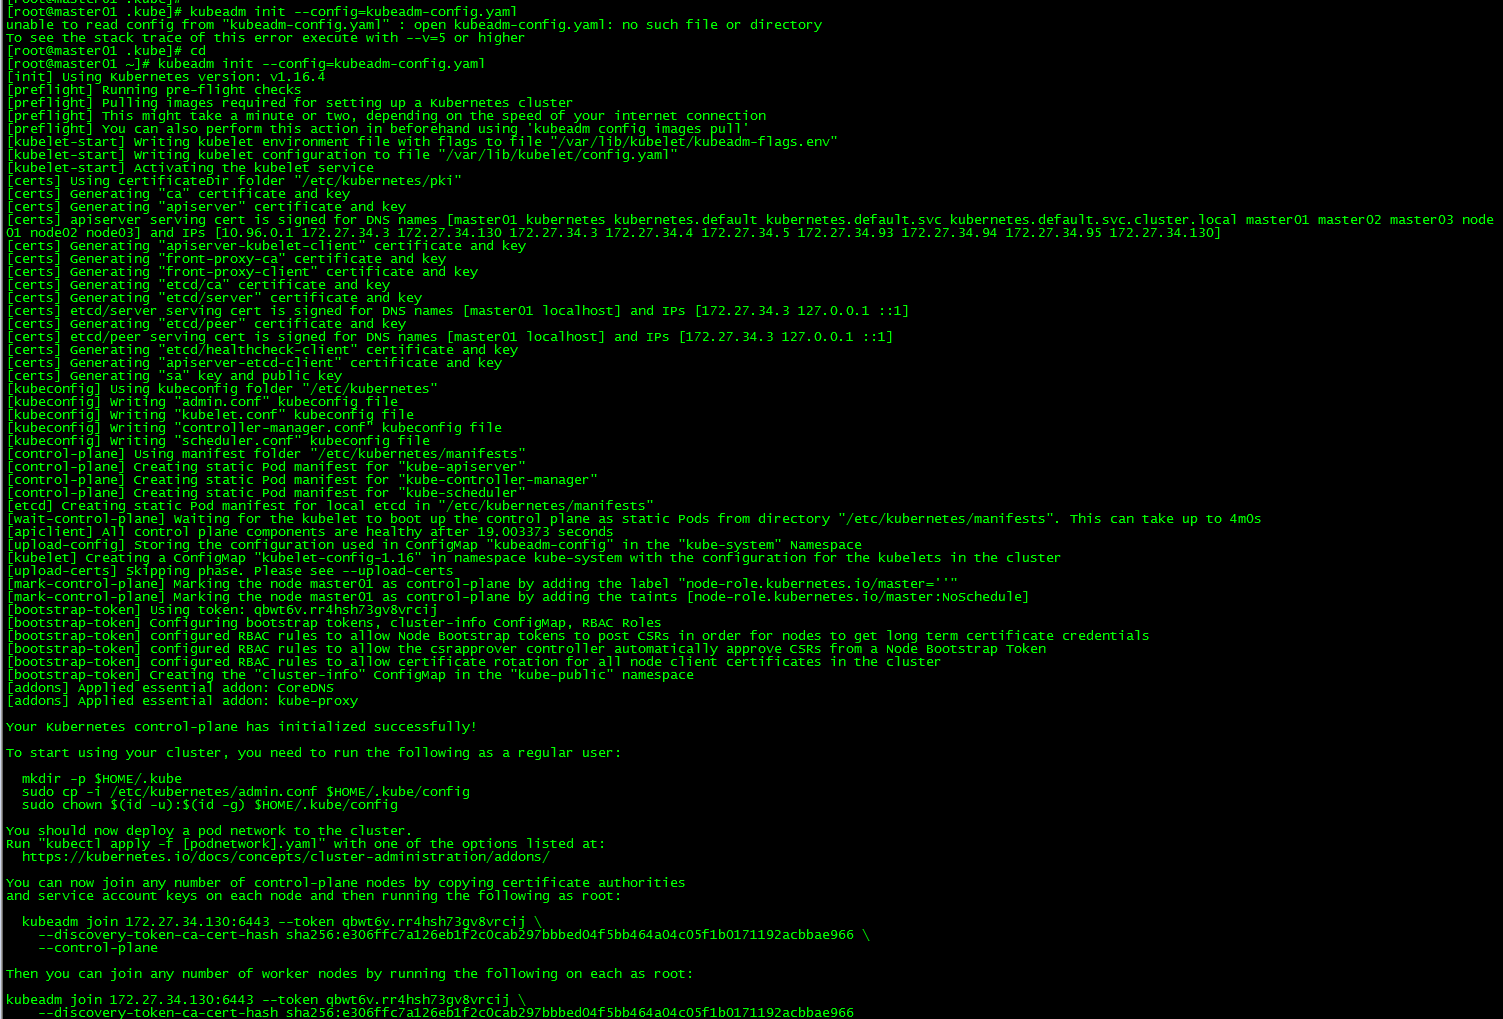
Record the output of kubeadm join. This command is needed later to join the work node and other control plane nodes to the cluster.
You can now join any number of control-plane nodes by copying certificate authorities
and service account keys on each node and then running the following as root:

 kubeadm join 172.27.34.130:6443--token qbwt6v.rr4hsh73gv8vrcij \
 - - discovery-token-ca-cert-hash sha256:e306ffc7a126eb1f2c0cab297bbbed04f5bb464a04c05f1b0171192acbbae966 \
 - - control-plane

Then you can join any number of worker nodes by running the following on each as root:

kubeadm join 172.27.34.130:6443--token qbwt6v.rr4hsh73gv8vrcij \
 - - discovery-token-ca-cert-hash sha256:e306ffc7a126eb1f2c0cab297bbbed04f5bb464a04c05f1b0171192acbbae966
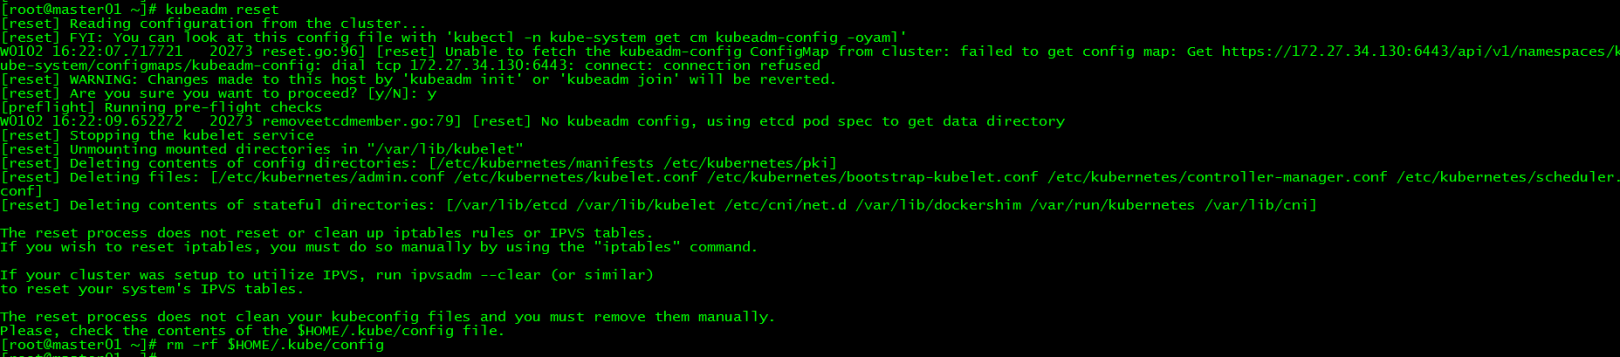
initialization failed:
If the initialization fails, execute kubeadm reset and re-initialize
[ root@master01 ~]# kubeadm reset
[ root@master01 ~]# rm -rf $HOME/.kube/config
3. Load environment variables##
[ root@master01 ~]# echo "export KUBECONFIG=/etc/kubernetes/admin.conf">>~/.bash_profile
[ root@master01 ~]# source .bash_profile
All operations in this article are performed under the root user, if it is a non-root user, perform the following operations:
mkdir -p $HOME/.kube
cp -i /etc/kubernetes/admin.conf $HOME/.kube/config
chown $(id -u):$(id -g) $HOME/.kube/config
4. Install flannel network##
Create a new flannel network on master01
[ root@master01 ~]# kubectl apply -f https://raw.githubusercontent.com/coreos/flannel/2140ac876ef134e0ed5af15c65e414cf26827915/Documentation/kube-flannel.yml

Due to network reasons, the installation may fail. You can download the kube-flannel.yml file directly at the end of the article, and then execute apply
Eight, control plane nodes join the cluster#
1. Certificate Distribution##
**master01 distribution certificate: **
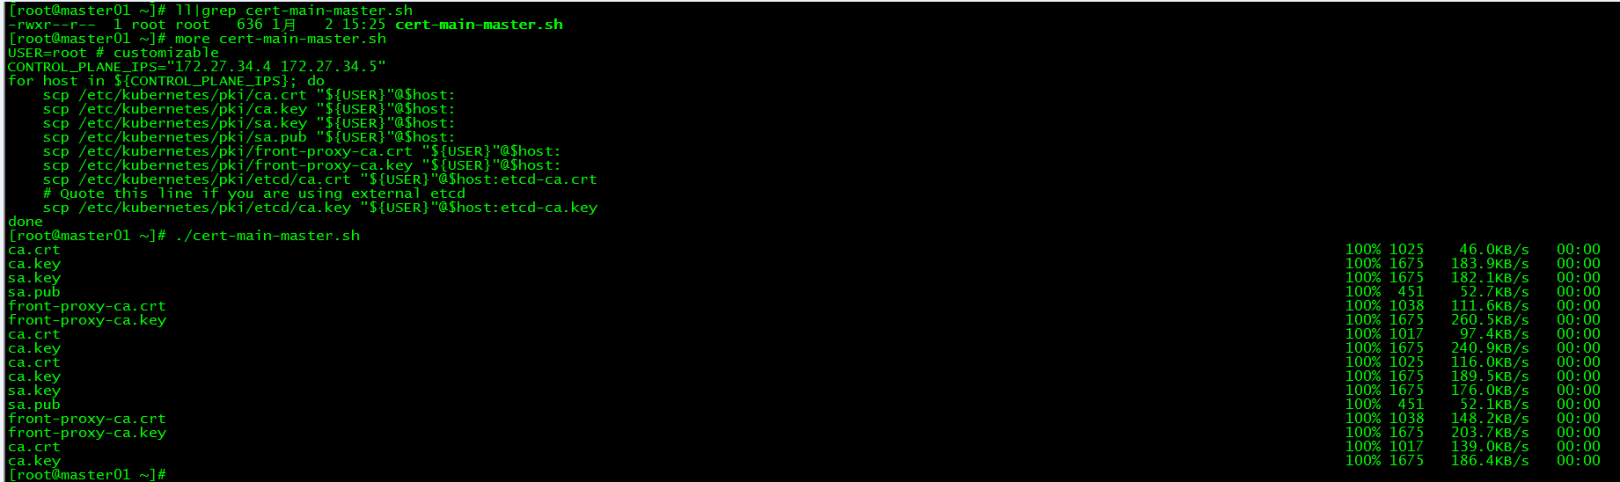
Run the script cert-main-master.sh on master01 to distribute the certificate to master02 and master03
[ root@master01 ~]# ll|grep cert-main-master.sh
- rwxr--r--1 root root 6381 215:23 cert-main-master.sh
[ root@master01 ~]# more cert-main-master.sh
USER=root # customizable
CONTROL_PLANE_IPS="172.27.34.4 172.27.34.5"for host in ${CONTROL_PLANE_IPS};do
 scp /etc/kubernetes/pki/ca.crt "${USER}"@$host:
 scp /etc/kubernetes/pki/ca.key "${USER}"@$host:
 scp /etc/kubernetes/pki/sa.key "${USER}"@$host:
 scp /etc/kubernetes/pki/sa.pub "${USER}"@$host:
 scp /etc/kubernetes/pki/front-proxy-ca.crt "${USER}"@$host:
 scp /etc/kubernetes/pki/front-proxy-ca.key "${USER}"@$host:
 scp /etc/kubernetes/pki/etcd/ca.crt "${USER}"@$host:etcd-ca.crt
 # Quote this line if you are using external etcd
 scp /etc/kubernetes/pki/etcd/ca.key "${USER}"@$host:etcd-ca.key
done
Master02 moves the certificate to the specified directory:
Run the script cert-other-master.sh on master02 to move the certificate to the specified directory
[ root@master02 ~]# pwd
/root
[ root@master02 ~]# ll|grep cert-other-master.sh
- rwxr--r--1 root root 4841 215:29 cert-other-master.sh
[ root@master02 ~]# more cert-other-master.sh
USER=root # customizable
mkdir -p /etc/kubernetes/pki/etcd
mv /${USER}/ca.crt /etc/kubernetes/pki/
mv /${USER}/ca.key /etc/kubernetes/pki/
mv /${USER}/sa.pub /etc/kubernetes/pki/
mv /${USER}/sa.key /etc/kubernetes/pki/
mv /${USER}/front-proxy-ca.crt /etc/kubernetes/pki/
mv /${USER}/front-proxy-ca.key /etc/kubernetes/pki/
mv /${USER}/etcd-ca.crt /etc/kubernetes/pki/etcd/ca.crt
# Quote this line if you are using external etcd
mv /${USER}/etcd-ca.key /etc/kubernetes/pki/etcd/ca.key
[ root@master02 ~]# ./cert-other-master.sh
Master03 moves the certificate to the specified directory:
Also run the script cert-other-master.sh on master03
[ root@master03 ~]# pwd
/root
[ root@master03 ~]# ll|grep cert-other-master.sh
- rwxr--r--1 root root 4841 215:31 cert-other-master.sh
[ root@master03 ~]# ./cert-other-master.sh
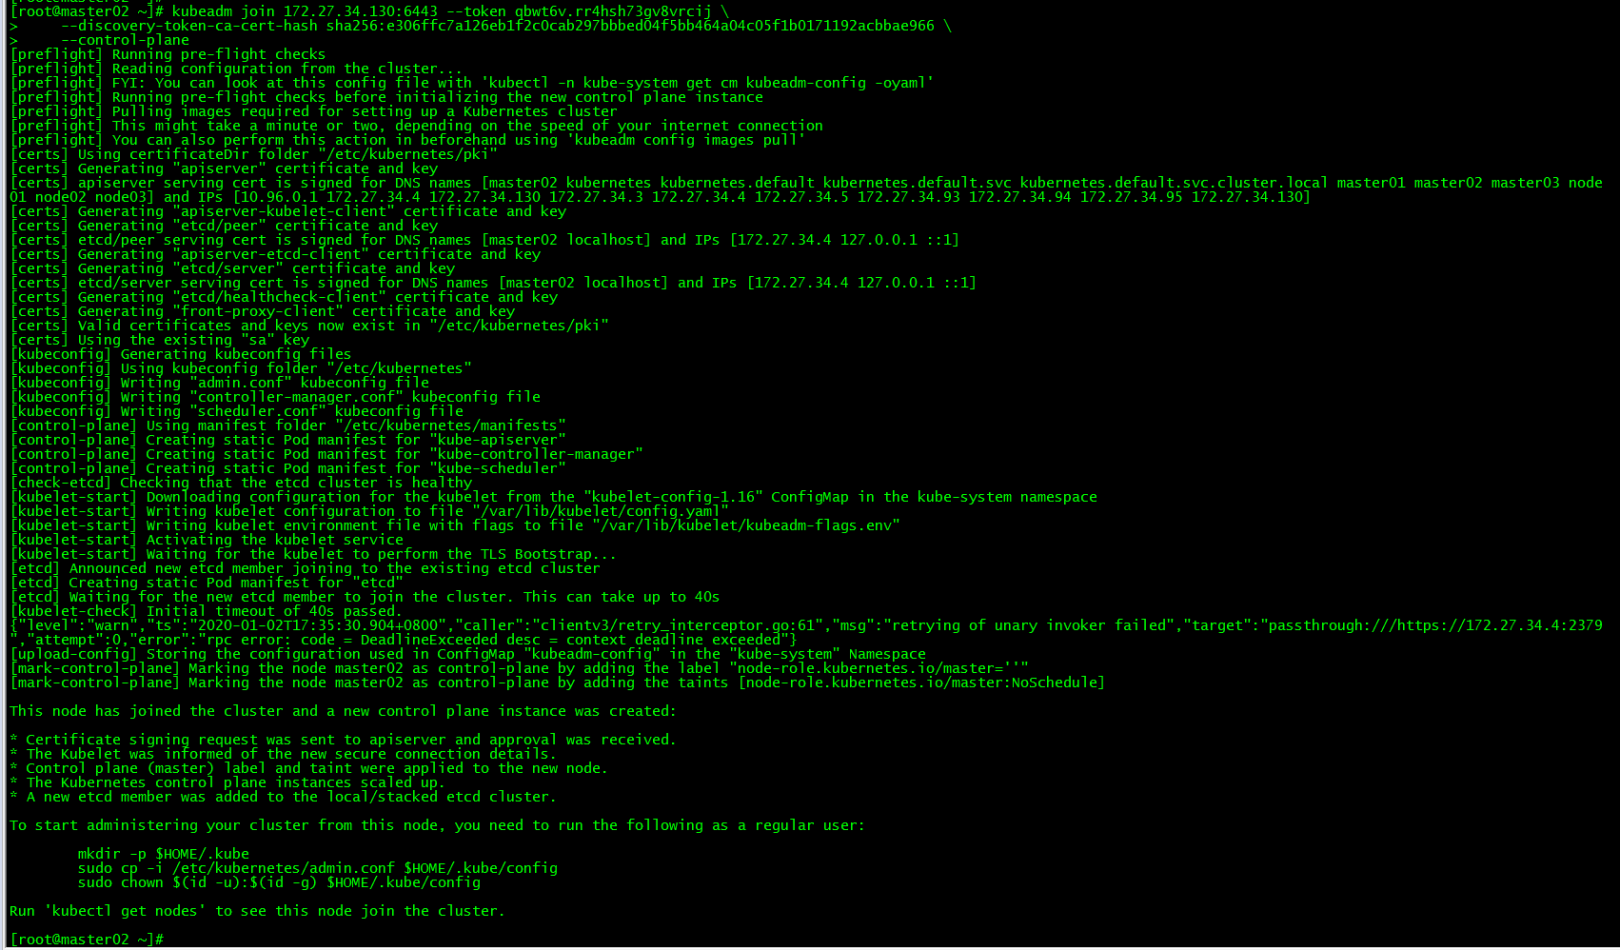
2. master02 join the cluster##
kubeadm join 172.27.34.130:6443--token qbwt6v.rr4hsh73gv8vrcij \
 - - discovery-token-ca-cert-hash sha256:e306ffc7a126eb1f2c0cab297bbbed04f5bb464a04c05f1b0171192acbbae966 \
 - - control-plane
Run the command to add the control plane node generated by the initial master to the cluster
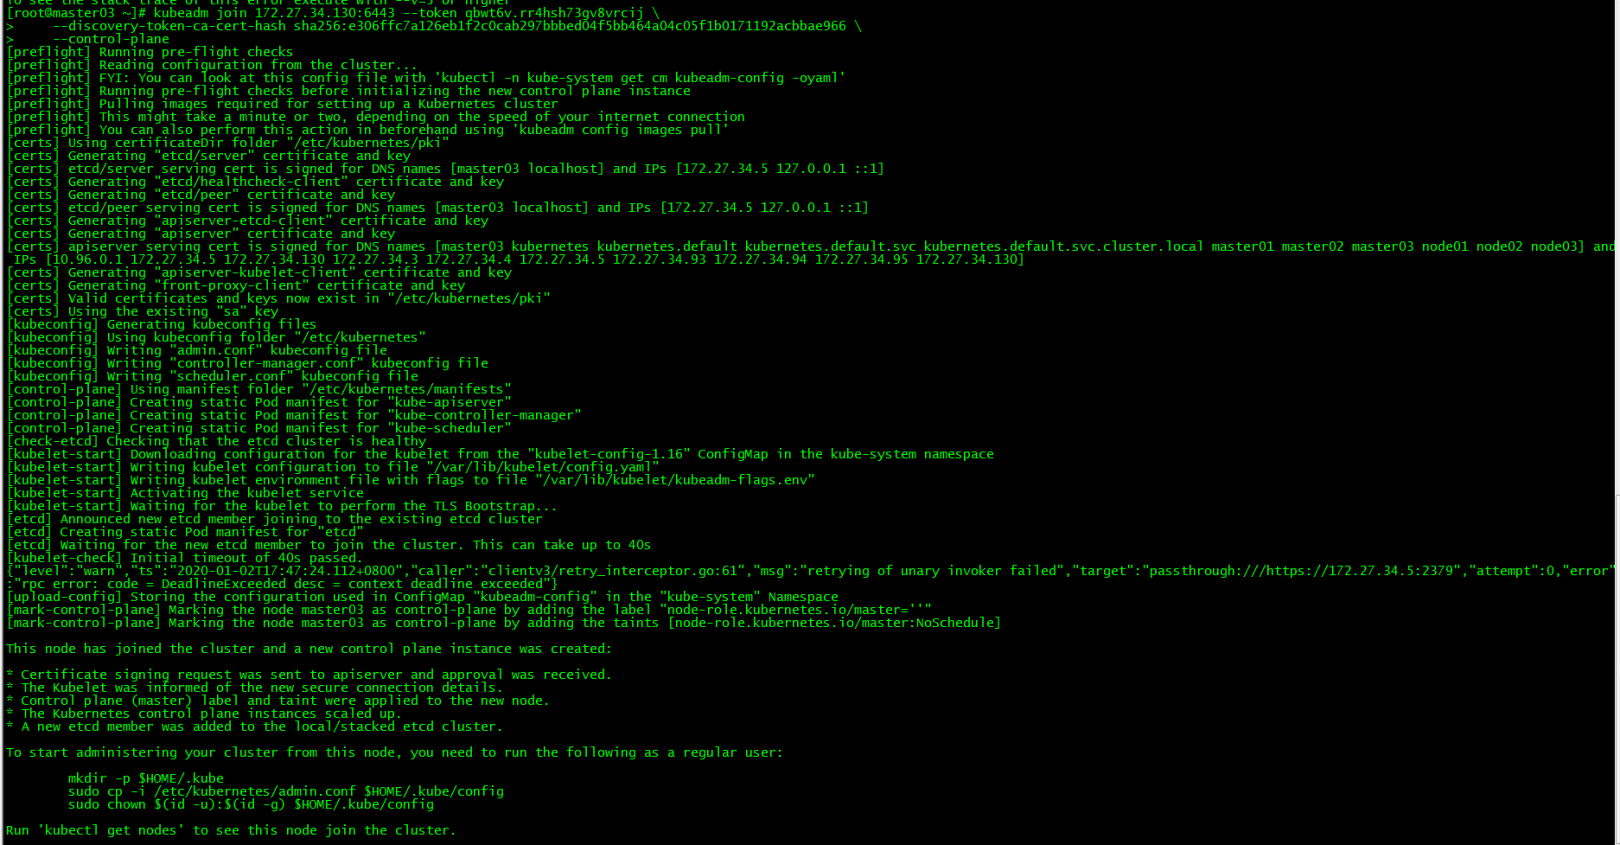
3. master03 join the cluster##
kubeadm join 172.27.34.130:6443--token qbwt6v.rr4hsh73gv8vrcij \
 - - discovery-token-ca-cert-hash sha256:e306ffc7a126eb1f2c0cab297bbbed04f5bb464a04c05f1b0171192acbbae966 \
 - - control-plane
4. Load environment variables##
master02 and master03 load environment variables
[ root@master02 ~]# scp master01:/etc/kubernetes/admin.conf /etc/kubernetes/[root@master02 ~]# echo "export KUBECONFIG=/etc/kubernetes/admin.conf">>~/.bash_profile
[ root@master02 ~]# source .bash_profile
[ root@master03 ~]# scp master01:/etc/kubernetes/admin.conf /etc/kubernetes/[root@master03 ~]# echo "export KUBECONFIG=/etc/kubernetes/admin.conf">>~/.bash_profile
[ root@master03 ~]# source .bash_profile
This step is to execute kubectl commands on master02 and master03.
5. Cluster node view##
[ root@master01 ~]# kubectl get nodes
[ root@master01 ~]# kubectl get po -o wide -n kube-system
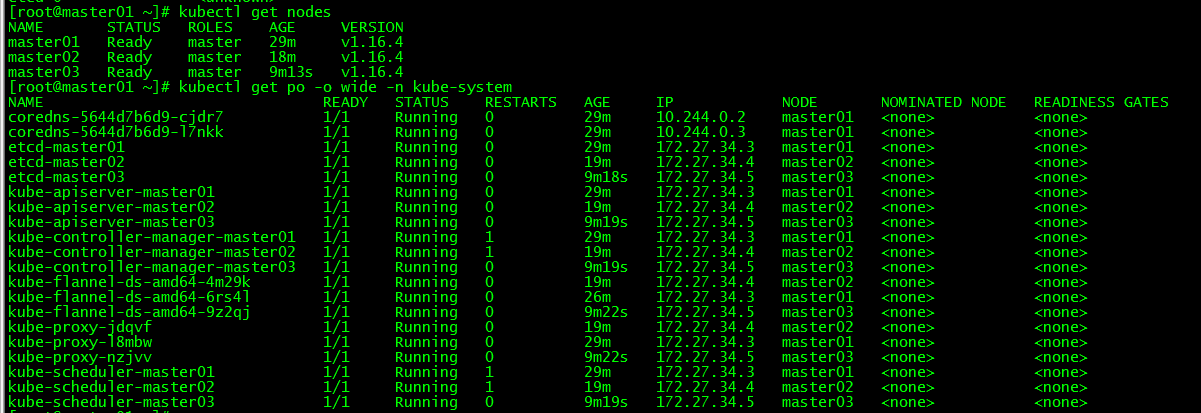
All control plane nodes are in the ready state, and all system components are normal.
Nine, work nodes join the cluster#
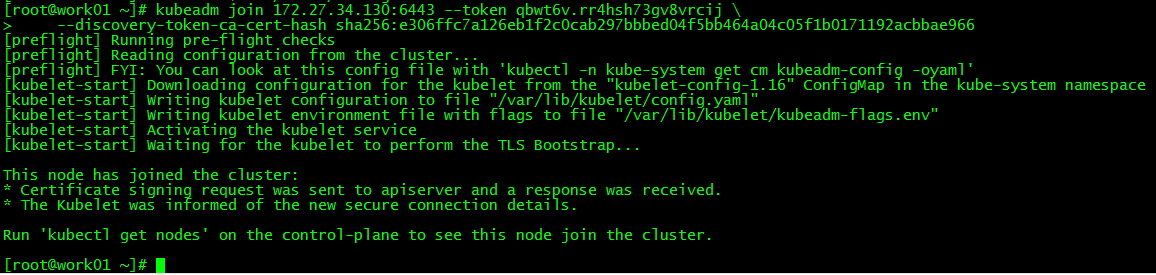
1. work01Join the cluster##
kubeadm join 172.27.34.130:6443--token qbwt6v.rr4hsh73gv8vrcij \
 - - discovery-token-ca-cert-hash sha256:e306ffc7a126eb1f2c0cab297bbbed04f5bb464a04c05f1b0171192acbbae966
Run the command to add the work node generated by the initial master to the cluster
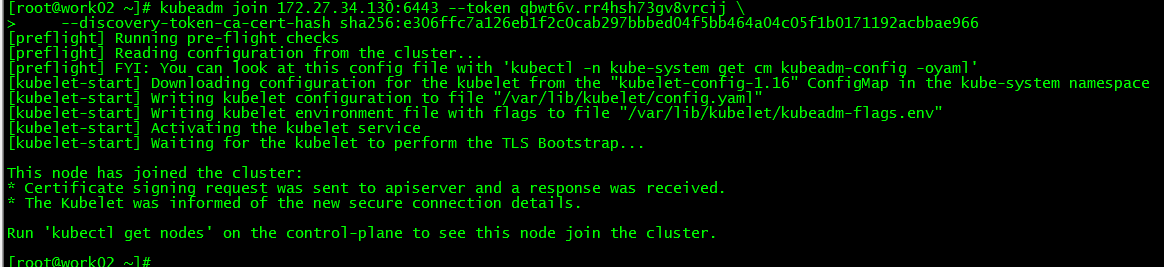
2. work02Join the cluster##
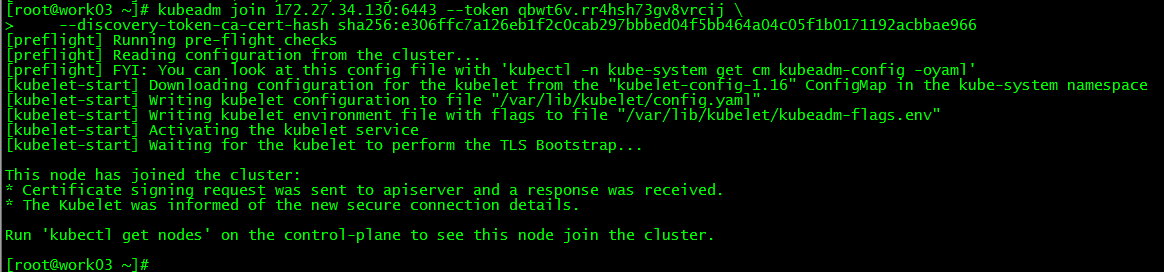
3. work03Join the cluster##
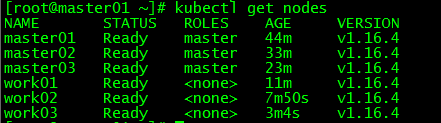
4. Cluster node view##
[ root@master01 ~]# kubectl get nodes
NAME       STATUS   ROLES    AGE     VERSION
master01   Ready    master   44m     v1.16.4
master02   Ready    master   33m     v1.16.4
master03   Ready    master   23m     v1.16.4
work01     Ready    <none>   11m     v1.16.4
work02     Ready    <none>   7m50s   v1.16.4
work03     Ready    <none>   3m4s    v1.16.4
Ten, client configuration#
1. Set up kubernetes source##
1.1 Added kubernetes source###
[ root@client ~]# cat <<EOF >/etc/yum.repos.d/kubernetes.repo
[ kubernetes]
name=Kubernetes
baseurl=https://mirrors.aliyun.com/kubernetes/yum/repos/kubernetes-el7-x86_64/
enabled=1
gpgcheck=1
repo_gpgcheck=1
gpgkey=https://mirrors.aliyun.com/kubernetes/yum/doc/yum-key.gpg https://mirrors.aliyun.com/kubernetes/yum/doc/rpm-package-key.gpg
EOF

1.2 refresh cache###
[ root@client ~]# yum clean all
[ root@client ~]# yum -y makecache
2. Install kubectl
[ root@client ~]# yum install -y kubectl-1.16.4
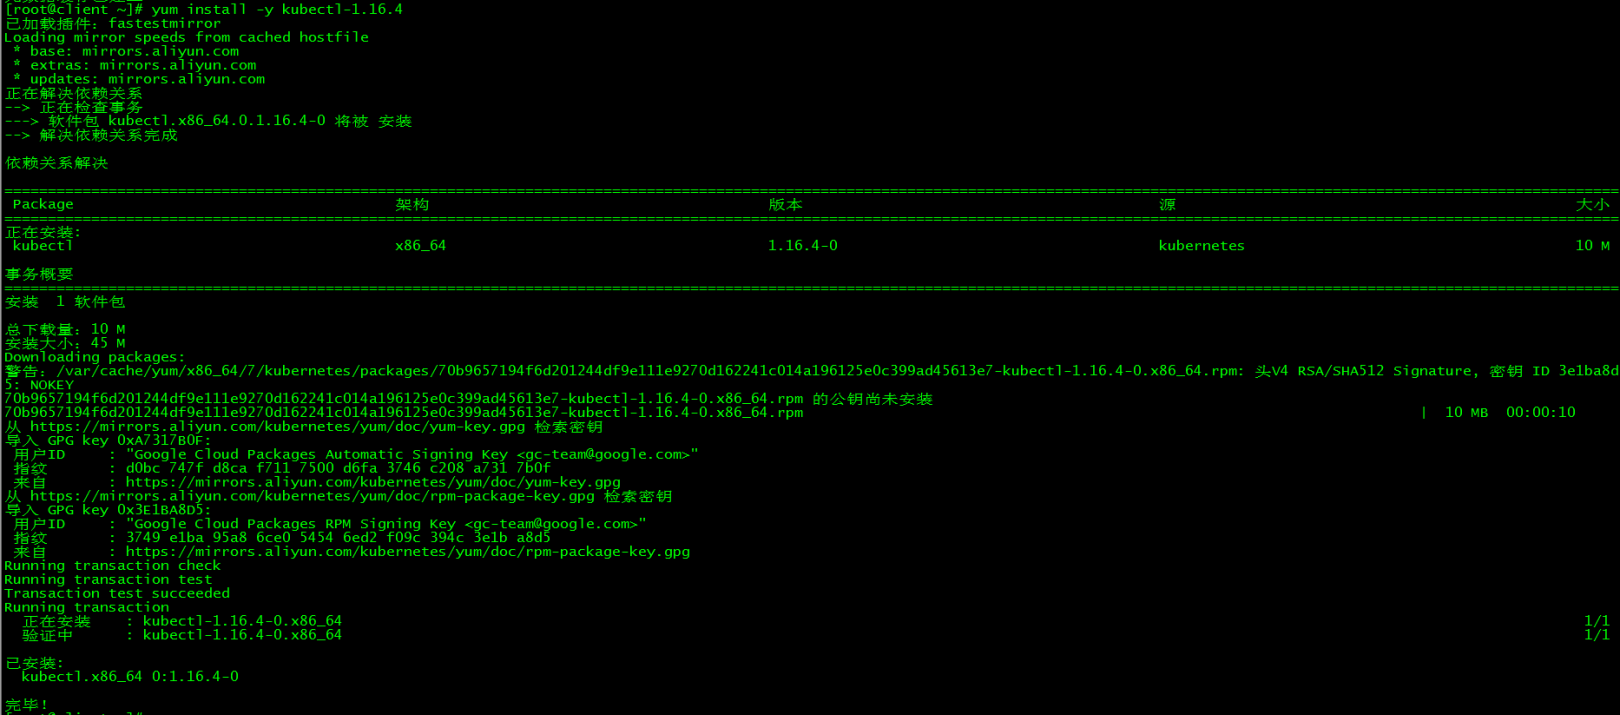
The installation version is consistent with the cluster version
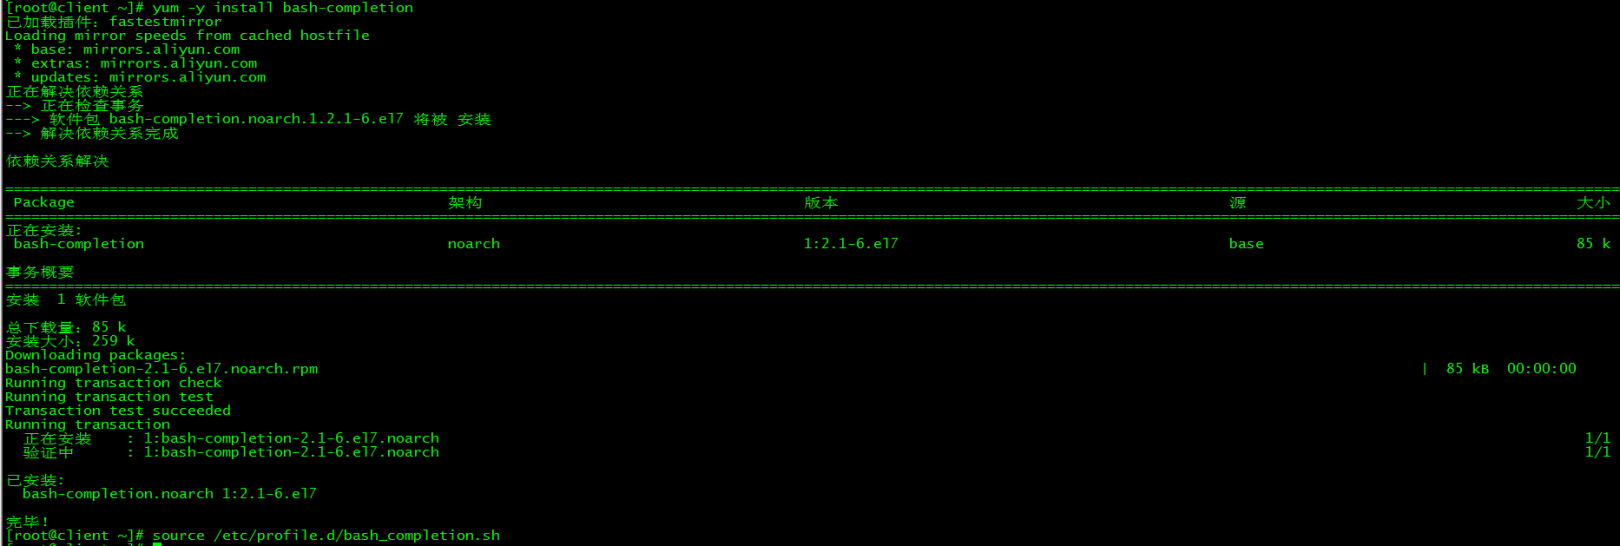
3. Command completion##
3.1 Install bash-completion
[ root@client ~]# yum -y install bash-completion
3.2 Load bash-completion
[ root@client ~]# source /etc/profile.d/bash_completion.sh
3.3 Copy admin.conf
[ root@client ~]# mkdir -p /etc/kubernetes
[ root@client ~]# scp 172.27.34.3:/etc/kubernetes/admin.conf /etc/kubernetes/[root@client ~]# echo "export KUBECONFIG=/etc/kubernetes/admin.conf">>~/.bash_profile
[ root@client ~]# source .bash_profile

3.4 Load environment variables###
[ root@master01 ~]# echo "source <(kubectl completion bash)">>~/.bash_profile
[ root@master01 ~]# source .bash_profile
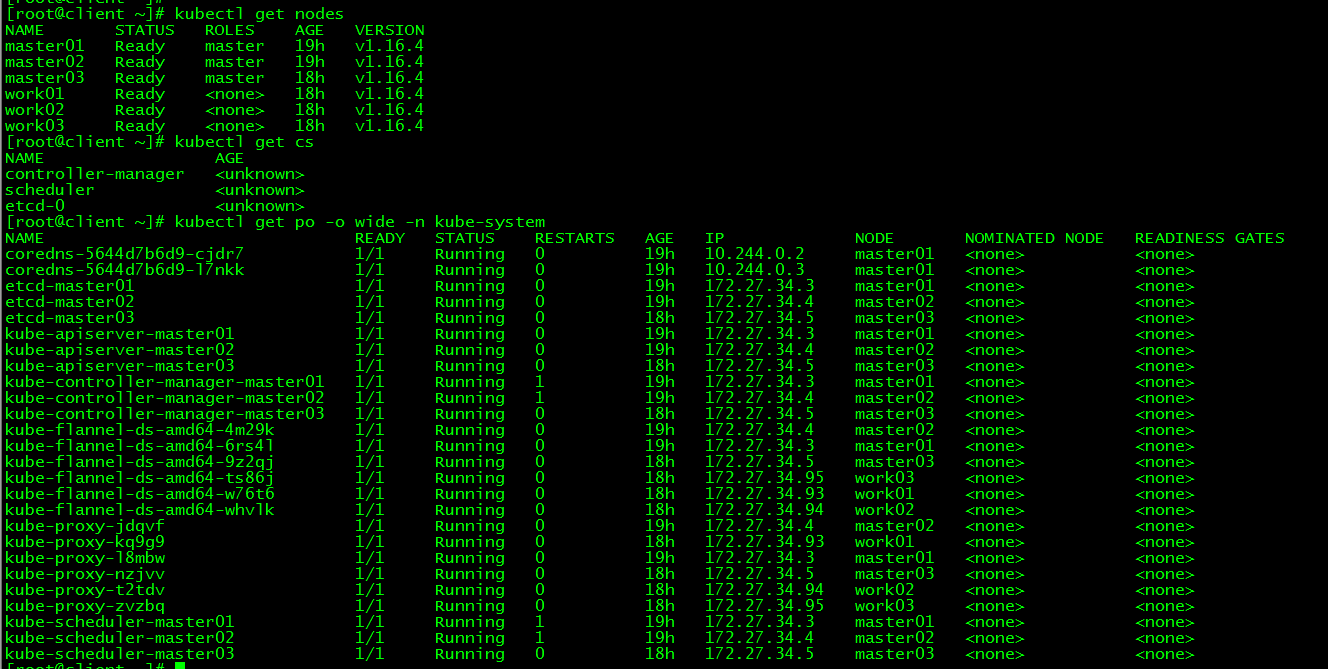
4. kubectl test##
[ root@client ~]# kubectl get nodes
[ root@client ~]# kubectl get cs
[ root@client ~]# kubectl get po -o wide -n kube-system
Eleven, Dashboard build#
The content of this section is completed on the client side
1. Download yaml
[ root@client ~]# wget https://raw.githubusercontent.com/kubernetes/dashboard/v2.0.0-beta8/aio/deploy/recommended.yaml
If the connection times out, you can try a few more times. recommended.yaml has been uploaded and can also be downloaded at the end of the article.
2. Configure yaml
2.1 Modify the mirror address###
[ root@client ~]# sed -i 's/kubernetesui/registry.cn-hangzhou.aliyuncs.com\/loong576/g' recommended.yaml
Because the default mirror warehouse network is not accessible, it is changed to Ali mirror
2.2 Extranet access###
[ root@client ~]# sed -i '/targetPort: 8443/a\ \ \ \ \ \ nodePort: 30001\n\ \ type: NodePort' recommended.yaml
Configure NodePort, access Dashboard externally through https://NodeIp:NodePort, the port is 30001 at this time
2.3 Add administrator account###
[ root@client ~]# cat >> recommended.yaml << EOF
---
# - - - - - - - - - - - - - - - - - - - dashboard-admin ------------------- #
apiVersion: v1
kind: ServiceAccount
metadata:
 name: dashboard-admin
 namespace: kubernetes-dashboard

---
apiVersion: rbac.authorization.k8s.io/v1beta1
kind: ClusterRoleBinding
metadata:
 name: dashboard-admin
subjects:- kind: ServiceAccount
 name: dashboard-admin
 namespace: kubernetes-dashboard
roleRef:
 apiGroup: rbac.authorization.k8s.io
 kind: ClusterRole
 name: cluster-admin
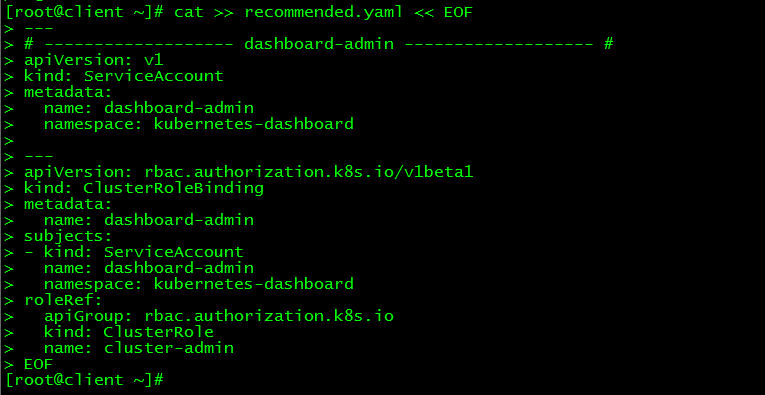
Create a super administrator account to log in to Dashboard
3. Deployment Access##
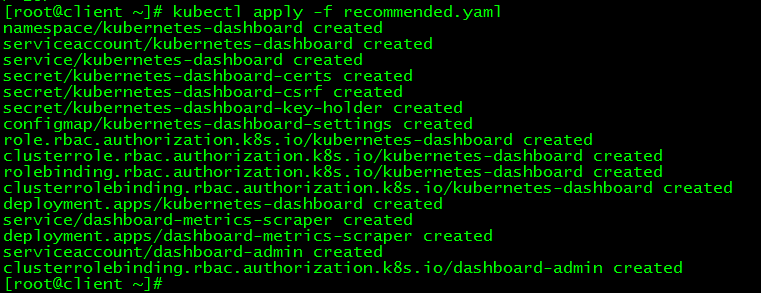
3.1 Deploy Dashboard
[ root@client ~]# kubectl apply -f recommended.yaml
3.2 Status View###
[ root@client ~]# kubectl get all -n kubernetes-dashboard

3.3 Token View###
[ root@client ~]# kubectl describe secrets -n kubernetes-dashboard dashboard-admin

The token is:
eyJhbGciOiJSUzI1NiIsImtpZCI6Ikd0NHZ5X3RHZW5pNDR6WEdldmlQUWlFM3IxbGM3aEIwWW1IRUdZU1ZKdWMifQ.eyJpc3MiOiJrdWJlcm5ldGVzL3NlcnZpY2VhY2NvdW50Iiwia3ViZXJuZXRlcy5pby9zZXJ2aWNlYWNjb3VudC9uYW1lc3BhY2UiOiJrdWJlcm5ldGVzLWRhc2hib2FyZCIsImt1YmVybmV0ZXMuaW8vc2VydmljZWFjY291bnQvc2VjcmV0Lm5hbWUiOiJkYXNoYm9hcmQtYWRtaW4tdG9rZW4tNms1ZjYiLCJrdWJlcm5ldGVzLmlvL3NlcnZpY2VhY2NvdW50L3NlcnZpY2UtYWNjb3VudC5uYW1lIjoiZGFzaGJvYXJkLWFkbWluIiwia3ViZXJuZXRlcy5pby9zZXJ2aWNlYWNjb3VudC9zZXJ2aWNlLWFjY291bnQudWlkIjoiZjk1NDE0ODEtMTUyZS00YWUxLTg2OGUtN2JmMWU5NTg3MzNjIiwic3ViIjoic3lzdGVtOnNlcnZpY2VhY2NvdW50Omt1YmVybmV0ZXMtZGFzaGJvYXJkOmRhc2hib2FyZC1hZG1pbiJ9.LAe7N8Q6XR3d0W8w-r3ylOKOQHyMg5UDfGOdUkko_tqzUKUtxWQHRBQkowGYg9wDn-nU9E-rkdV9coPnsnEGjRSekWLIDkSVBPcjvEd0CVRxLcRxP6AaysRescHz689rfoujyVhB4JUfw1RFp085g7yiLbaoLP6kWZjpxtUhFu-MKh1NOp7w4rT66oFKFR-_5UbU3FoetAFBmHuZ935i5afs8WbNzIkM6u9YDIztMY3RYLm9Zs4KxgpAmqUmBSlXFZNW2qg6hxBqDijW_1bc0V7qJNt_GXzPs2Jm1trZR6UU1C2NAJVmYBu9dcHYtTCgxxkWKwR0Qd2bApEUIJ5Wug
3.4 access###
**Please use the Firefox browser to visit: **https://VIP:30001
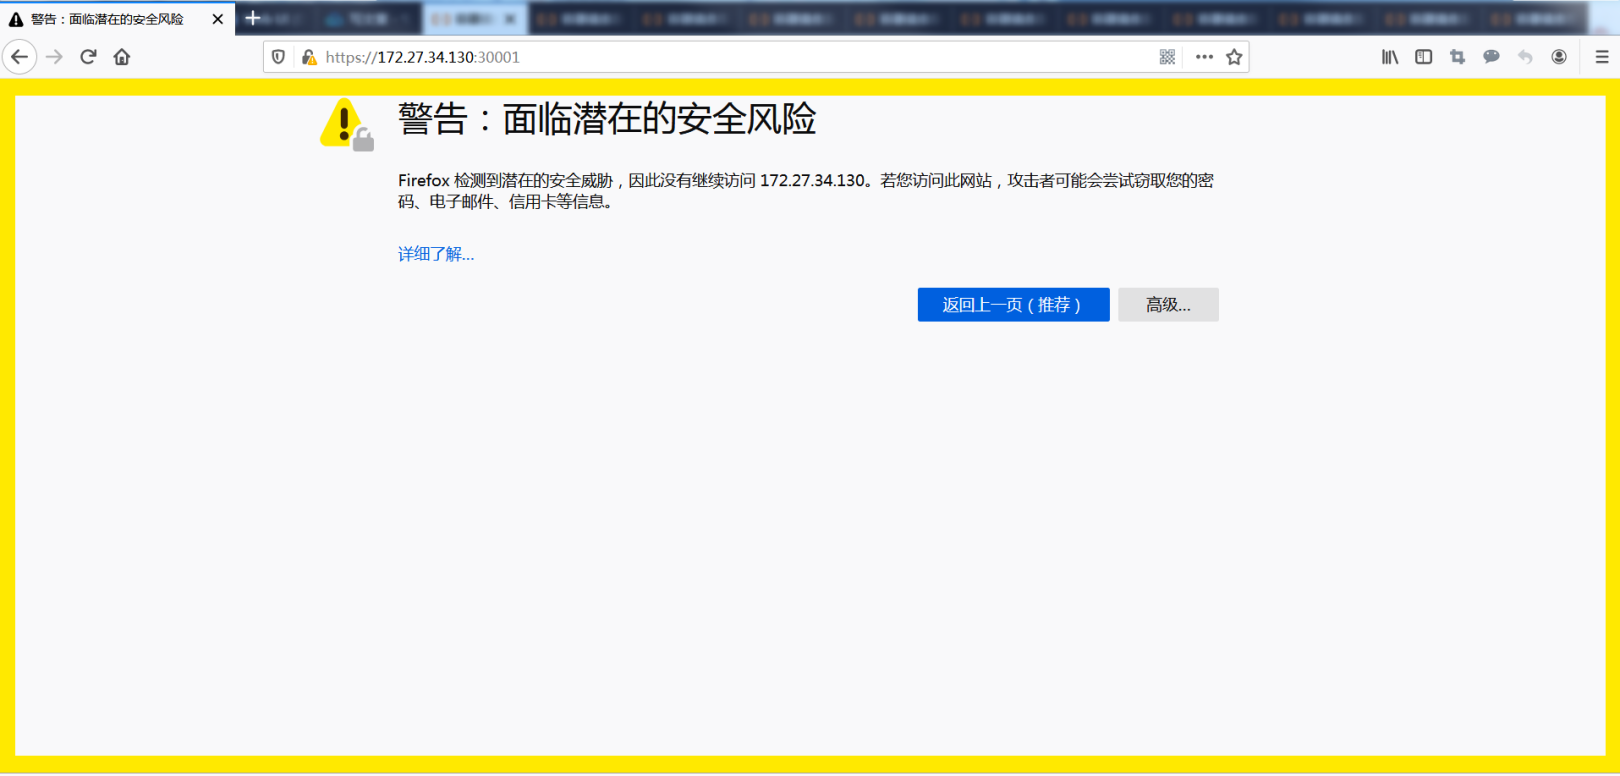
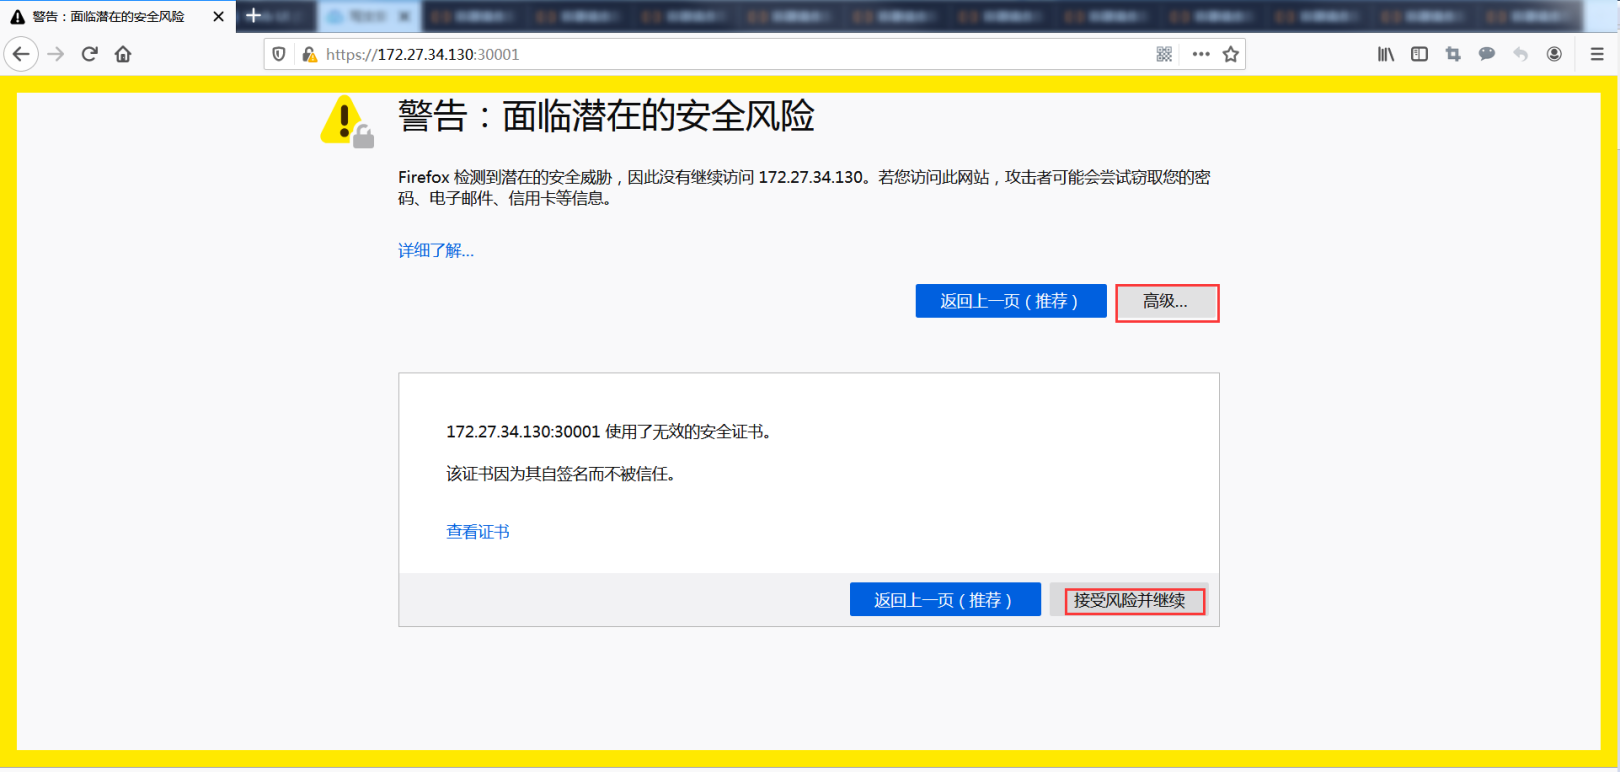
Accept the risk
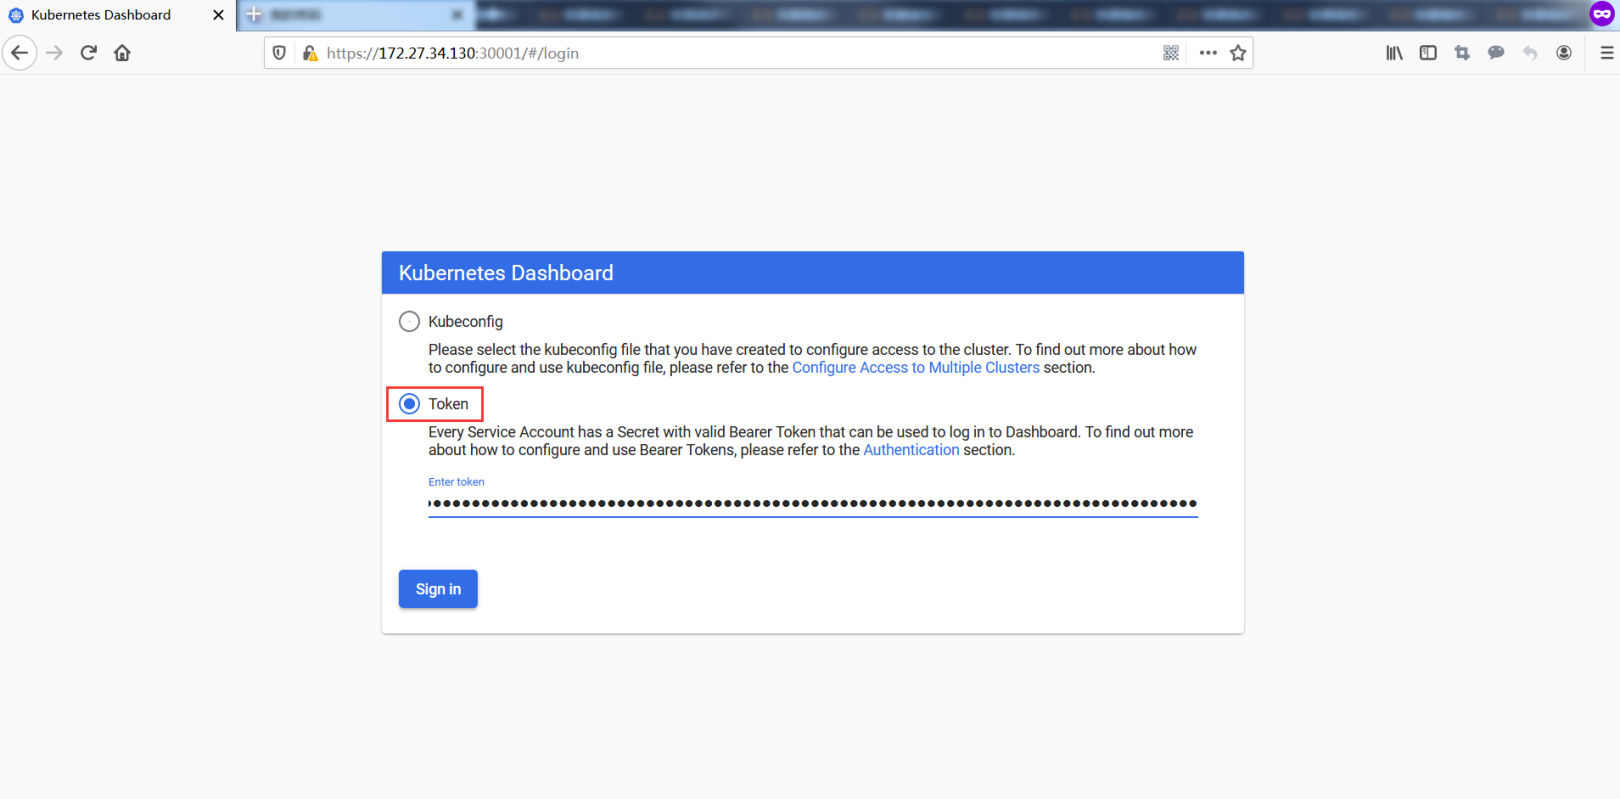
Login via token

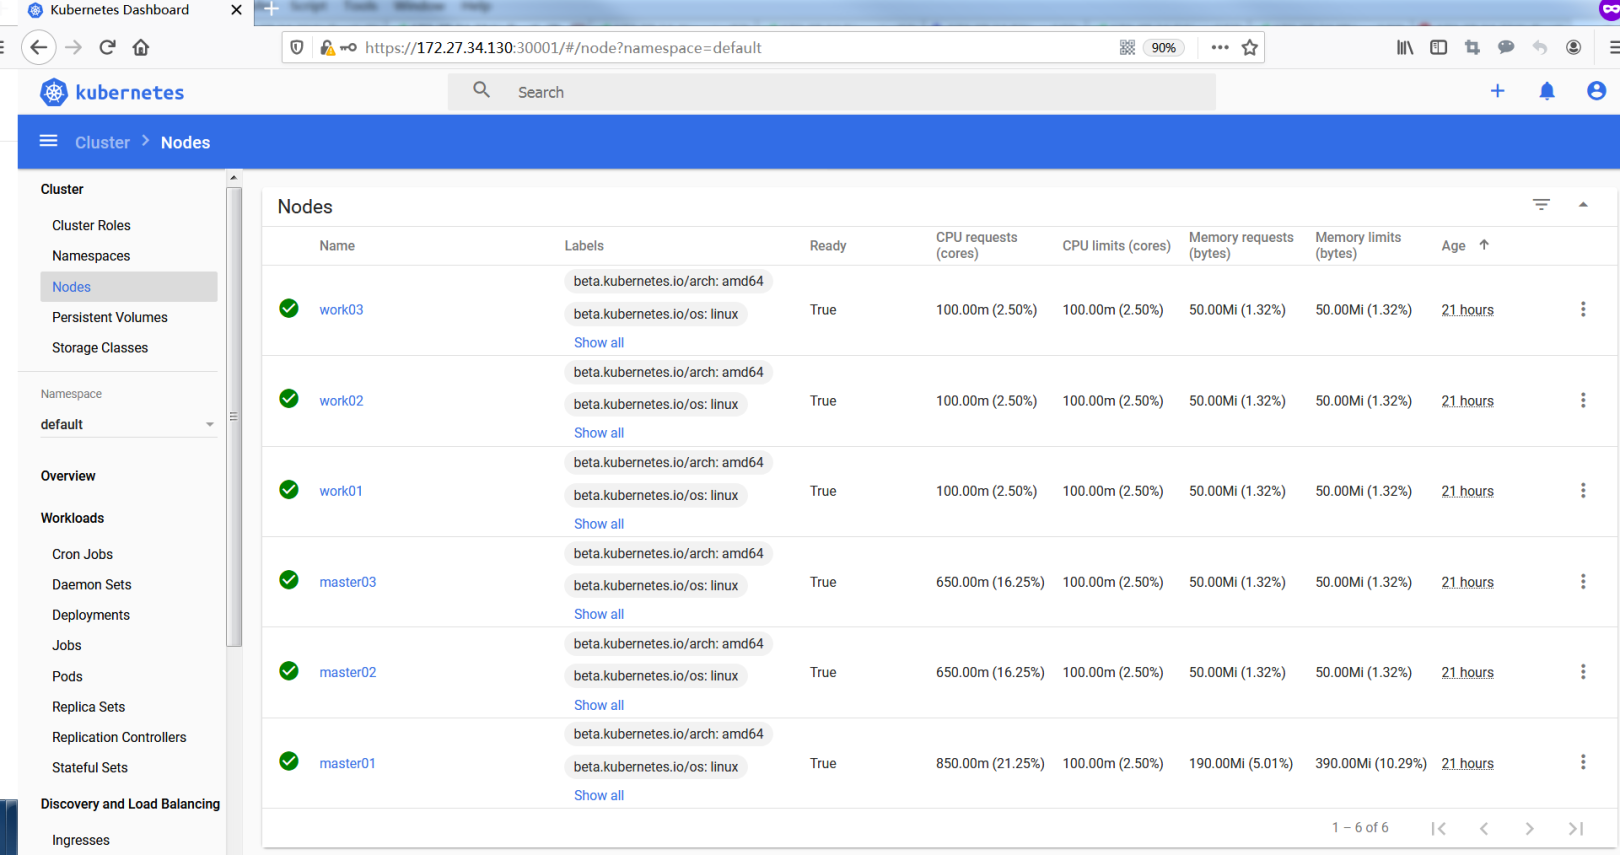
Dashboard provides functions such as cluster management, workload, service discovery, [load balancing] (https://cloud.tencent.com/product/clb?from=10680), storage, dictionary configuration, and log view.
12. Cluster high availability test#
The content of this section is completed on the client side
1. View the node where the component is located##
View the node where the apiserver is located through ip, and view the node where the scheduler and controller-manager are located through leader-elect:
[ root@master01 ~]# ip a|grep 130
 inet 172.27.34.130/32 scope global ens160
[ root@client ~]# kubectl get endpoints kube-controller-manager -n kube-system -o yaml |grep holderIdentity
 control-plane.alpha.kubernetes.io/leader:'{"holderIdentity":"master01_6caf8003-052f-451d-8dce-4516825213ad","leaseDurationSeconds":15,"acquireTime":"2020-01-02T09:36:23Z","renewTime":"2020-01-03T07:57:55Z","leaderTransitions":2}'[root@client ~]# kubectl get endpoints kube-scheduler -n kube-system -o yaml |grep holderIdentity
 control-plane.alpha.kubernetes.io/leader:'{"holderIdentity":"master01_720d65f9-e425-4058-95d7-e5478ac951f7","leaseDurationSeconds":15,"acquireTime":"2020-01-02T09:36:20Z","renewTime":"2020-01-03T07:58:03Z","leaderTransitions":2}'

| Component name | node |
|---|---|
| apiserver | master01 |
| controller-manager | master01 |
| scheduler | master01 |
2. master01 shutdown##
2.1 Shut down master01, simulate downtime###
[ root@master01 ~]# init 0
2.2 View all components###
vip floated to master02
[ root@master02 ~]# ip a|grep 130
 inet 172.27.34.130/32 scope global ens160
Controller-manager and scheduler also migrated
[ root@client ~]# kubectl get endpoints kube-controller-manager -n kube-system -o yaml |grep holderIdentity
 control-plane.alpha.kubernetes.io/leader:'{"holderIdentity":"master02_b3353e8f-a02f-4322-bf17-2f596cd25ba5","leaseDurationSeconds":15,"acquireTime":"2020-01-03T08:04:42Z","renewTime":"2020-01-03T08:06:36Z","leaderTransitions":3}'[root@client ~]# kubectl get endpoints kube-scheduler -n kube-system -o yaml |grep holderIdentity
 control-plane.alpha.kubernetes.io/leader:'{"holderIdentity":"master03_e0a2ec66-c415-44ae-871c-18c73258dc8f","leaseDurationSeconds":15,"acquireTime":"2020-01-03T08:04:56Z","renewTime":"2020-01-03T08:06:45Z","leaderTransitions":3}'
| Component name | node |
|---|---|
| apiserver | master02 |
| controller-manager | master02 |
| scheduler | master03 |
2.3 Cluster functional test###
Inquire:
[ root@client ~]# kubectl get nodes
NAME       STATUS     ROLES    AGE   VERSION
master01   NotReady   master   22h   v1.16.4
master02   Ready      master   22h   v1.16.4
master03   Ready      master   22h   v1.16.4
work01     Ready      <none>   22h   v1.16.4
work02     Ready      <none>   22h   v1.16.4
work03     Ready      <none>   22h   v1.16.4
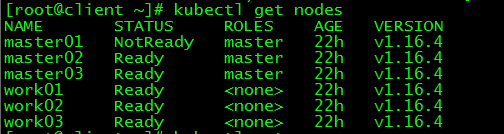
master01 status is NotReady
**New pod: **
[ root@client ~]# more nginx-master.yaml
apiVersion: apps/v1             #The description file follows the extensions/Kubernetes API v1beta1
kind: Deployment                #Create resource type as Deployment
metadata:                       #The resource metadata
 name: nginx-master            #Deployment name
spec:                           #Deployment specifications
 selector:
 matchLabels:
  app: nginx
 replicas:3                   #Specify the number of copies as 3
 template:                     #Define Pod template
 metadata:                   #Define Pod metadata
  labels:                   #Define label
  app: nginx              #The key and value of the label are app and nginx respectively
 spec:                       #Pod specifications
  containers:- name: nginx             #The name of the container
  image: nginx:latest     #Create the image used by the container
[ root@client ~]# kubectl apply -f nginx-master.yaml
deployment.apps/nginx-master created
[ root@client ~]# kubectl get po -o wide
NAME                            READY   STATUS    RESTARTS   AGE     IP           NODE     NOMINATED NODE   READINESS GATES
nginx-master-75b7bfdb6b-lnsfh   1/1     Running   0          4m44s   10.244.5.6   work03   <none><none>
nginx-master-75b7bfdb6b-vxfg7   1/1     Running   0          4m44s   10.244.3.3   work01   <none><none>
nginx-master-75b7bfdb6b-wt9kc   1/1     Running   0          4m44s   10.244.4.5   work02   <none><none>
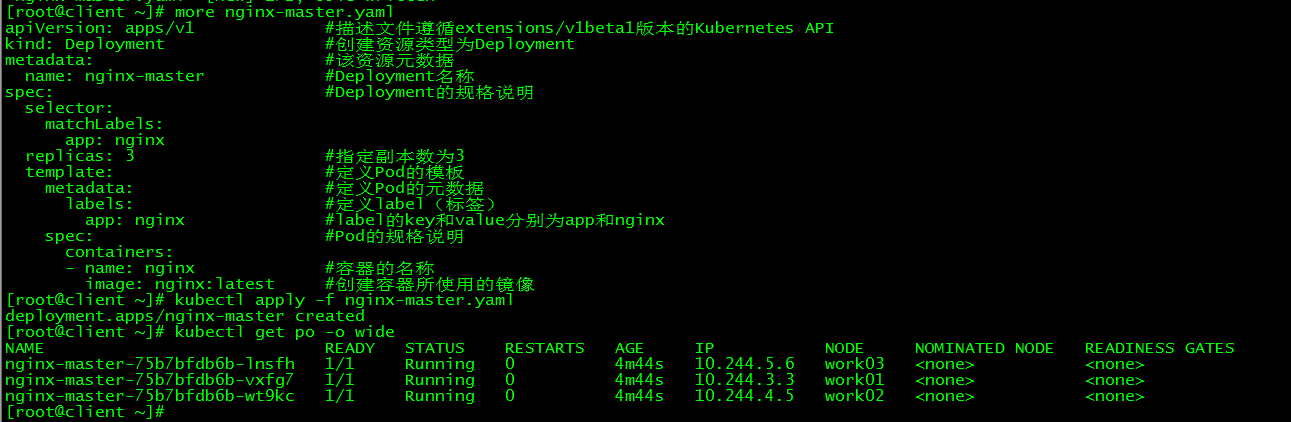
2.4 in conclusion###
When a control plane node goes down, the VIP will drift, and the functions of the cluster will not be affected.
3. master02 shutdown##
Shut down master02 while shutting down master01 to test whether the cluster can still serve externally normally.
3.1 Close master02:
[ root@master02 ~]# init 0
3.2 View VIP:
[ root@master03 ~]# ip a|grep 130
 inet 172.27.34.130/32 scope global ens160
vip drifts to the only control plane: master03
3.3 Cluster function test###
[ root@client ~]# kubectl get nodes
Error from server: etcdserver: request timed out
[ root@client ~]# kubectl get nodes
The connection to the server 172.27.34.130:6443 was refused - did you specify the right host or port?
The etcd cluster crashes, and the entire k8s cluster cannot serve externally.
**All scripts and configuration files in this article have been uploaded: **Centos7.6-install-k8s-v1.16.4-HA-cluster