k8s practice (1): Centos 7.6 deployment k8s (v1.14.2) cluster
**Environmental description: **
| Hostname | operating system version | ip | docker version | kubelet version | kubeadm version | kubectl version | flannel version | remarks |
|---|---|---|---|---|---|---|---|---|
| master | Centos 7.6.1810 | 172.27.9.131 | Docker 18.09.6 | V1.14.2 | V1.14.2 | V1.14.2 | V0.11.0 | master host |
| node01 | Centos 7.6.1810 | 172.27.9.135 | Docker 18.09.6 | V1.14.2 | V1.14.2 | V1.14.2 | V0.11.0 | node node |
| node02 | Centos 7.6.1810 | 172.27.9.136 | Docker 18.09.6 | V1.14.2 | V1.14.2 | V1.14.2 | V0.11.0 | node node |
**For Centos7.6 installation details, please refer to: **Centos7.6 operating system installation and optimization record
The name Kubernetes is derived from Greek, meaning "helmsman", and is also the source of words such as "manager" and "government". k8s is the abbreviation of Kubernetes (use the number "8" to replace the middle 8 letters "ubernete")
**Preface: **This article uses kudeadm to install kubernetes v1.14.2 cluster on centos7.6 (currently both centos and kubernetes are the latest version), which is divided into five parts:
**1. Docker installation; **
2. Preparation for k8s installation;
**3. Master node installation; **
**Four, Node node installation; **
**Five, Dashboard installation; **
**6. Cluster testing. **
One, Docker installation#
All nodes need to install docker
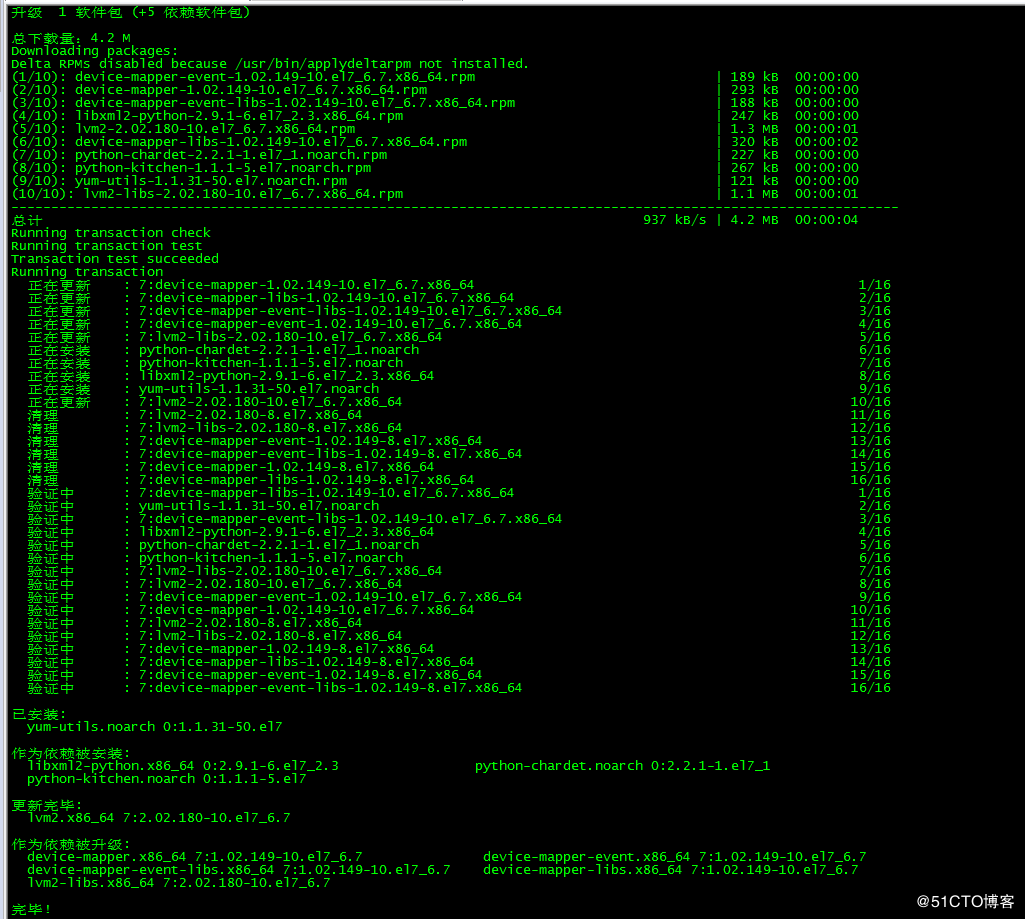
1. Install dependencies##
[ root@centos7 ~]# yum install -y yum-utils device-mapper-persistent-data lvm2
2. Set up Docker source##
[ root@centos7 ~]# yum-config-manager --add-repo https://download.docker.com/linux/centos/docker-ce.repo

3. Install Docker CE
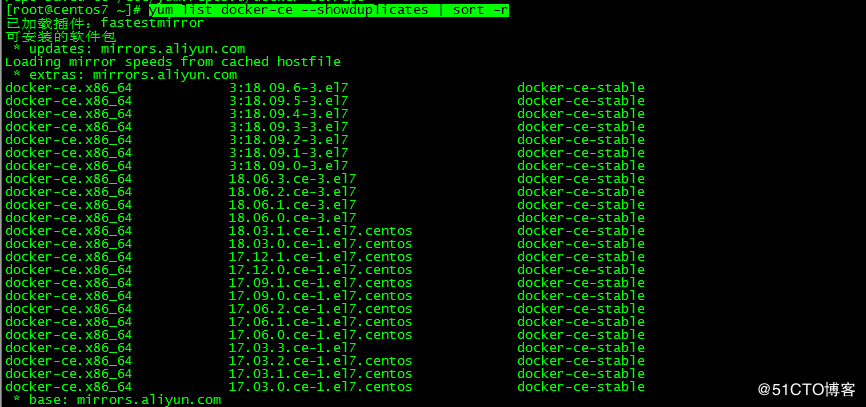
3.1 Docker installation version view###
[ root@centos7 ~]# yum list docker-ce --showduplicates | sort -r
3.2 Install docker
[ root@centos7 ~]# yum install docker-ce-18.09.6 docker-ce-cli-18.09.6 containerd.io
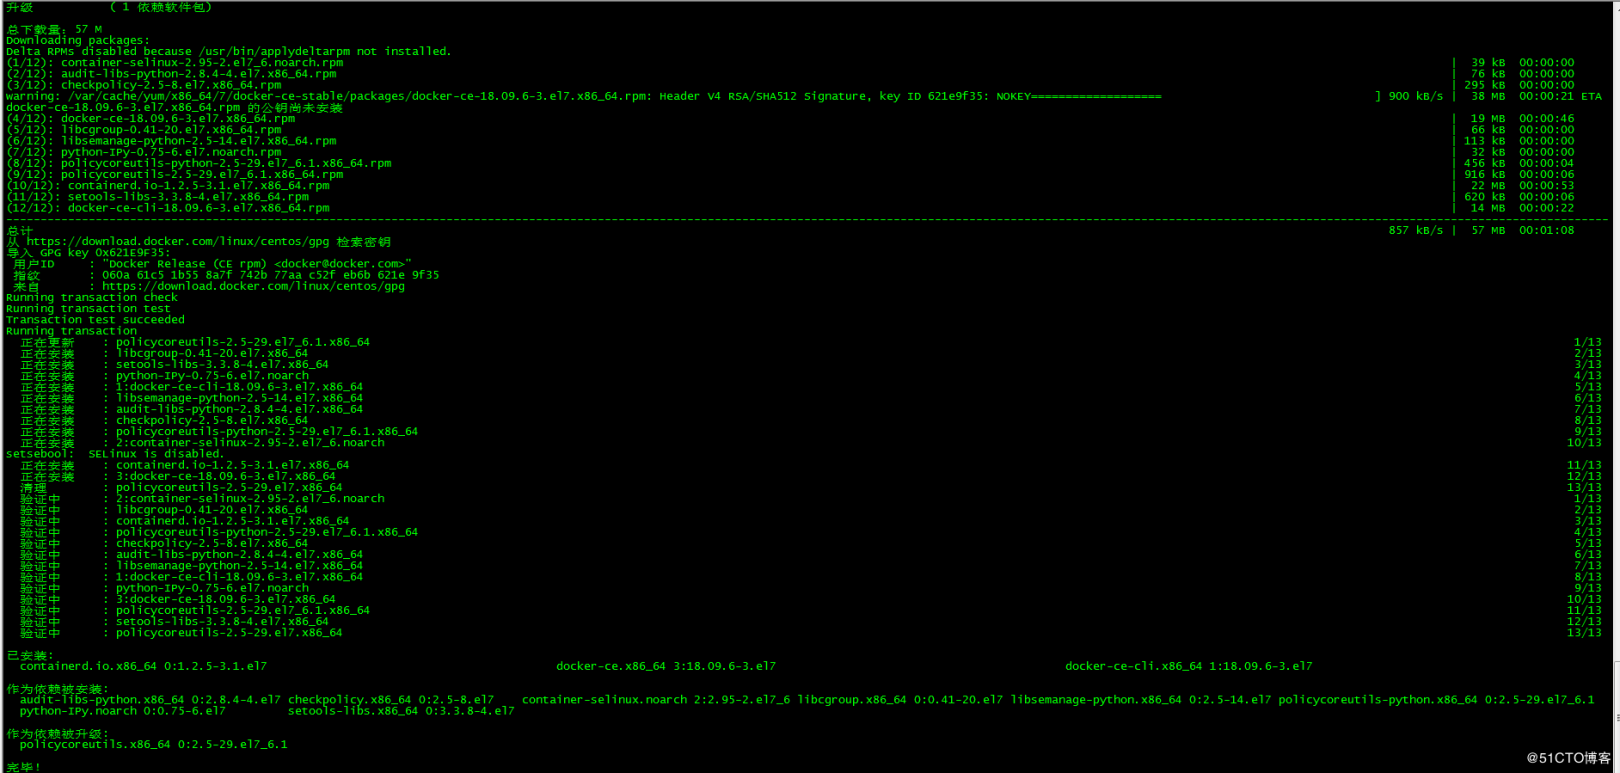
The docker version specified for installation is 18.09.6. Since this version is currently the latest version, it can be installed directly without specifying the version:
yum install -y docker-ce docker-ce-cli containerd.io
4. Start Docker
[ root@centos7 ~]# systemctl start docker
[ root@centos7 ~]# systemctl enable docker

5. Command completion##
5.1 Install bash-completion
[ root@centos7 ~]# yum -y install bash-completion
5.2 Load bash-completion
[ root@centos7 /]# source /etc/profile.d/bash_completion.sh
6. Mirror acceleration##
Since the Docker Hub server is located abroad, it will be slower to download the image, you can configure the image accelerator. The main accelerators are: China registry mirror, Alibaba Cloud accelerator, and DaoCloud accelerator officially provided by Docker. This article takes the configuration of Alibaba accelerator as an example.
6.1 Log in to Alibaba Cloud Container Module###
The login address is: https://cr.console.aliyun.com, if you have not registered, you can register an Alibaba Cloud account first
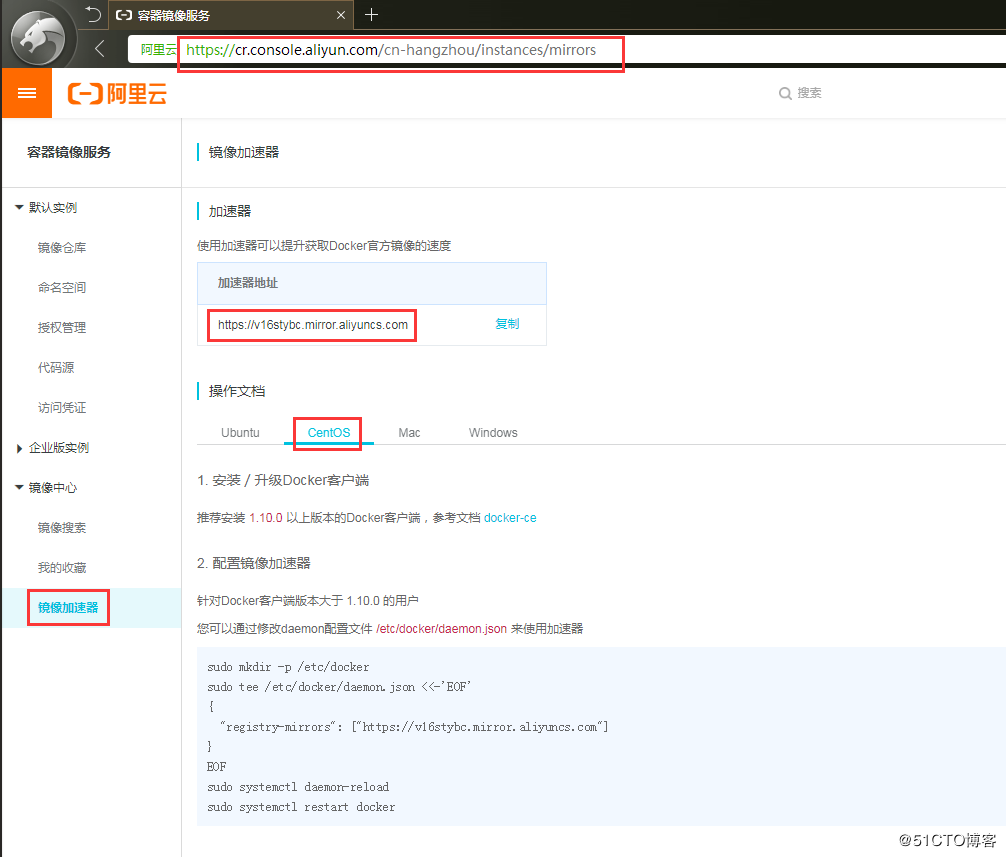
6.2 Configure Mirror Accelerator###
Configure the daemon.json file
[ root@centos7 ~]# mkdir -p /etc/docker
[ root@centos7 ~]# tee /etc/docker/daemon.json <<-'EOF'{"registry-mirrors":["https://v16stybc.mirror.aliyuncs.com"]}
EOF
Restart service
[ root@centos7 ~]# systemctl daemon-reload
[ root@centos7 ~]# systemctl restart docker
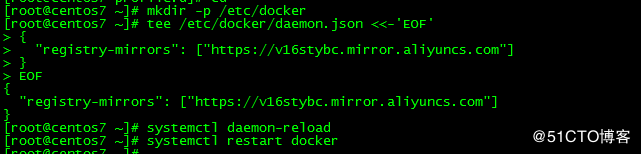
The accelerator configuration is complete
7. verification##
[ root@centos7 ~]# docker --version
[ root@centos7 ~]# docker run hello-world
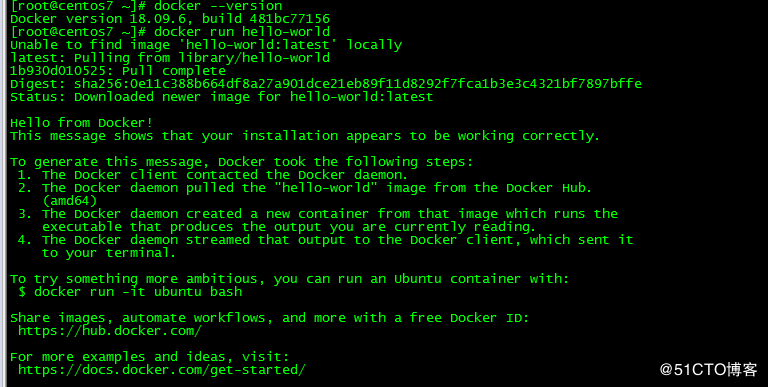
Verify whether docker is installed successfully by querying the docker version and running the container hello-world.
Two, k8s installation preparations#
The installation of Centos is that the firewall and selinux have been disabled and the Ali source has been set. Both master and node nodes perform this part of the operation.
1. Configure the host name##
1.1 Modify host name###
[ root@centos7 ~]# hostnamectl set-hostname master
[ root@centos7 ~]# more /etc/hostname
master
Exit and log in again to display the newly set host name master
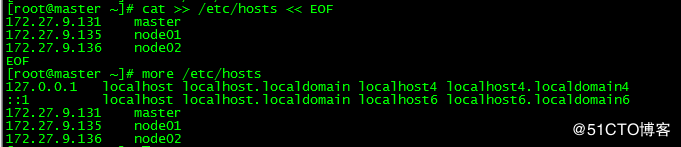
1.2 Modify the hosts file###
[ root@master ~]# cat >>/etc/hosts << EOF
172.27.9.131 master
172.27.9.135 node01
172.27.9.136 node02
EOF
2. Verify mac address uuid
[ root@master ~]# cat /sys/class/net/ens33/address
[ root@master ~]# cat /sys/class/dmi/id/product_uuid
Ensure that the mac and uuid of each node are unique
3. Disable swap
3.1 Temporarily disable
[ root@master ~]# swapoff -a

3.2 Permanently disable
If you need to restart and take effect, you need to modify the configuration file /etc/fstab after disabling swap, and comment swap
[ root@master ~]# sed -i.bak '/swap/s/^/#/'/etc/fstab
4. Kernel parameter modification##
4.1 Temporary modification###
[ root@master ~]# sysctl net.bridge.bridge-nf-call-iptables=1
net.bridge.bridge-nf-call-iptables =1[root@master ~]# sysctl net.bridge.bridge-nf-call-ip6tables=1
net.bridge.bridge-nf-call-ip6tables =1
4.2 Permanent modification###
[ root@master ~]# cat <<EOF >/etc/sysctl.d/k8s.conf
net.bridge.bridge-nf-call-ip6tables =1
net.bridge.bridge-nf-call-iptables =1
EOF
[ root@master ~]# sysctl -p /etc/sysctl.d/k8s.conf

5. Modify Cgroup Driver
5.1 Modify daemon.json
Modify daemon.json, add'"exec-opts": ["native.cgroupdriver=systemd"'
[ root@master ~]# more /etc/docker/daemon.json
{" registry-mirrors":["https://v16stybc.mirror.aliyuncs.com"],"exec-opts":["native.cgroupdriver=systemd"]}
5.2 Reload docker
[ root@master ~]# systemctl daemon-reload
[ root@master ~]# systemctl restart docker
The cgroupdriver is modified to eliminate the warning:
WARNING IsDockerSystemdCheck: detected "cgroupfs" as the Docker cgroup driver. The recommended driver is "systemd". Please follow the guide at https://kubernetes.io/docs/setup/cri/
6. Set up kubernetes source##
6.1 Added kubernetes source###
[ root@master ~]# cat <<EOF >/etc/yum.repos.d/kubernetes.repo
[ kubernetes]
name=Kubernetes
baseurl=https://mirrors.aliyun.com/kubernetes/yum/repos/kubernetes-el7-x86_64/
enabled=1
gpgcheck=1
repo_gpgcheck=1
gpgkey=https://mirrors.aliyun.com/kubernetes/yum/doc/yum-key.gpg https://mirrors.aliyun.com/kubernetes/yum/doc/rpm-package-key.gpg
EOF
- [] The one in the brackets is the repository id, which is unique and used to identify different warehouses
- name Warehouse name, custom
- baseurl warehouse address
- enable Whether to enable the warehouse, the default is 1 means enable
- Whether gpgcheck verifies the legality of the package obtained from the warehouse, 1 is verification
- Whether repo_gpgcheck verifies the validity of metadata metadata is the package list, 1 is verification
- gpgkey=URL is the location of the public key file of the digital signature. If the gpgcheck value is 1, you need to specify the location of the gpgkey file here. If the gpgcheck value is 0, you don’t need this item.
6.2 refresh cache###
[ root@master ~]# yum clean all
[ root@master ~]# yum -y makecache
Three, Master node installation#
1. Version view##
[ root@master ~]# yum list kubelet --showduplicates | sort -r

The latest version is 1.14.2, which supports docker versions 1.13.1, 17.03, 17.06, 17.09, 18.06, 18.09.
2. Install kubelet, kubeadm and kubectl
2.1 Install three packages###
[ root@master ~]# yum install -y kubelet-1.14.2 kubeadm-1.14.2 kubectl-1.14.2
If you do not specify the version and run'yum install -y kubelet kubeadm kubectl' directly, the latest version, 1.14.2, will be installed by default, and the results of the two methods are the same.
2.2 Installation package description###
- kubelet runs on all nodes in the cluster and is a tool used to start objects such as Pod and containers
- kubeadm is a command tool used to initialize and start the cluster
- kubectl is a command line used to communicate with the cluster. Through kubectl, you can deploy and manage applications, view various resources, create, delete and update various components
2.3 Start kubelet
Start kubelet and set it to boot
[ root@master ~]# systemctl enable kubelet && systemctl start kubelet
2.4 kubelet command completion###
[ root@master ~]# echo "source <(kubectl completion bash)">>~/.bash_profile
[ root@master ~]# source .bash_profile
3. Download mirror##
3.1 Mirror download script###
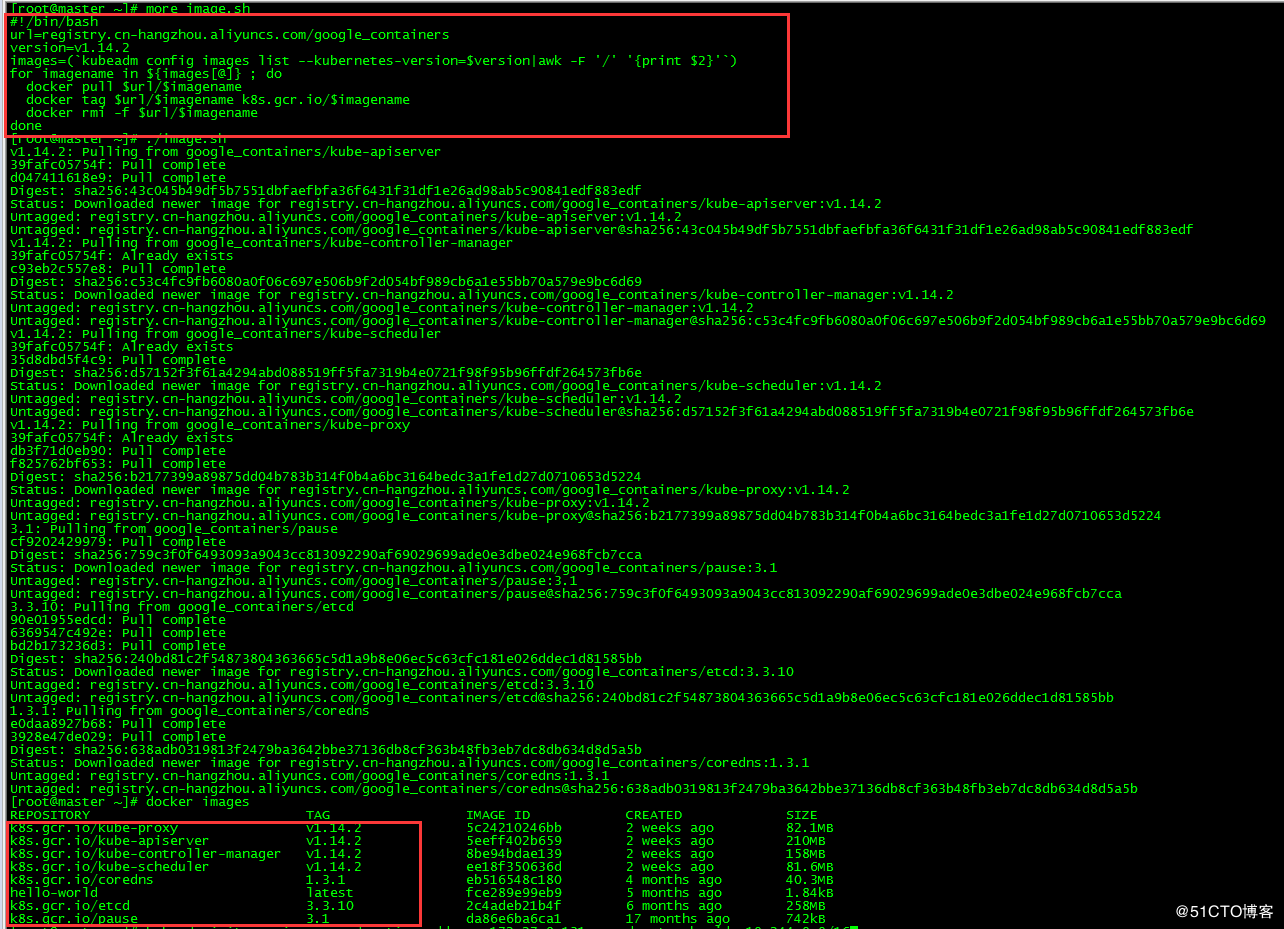
Almost all Kubernetes installation components and Docker images are placed on goolge's own website. Direct access may cause network problems. The solution here is to download the image from the Alibaba Cloud mirror warehouse, pull it locally and change it back to the default image tag. .
[ root@master ~]# more image.sh
#! /bin/bash
url=registry.cn-hangzhou.aliyuncs.com/google_containers
version=v1.14.2
images=(`kubeadm config images list --kubernetes-version=$version|awk -F '/' '{print $2}'`)for imagename in ${images[@]};do
 docker pull $url/$imagename
 docker tag $url/$imagename k8s.gcr.io/$imagename
 docker rmi -f $url/$imagename
done
The url is the address of the Alibaba Cloud mirror warehouse, and the version is the installed version of kubernetes.
3.2 Download mirror###
Run the script image.sh to download the specified version of the image
[ root@master ~]# ./image.sh
[ root@master ~]# docker images
4. Initialize Master
4.1 initialization###
[ root@master ~]# kubeadm init --apiserver-advertise-address 172.27.9.131--pod-network-cidr=10.244.0.0/16
apiserver-advertise-address specifies the interface of the master, pod-network-cidr specifies the range of the Pod network, and the flannel network solution is used here.
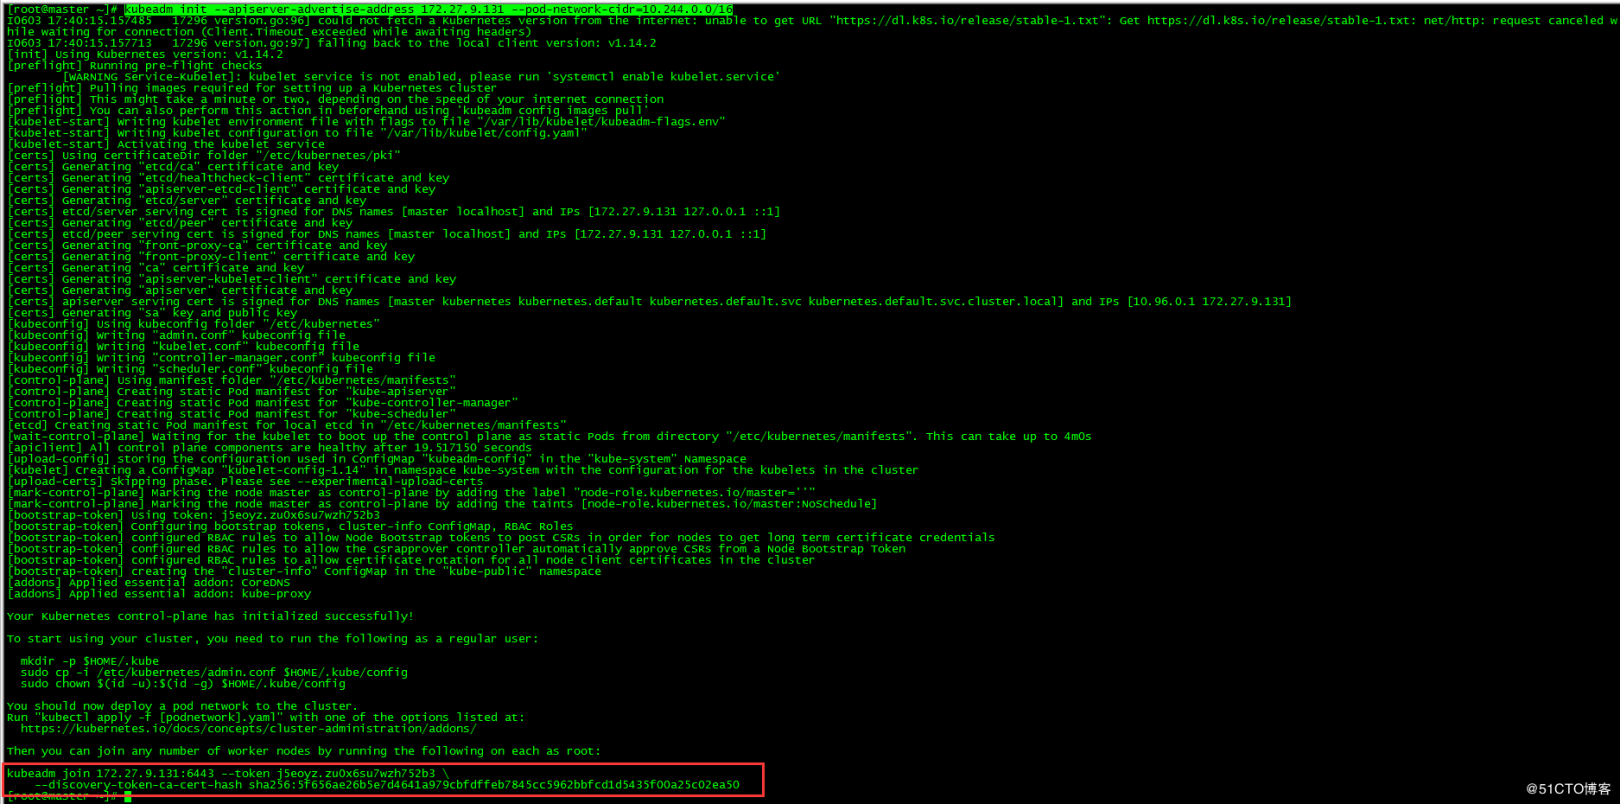
Record the output of kubeadm join. You will need this command later to add each node to the cluster.
4.2 Load environment variables###
[ root@master ~]# echo "export KUBECONFIG=/etc/kubernetes/admin.conf">>~/.bash_profile
[ root@master ~]# source .bash_profile
All operations in this article are performed under the root user, if it is a non-root user, perform the following operations:
mkdir -p $HOME/.kube
cp -i /etc/kubernetes/admin.conf $HOME/.kube/config
chown $(id -u):$(id -g) $HOME/.kube/config
5. Install pod network##
[ root@master ~]# kubectl apply -f https://raw.githubusercontent.com/coreos/flannel/master/Documentation/kube-flannel.yml

6. master node configuration##
taint: The meaning of taint. If a node is tainted, the pod is not allowed to run on this node
6.1 Delete the default taint of the master node###
By default, the cluster does not schedule pods on the master. If you prefer to schedule pods on the master, you can perform the following operations:
**View stains: **
[ root@master ~]# kubectl describe node master|grep -i taints
Taints:             node-role.kubernetes.io/master:NoSchedule
Delete the default stain:
[ root@master ~]# kubectl taint nodes master node-role.kubernetes.io/master-
node/master untainted
6.2 Stain mechanism###
grammar:
kubectl taint node [node] key=value[effect]
  among them[effect]Possible value:[ NoSchedule | PreferNoSchedule | NoExecute ]
  NoSchedule:Must not be scheduled
  PreferNoSchedule:Try not to schedule
  NoExecute:Not only will not schedule,Will also expel existing Pods on Node
Smear
[ root@master ~]# kubectl taint node master key1=value1:NoSchedule
node/master tainted
[ root@master ~]# kubectl describe node master|grep -i taints
Taints:             key1=value1:NoSchedule
The key is key1, the value is value1 (value can be empty), and the effect is NoSchedule, which means it must not be scheduled
**Remove stains: **
[ root@master ~]# kubectl taint nodes master  key1-
node/master untainted
[ root@master ~]# kubectl describe node master|grep -i taints
Taints:<none>
Delete all effects of the specified key,'-' means to remove all stains with key1 as the key
Four, Node node installation#
1. Install kubelet, kubeadm and kubectl
Same as master node
2. Download mirror##
Same as master node
3. Join the cluster##
The following operations are executed on the master
3.1 View token
[ root@master ~]# kubeadm token list
TOKEN                     TTL         EXPIRES                     USAGES                   DESCRIPTION                                                EXTRA GROUPS
j5eoyz.zu0x6su7wzh752b3   <invalid>2019-06-04T17:40:41+08:00   authentication,signing   The default bootstrap token generated by 'kubeadm init'.   system:bootstrappers:kubeadm:default-node-token
Found that the token at the time of initialization has expired
3.2 Generate a new token###
[ root@master ~]# kubeadm token create
1 zl3he.fxgz2pvxa3qkwxln
3.3 Generate a new encrypted string
[ root@master ~]# openssl x509 -pubkey -in/etc/kubernetes/pki/ca.crt | openssl rsa -pubin -outform der 2>/dev/null| \
 openssl dgst -sha256 -hex | sed 's/^.* //'
3.4 Node node joins the cluster###
Perform the following operations on the node node:
[ root@node01 ~]# kubeadm join 172.27.9.131:6443--token 1zl3he.fxgz2pvxa3qkwxln --discovery-token-ca-cert-hash sha256:5f656ae26b5e7d4641a979cbfdffeb7845cc5962bbfcd1d5435f00a25c02ea50

Five, Dashboard installation#
1. Download yaml
[ root@master ~]# wget https://raw.githubusercontent.com/kubernetes/dashboard/master/aio/deploy/recommended/kubernetes-dashboard.yaml
If the connection times out, you can try a few more times
2. Configure yaml
2.1 Modify the mirror address###
sed -i 's/k8s.gcr.io/registry.cn-hangzhou.aliyuncs.com\/kuberneters/g' kubernetes-dashboard.yaml
Because the default mirror warehouse network is not accessible, it is changed to Ali mirror
2.2 Extranet access###
sed -i '/targetPort:/a\ \ \ \ \ \ nodePort: 30001\n\ \ type: NodePort' kubernetes-dashboard.yaml
Configure NodePort, access Dashboard externally through https://NodeIp:NodePort, the port is 30001 at this time
2.3 Add administrator account###
cat >> kubernetes-dashboard.yaml << EOF
---
# - - - - - - - - - - - - - - - - - - - dashboard-admin ------------------- #
apiVersion: v1
kind: ServiceAccount
metadata:
 name: dashboard-admin
 namespace: kube-system

---
apiVersion: rbac.authorization.k8s.io/v1beta1
kind: ClusterRoleBinding
metadata:
 name: dashboard-admin
subjects:- kind: ServiceAccount
 name: dashboard-admin
 namespace: kube-system
roleRef:
 apiGroup: rbac.authorization.k8s.io
 kind: ClusterRole
 name: cluster-admin
 EOF
Create a super administrator account to log in to Dashboard
3. Deployment Access##
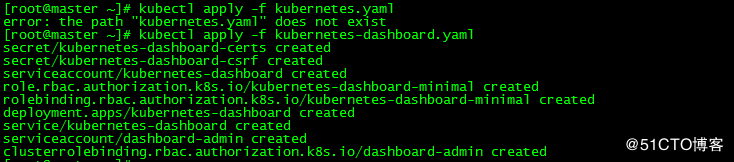
3.1 Deploy Dashboard
[ root@master ~]# kubectl apply -f kubernetes-dashboard.yaml
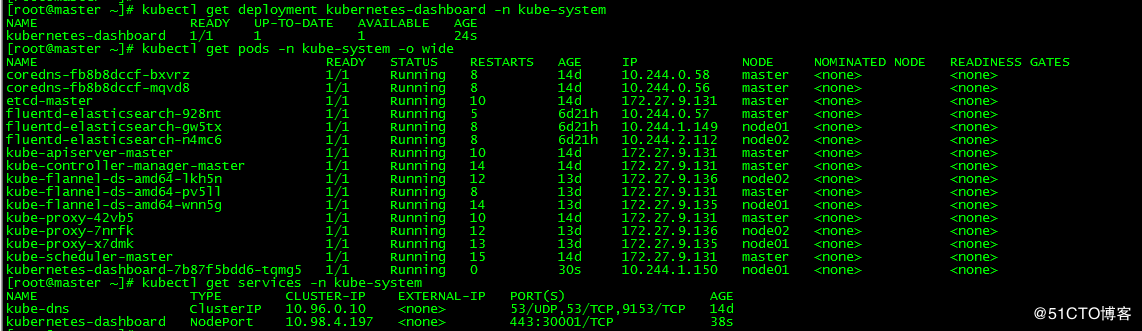
3.2 Status View###
[ root@master ~]# kubectl get deployment kubernetes-dashboard -n kube-system
[ root@master ~]# kubectl get pods -n kube-system -o wide
[ root@master ~]# kubectl get services -n kube-system
3.3 Token View###
kubectl describe secrets -n kube-system dashboard-admin

The token is:
eyJhbGciOiJSUzI1NiIsImtpZCI6IiJ9.eyJpc3MiOiJrdWJlcm5ldGVzL3NlcnZpY2VhY2NvdW50Iiwia3ViZXJuZXRlcy5pby9zZXJ2aWNlYWNjb3VudC9uYW1lc3BhY2UiOiJrdWJlLXN5c3RlbSIsImt1YmVybmV0ZXMuaW8vc2VydmljZWFjY291bnQvc2VjcmV0Lm5hbWUiOiJkYXNoYm9hcmQtYWRtaW4tdG9rZW4ta3Q5eDciLCJrdWJlcm5ldGVzLmlvL3NlcnZpY2VhY2NvdW50L3NlcnZpY2UtYWNjb3VudC5uYW1lIjoiZGFzaGJvYXJkLWFkbWluIiwia3ViZXJuZXRlcy5pby9zZXJ2aWNlYWNjb3VudC9zZXJ2aWNlLWFjY291bnQudWlkIjoiYzI2MjZiYTUtOTE5Ny0xMWU5LTk2OTQtMDAwYzI5ZDk5YmEzIiwic3ViIjoic3lzdGVtOnNlcnZpY2VhY2NvdW50Omt1YmUtc3lzdGVtOmRhc2hib2FyZC1hZG1pbiJ9.XnBTkkMNQx_hKlTml7B-D1Ip-hp-WFi1mgjgx2E_SHbaRJluLN5qXWLsBAPl1Cgp-IY5ujg9pYePAZL2GDYyjnCaMiFmQsRW-zbNfkyYfPWje8MtCxJqoILTlCxsa5apwWsKdbsW_X8moMC4cM92hApQshn_-x-V7cxydEKuQPrB3PfQ7ReNMM5VCj4rexAh9Qr7I1wEHFa0KX1XaDRiedjWgXFKU7kWX2VQ3vwnfRdpKq_r0vlDSQRVdrMDPT1BHuBaUn8Gz-EdLR3qUy5vlZbzo1UFvxuL2enoZxntHZmnP1vg4552HROeEJhigdtRSbDvxHTEGWT3A67faha-Kg
3.4 access###
https://NodeIp:30001
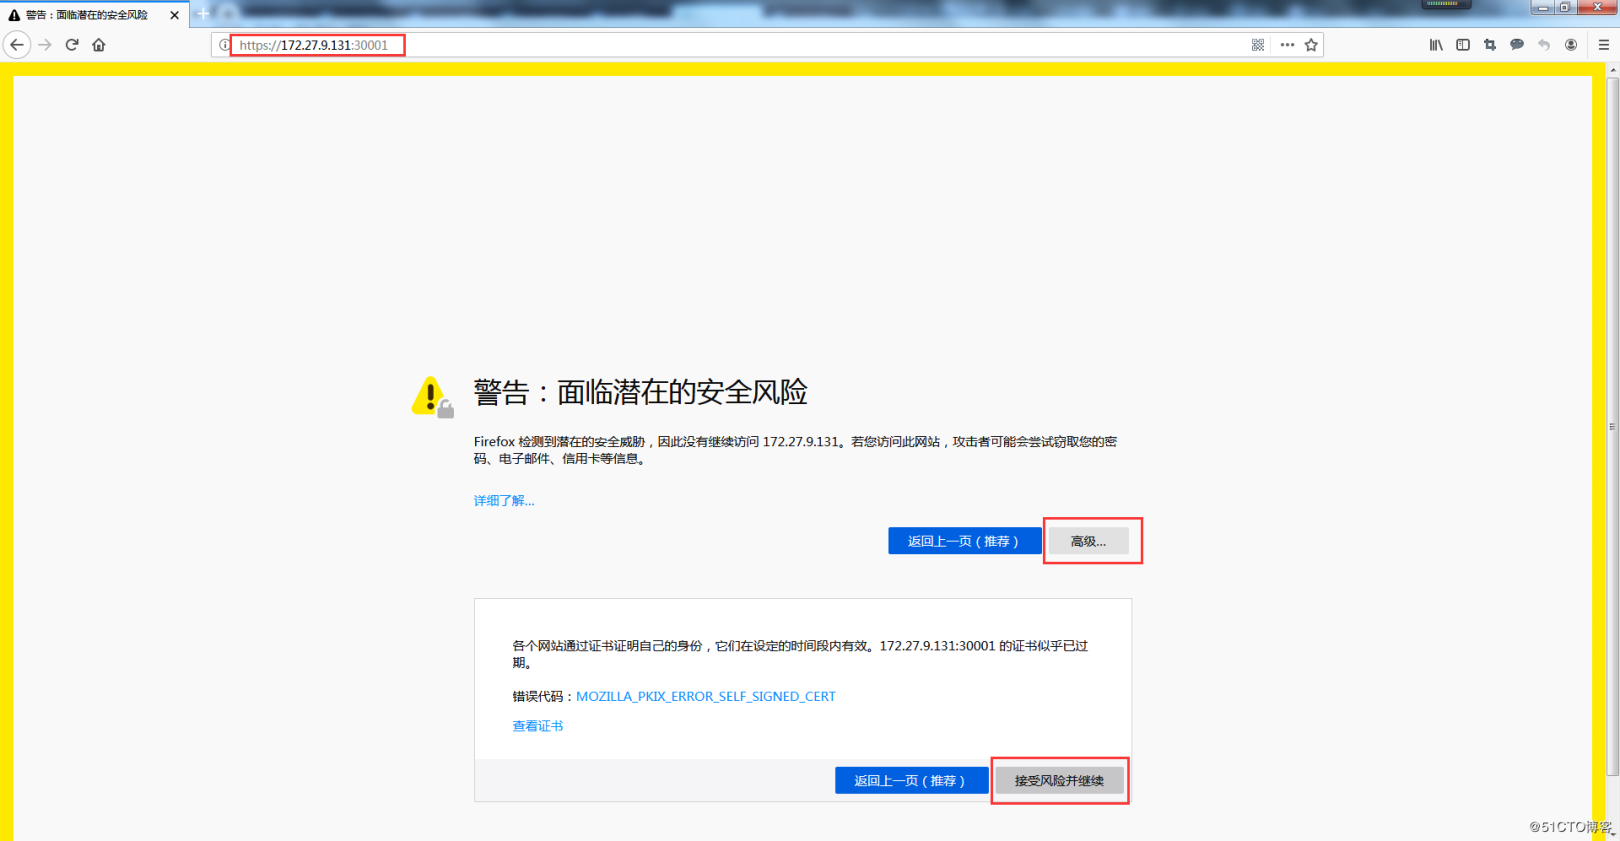
Please use Firefox to access
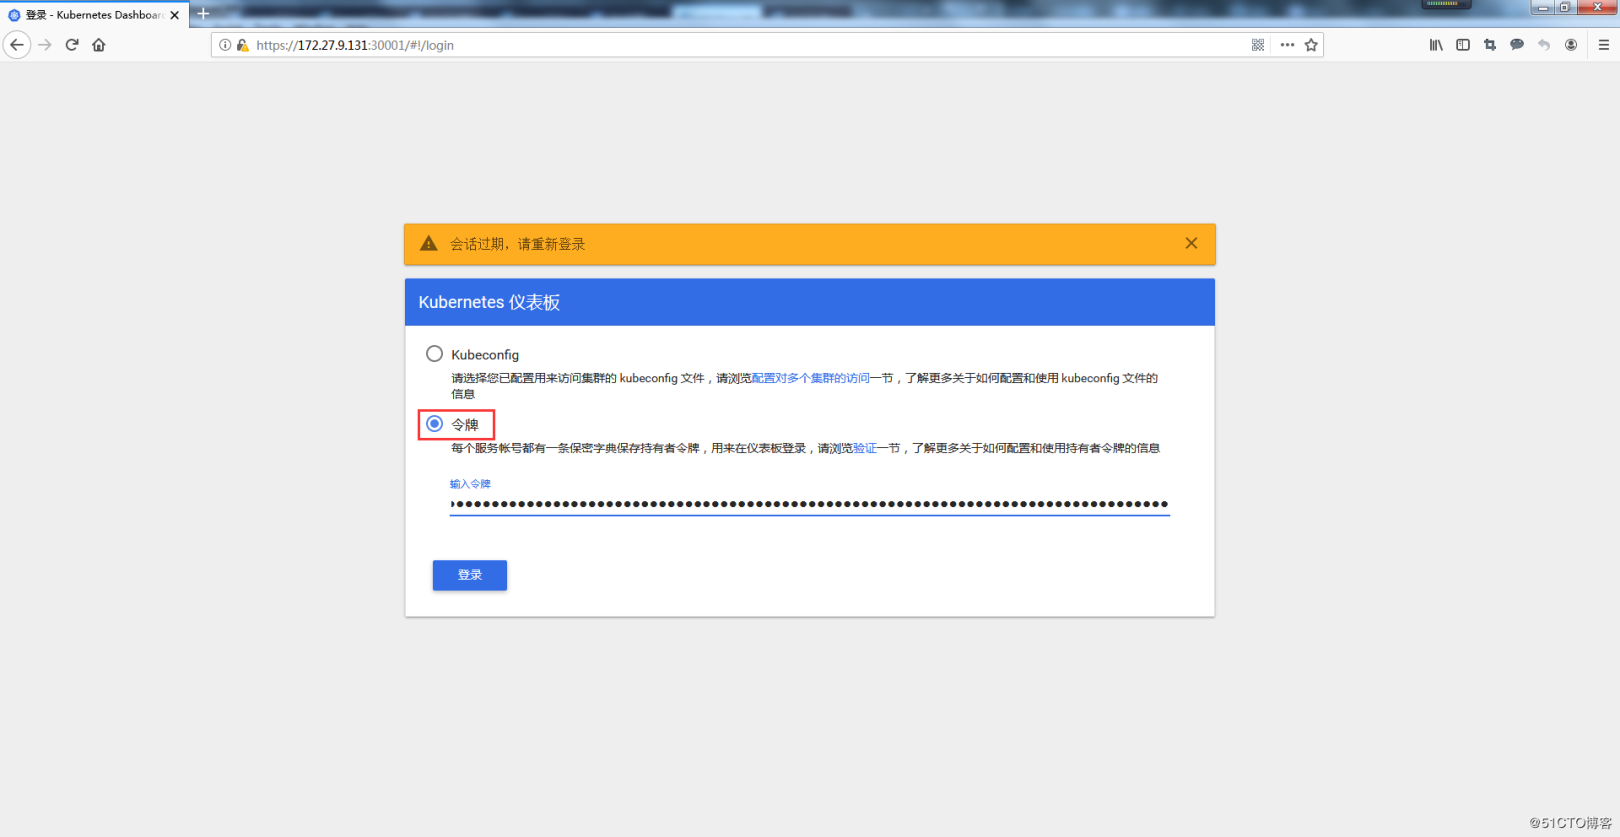
Login via token
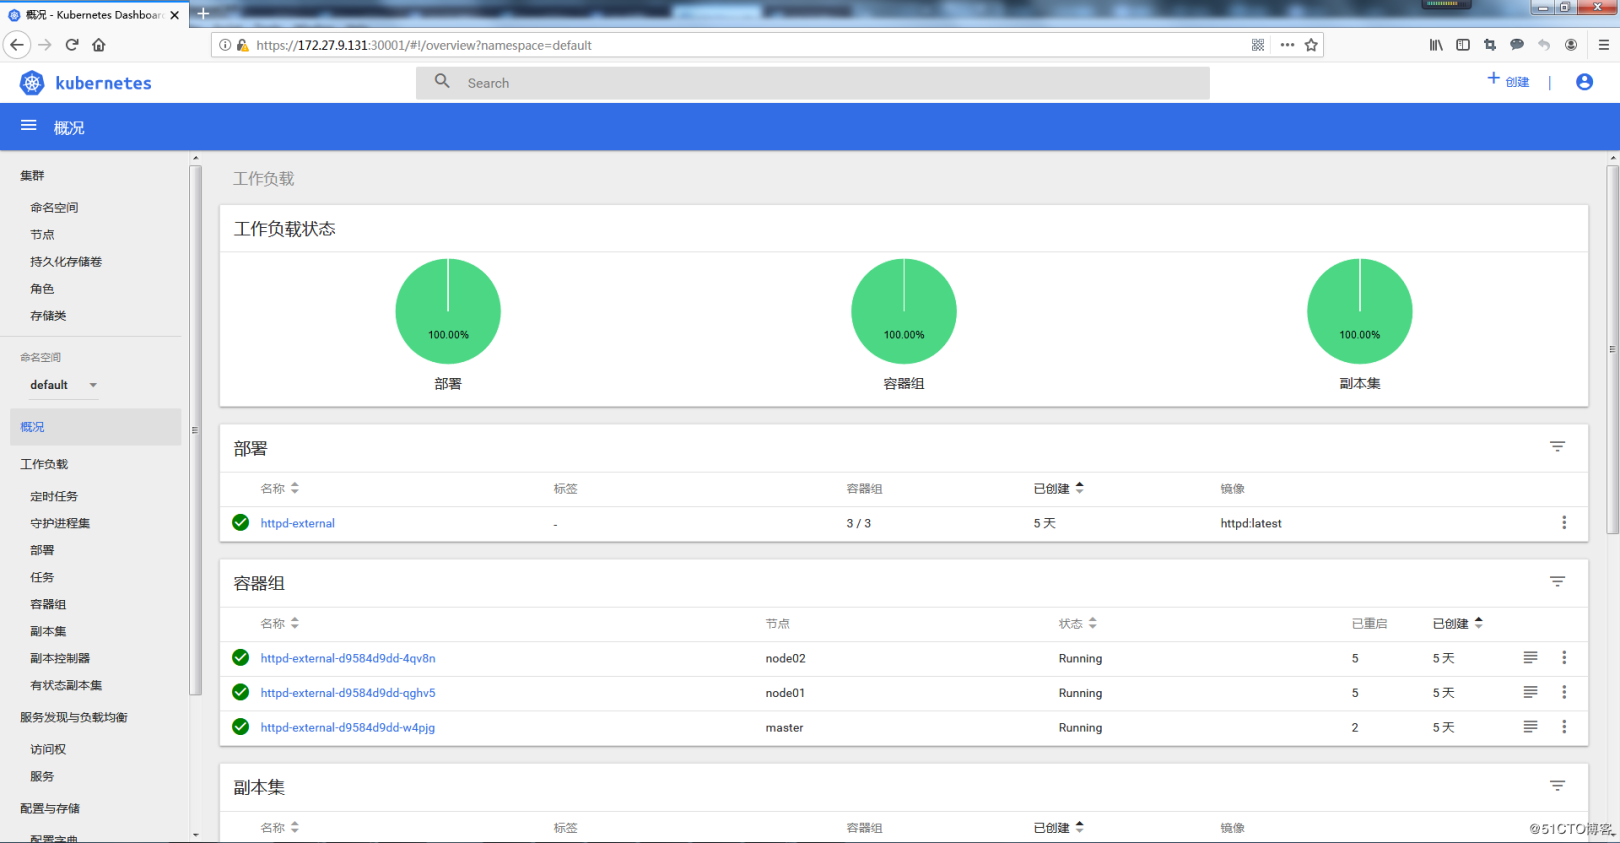
Dashboard provides functions such as cluster management, workload, service discovery, [load balancing] (https://cloud.tencent.com/product/clb?from=10680), storage, dictionary configuration, and log view.
Six, cluster test#
1. Deploy application##
1.1 Command mode
[ root@master ~]# kubectl run httpd-app --image=httpd --replicas=3
kubectl run --generator=deployment/apps.v1 is DEPRECATED and will be removed in a future version. Use kubectl run --generator=run-pod/v1 or kubectl create instead.
deployment.apps/httpd-app created
Deploy apache service via command line
1.2 Configuration file method
cat >> nginx.yml << EOF
apiVersion: extensions/v1beta1
kind: Deployment
metadata:
 name: nginx
spec:
 replicas:3
 template:
 metadata:
  labels:
  app: nginx
 spec:
  restartPolicy: Always
  containers:- name: nginx
  image: nginx:latest
EOF
[ root@master ~]# kubectl apply -f nginx.yml
deployment.extensions/nginx created
Deploy nginx service through configuration file
2. Status View##
2.1 View node status###
[ root@master ~]# kubectl get nodes
NAME     STATUS   ROLES    AGE     VERSION
master   Ready    master   47h     v1.14.2
node01   Ready    <none>   22h     v1.14.2
node02   Ready    <none>   6h55m   v1.14.2
2.2 View pod status###
[ root@master ~]# kubectl get pod --all-namespaces
NAMESPACE     NAME                             READY   STATUS    RESTARTS   AGE
default       httpd-app-6df58645c6-42zmc       1/1     Running   0          176m
default       httpd-app-6df58645c6-g6bkc       1/1     Running   0          176m
default       httpd-app-6df58645c6-kp8tl       1/1     Running   0          176m
default       nginx-9d4cf4f77-dft2f            1/1     Running   0          18m
default       nginx-9d4cf4f77-dztxq            1/1     Running   0          18m
default       nginx-9d4cf4f77-l9gdh            1/1     Running   0          18m
kube-system   coredns-fb8b8dccf-bxvrz          1/1     Running   1          47h
kube-system   coredns-fb8b8dccf-mqvd8          1/1     Running   1          47h
kube-system   etcd-master                      1/1     Running   3          47h
kube-system   kube-apiserver-master            1/1     Running   3          47h
kube-system   kube-controller-manager-master   1/1     Running   4          47h
kube-system   kube-flannel-ds-amd64-lkh5n      1/1     Running   0          6h55m
kube-system   kube-flannel-ds-amd64-pv5ll      1/1     Running   1          24h
kube-system   kube-flannel-ds-amd64-wnn5g      1/1     Running   1          22h
kube-system   kube-proxy-42vb5                 1/1     Running   3          47h
kube-system   kube-proxy-7nrfk                 1/1     Running   0          6h55m
kube-system   kube-proxy-x7dmk                 1/1     Running   1          22h
kube-system   kube-scheduler-master            1/1     Running   4          47h
2.3 View the number of copies
[ root@master ~]# kubectl get deployments
NAME        READY   UP-TO-DATE   AVAILABLE   AGE
httpd-app   3/333           178m
nginx       3/333           19m
[ root@master ~]# kubectl get pod -o wide
NAME                         READY   STATUS    RESTARTS   AGE    IP           NODE     NOMINATED NODE   READINESS GATES
httpd-app-6df58645c6-42zmc   1/1     Running   0          179m   10.244.0.6   master   <none><none>
httpd-app-6df58645c6-g6bkc   1/1     Running   0          179m   10.244.1.2   node01   <none><none>
httpd-app-6df58645c6-kp8tl   1/1     Running   0          179m   10.244.2.2   node02   <none><none>
nginx-9d4cf4f77-dft2f        1/1     Running   0          20m    10.244.0.7   master   <none><none>
nginx-9d4cf4f77-dztxq        1/1     Running   0          20m    10.244.2.3   node02   <none><none>
nginx-9d4cf4f77-l9gdh        1/1     Running   0          20m    10.244.1.3   node01   <none><none>[root@master ~]#
You can see that the 3 replica pods of nginx and httpd are evenly distributed on 3 nodes
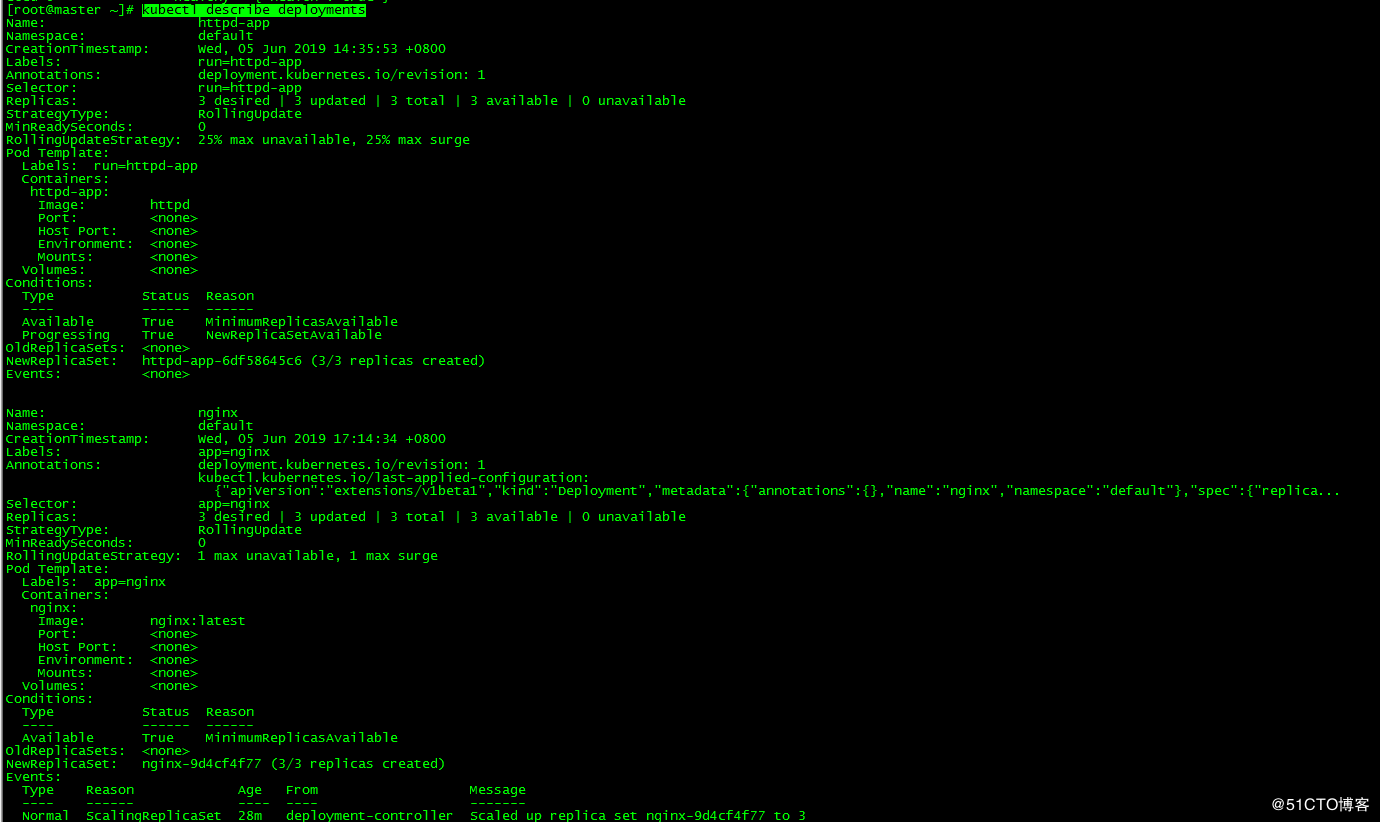
2.4 View deployment details###
[ root@master ~]# kubectl describe deployments
2.5 View the status of the basic components of the cluster###
[ root@master ~]# kubectl get cs
NAME                 STATUS    MESSAGE             ERROR
scheduler            Healthy   ok
controller-manager   Healthy   ok
etcd-0               Healthy   {"health":"true"}
So far, the k8s (v1.14.2) cluster deployment under Centos 7.6 is completed.
All scripts and configuration files in this article have been uploaded to github: https://github.com/loong576/Centos7.6-install-k8s-v1.14.2-cluster.git
This article references:
1. https://docs.docker.com/install/linux/docker-ce/centos;
2. https://kubernetes.io/docs/setup/independent/install-kubeadm;
3. https://kubernetes.io/docs/setup/independent/create-cluster-kubeadm;
4. https://github.com/coreos/flannel;
5. https://github.com/kubernetes/kubernetes/blob/master/CHANGELOG-1.14.md#external-dependencies;
6. https://kubernetes.io/docs/tasks/access-application-cluster/web-ui-dashboard/;