Centos7 hadoop cluster installation and configuration
Please be sure to indicate the original address for reprinting: http://dongkelun.com/2018/04/05/hadoopClusterConf/
Foreword:
The hadoop installed and configured in this article is a distributed cluster. For the stand-alone configuration, see: centos7 hadoop stand-alone mode installation and configuration
For the three centos7 I use, first configure the common environment (CentOS initial environment configuration), and set the ip respectively: 192.168.44.138, 192.168.44.139, 192.168.44.140, corresponding to the alias master, slave1, slave2
1、 First install and configure jdk (1.8 that I installed)
2、 Give the ip of each virtual machine an individual name##
Execute on each virtual machine
vim /etc/hosts
Add at the bottom:
192.168.44.138 master
192.168.44.139 slave1
192.168.44.140 slave2
Ping each virtual machine to ensure that it can be pinged
ping master
ping slave1
ping slave2
3、 SSH password-free login##
Ensure that all three machines can communicate without secret, refer to: linux ssh secret free login
3、 Download hadoop (per machine)
Download link: http://mirror.bit.edu.cn/apache/hadoop/common/, I downloaded hadoop-2.7.5.tar.gz
4、 Unzip to the /opt directory (each machine, directory according to your own habits)
tar -zxvf hadoop-2.7.5.tar.gz -C /opt/
5、 Configure hadoop environment variables (per machine)
vim /etc/profile
export HADOOP_HOME=/opt/hadoop-2.7.5export PATH=$PATH:$HADOOP_HOME/bin
source /etc/profile
6、 Configure hadoop (only master)
The file path and port in the configuration file are configured according to your own habits
6.1 Configure slaves
You need to delete the localhost in the slaves1 file. This time use two slave nodes, so that the master is only used as the NameNode, or the master can be used as both the NameNode and the DataNode, and the master can be added to the slaves.
vim /opt/hadoop-2.7.5/etc/hadoop/slaves
slave1
slave2
6.2 Configure hadoop-env.sh
vim /opt/hadoop-2.7.5/etc/hadoop/hadoop-env.sh
Find # The java implementation to use. Change the following line to:
export JAVA_HOME=/opt/jdk1.8.0_45
6.3 Configure core-site.xml
vim /opt/hadoop-2.7.5/etc/hadoop/core-site.xml
< configuration><property><name>hadoop.tmp.dir</name><value>file:///opt/hadoop-2.7.5</value><description>Abase for other temporary directories.</description></property><property><name>fs.defaultFS</name><value>hdfs://master:8888</value></property></configuration>
6.4 Configure hdfs-site.xml
vim /opt/hadoop-2.7.5/etc/hadoop/hdfs-site.xml
dfs.replication is generally set to 3, but this time only two slaves are used, so the value of dfs.replication is set to 2
< configuration><property><name>dfs.namenode.secondary.http-address</name><value>master:50090</value></property><property><name>dfs.replication</name><value>2</value></property><property><name>dfs.namenode.name.dir</name><value>file:///opt/hadoop-2.7.5/tmp/dfs/name</value></property><property><name>dfs.datanode.data.dir</name><value>file:///opt/hadoop-2.7.5/tmp/dfs/data</value></property></configuration>
6.5 Configure yarn-site.xml
vim /opt/hadoop-2.7.5/etc/hadoop/yarn-site.xml
< configuration><!-- Site specific YARN configuration properties --><property><name>yarn.resourcemanager.hostname</name><value>master</value></property><property><name>yarn.nodemanager.aux-services</name><value>mapreduce_shuffle</value></property></configuration>
6.6 Configure mapred-site.xml
cd /opt/hadoop-2.7.5/etc/hadoop/
cp mapred-site.xml.template mapred-site.xml
vim mapred-site.xml
< configuration><property><name>mapreduce.framework.name</name><value>yarn</value></property></configuration>
6.7 Transfer the files of the above configuration to the /opt/hadoop-2.7.5/etc/hadoop/ directory of other nodes###
scp -r slaves hadoop-env.sh core-site.xml  hdfs-site.xml yarn-site.xml hdfs-site.xml root@slave1:/opt/hadoop-2.7.5/etc/hadoop/
scp -r slaves hadoop-env.sh core-site.xml  hdfs-site.xml yarn-site.xml hdfs-site.xml root@slave2:/opt/hadoop-2.7.5/etc/hadoop/

7、 Start and stop (only master)
7.1 hdfs start and stop###
The first time you start hdfs you need to format:
cd /opt/hadoop-2.7.5./bin/hdfs namenode -format
start up:
. /sbin/start-dfs.sh
stop:
. /sbin/stop-dfs.sh

Verification, browser input: http://192.168.44.138:50070
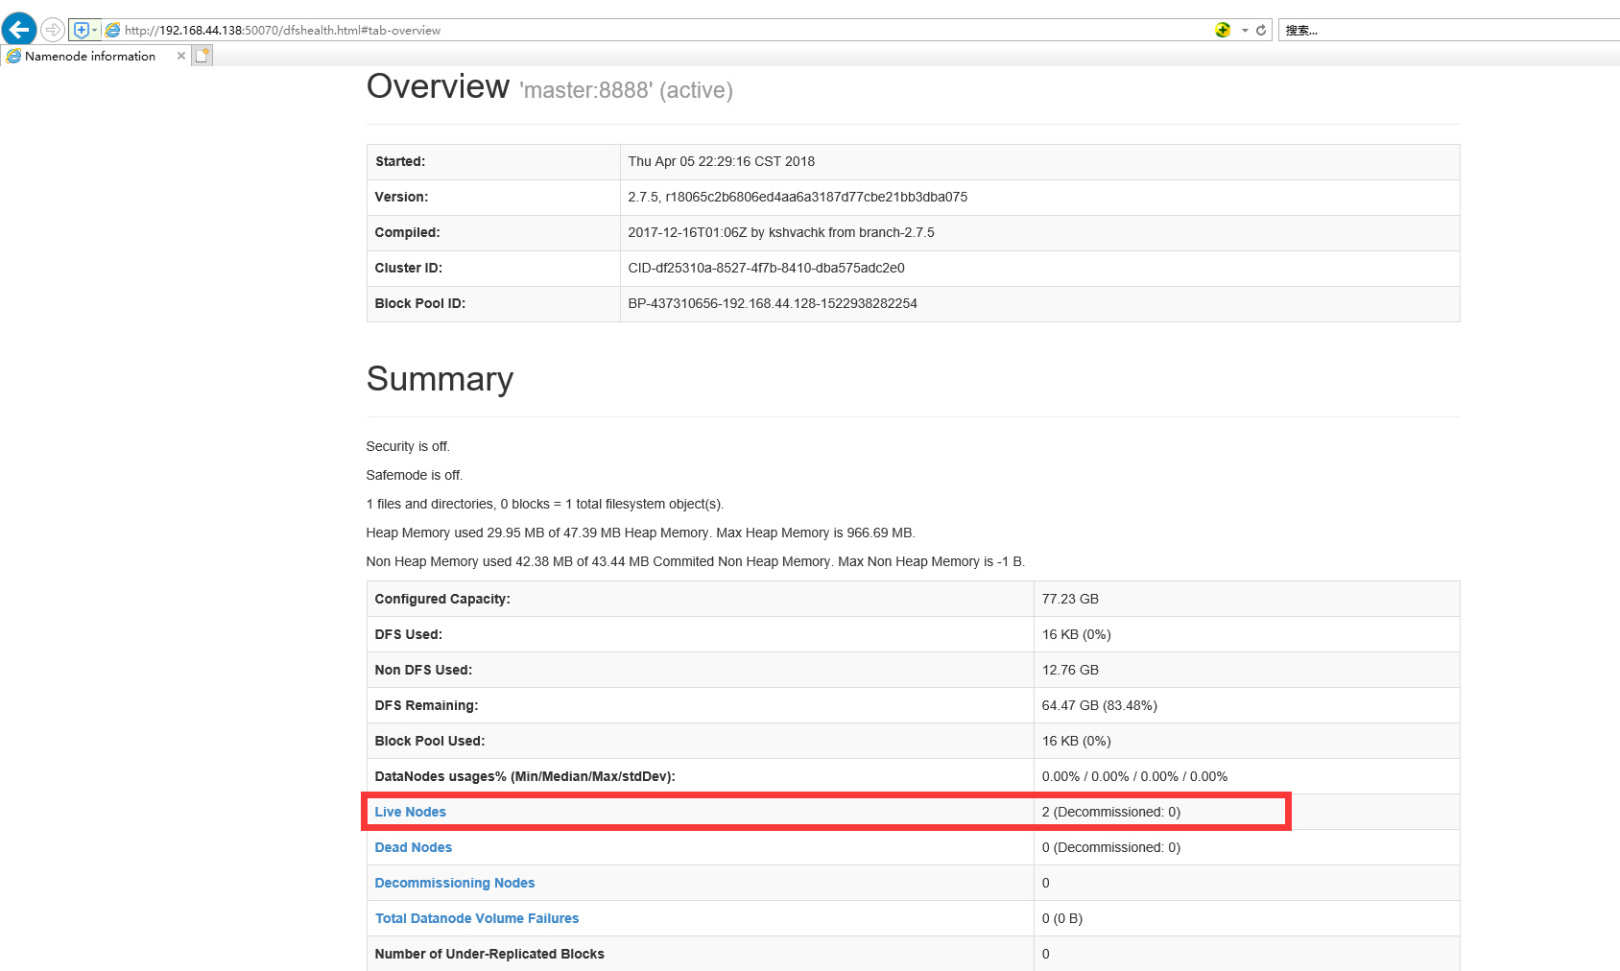
Simple verification hadoop command:
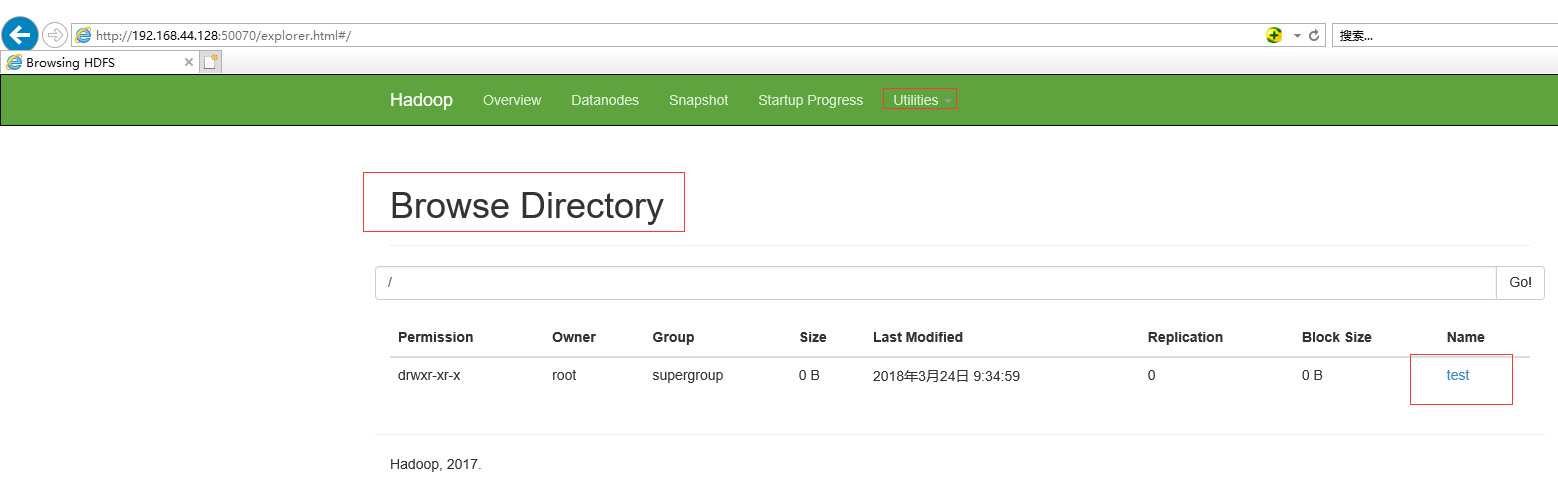
hadoop fs -mkdir /test
Check it in the browser, if it appears as shown below, it means success
7.2 yarn start and stop###
start up:
cd /opt/hadoop-2.7.5./sbin/start-yarn.sh
. /sbin/stop-yarn.sh
Browser view: http://192.168.44.138:8088

jps view process
master:

slave1:

slave2:

If the processes of each node are as shown in the figure, then the hadoop cluster is configured successfully!
References##
http://www.powerxing.com/install-hadoop-cluster/
Recommended Posts