Cobblerを使用して、CentOS / Ubuntuのバッチ展開を自動化します

この記事では主に、CentOS 7.6 Minimal + Cobblerを介したCentOS / Ubuntuの自動インストールについて説明します。
準備 ##
Aliミラーステーションから、CentOS-7-x86_64-Minimal-1810.isoおよびUbuntu-16.04.5-desktop-amd64.isoをダウンロードし、VMwareを使用してCentOS7仮想マシンを作成します。
環境の初期化
- ソフトウェアソースをAliソースに変更します
# yumソース

# バックアップシステムのデフォルトソース
[ root@localhost ~]# mkdir /etc/yum.repos.d/old && mv /etc/yum.repos.d/C*/etc/yum.repos.d/old/[root@localhost ~]# yum clean all

# Aliyumソースを設定する
[ root@localhost ~]# curl -o /etc/yum.repos.d/CentOS-Base.repo http://mirrors.aliyun.com/repo/Centos-7.repo
[ root@localhost ~]# curl -o /etc/yum.repos.d/epel.repo http://mirrors.aliyun.com/repo/epel-7.repo

# ピップソース(2.8.4つのバグ)[root@localhost ~]# mkdir ~/.pip
[ root@localhost ~]# cat >~/.pip/pip.conf << EOF
[ global]
trusted-host=mirrors.aliyun.com
index-url=https://mirrors.aliyun.com/pypi/simple/
EOF
- SSHを構成する
DNS解決はssh_configでデフォルトで有効になっているため、毎回リモートSSHが非常に遅くなります。
[ root@localhost ~]# sed -i 's%#UseDNS yes%UseDNS no%'/etc/ssh/sshd_config
[ root@localhost ~]# service sshd restart
- SElinuxを無効にする
CentosでCobblerサポートを有効にする場合は、ルートユーザーとしてsetseboolを実行して、ブートイメージを提供するようにSELinuxコンテキストルールを構成する必要があります。 SElinuxの構成はより複雑であるため、ここではSELinuxを直接無効にします。
[ root@localhost ~]# sed -i '/SELINUX/s/enforcing/disabled/'/etc/selinux/config
[ root@localhost ~]# setenforce 0
- 対応するファイアウォールルールを構成する
# TFTP
[ root@localhost ~]# firewall-cmd --zone=public--add-port=69/tcp --permanent
[ root@localhost ~]# firewall-cmd --zone=public--add-port=69/udp --permanent

# HTTPD
[ root@localhost ~]# firewall-cmd --zone=public--add-port=80/tcp --permanent
[ root@localhost ~]# firewall-cmd --zone=public--add-port=443/tcp --permanent

# Cobbler
[ root@localhost ~]# firewall-cmd --zone=public--add-port=25150/tcp --permanent
[ root@localhost ~]# firewall-cmd --zone=public--add-port=25150/udp --permanent

# Koanは使用しない場合は閉じることができます
[ root@localhost ~]# firewall-cmd --zone=public--add-port=25151/tcp --permanent

# SambaウィンドウのインストールにはSambaが必要です,それ以外の場合は閉じることができます
[ root@localhost ~]# firewall-cmd --zone=public--add-port=139/tcp --permanent
[ root@localhost ~]# firewall-cmd --zone=public--add-port=445/tcp --permanent
[ root@localhost ~]# firewall-cmd --zone=public--add-port=137/udp --permanent
[ root@localhost ~]# firewall-cmd --zone=public--add-port=138/udp --permanent

# ファイアウォールルールを更新する
[ root@localhost ~]# firewall-cmd --reload

# 開いているすべてのポートを表示
[ root@localhost ~]# firewall-cmd --zone=public--list-ports
Cobblerをインストールする
- 依存ソフトウェアをインストールする
[ root@localhost ~]# yum install -y cobbler cobbler-web dhcp tftp-server pykickstart httpd xinetd
- 自動起動を設定する
[ root@localhost ~]# systemctl enable httpd
[ root@localhost ~]# systemctl enable xinetd
[ root@localhost ~]# systemctl enable rsyncd
[ root@localhost ~]# systemctl enable tftp
[ root@localhost ~]# systemctl enable cobblerd
- サービス開始
[ root@localhost ~]# systemctl start httpd
[ root@localhost ~]# systemctl start xinetd
[ root@localhost ~]# systemctl start tftp
[ root@localhost ~]# systemctl start cobblerd
- 構成を確認する
[ root@localhost ~]# cobbler check
The following are potential configuration items that you may want to fix:1: The 'server' field in/etc/cobbler/settings must be set to something other than localhost, or kickstarting features will not work.  This should be a resolvable hostname or IP for the boot server as reachable by all machines that will use it.2: For PXE to be functional, the 'next_server' field in/etc/cobbler/settings must be set to something other than 127.0.0.1, and should match the IP of the boot server on the PXE network.3: SELinux is enabled. Please review the following wiki page for details on ensuring cobbler works correctly in your SELinux environment:
 https://github.com/cobbler/cobbler/wiki/Selinux
4: change 'disable' to 'no'in/etc/xinetd.d/tftp
5: Some network boot-loaders are missing from/var/lib/cobbler/loaders, you may run 'cobbler get-loaders' to download them, or,if you only want to handle x86/x86_64 netbooting, you may ensure that you have installed a *recent* version of the syslinux package installed and can ignore this message entirely.  Files inthis directory, should you want to support all architectures, should include pxelinux.0, menu.c32, elilo.efi, and yaboot. The 'cobbler get-loaders' command is the easiest way to resolve these requirements.6: debmirror package is not installed, it will be required to manage debian deployments and repositories
7: The default password used by the sample templates for newly installed machines(default_password_crypted in/etc/cobbler/settings) is still set to 'cobbler' and should be changed,try:"openssl passwd -1 -salt 'random-phrase-here' 'your-password-here'" to generate newone8: fencing tools were not found, and are required to use the(optional) power management features. install cman or fence-agents to use them

Restart cobblerd and then run 'cobbler sync' to apply changes.
以下は、検査結果の問題の簡単な説明です。
- 1番目と2番目の項目:cobbler_ipとnext_serverを設定します
cobbler_ipは、cobblerホストIPです。
next_serverはDHCPホストIPです。この実験では、DHCPとCobblerは同じホストです。
[ root@localhost ~]# export cobbler_ip=192.168.0.12[root@localhost ~]# sed -i "s%^server: 127.0.0.1%server: ${cobbler_ip}%g"/etc/cobbler/settings
[ root@localhost ~]# sed -i "s%^next_server: 127.0.0.1%next_server: ${cobbler_ip}%g"/etc/cobbler/settings
- 項目3:SELinuxとファイアウォールを構成する
SELinuxがオフになっていて、ファイアウォールが構成されているため、無視できます。
- 項目4:tftp機能をオンにする
[ root@localhost ~]# sed -i '/disable\>/s/\<yes\>/no/'/etc/xinetd.d/tftp
- アイテム5:ブートロードをダウンロードする
[ root@localhost ~]# cobbler get-loaders
- アイテム6:Ubuntuローカルパッケージイメージをダウンロードする
Ubuntuをインストールする必要がない場合は、変更できます。
[ root@localhost ~]# yum install -y debmirror
[ root@localhost ~]# sed -i 's%^@dists="sid"%#@dists="sid"%g;s%@arches="i386"%#@arches="i386"%g'/etc/debmirror.conf
- 項目7:システムのインストール後にrootパスワードを設定する
[ root@localhost ~]# export root_pwd=$(openssl passwd -1-salt `openssl rand 15 -base64`'Abcd1234!@#$')[root@localhost ~]# sed -i "s%^default_password_crypted.*%default_password_crypted: \"${root_pwd}\"%g"/etc/cobbler/settings
- 項目8:電源管理モジュールの取り付け(オプション)
cmanまたはence-agentsのいずれかを選択できますが、ここでは無視されます。
- 残りの関連部分の変更
# 対応する構成ファイルを変更します
[ root@localhost ~]# sed -i "s%manage_dhcp: 0%manage_dhcp: 1%g"/etc/cobbler/settings
[ root@localhost ~]# sed -i "s%pxe_just_once: 0%pxe_just_once: 1%g"/etc/cobbler/settings

# DHCPを変更する
[ root@localhost ~]# vi /etc/cobbler/dhcp.template
\# 変更されたパーツのみを一覧表示します
\......
subnet 192.168.0.0 netmask 255.255.255.0{
  option routers             192.168.0.1;
  option domain-name-servers 192.168.0.1;
  option subnet-mask         255.255.255.0;
  range dynamic-bootp        192.168.0.100192.168.0.200;
\......
- 関連サービスを再開する
[ root@localhost ~]# systemctl restart httpd
[ root@localhost ~]# systemctl restart xinetd
[ root@localhost ~]# systemctl restart tftp
[ root@localhost ~]# systemctl restart cobblerd
- もう一度確認して、情報が2つしかないことを確認してください。無視してください。
[ root@localhost ~]# cobbler check
The following are potential configuration items that you may want to fix:1: SELinux is enabled. Please review the following wiki page for details on ensuring cobbler works correctly in your SELinux environment:
 https://github.com/cobbler/cobbler/wiki/Selinux
2: fencing tools were not found, and are required to use the(optional) power management features. install cman or fence-agents to use them

Restart cobblerd and then run 'cobbler sync' to apply changes.
- cobbler syncを実行して、情報を同期します
[ root@localhost ~]# cobbler sync
task started:2019-02-22_184309_sync
task started(id=Sync, time=Fri Feb 2218:43:092019)
running pre-sync triggers
# .... 無視する
running python trigger cobbler.modules.scm_track
running shell triggers from/var/lib/cobbler/triggers/change/*
*** TASK COMPLETE ***
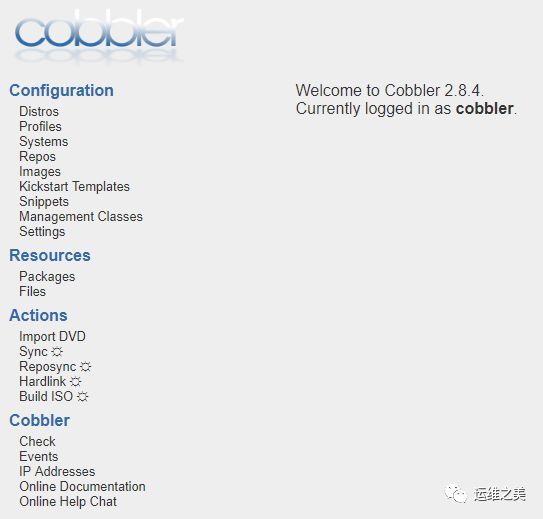
- Cobbler-Webのバグを解決する
https:// $ {cobbler_ip} / cobbler_webを開くと、開いた後に500 Internal ServerErrorエラーが発生します。
Djangoのバージョンが高すぎて互換性がないため、これは2.8.4のバグです。解決:
[ root@localhost ~]# yum install -y python-pip
[ root@localhost ~]# pip2.7 install -U django==1.9.13[root@localhost ~]# systemctl restart cobblerd
- ユーザー名とパスワードを設定する
デフォルトのユーザー名とパスワードはcobbler / cobblerです。
[ root@localhost ~]# htdigest -c /etc/cobbler/users.digest Cobbler cobbler #これはユーザー名です
[ root@localhost ~]# systemctl restart cobblerd
もう一度https:// $ {cobbler_ip} / cobbler_webにアクセスしてください
画像をマウント
Winscp、Mobaxtermなどを介してUbuntuおよびCentosイメージをCobblerサーバーの/ tmp /ディレクトリにアップロードします。ここで、net.ifnames = 0 biosdevname = 0 noipv6は、ネットワークカードの名前を均一にeth0にします。
[ root@localhost ~]# mount -t iso9660 -o loop /tmp/CentOS-7-x86_64-Minimal-1810.iso /mnt/[root@localhost ~]# cobbler import--name=CentOS-7.6.1810-x86_64 --path=/mnt/--arch=x86_64
[ root@localhost ~]# cobbler profile edit --name=CentOS-7.6.1810-x86_64 --kopts='net.ifnames=0 biosdevname=0'[root@localhost ~]# mount -t iso9660 -o loop /tmp/ubuntu-16.04.5-server-amd64.iso /mnt/[root@localhost ~]# cobbler import--name=ubuntu-16.04.5-server-x86_64 --path=/mnt/--arch=x86_64
PXEインストールシステムをテストします
2Gのメモリ、2コアのCPU、および20Gのディスクを備えた2つの仮想マシンをVMwareで作成します(空のディスクを選択します)。作成後、スナップショットを作成することを忘れないでください。実験が失敗した場合は、復元してください。
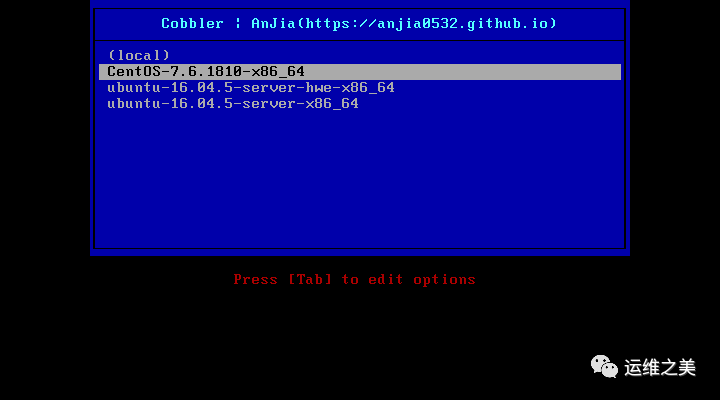
CentOSを選択し、Enterキーを押すと、システムが自動的にインストールされます。
最適化
- CentOSのKS構成ファイル
[ root@localhost ~]# cobbler profile report --name CentOS-7.6.1810-x86_64
Name                           : CentOS-7.6.1810-x86_64
# //...無視する
Kickstart                      :/var/lib/cobbler/kickstarts/sample_end.ks
# //...無視する
# //ksのコピーをコピーして変更します[root@localhost ~]# cp /var/lib/cobbler/kickstarts/sample_end.ks /var/lib/cobbler/kickstarts/centos-7-6.ks
[ root@localhost ~]# cobbler profile edit --name CentOS-7.6.1810-x86_64  --kickstart=/var/lib/cobbler/kickstarts/centos-7-6.ks
[ root@localhost ~]# cp /var/lib/cobbler/kickstarts/sample.seed /var/lib/cobbler/kickstarts/ubuntu-16-4-5.seed
[ root@localhost ~]# cobbler profile edit --name ubuntu-16.04.5-server-x86_64  --kickstart=/var/lib/cobbler/kickstarts/ubuntu-16-4-5.seed
CentOSのKS構文は、ここで参照できます。
a。)KICKSTART構文リファレンス(https://access.redhat.com/documentation/zh-cn/red_hat_enterprise_linux/7/html/installation_guide/sect-kickstart-syntax)
b。)操作および保守作業に関する注意事項-Cobbler構成ファイル(https://www.kancloud.cn/devops-centos/centos-linux-devops/392369)
- UbuntuのPreseed構成ファイル
UbuntuがCobblerコードで検出されると、KSが自動的にURLに置き換えられます(preseedが強制されます)。
UbuntuのPreseedはここで参照できます:
a。)Preseed構文リファレンス(https://www.debian.org/releases/stable/amd64/apbs04.html.zh-cn)
以下は、Preseedファイルの例です。
$ cat /var/lib/cobbler/kickstarts/ubuntu-16-4-5.seed

# Mostly based on the Ubuntu installation guide
# https://help.ubuntu.com/16.04/installation-guide/
# Debian sample
# https://www.debian.org/releases/stable/example-preseed.txt
## Part 1. Localization
# Preseeding only locale sets language, country and locale.
d-i debian-installer/locale string en_US
# Keyboard selection.
# Disable automatic(interactive) keymap detection.
d-i console-setup/ask_detect boolean false
d-i keyboard-configuration/toggle select No toggling
d-i keyboard-configuration/layoutcode string us
d-i keyboard-configuration/variantcode string

## Part 2. Network configuration
# netcfg will choose an interfacethat has link if possible. This makes it
# skip displaying a list if there is more than one interface.
# set $myhostname =$getVar('hostname',$getVar('name','cobbler')).replace("_","-")
d-i netcfg/choose_interface select auto
d-i netcfg/get_hostname string $myhostname
# If non-free firmware is needed for the network or other hardware, you can
# configure the installer to always try to load it, without prompting. Or
# change to false to disable asking.
# d-i hw-detect/load_firmware boolean true
## Part 3 NTP/Time
# NTP/Time Setup
d-i time/zone string Asia/Shanghai
d-i clock-setup/utc boolean true
d-i clock-setup/ntp boolean true
d-i clock-setup/ntp-server  string ntp1.aliyun.com

## Part 4. Mirror settings
# Setup the installation source
d-i mirror/country string manual
d-i mirror/http/hostname string $http_server
d-i mirror/http/directory string $install_source_directory
d-i mirror/http/proxy string
# set $os_v =$getVar('os_version','')
# if $breed =="ubuntu" and $os_v and($os_v.lower()[0]>'p' or $os_v.lower()[0]<'d')
# Required at least for ubuntu 12.10+, so test os_v is higher than precise and lower than drapper
d-i live-installer/net-image string http://$http_server/cobbler/links/$distro_name/install/filesystem.squashfs
# end if
# Suite to install.
# d-i mirror/suite string precise
# d-i mirror/udeb/suite string precise
# Components to use for loading installer components(optional).
# d-i mirror/udeb/components multiselect main, restricted
## Part 4. Partitioning
# Disk Partitioning
# Use LVM, and wipe out anything that already exists
d-i partman/choose_partition select finish
d-i partman/confirm boolean true
d-i partman/confirm_nooverwrite boolean true
d-i partman-auto/method string lvm
d-i partman-lvm/device_remove_lvm boolean true
d-i partman-lvm/confirm boolean true
d-i partman-lvm/confirm_nooverwrite boolean true
d-i partman-md/device_remove_md boolean true
d-i partman-partitioning/confirm_write_new_label boolean true
# You can choose one of the three predefined partitioning recipes:
# - atomic: all files in one partition
# - home:   separate /home partition
# - multi:  separate /home,/usr,/var, and /tmp partitions
d-i partman-auto/choose_recipe select atomic
# If you just want to change the default filesystem from ext3 to something
# else, you can do that without providing a full recipe.
# d-i partman/default_filesystem string ext4
## Part 5. Account setup
# root account and password
d-i passwd/root-login boolean true
d-i passwd/root-password-crypted password $default_password_crypted
# skip creation of a normal user account.
d-i passwd/make-user boolean true
d-i passwd/user-fullname  string anjia
d-i passwd/username       string anjia
d-i passwd/user-password-crypted password $default_password_crypted

## Part 6. Apt setup
# You can choose to install restricted and universe software, or to install
# software from the backports repository.
# d-i apt-setup/restricted boolean true
# d-i apt-setup/universe boolean true
# d-i apt-setup/backports boolean true
# Uncomment thisif you don't want to use a network mirror.
# d-i apt-setup/use_mirror boolean true
# Select which update services to use; define the mirrors to be used.
# Values shown below are the normal defaults.
# d-i apt-setup/services-select multiselect security
# d-i apt-setup/security_host string mirrors.aliyun.com
# d-i apt-setup/security_path string /ubuntu

$SNIPPET('preseed_apt_repo_config')

# Enable deb-src lines
# d-i apt-setup/local0/source boolean true
# URL to the public key of the local repository; you must provide a key or
# apt will complain about the unauthenticated repository and so the
# sources.list line will be left commented out
# d-i apt-setup/local0/key string http://local.server/key
# By default the installer requires that repositories be authenticated
# using a known gpg key. This setting can be used to disable that
# authentication. Warning: Insecure, not recommended.
# d-i debian-installer/allow_unauthenticated boolean true
## Part 7. Package selection
# Default for minimal
tasksel tasksel/first multiselect standard
# Default for server
# tasksel tasksel/first multiselect standard, web-server
# Default for gnome-desktop
# tasksel tasksel/first multiselect standard, gnome-desktop
# Individual additional packages to install
# wget is REQUIRED otherwise quite a few things won't work
# later in the build(like late-command scripts)
d-i pkgsel/include string ntp ssh wget
# Debian needs thisfor the installer to avoid any question for grub
# Please verify that it suit your needs as it may overwrite any usb stick
# if $breed =="debian"
d-i grub-installer/grub2_instead_of_grub_legacy boolean true
d-i grub-installer/bootdev string default
# end if
# Use the following option to add additional boot parameters for the
# installed system(if supported by the bootloader installer).
# Note: options passed to the installer will be added automatically.
d-i debian-installer/add-kernel-opts string $kernel_options_post
# Avoid that last message about the install being complete.
d-i finish-install/reboot_in_progress note
## Figure out if we're kickstarting a system or a profile
# if$getVar('system_name','')!=''
# set $what ="system"
# else
# set $what ="profile"
# end if
# This first command is run as early as possible, just after preseeding is read.
# d-i preseed/early_command string [command]
d-i preseed/early_command string wget -O- \
 http://$http_server/cblr/svc/op/script/$what/$name/?script=preseed_early_default | \
 /bin/sh -s
# This command is run immediately before the partitioner starts. It may be
# useful to apply dynamic partitioner preseeding that depends on the state
# of the disks(which may not be visible when preseed/early_command runs).
# d-i partman/early_command \
#  string debconf-set partman-auto/disk "\$(list-devices disk | head -n1)"

# This command is run just before the install finishes, but when there is
# still a usable /target directory. You can chroot to /target and use it
# directly, or use the apt-install and in-target commands to easily install
# packages and run commands in the target system.
# d-i preseed/late_command string [command]
d-i preseed/late_command string wget -O- \
 http://$http_server/cblr/svc/op/script/$what/$name/?script=preseed_late_default | \
 chroot /target /bin/sh -s
- スニペットを作成する
インストール後、スニペットを使用してソフトウェアを自動的にインストールできます。具体的な参考資料:
Using template scripts for Debian and Ubuntu seeds (http://t.cn/EXd30sU)
[ root@localhost ~]# tee /var/lib/cobbler/snippets/ubuntu_apt_install_soft <<-'EOF'
apt-get update
apt-get install -y language-pack-zh-hans apt-transport-https ca-certificates software-properties-common  git ansible openssh-server vim curl htop iotop iftop ncdu

curl -fsSL http://mirrors.aliyun.com/docker-ce/linux/ubuntu/gpg | sudo apt-key add -
sudo add-apt-repository "deb [arch=amd64] http://mirrors.aliyun.com/docker-ce/linux/ubuntu $(lsb_release -cs) stable"
apt-get update

apt-get install -y docker-ce=18.06.2~ce~3-0~ubuntu
apt-mark hold docker-ce
systemctl enable docker
EOF

## // d-i preseed/late_コマンドフェーズの実行[root@localhost ~]# echo '$SNIPPET("ubuntu_apt_install_soft")>>/var/lib/cobbler/snippets/late_apt_repo_config
- Ubuntuパッケージリポジトリを設定する
[ root@localhost ~]# cobbler repo edit --name=ubuntu-16.04.5-server-x86_64 --arch=x86_64 --breed=apt --mirror=http://mirrors.aliyun.com/ubuntu --owners=admin --mirror-locally=False --apt-components='main universe'--apt-dists='xenial xenial-updates xenial-security'[root@localhost ~]# cobbler profile edit --name=ubuntu-16.04.5-server-x86_64 --repos=ubuntu-16.04.5-server-x86_64
よくある間違い
- 理由:関連サービスが開始されていません
[ root@localhost ~]# cobbler check
cobblerd does not appear to be running/accessible:error(111,'Connection refused')
- 理由:ファイアウォールがオフになっていない
[ root@localhost ~]# cobbler check
httpd does not appear to be running and proxying cobbler, or SELinux is in the way. Original traceback:Traceback(most recent call last):
 File "/usr/lib/python2.7/site-packages/cobbler/cli.py", line 251,in check_setup
 s.ping()
 File "/usr/lib64/python2.7/xmlrpclib.py", line 1233,in __call__
 return self.__send(self.__name, args)
 File "/usr/lib64/python2.7/xmlrpclib.py", line 1591,in __request
 verbose=self.__verbose
 File "/usr/lib64/python2.7/xmlrpclib.py", line 1273,in request
 return self.single_request(host, handler, request_body, verbose)
 File "/usr/lib64/python2.7/xmlrpclib.py", line 1321,in single_request
 response.msg,
ProtocolError:<ProtocolError for127.0.0.1:80/cobbler_api:503 Service Unavailable>
- DHCPテンプレートを変更しなかったため、同期の同期に問題が発生しました。
[ root@localhost ~]# cobbler sync
received on stderr: Redirecting to /bin/systemctl restart dhcpd.service
Job for dhcpd.service failed because the control process exited with error code. See "systemctl status dhcpd.service" and "journalctl -xe"for details.

Exception occured:<class'cobbler.cexceptions.CX'>
Exception value:'cobbler trigger failed: cobbler.modules.sync_post_restart_services'
Exception Info:
 File "/usr/lib/python2.7/site-packages/cobbler/remote.py", line 82,in run
 rc = self._run(self)
 File "/usr/lib/python2.7/site-packages/cobbler/remote.py", line 181,in runner
 return self.remote.api.sync(self.options.get("verbose",False),logger=self.logger)
 File "/usr/lib/python2.7/site-packages/cobbler/api.py", line 763,in sync
 return sync.run()
 File "/usr/lib/python2.7/site-packages/cobbler/action_sync.py", line 144,in run
 utils.run_triggers(self.api, None,"/var/lib/cobbler/triggers/sync/post/*", logger=self.logger)
 File "/usr/lib/python2.7/site-packages/cobbler/utils.py", line 928,in run_triggers
 raise CX("cobbler trigger failed: %s"% m.__name__)!!! TASK FAILED !!!
- Djangoのバージョンが間違っています。指定されたバージョンをインストールするだけです。
pip2.7 install -U django==1.9.13
[ root@localhost ~]# cat /var/log/httpd/ssl_error_log
[ Fri Feb 2220:07:49.4604422019][:error][pid 6910][remote 127.0.0.1:204]mod_wsgi(pid=6910): Exception occurred processing WSGI script '/usr/share/cobbler/web/cobbler.wsgi'.[Fri Feb 2220:07:49.4605592019][:error][pid 6910][remote 127.0.0.1:204]Traceback(most recent call last):[Fri Feb 2220:07:49.4606052019][:error][pid 6910][remote 127.0.0.1:204]   File "/usr/share/cobbler/web/cobbler.wsgi", line 26,in application
[ Fri Feb 2220:07:49.4606682019][:error][pid 6910][remote 127.0.0.1:204]     _application =get_wsgi_application()[Fri Feb 2220:07:49.4606842019][:error][pid 6910][remote 127.0.0.1:204]   File "/usr/lib/python2.7/site-packages/django/core/wsgi.py", line 13,in get_wsgi_application
[ Fri Feb 2220:07:49.4607232019][:error][pid 6910][remote 127.0.0.1:204]     django.setup(set_prefix=False)[Fri Feb 2220:07:49.4607372019][:error][pid 6910][remote 127.0.0.1:204]   File "/usr/lib/python2.7/site-packages/django/__init__.py", line 22,in setup
[ Fri Feb 2220:07:49.4607682019][:error][pid 6910][remote 127.0.0.1:204]configure_logging(settings.LOGGING_CONFIG, settings.LOGGING)[Fri Feb 2220:07:49.4607812019][:error][pid 6910][remote 127.0.0.1:204]   File "/usr/lib/python2.7/site-packages/django/conf/__init__.py", line 56,in __getattr__
[ Fri Feb 2220:07:49.4608122019][:error][pid 6910][remote 127.0.0.1:204]     self._setup(name)[Fri Feb 2220:07:49.4608242019][:error][pid 6910][remote 127.0.0.1:204]   File "/usr/lib/python2.7/site-packages/django/conf/__init__.py", line 41,in _setup
[ Fri Feb 2220:07:49.4608522019][:error][pid 6910][remote 127.0.0.1:204]     self._wrapped =Settings(settings_module)[Fri Feb 2220:07:49.4608712019][:error][pid 6910][remote 127.0.0.1:204]   File "/usr/lib/python2.7/site-packages/django/conf/__init__.py", line 110,in __init__
[ Fri Feb 2220:07:49.4609002019][:error][pid 6910][remote 127.0.0.1:204]     mod = importlib.import_module(self.SETTINGS_MODULE)[Fri Feb 2220:07:49.4609112019][:error][pid 6910][remote 127.0.0.1:204]   File "/usr/lib64/python2.7/importlib/__init__.py", line 37,in import_module
[ Fri Feb 2220:07:49.4609532019][:error][pid 6910][remote 127.0.0.1:204]__import__(name)[Fri Feb 2220:07:49.4609732019][:error][pid 6910][remote 127.0.0.1:204]   File "/usr/share/cobbler/web/settings.py", line 89,in<module>[Fri Feb 2220:07:49.4609952019][:error][pid 6910][remote 127.0.0.1:204]from django.conf.global_settings import TEMPLATE_CONTEXT_PROCESSORS
[ Fri Feb 2220:07:49.4610432019][:error][pid 6910][remote 127.0.0.1:204] ImportError: cannot import name TEMPLATE_CONTEXT_PROCESSORS
出典:ホームのブログ
オリジナル:* http://t.cn/EXdBkDt *
タイトル画像:* Google画像検索から*
著作権:この記事の著作権は原作者に帰属します
寄稿:*寄稿は大歓迎です、提出メール:[email protected] *

今日考える
私もスターであることを願っています。輝くことができれば、暗闇を恐れる必要はありません。私がとても美しいなら、すべての恐れは消えることができます。
-王暁波「無人島の夜明けを迎える」
Recommended Posts