Install Hadoop cluster on Linux (CentOS7+hadoop-2.8.0)
1 Download hadoop
The hadoop used in this blog post is 2.8.0
Open the download address selection page:
http://www.apache.org/dyn/closer.cgi/hadoop/common/hadoop-2.8.0/hadoop-2.8.0.tar.gz
As shown:
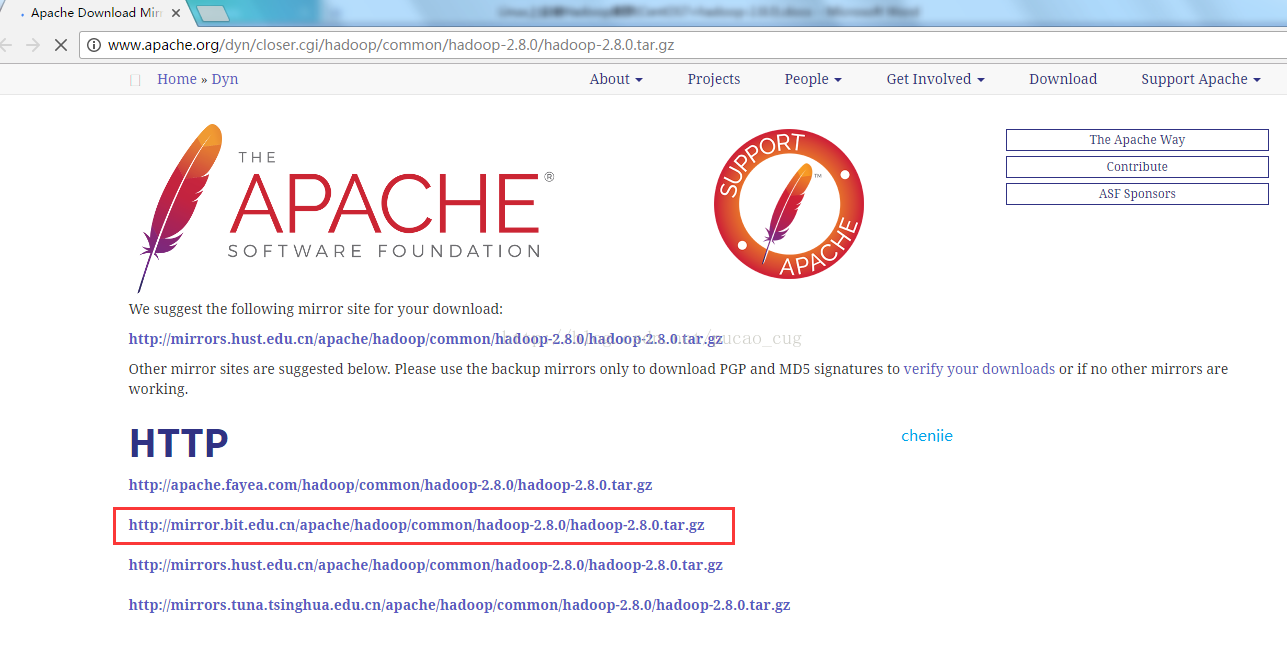
The address I use is:
http://mirror.bit.edu.cn/apache/hadoop/common/hadoop-2.8.0/hadoop-2.8.0.tar.gz
2 Install 3 virtual machines and realize SSH password-free login#
2.1 Install 3 machines##
The Linux system used here is CentOS7 (in fact, Ubuntu is also very good, but here is the CentOS7 demo), the installation method is not much to say, if necessary, please refer to this blog post:
http://blog.csdn.net/pucao_cug/article/details/71229416
Install 3 machines, and the machine names are hserver1, hserver2, hserver3 (indicating that the machine name is not called this way, and you can use the hostname command to modify it later).
As shown:

Note: In order to avoid the trouble of the following series of authorization, the root account is used to log in and operate directly.
Use the ifconfig command to view the IP of these 3 machines. The correspondence between my machine name and ip is:
192.168.119.128 hserver1
192.168.119.129 hserver2
192.168.119.130 hserver3
2.2 Check the machine name##
For the convenience of subsequent operations, ensure that the hostname of the machine is what we want. Take the machine 192.168.119.128 as an example, log in with the root account, and then use the hostname command to view the machine name
As shown:
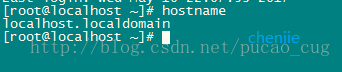
Found that the machine name is not what we want. But this is easy to handle. I will change its name. The command is:
hostname hserver1
As shown:

After the execution is complete, check to see if it has been modified, and type the hostname command:
As shown:

Similarly, rename the other two machines to hserver2 and hserver3 respectively.
2.3 Modify the /etc/hosts file##
Modify the /etc/hosts file of these 3 machines and add the following content to the file:
[ plain]view plaincopy
- 192.168.119.128 hserver1
- 192.168.119.129 hserver2
- 192.168.119.130 hserver3
As shown:

Note: The IP address does not need to be the same as mine, here is just a mapping, as long as the mapping is correct, as for the modification method, you can use the vim command, or you can write the contents of the hosts file on your local machine. Get the Linux machine to cover.
After the configuration is complete, use the ping command to check whether the three machines can ping each other. Taking hserver1 as an example, where to execute the command:
ping -c 3 hserver2
As shown:

Excuting an order:
ping -c 3 hserver3
As shown:
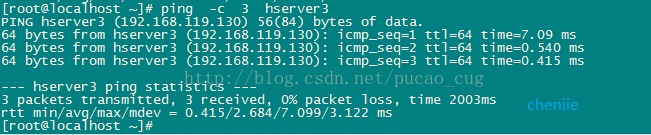
If the ping works, it means that the machines are interconnected and the hosts configuration is correct.
2.4 Generate secret key files for 3 machines##
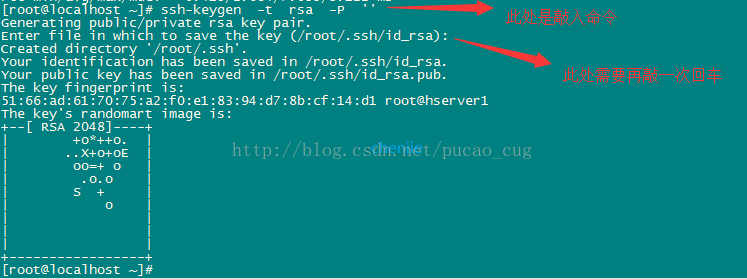
Take hserve1 as an example, execute the command to generate a secret key with an empty string (the public key will be used later), the command is:
ssh-keygen -t rsa -P ''
As shown:
Because I am using the root account now, the secret key file is saved in the /root/.ssh/ directory, and you can use the command to view it. The command is:
ls /root/.ssh/
As shown:

Use the same method to generate secret keys for hserver2 and hserver3 (the command is exactly the same, no need to modify it).
2.5 Create authorized_keys file on hserver1##
The next thing to do is to save a file with the same content in the /root/.ssh/ directory of the three machines. The file name is authorized_keys. The content of the file is the public key we just generated for the three machines. For convenience, my next step is to generate an authorized_keys file on hserver1, and then add the public keys generated by the three machines to the authorized_keys file of hserver1, and then copy the authorized_keys file to hserver2 and hserver3.
First use the command to generate a file named authorized_keys in the /root/.ssh/ directory of hserver1. The command is:
touch /root/.ssh/authorized_keys
As shown:

You can use the command to see if the generation is successful, the command is:
ls /root/.ssh/
As shown:

Then copy the contents of the /root/.ssh/id_rsa.pub file on hserver1, the contents of the /root/.ssh/id_rsa.pub file on hserver2, and the contents of the /root/.ssh/id_rsa.pub file on hserver3 to this authorized_keys. In the file, there are many ways to copy, you can use the cat command and the vim command to get it, or you can directly download the /root/.ssh/id_rsa.pub file on the three machines to the local, and edit the authorized_keys file locally Fortunately, upload to these 3 machines.
The content of my /root/.ssh/id_rsa.pub on the hserver1 machine is:
[ plain]view plaincopy
- ssh-rsa AAAAB3NzaC1yc2EAAAADAQABAAABAQD8fTIVorOxgDo81yCEgcJTstUcyfOBecL+NZ/OLXCEzaBMw5pLV0UNRX6SZnaAgu/erazkz4sw74zfRIMzEeKKCeNcZ6W78cg+ZNxDcj8+FGeYqY5+nc0YPhXFVI7AwFmfr7fH5hoIT14ClKfGklPgpEgUjDth0PeRwnUTvUy9A1x76npjAZrknQsnoLYle7cVJZ/zO3eGxS75YEdTYDMv+UMiwtcJg7UxOqR+9UT3TO+xLk0yOl8GIISXzMhdCZkmyAH+DmW56ejzsd+JWwCMm177DtOZULl7Osq+OGOtpbloj4HCfstpoiG58SM6Nba8WUXWLnbgqZuHPBag/Kqjroot@hserver1
The content of my /root/.ssh/id_rsa.pub on the hserver2 machine is:
[ plain]view plaincopy
- ssh-rsa AAAAB3NzaC1yc2EAAAADAQABAAABAQC29kPkYz4c3bd9Qa1TV8kCR0bUNs4f7/dDcR1NKwrgIiecN7zPEWJpjILtlm3niNNx1j5R49QLTLBKKo8PE8mid47POvNypkVRGDeN2IVCivoAQ1T7S8bTJ4zDECGydFYyKQfS2nOAifAWECdgFFtIp52d+dLIAg1JC37pfER9f32rd7anhTHYKwnLwR/NDVGAw3tMkXOnFuFKUMdOJ3GSoVOZf3QHKykGIC2fz/lsXZHaCcQWvOU/Ecd9e0263Tvqh7zGWpF5WYEGjkLlY8v2sioeZxgzog1LWycUTMTqaO+fSdbvKqVj6W0qdy3Io8bJ29Q3S/6MxLa6xvFcBJEXroot@hserver2
The content of my /root/.ssh/id_rsa.pub on the hserver2 machine is:
[ plain]view plaincopy
- ssh-rsa AAAAB3NzaC1yc2EAAAADAQABAAABAQC1a2o10ttv2570GpuUZy7g9o7lIkkeed7ba25VvFEBcUroQIZ+NIAiVIMGPRiOqm7X4bTLWj5EOz5JXG2l8rwA6CFnWfW3U+ttD1COLOrv2tHTiJ1PhQy1jJR/LpC1iX3sNIDDs+I0txZFGTCTRMLmrbHVTl8j5Yy/CTYLuC7reIZjzpHP7aaS2ev0dlbQzeB08ncjA5Jh4X72qQMOGPUUc2C9oa/CeCvI0SJbt8mkHwqFanZz/IfhLJIKhupjtYsqwQMmzLIjHxbLRwUGoWU6X4e76OkUz/xyyHlzBg1Vu2F9hjoXPW80VmupIRSXFDliDBJ8NlXXQN47wwYBG28broot@hserver3
After merging, the content of the /root/.ssh/authorized_keys file on my hserver1 machine is:
[ plain]view plaincopy
- ssh-rsa AAAAB3NzaC1yc2EAAAADAQABAAABAQD8fTIVorOxgDo81yCEgcJTstUcyfOBecL+NZ/OLXCEzaBMw5pLV0UNRX6SZnaAgu/erazkz4sw74zfRIMzEeKKCeNcZ6W78cg+ZNxDcj8+FGeYqY5+nc0YPhXFVI7AwFmfr7fH5hoIT14ClKfGklPgpEgUjDth0PeRwnUTvUy9A1x76npjAZrknQsnoLYle7cVJZ/zO3eGxS75YEdTYDMv+UMiwtcJg7UxOqR+9UT3TO+xLk0yOl8GIISXzMhdCZkmyAH+DmW56ejzsd+JWwCMm177DtOZULl7Osq+OGOtpbloj4HCfstpoiG58SM6Nba8WUXWLnbgqZuHPBag/Kqjroot@hserver1
- ssh-rsa AAAAB3NzaC1yc2EAAAADAQABAAABAQC29kPkYz4c3bd9Qa1TV8kCR0bUNs4f7/dDcR1NKwrgIiecN7zPEWJpjILtlm3niNNx1j5R49QLTLBKKo8PE8mid47POvNypkVRGDeN2IVCivoAQ1T7S8bTJ4zDECGydFYyKQfS2nOAifAWECdgFFtIp52d+dLIAg1JC37pfER9f32rd7anhTHYKwnLwR/NDVGAw3tMkXOnFuFKUMdOJ3GSoVOZf3QHKykGIC2fz/lsXZHaCcQWvOU/Ecd9e0263Tvqh7zGWpF5WYEGjkLlY8v2sioeZxgzog1LWycUTMTqaO+fSdbvKqVj6W0qdy3Io8bJ29Q3S/6MxLa6xvFcBJEXroot@hserver2
- ssh-rsa AAAAB3NzaC1yc2EAAAADAQABAAABAQC1a2o10ttv2570GpuUZy7g9o7lIkkeed7ba25VvFEBcUroQIZ+NIAiVIMGPRiOqm7X4bTLWj5EOz5JXG2l8rwA6CFnWfW3U+ttD1COLOrv2tHTiJ1PhQy1jJR/LpC1iX3sNIDDs+I0txZFGTCTRMLmrbHVTl8j5Yy/CTYLuC7reIZjzpHP7aaS2ev0dlbQzeB08ncjA5Jh4X72qQMOGPUUc2C9oa/CeCvI0SJbt8mkHwqFanZz/IfhLJIKhupjtYsqwQMmzLIjHxbLRwUGoWU6X4e76OkUz/xyyHlzBg1Vu2F9hjoXPW80VmupIRSXFDliDBJ8NlXXQN47wwYBG28broot@hserver3
As shown:

2.6 Copy the authorized_keys file to other machines##
The authorized_keys file is already in the /root/.ssh/ directory of the hserver1 machine, and the content of the file is already OK. Next, copy the file to /root/.ssh/ of hserver2 and /root/ of hserver3. ssh/.
There are many ways to copy, the easiest one is to use the SecureFX visualization tool.
After the copy is complete, you can see that there are such files in the /root/.ssh directory of the three machines
As shown:
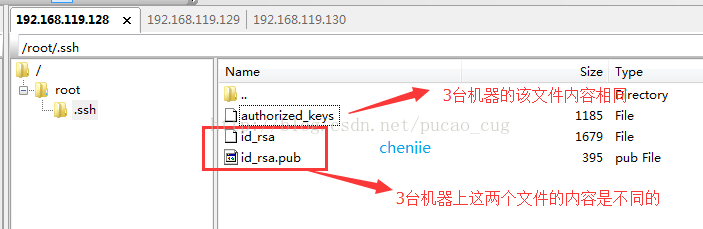
The above figure has made it very clear. The /root/.ssh of the three machines have files with the same name, but only the contents of the authorized_keys file are the same.
2.7 Test using ssh for passwordless login##
2.7.1 Test on hserver1###
input the command:
ssh hserver2
As shown:

input the command:
exit enter
As shown:

input the command:
ssh hserver3
As shown:

input the command:
exit enter
As shown:

2.7.2 Test on hserver2###
The method is similar to 2.7.1, except that the commands have become ssh hserver1 and ssh hserver3, but it must be noted that after each ssh is completed, exit must be executed, otherwise your subsequent commands will be executed on another machine .
2.7.3 Test on hserver3###
The method is similar to 2.7.1, except that the commands have become ssh hserver1 and ssh hserver2, but it must be noted that after each ssh is completed, exit must be executed, otherwise your subsequent commands will be executed on another machine .
3 Install jdk and hadoop
Explain that in order to save a series of tedious operations such as obtaining administrator rights, authorization, etc., and to streamline the tutorial, here are all logins with root accounts and operations with root privileges.
3.1 Install JDK
The installation of jdk is not detailed here. If necessary, you can refer to the blog post (although the blog post uses ubuntu, the jdk installation is the same under CentOS):
http://blog.csdn.net/pucao_cug/article/details/68948639
3.2 Install hadoop
Note: The following steps need to be repeated on all 3 machines.
3.2.1 Upload the file and unzip###
Create a new directory named hadoop in the opt directory, and upload the downloaded hadoop-2.8.0.tar to this directory, as shown in the figure:
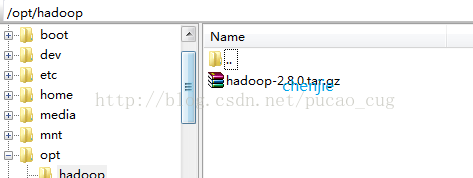
Enter the directory and execute the command:
cd /opt/hadoop
Execute the decompression command:
tar -xvf hadoop-2.8.0.tar.gz
Note: All three machines must perform the above operations, and after decompression, a directory named hadoop-2.8.0 will be obtained.
3.2.2 Create several directories###
Create a few directories in the /root directory, copy and paste and execute the following commands:
[ plain]view plaincopy
- mkdir /root/hadoop
- mkdir /root/hadoop/tmp
- mkdir /root/hadoop/var
- mkdir /root/hadoop/dfs
- mkdir /root/hadoop/dfs/name
- mkdir /root/hadoop/dfs/data
3.2.3 Modify a series of configuration files in etc/hadoop###
Modify a series of files in the /opt/hadoop/hadoop-2.8.0/etc/hadoop directory.
3.2.3.1 Modify core-site.xml
Modify the /opt/hadoop/hadoop-2.8.0/etc/hadoop/core-site.xml file
in
< /configuration>
3.2.3.2 Modify hadoop-env.sh
Modify the /opt/hadoop/hadoop-2.8.0/etc/hadoop/hadoop-env.sh file
Export JAVA_HOME=${JAVA_HOME}
change into:
export JAVA_HOME=/opt/java/jdk1.8.0_121
Description: Modify to your own JDK path
3.2.3.3 Modify hdfs-site.xml
Modify the /opt/hadoop/hadoop-2.8.0/etc/hadoop/hdfs-site.xml file
in
< property>
< /property>
< property>
< /property>
< property>
< /property>
< property>
< /property>
Note: After dfs.permissions is configured as false, you can allow files on dfs to be generated without checking permissions, which is convenient, but you need to prevent accidental deletion, please set it to true, or delete the property node directly, because The default is true.
3.2.3.4 Create and modify mapred-site.xml
In this version, there is a file named mapred-site.xml.template. Copy the file and rename it to mapred-site.xml. The command is:
[ plain]view plaincopy
- cp /opt/hadoop/hadoop-2.8.0/etc/hadoop/mapred-site.xml.template /opt/hadoop/hadoop-2.8.0/etc/hadoop/mapred-site.xml
Modify this newly created mapred-site.xml file, in
< /property>
< property>
< /property>
< property>
< /property>
3.2.3.5 Modify slaves file####
Modify the /opt/hadoop/hadoop-2.8.0/etc/hadoop/slaves file, delete the localhost inside, and add the following content:
[ plain]view plaincopy
- hserver2
- hserver3
3.2.3.6 Modify the yarn-site.xml file####
Modify the /opt/hadoop/hadoop-2.8.0/etc/hadoop/yarn-site.xml file,
in
< property>
< /property>
< /property>
Note: yarn.nodemanager.vmem-check-enabled means ignoring the check of virtual memory. If you are installing on a virtual machine, this configuration is very useful, and it is not easy to cause problems with subsequent operations. If it is on a physical machine and there is enough memory, this configuration can be removed.
4 Start hadoop
4.1 Perform initialization on namenode##
Because hserver1 is a namenode, hserver2 and hserver3 are both datanodes, so only hserver1 needs to be initialized, that is, hdfs is formatted.
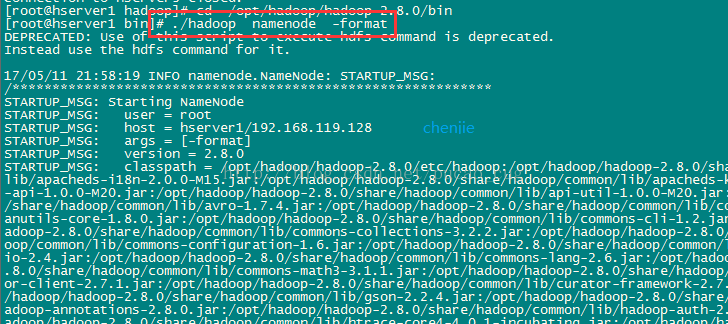
Enter the /opt/hadoop/hadoop-2.8.0/bin directory of the hserver1 machine, that is, execute the command:
cd /opt/hadoop/hadoop-2.8.0/bin
Execute the initialization script, that is, execute the command:
./hadoop namenode -format
As shown:
Wait a few seconds, if no error is reported, the execution can be successful, as shown in the figure:
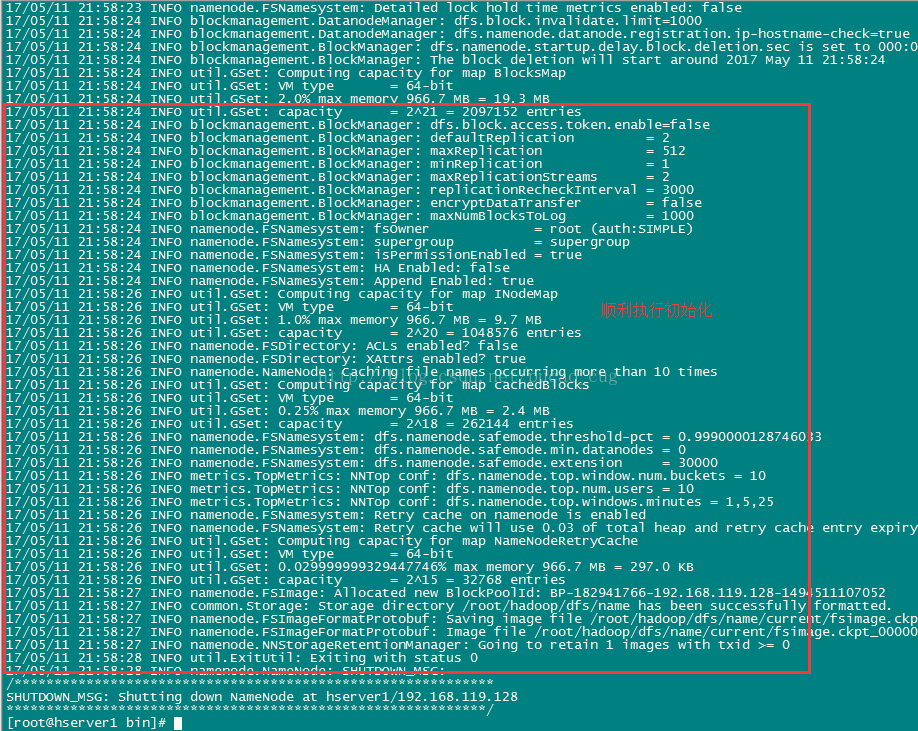
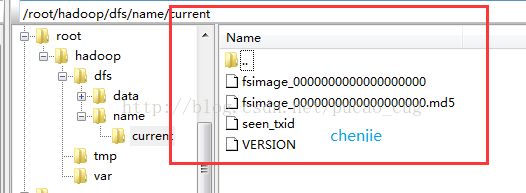
After the format is successful, you can see that there is an additional current directory in the /root/hadoop/dfs/name/ directory, and there are a series of files in the directory
As shown:
4.2 Execute start command on namenode##
Because hserver1 is a namenode, hserver2 and hserver3 are both datanodes, so you only need to execute the startup command on hserver1.
Enter the /opt/hadoop/hadoop-2.8.0/sbin directory of the hserver1 machine, that is, execute the command:
cd /opt/hadoop/hadoop-2.8.0/sbin
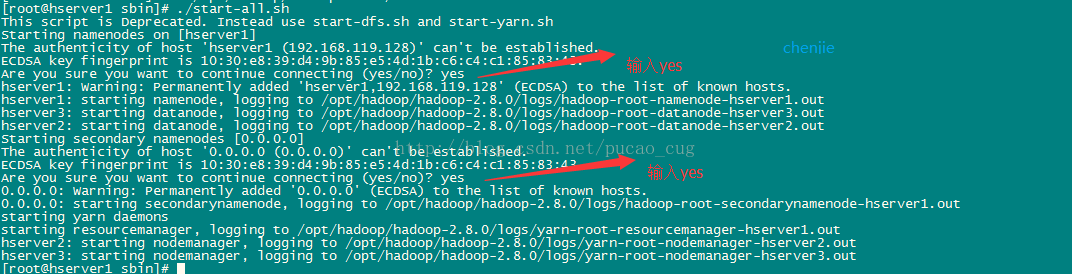
Execute the initialization script, that is, execute the command:
./start-all.sh
The first time we execute the above startup command, we will need to perform interactive operations. Enter yes on the Q&A interface and press Enter
As shown:
5 Test hadoop#
Hadoop is started, you need to test whether Hadoop is normal.
Execute the command to turn off the firewall. Under CentOS7, the command is:
systemctl stop firewalld.service
As shown:

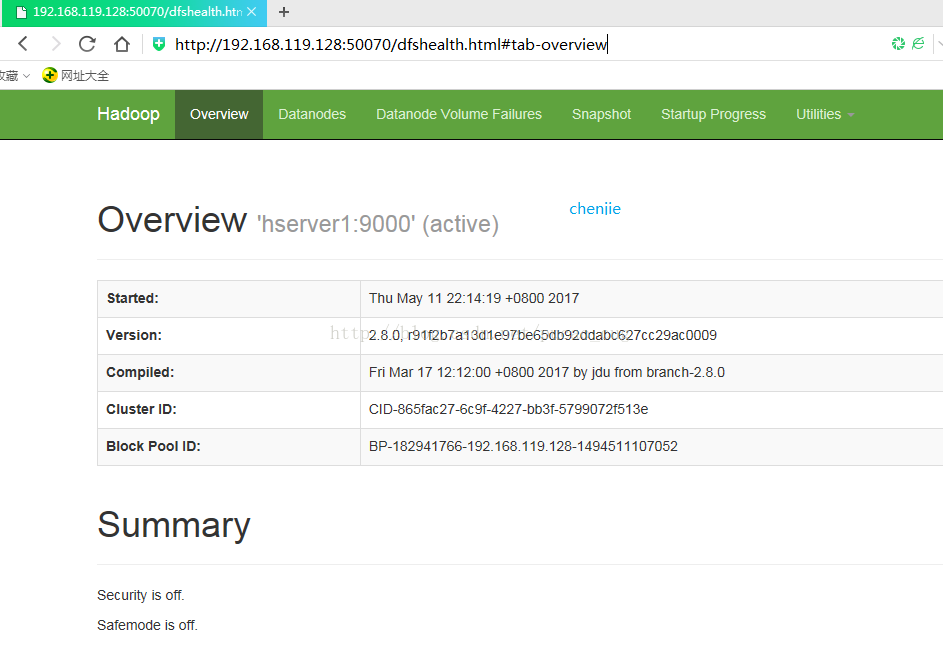
hserver1 is our namanode, the IP of this machine is 192.168.119.128, visit the following address on the local computer:
Automatically jump to the overview page
As shown:
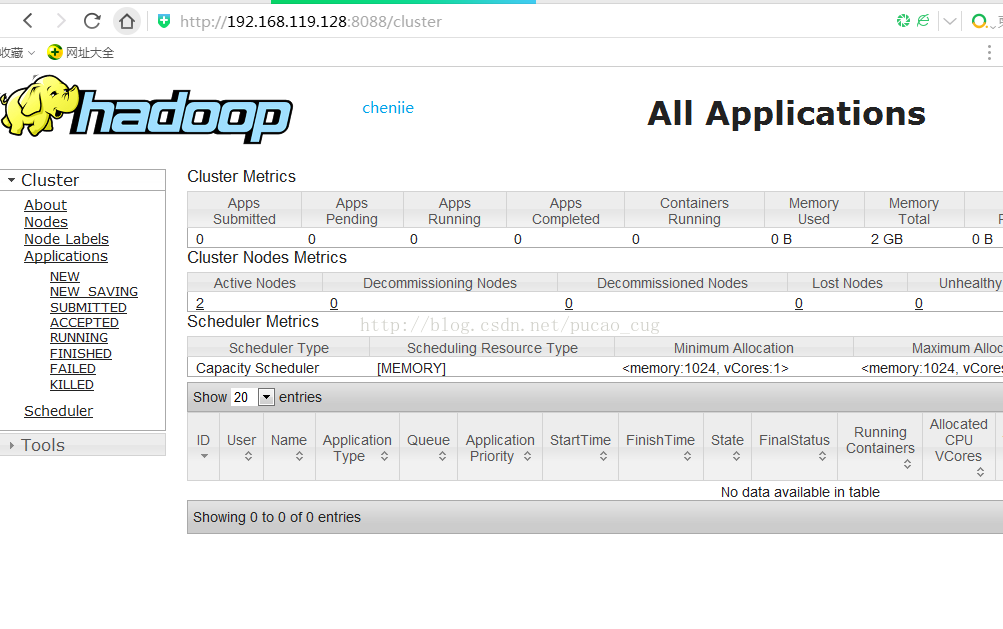
Visit the following address in the local browser:
Automatically jump to the cluster page
As shown:
Recommended Posts