Centos7 deploys HAproxy to implement Nginx cluster
Preface#
Haproxy is a free and open code software written in C language, which provides high availability, [load balancing] (https://cloud.tencent.com/product/clb?from=10680), and TCP and HTTP-based application proxy, which can run on most mainstream Linux operating systems.
Four servers are used in this experiment, one server is installed with haproxy for scheduling, the other three servers are built with nginx to provide web services, and one client is used for test access.
Environment introduction#
| Host | system | ip address | function |
|---|---|---|---|
| HAproxy | Centos7 | 192.168.128.130 | haproxy |
| node1 | Centos7 | 192.168.128.131 | Openresty |
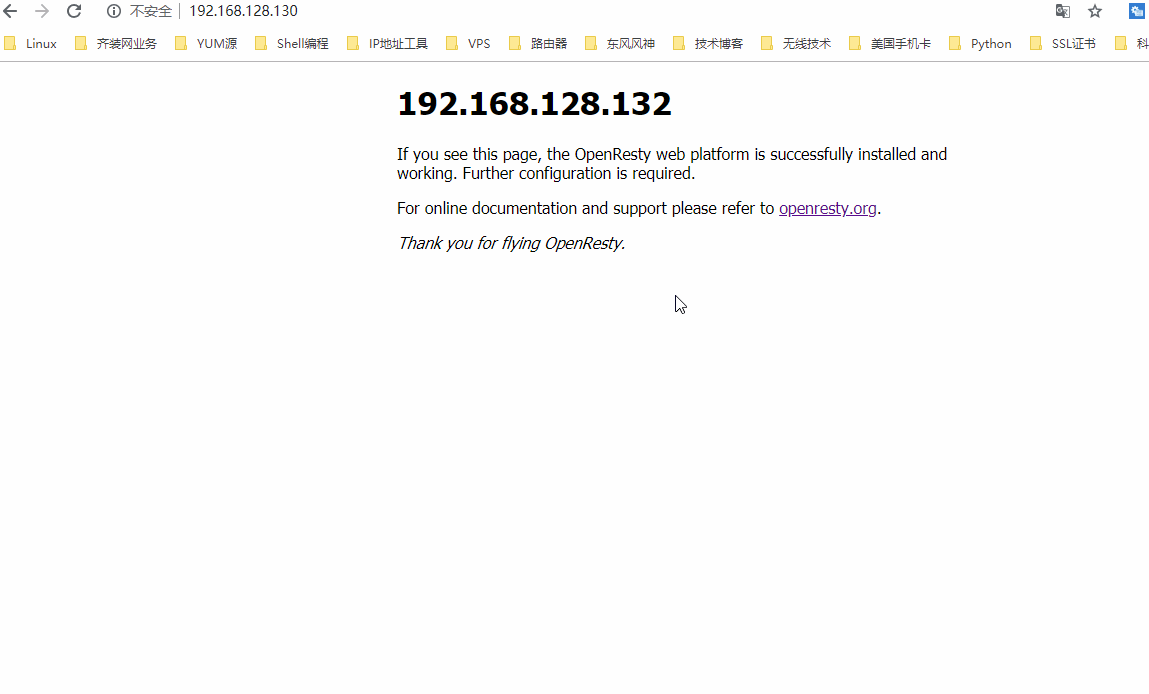
| node2 | Centos7 | 192.168.128.132 | Openresty |
| node3 | Centos7 | 192.168.128.133 | Openresty |
| Client | Windows10 | 192.168.3.2 | chrome |
nginx deployment#
PS: Since there are 3 nginx web servers, I installed them using ansible.
wget https://openresty.org/download/openresty-1.13.6.1.tar.gz
tar -zxvf openresty-1.13.6.1.tar.gz
cd openresty-1.13.6.1.tar
useradd -m www
yum -y install gcc gcc-c++ zlib-devel  pcre-devel openssl-devel
. /configure --prefix=/usr/local --with-http_stub_status_module --with-http_ssl_module --with-http_v2_module --with-http_gzip_static_module
gmake && gmake install
/usr/local/nginx/sbin/nginx -t
/usr/local/nginx/sbin/nginx
Test whether nginx is installed correctly
[ root@node1 html]# curl -I http://192.168.128.131
HTTP/1.1200 OK
Server: openresty/1.13.6.1
Date: Mon,18 Mar 201914:06:59 GMT
Content-Type: text/html
Content-Length:556
Last-Modified: Mon,18 Mar 201913:39:22 GMT
Connection: keep-alive
ETag:"5c8f9f8a-22c"
Accept-Ranges: bytes

[ root@node2 openresty-1.13.6.1]# curl -I http://192.168.128.132
HTTP/1.1200 OK
Server: openresty/1.13.6.1
Date: Mon,18 Mar 201914:07:28 GMT
Content-Type: text/html
Content-Length:556
Last-Modified: Mon,18 Mar 201913:38:49 GMT
Connection: keep-alive
ETag:"5c8f9f69-22c"
Accept-Ranges: bytes

[ root@node3 openresty-1.13.6.1]# curl -I http://192.168.128.133
HTTP/1.1200 OK
Server: openresty/1.13.6.1
Date: Mon,18 Mar 201914:07:32 GMT
Content-Type: text/html
Content-Length:556
Last-Modified: Mon,18 Mar 201913:39:08 GMT
Connection: keep-alive
ETag:"5c8f9f7c-22c"
Accept-Ranges: bytes
haproxy deployment#
After the successful deployment of nginx, we start to deploy haproxy, here we choose version 1.8.19 to install.
Compile and install##
wget http://www.haproxy.org/download/1.8/src/haproxy-1.8.19.tar.gz
tar -zxvf haproxy-1.8.19.tar.gz
cd haproxy-1.8.19
make TARGET=linux310 ARCH=x86_64 PREFIX=/usr/local/haproxy
make install PREFIX=/usr/local/haproxy
[ root@haproxy conf]# /usr/local/haproxy/sbin/haproxy -v
HA-Proxy version 1.8.192019/02/11
Copyright 2000-2019 Willy Tarreau <[email protected]>
- TARGET=linux310, kernel version, use uname-r to view the kernel, such as: 3.10.0-514.el7, at this time the parameter is linux310; if the kernel is greater than 2.6.28, you can use: TARGET=linux2628;
- ARCH=x86_64, the number of system bits;
- PREFIX=/usr/local/haprpxy #/usr/local/haprpxy, is the installation path of haprpxy.
Configuration##
Since the new version of haproxy no longer saves the configuration file in the examples directory, I recruited an old version of the configuration file to use.
Add configuration file###
global
log 127.0.0.1 local0 #Log
maxconn 1000 #Maximum number of connections
daemon
defaults
log global #Use globally defined logs
mode http #The default mode mode{ tcp|http|health }, Tcp is layer 4, http is layer 7, health will only return OK
option httplog #The log type is http log
option dontlognull #Do not record the log information of the health check
retries 3 #If the connection fails for 3 times, the service is considered unavailable. You can also set it below
timeout connect 5000 #Connection timeout
timeout client 50000 #Client connection timeout
timeout server 50000 #Server connection timeout
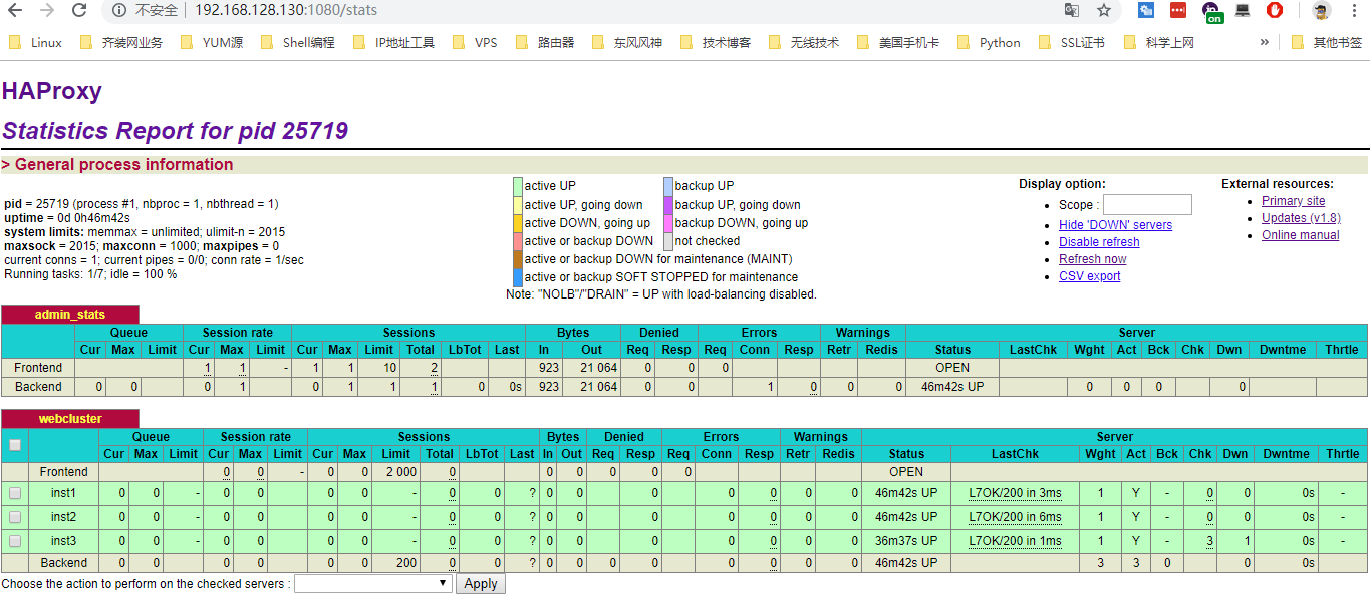
listen admin_stats
bind 0.0.0.0:1080 #Listening port
mode http
option httplog
maxconn 10
stats refresh 30s #Statistics page refresh time
stats uri /stats #Statistics page url
stats realm XingCloud\ Haproxy #The prompt text of the password box on the statistics page
stats auth admin:admin #Verification information of statistics page
stats auth Frank:Frank
stats hide-version
stats admin if TRUE
listen webcluster
bind 0.0.0.0:80
option httpchk GET /index.html
balance roundrobin #Load balancing mode polling
server inst1 192.168.128.131:80 check inter 2000 fall 3 #Define the backend server, check every 2000 milliseconds
server inst2 192.168.128.132:80 check inter 2000 fall 3
server inst3 192.168.128.133:80 check inter 2000 fall 3
Processing log###
By default, haproxy does not have logs. We need rsyslog to generate logs. If there is no rsyslog in your system, you can install it with yum.
Add the following two lines at the end of /etc/rsyslog.conf:
# haproxy.log
local0.*/var/log/haproxy.log
local3.*/var/log/haproxy.log
Modify the configuration in the /etc/sysconfig/rsyslog file to the following configuration:
# SYSLOGD_OPTIONS=""
SYSLOGD_OPTIONS="-r -m 0"
Restart rsyslog
systemctl restart rsyslog
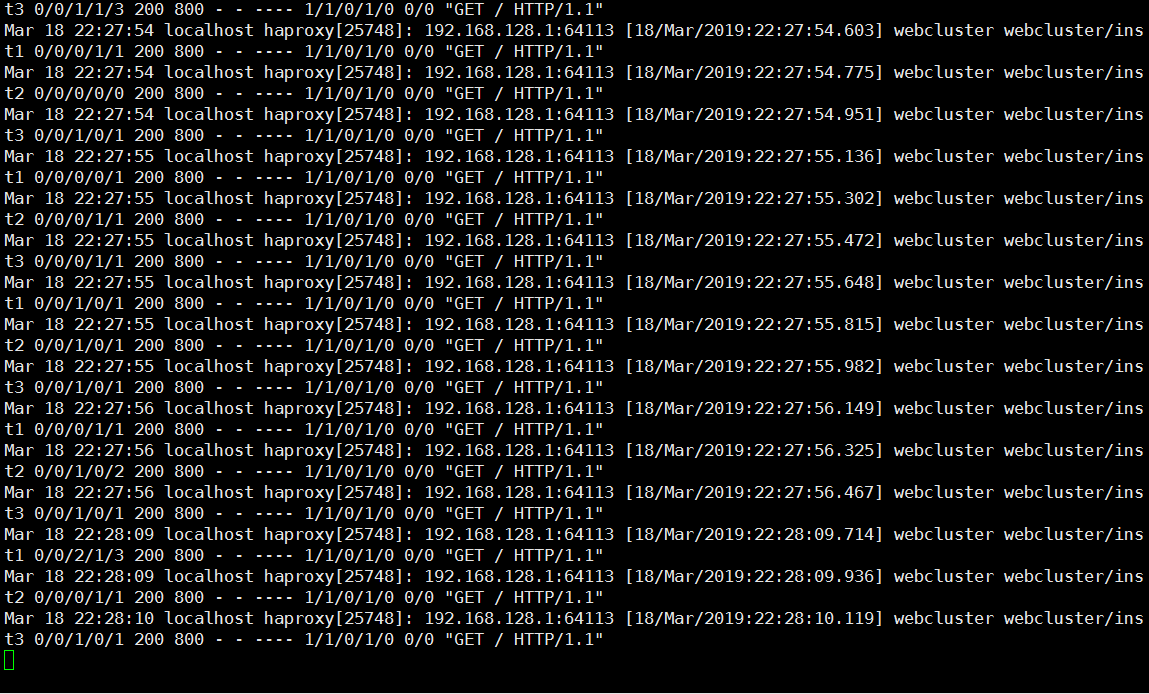
test#
After the above configuration is completed, check if the port and process of haproxy are normal
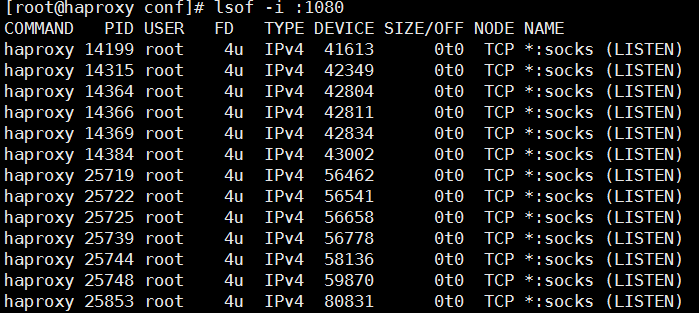
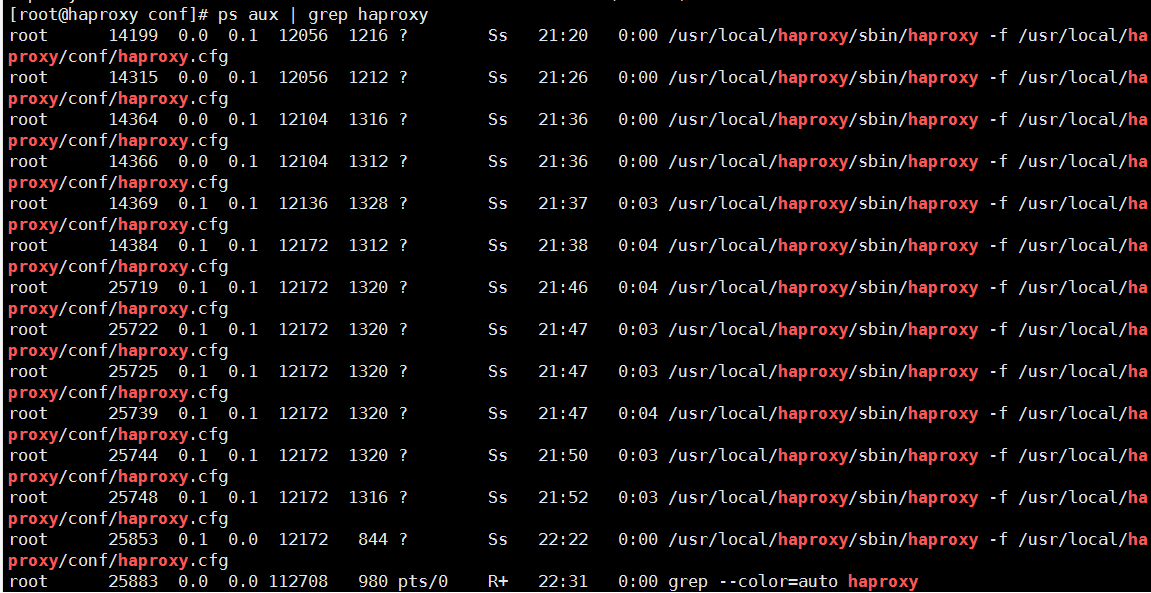
Seeing that the ports and processes are in a normal state, let's test whether the load balancing can work normally.
Recommended Posts