JumpServer Bastion Host--CentOS 8 Installation and Deployment (4)
Introduction to JumpServer
Jumpserver is an open source springboard/fortress machine system written by python and developed by Django, which helps Internet companies efficiently manage users, assets, permissions, and audits. Jumpserver implements the functions of a springboard machine, and is managed based on the ssh protocol, and the client does not need to install an agent.
Jumpserver is the world's first fully open source bastion machine. It uses the GNU GPL v2.0 open source protocol and is a 4A-compliant professional operation and maintenance audit system.
Jumpserver uses Python/Django for development, follows Web 2.0 specifications, and is equipped with industry-leading Web Terminal solutions. The interactive interface is beautiful and the user experience is good.
Jumpserver adopts a distributed architecture, supports multi-machine rooms and cross-regional deployment, the central node provides API, and each computer room deploys login nodes, which can be scaled horizontally without concurrent access restrictions.
JumpServer features
(1 ) Fully open source, GPL licensed
(2 ) Written in Python, easy to redevelop
(3 ) The basic functions of the springboard are realized, such as identity authentication, access control, authorization, audit, batch operation, etc.
(4 ) Integrated Ansible, batch commands, etc.
(5 ) Support WebTerminal
(6 ) Prepared by Bootstrap, beautiful interface
(7 ) Automatically collect hardware information
(8 ) Video playback
(9 ) Command search
(10 )real time monitoring
(11 ) Batch upload and download
JumpServer environment description
Installation Environment
· Hardware configuration: 2 CPU cores, 4G memory, 50G hard disk (minimum)
Operating system: Linux distribution x86_64
· Python environment: Python = 3.6.x
· Database: Mysql Server ≥ 5.6 \ Mariadb Server ≥ 5.5.56
· Cache database: Redis
· Agent: Ningx
JumpServer plugin
Jumpserver management background is the core component (Core), developed in the style of Django Class Based View, and supports Restful API.
Koko
Koko is SSH Server and Web Terminal Server. Users can use their own account to access SSH protocol and Telnet protocol assets through SSH or Web Terminal.
Luna
Luna is the front-end page of Web Terminal Server, a plug-in required for users to log in using Web Terminal.
Guacamole
Guacamole is an open source project that provides solutions for remote desktops. Jumpserver uses its components to implement RDP and VNC functions. Jumpserver does not modify its code but adds additional plug-ins to support Jumpserver calls.
JumpServer components and their listening ports
Jumpserver  8080/tcp
Redis  6379/tcp
MySQL/Mariadb  3306/tcp
Nginx  80/tcp
Koko  SSH 2222/tcp Web Terminal 5000/tcp
Guacamole  8081/tcp
JumpServer deployment installation
System Configuration
system version
[ root@JumpServer ~]# cat  /etc/redhat-release
CentOS Linux release 8.1.1911(Core)
system time
date -s "2020-06-16 10:57:00"
hwclock -w
clock -w
Software version
selinux
setenforce 0
sed -i '/SELINUX/s/enforcing/disabled/'/etc/selinux/config
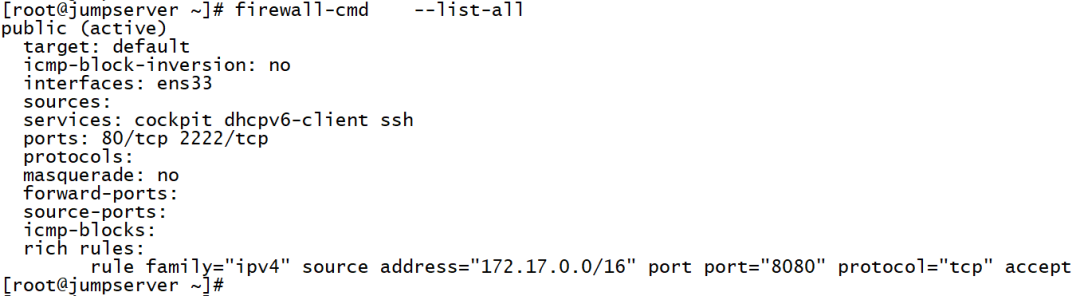
firewall
# nginx port
firewall-cmd --zone=public--add-port=80/tcp --permanent
# User SSH login port koko
firewall-cmd --zone=public--add-port=2222/tcp --permanent
# Set firewall rules to allow container ip to access port 8080 of the host
firewall-cmd --permanent --add-rich-rule="rule family="ipv4" source address="172.17.0.0/16" port protocol="tcp" port="8080" accept"
# Set firewall rules to allow container ip to access port 8080 of the host
firewall-cmd --reload
# Reload rules
Python3 and Python virtual environment
Install dependent packages
yum -y install wget gcc epel-release git
Install Python 3.6
dnf install python36 python36-devel
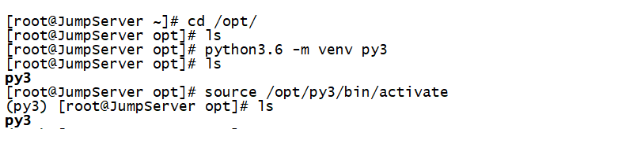
Build a Python virtual environment
# Create a virtual environment, the environment command is customized to py3
cd /opt
python3.6-m venv py3
# Run a virtualized environment
# Seeing the prompt below means success,To run Jumpserver in the future, you must first run the above source command,All the following commands are run in this virtual environment
source /opt/py3/bin/activate
# The above characters indicate successful operation(py3)[root@jumpserver py3]
Redis
Jumpserver uses Redis for cache and celery broke
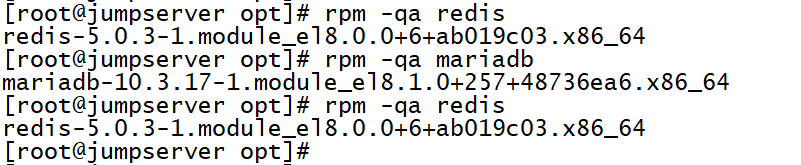
dnf -y install redis
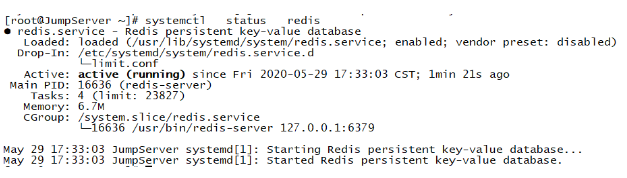
systemctl start redis && systemctl enable redis
systemctl status redis
Mariadb database
Install Mariadb database
dnf install mariadb-server mariadb -y
Start and boot up
systemctl start mariadb && systemctl enable mariadb
Initialize the database
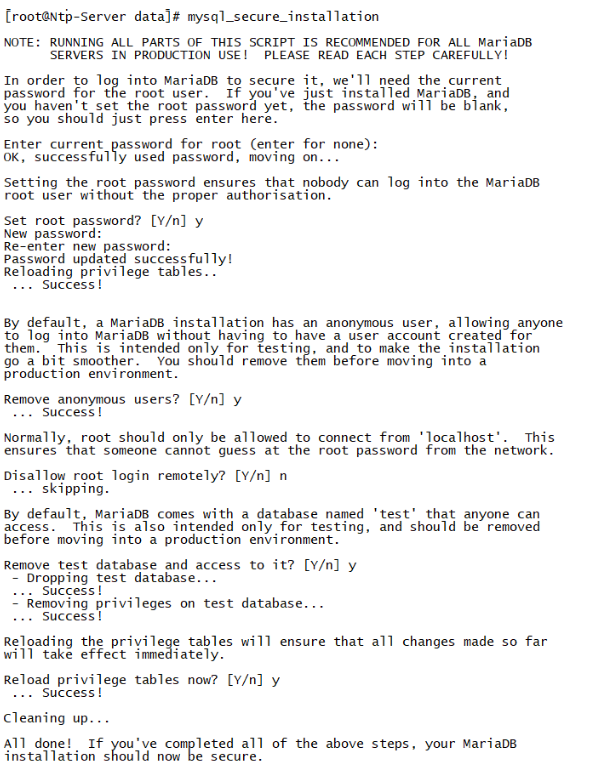
Generate random database password
[ root@JumpServer ~]# DB_PASSWORD=`cat /dev/urandom | tr -dc A-Za-z0-9 | head -c 24`[root@JumpServer ~]# echo -e "\033[31m Your database password is$DB_PASSWORD \033[0m"
 Your database password is dhfbGWxvTjZIPDzard39xy7L
Database configuration
mysql -uroot -p
# Create a jumpserver database
create database jumpserver default charset 'utf8';
# Authorize jumpserver user
grant all on jumpserver.* to 'jumpserver'@'127.0.0.1' identified by 'dhfbGWxvTjZIPDzard39xy7L';
grant all on jumpserver.* to 'jumpserver'@'localhost' identified by 'dhfbGWxvTjZIPDzard39xy7L';
# Refresh strategy
flush privileges;
Jumpserver installation
Get the jumpserver code
cd /opt && \
git clone --depth=1 https://github.com/jumpserver/jumpserver.git
There is a problem with the network, you can download it with wget
cd /opt
wget http://demo.jumpserver.org/download/jumpserver/latest/jumpserver.tar.gz
tar xf jumpserver.tar.gz
Software environment dependent
dnf -y install gcc krb5-devel libtiff-devel libjpeg-devel libzip-devel freetype-devel libwebp-devel tcl-devel tk-devel sshpass openldap-devel mariadb-devel libffi-devel openssh-clients telnet openldap-clients
** pip depends on the environment**
cd /opt/jumpserver/requirements/
pip install wheel && \
pip install --upgrade pip setuptools && \
pip install -r requirements.txt

Make sure that the py3 virtual environment has been loaded. If you encounter an error in the middle, it is usually that the dependent packages are not installed.
Alibaba image acceleration can be used in China
pip install wheel -i https://mirrors.aliyun.com/pypi/simple/
pip install --upgrade pip setuptools -i https://mirrors.aliyun.com/pypi/simple/
pip install -r requirements.txt -i https://mirrors.aliyun.com/pypi/simple/
Modify the jumpserver configuration file
cd /opt/jumpserver
cp config_example.yml config.yml

SECRET_KEY=`cat /dev/urandom | tr -dc A-Za-z0-9 | head -c 50`
# Generate random SECRET_KEY
echo "SECRET_KEY=$SECRET_KEY">>~/.bashrc

BOOTSTRAP_TOKEN=`cat /dev/urandom | tr -dc A-Za-z0-9 | head -c 16`
# Generate random BOOTSTRAP_TOKEN
echo "BOOTSTRAP_TOKEN=$BOOTSTRAP_TOKEN">>~/.bashrc

sed -i "s/SECRET_KEY:/SECRET_KEY: $SECRET_KEY/g"/opt/jumpserver/config.yml

sed -i "s/BOOTSTRAP_TOKEN:/BOOTSTRAP_TOKEN: $BOOTSTRAP_TOKEN/g"/opt/jumpserver/config.yml

sed -i "s/# DEBUG: true/DEBUG: false/g"/opt/jumpserver/config.yml

sed -i "s/# LOG_LEVEL: DEBUG/LOG_LEVEL: ERROR/g"/opt/jumpserver/config.yml

sed -i "s/# SESSION_EXPIRE_AT_BROWSER_CLOSE: false/SESSION_EXPIRE_AT_BROWSER_CLOSE: true/g"/opt/jumpserver/config.yml

sed -i "s/DB_PASSWORD: /DB_PASSWORD: $DB_PASSWORD/g"/opt/jumpserver/config.yml

echo -e "\033[31m your SECRET_KEY is$SECRET_KEY \033[0m"

echo -e "\033[31m your BOOTSTRAP_TOKEN is$BOOTSTRAP_TOKEN \033[0m"
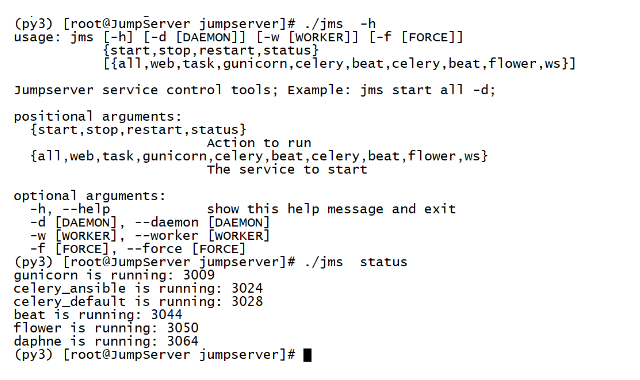
Start jumpserver
Make sure to load the py3 virtual environment source /opt/py3/bin/activate
cd /opt/jumpserver
. /jms start all -d
Can run in the background-d parameter
Docker
# Installation related dependencies
dnf install -y yum-utils device-mapper-persistent-data lvm2
# Configure Docker source
yum-config-manager --add-repo http://mirrors.aliyun.com/docker-ce/linux/centos/docker-ce.repo
# Regenerate the cache
dnf makecache
# Install Docker-ce
rpm --import https://mirrors.aliyun.com/docker-ce/linux/centos/gpg
dnf -y install docker-ce
# Download related files
mkdir -p /etc/docker
wget -O /etc/docker/daemon.json http://demo.jumpserver.org/download/docker/daemon.json
# Start docker and set to start automatically
systemctl restart docker && systemctl enable docker
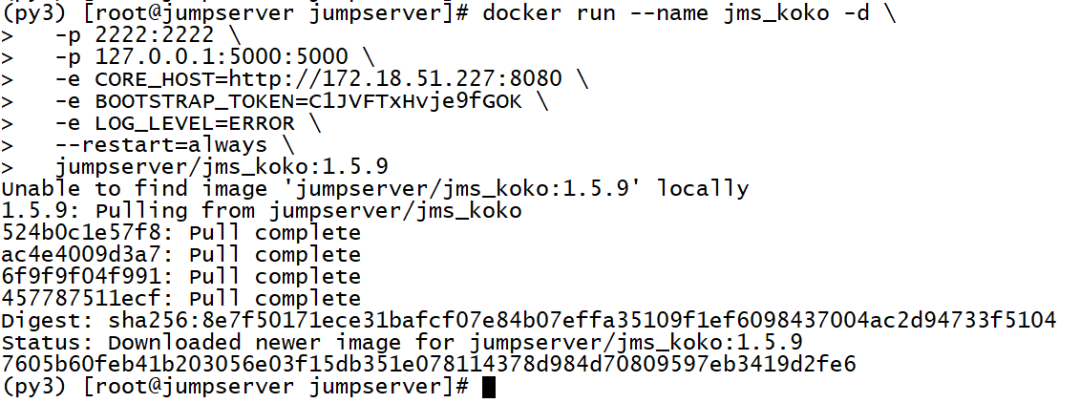
Docker deploy koko components
format
docker run --name jms_koko -d \
 - p 2222:2222-p 127.0.0.1:5000:5000 \
 - e CORE_HOST=http://<Jumpserver_url> \
 - e BOOTSTRAP_TOKEN=<Jumpserver_BOOTSTRAP_TOKEN> \
 - e LOG_LEVEL=ERROR \
 - - restart=always \
 jumpserver/jms_koko:<Tag><Jumpserver_url>Is the url address of jumpserver,<Jumpserver_BOOTSTRAP_TOKEN>Need from jumpserver/config.Get in yml,Guarantee consistency,<Tag>Is the version
E.g
docker run --name jms_koko -d \
 - p 2222:2222 \
 - p 127.0.0.1:5000:5000 \
 - e CORE_HOST=http://172.18.51.227:8080 \
 - e BOOTSTRAP_TOKEN=C1JVFTxHvje9fGOK \
 - e LOG_LEVEL=ERROR \
 - - restart=always \
 jumpserver/jms_koko:1.5.9
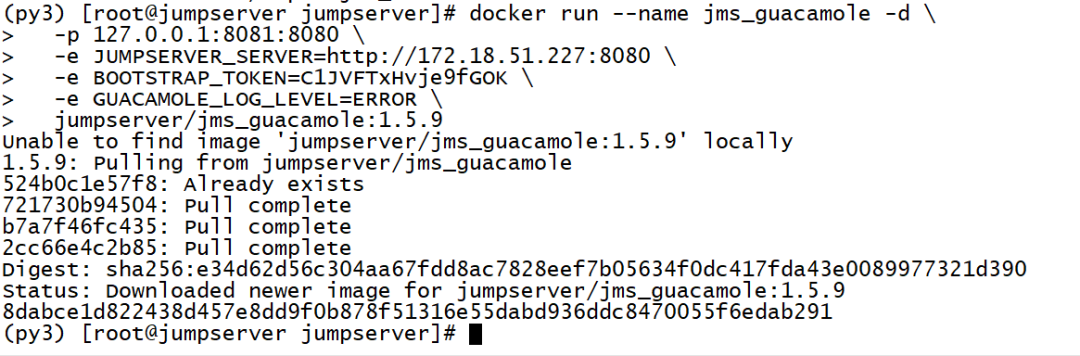
Docker deploys the guacamole component
format
docker run --name jms_guacamole -d \
 - p 127.0.0.1:8081:8080 \
 - e JUMPSERVER_SERVER=http://<Jumpserver_url> \
 - e BOOTSTRAP_TOKEN=<Jumpserver_BOOTSTRAP_TOKEN> \
 - e GUACAMOLE_LOG_LEVEL=ERROR \
 jumpserver/jms_guacamole:<Tag><Jumpserver_url>Is the url address of jumpserver,<Jumpserver_BOOTSTRAP_TOKEN>Need from jumpserver/config.Get in yml,Guarantee consistency,<Tag>Is the version
Example
docker run --name jms_guacamole -d \
 - p 127.0.0.1:8081:8080 \
 - e JUMPSERVER_SERVER=http://172.18.51.227:8080 \
 - e BOOTSTRAP_TOKEN=C1JVFTxHvje9fGOK \
 - e GUACAMOLE_LOG_LEVEL=ERROR \
 jumpserver/jms_guacamole:1.5.9
Check the running status of the container
docker images
docker ps -a

View docker IP address
docker inspect --format='{{.NetworkSettings.IPAddress}}'Container name

Web Terminal (front-end Luna)
Download the installation package
cd /opt
wget https://github.com/jumpserver/luna/releases/download/1.5.9/luna.tar.gz
Unzip and authorize
tar -xf luna.tar.gz
chown -R nginx:nginx luna
Install Nginx
Edit nginx repo file
vi /etc/yum.repos.d/nginx.repo
[ nginx-stable]
name=nginx stable repo
baseurl=http://nginx.org/packages/centos/$releasever/$basearch/
gpgcheck=1
enabled=1
gpgkey=https://nginx.org/keys/nginx_signing.key
module_hotfixes=true
Install Nginx
dnf -y install nginx
Nginx jumpserver configuration file
# Delete the default default.conf file
rm -rf /etc/nginx/conf.d/default.conf
# Edit the jumpserver configuration file
vi /etc/nginx/conf.d/jumpserver.conf
[ root@JumpServer conf.d]# cat jumpserver.conf
server {
 listen 80;

 client_max_body_size 100m;  #Video and file upload size limit

 location /luna/{
  try_files $uri //index.html;
  alias /opt/luna/;  #luna path,If you modify the installation directory,Need to be modified here
    }

 location /media/{
  add_header Content-Encoding gzip;
  root /opt/jumpserver/data/;  #Video location,If you modify the installation directory,Need to be modified here
    }

 location /static/{
  root /opt/jumpserver/data/;  #Static resources,If you modify the installation directory,Need to be modified here
    }

 location /koko/{
  proxy_pass       http://localhost:5000;
  proxy_buffering off;
  proxy_http_version 1.1;
  proxy_set_header Upgrade $http_upgrade;
  proxy_set_header Connection "upgrade";
  proxy_set_header X-Real-IP $remote_addr;
  proxy_set_header Host $host;
  proxy_set_header X-Forwarded-For $proxy_add_x_forwarded_for;
  access_log off;}

 location /guacamole/{
  proxy_pass       http://localhost:8081/;
  proxy_buffering off;
  proxy_http_version 1.1;
  proxy_set_header Upgrade $http_upgrade;
  proxy_set_header Connection $http_connection;
  proxy_set_header X-Real-IP $remote_addr;
  proxy_set_header Host $host;
  proxy_set_header X-Forwarded-For $proxy_add_x_forwarded_for;
  access_log off;}

 location /ws/{
  proxy_set_header X-Real-IP $remote_addr;
  proxy_set_header Host $host;
  proxy_set_header X-Forwarded-For $proxy_add_x_forwarded_for;
  proxy_pass http://localhost:8070;
  proxy_http_version 1.1;
  proxy_buffering off;
  proxy_set_header Upgrade $http_upgrade;
  proxy_set_header Connection "upgrade";}

 location /{
  proxy_pass http://localhost:8080;
  proxy_set_header X-Real-IP $remote_addr;
  proxy_set_header Host $host;
  proxy_set_header X-Forwarded-For $proxy_add_x_forwarded_for;}}
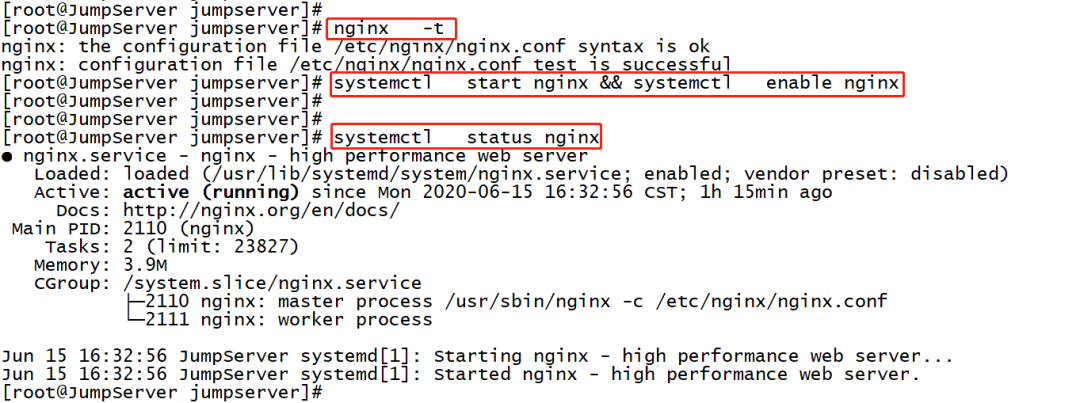
**Check Nginx configuration file and start **
nginx -t
systemctl   start nginx && systemctl   enable nginx
systemctl   status nginx
Visit JumpServer Web
** After all the services are started, access port 80 of the nginx proxy of the jumpserver server. Do not access port 8080. Default account: admin Password: admin**
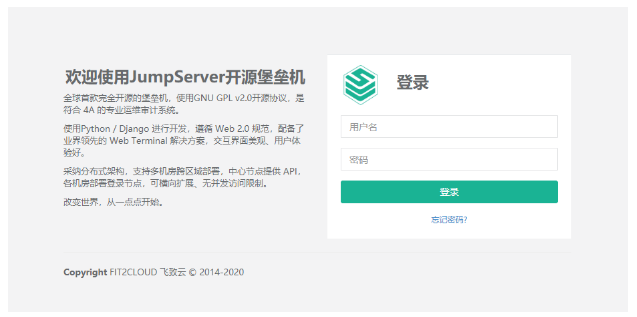
JumpServer homepage

Session management-terminal management to check whether the registration of koko and guacamole components is normal

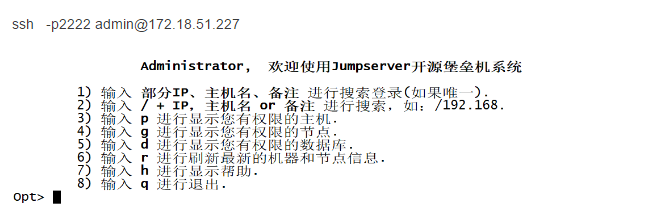
SSH test connection
ssh -p2222 [email protected]
CentOS 8.0 installs docker error: Problem: package docker-ce-3:19.03.4-3.el7.x86_64 requires containerd.io >= 1.2.2-3
package docker-ce-3:19.03.2-3.el7.x86_64 requires containerd.io >=1.2.2-3, but none of the providers can be installed
- cannot install the best candidate for the job
- package containerd.io-1.2.2-3.3.el7.x86_64 is excluded
- package containerd.io-1.2.2-3.el7.x86_64 is excluded
- package containerd.io-1.2.4-3.1.el7.x86_64 is excluded
- package containerd.io-1.2.5-3.1.el7.x86_64 is excluded
- package containerd.io-1.2.6-3.3.el7.x86_64 is excluded(try to add '--skip-broken' to skip uninstallable packages or '--nobest' to use not only best candidate packages)
Update the version of containerd.io, and then reinstall the latest version of docker to install successfully
wget https://download.docker.com/linux/centos/7/x86_64/edge/Packages/containerd.io-1.2.6-3.3.el7.x86_64.rpm
dnf install -y  containerd.io-1.2.6-3.3.el7.x86_64.rpm
Check if the installation is successful
docker -v

docker operation command
# Search mirror
docker search *image_name*
# Download mirror
docker pull *image_name*
# View mirror
docker images
# Delete mirror
docker rmi *image_name*
docker image rm *image_name*
# Export docker image
docker save *image_name*>/save/image/path/name.tar.gz
# Import docker image
docker load </save/image/path/name.tar.gz
# View container
docker ps
docker ps -a
docker ps -aq
# Container port mapping list
docker port jms_koko
# run|Reboot|Stop container
docker start|restart|stop <CONTAINER ID of the container or container NAMES>
# View container log
docker logs -f <CONTAINER ID of the container or container NAMES>
# Delete container
docker rm *container_id*
# Display the resource usage of the container(Memory, CPU, disk, etc.)
docker stats jms_koko
# Display docker client and server version information
docker version
# Show the processes running in the container(Equivalent to executing ps in the container-ef command)
docker top jms_koko
# Display Docker detailed system information
docker info
# Kill all running containers
docker kill $(docker ps -a -q)
# Delete all stopped containers
docker rm $(docker ps -a -q)
# Delete all mirrors that are not tagged with dangling
docker rmi $(docker images -q -f dangling=true)
# Delete all mirrors
docker rmi $(docker images -q)
# Forcibly delete the image name containing "doss-api" mirror
docker rmi --force $(docker images | grep doss-api | awk '{print $3}')
# Delete all unused data
docker system prune
# Only delete unused volumes
docker volume prune
JumpServer official documentation
https://docs.jumpserver.org/zh/master/install/step_by_step/
Recommended Posts