Ubuntu deployment and experience Nexus3
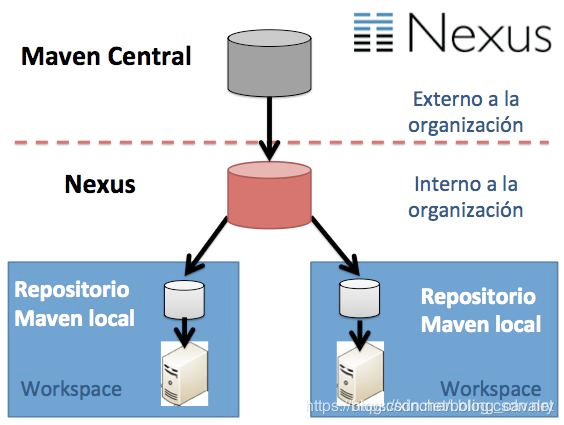
About Nexus
As shown in the figure below, after deploying Nexus on the local area network, the jars in the central warehouse can be cached, and the developed second-party libraries can be published on Nexus. Others in the local area network can also download these second-party libraries from Nexus for use:
Environmental information###
The actual combat is to install Nexus3 through Docker on the Linux server:
- Operating system: Ubuntu 18.04.3 LTS
- Docker:19.03.5
- Nexus:3.19.1
Install docker on Ubuntu
- apt update:
apt-get update
- Install curl:
apt-get install -y curl
- Install docker:
curl -sSL https://get.docker.com | sh
- After the installation is complete, execute the command docker version to check whether the docker is normal;
Deploy Nexus3
- Create a working directory and assign permissions:
mkdir -p /usr/local/work/nexus-data && chown -R 200/usr/local/work/nexus-data
- Download the Nexus image and create the container:
docker run -d \
- p 8081:8081 \
- - name nexus \
- v /usr/local/work/nexus-data:/nexus-data \
sonatype/nexus3:3.19.1
The above command has many parameters, there are several points to note:
a. Port 8081 of the container is mapped to port 8081 of [Host] (https://cloud.tencent.com/product/cdh?from=10680);
b. The container name is nexus;
c. The /nexus-data/ directory of the container is mapped to /usr/local/work/nexus-data/ of the host;
d. The image is the official version 3.19.1 of sonatype;
- After the container is successfully created, Nexus3 is deployed successfully;
Login and operate Nexus3
- Execute the following command on the console to get the initial password of Nexus3:
echo `docker exec nexus cat /nexus-data/admin.password`
What I got here is 2c9c5399-d0da-48ec-9050-dc4f43cede10
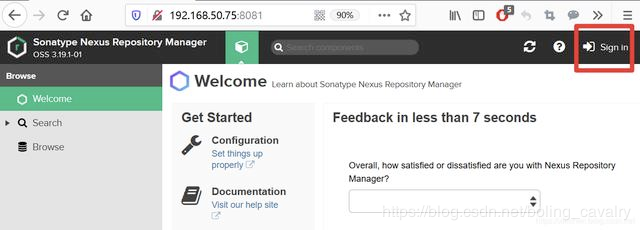
2. Click Sign in in the red box in the upper right corner of the figure below to enter the login page:
- The login page is as shown below, the account is admin, and the password is 2c9c5399-d0da-48ec-9050-dc4f43cede10 obtained just now:

- A successful login will prompt to change the password, as shown in the figure below, please change:

- Whether to run anonymous access, check it here:

Role and account###
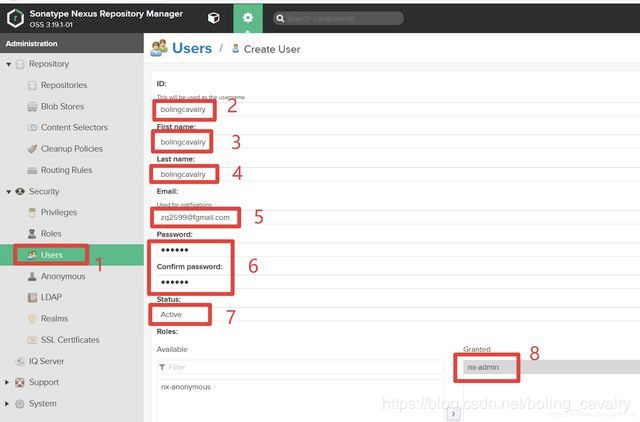
In actual use, for security reasons, each user cannot use the admin account. You can create a role first, add various permissions to the role according to actual needs, and then create an account under this role:
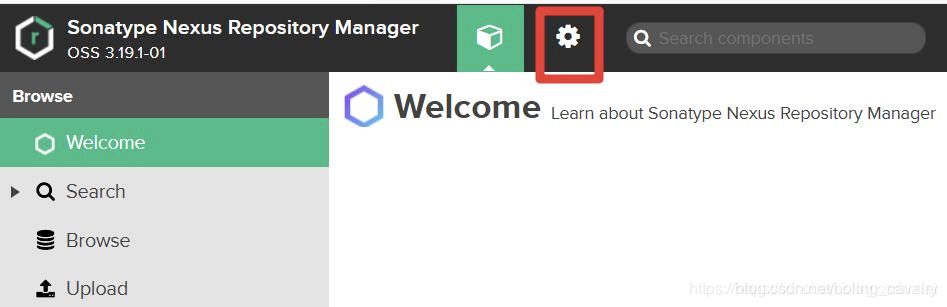
- Click the button in the red box below to enter the setting page:
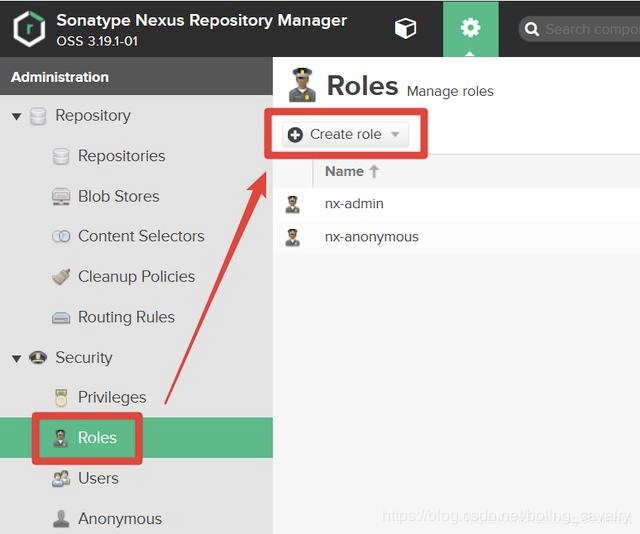
- The red box in the figure below is a link to the role management page. You can create a role according to the actual situation:
- In order to simplify the operation, we will not create a new role, but create an account bolingcavalry with an administrator role, as shown in the following figure:
At this point, the deployment of Nexus3 is complete. Next, verify whether Nexus can provide the jar cache function;
Prepare two computers to verify Nexus service###
The next thing to verify is the ability of Nexus to cache the jar packages of the central warehouse, and see if Nexus can allow us to download the required jars faster during the development and construction process;
- In addition, prepare two computers, computer A and computer B, to verify that the just deployed Nexus3 can cache the jar package of the central warehouse (you can also use virtual machines to create two computers);
- Both computers A and B have installed JDK8 and Maven3;
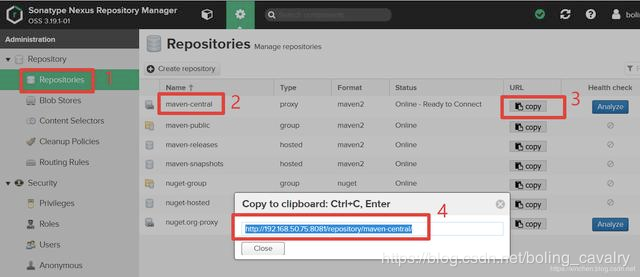
- As shown in the figure below, on the warehouse list page, click on the red box position in the figure below to get the address of the maven-central warehouse http://192.168.50.75:8081/repository/maven-central/:
Modify the maven configuration files of two computers###
The conf/settings.xml files in the maven directory on Computer A and Computer B must be modified as follows:
- Find the servers node and add the following content:
< server><id>maven-central</id><username>bolingcavalry</username><password>888888</password></server>
- Find the mirrors node and add the following content, where the content of the url is the maven-central warehouse address obtained earlier:
< mirror><id>maven-central</id><mirrorOf>*</mirrorOf><url>http://192.168.50.75:8081/repository/maven-central/</url></mirror>
Compile and build the project on computer A (should be very slow)
Compile the open source project spring-cloud-alibaba on computer A. At this time, there is no jar package cached on Nexus, so the compilation speed will be very slow, because all dependent jars must be downloaded from the central warehouse, let's try:
- Log in to computer A and download the 2.1.1.RELEASE archive package of spring-cloud-alibaba:
wget https://github.com/alibaba/spring-cloud-alibaba/archive/v2.1.1.RELEASE.tar.gz
- Unzip the downloaded file:
tar -zxvf v2.1.1.RELEASE.tar.gz
- Enter the unzipped directory:
cd spring-cloud-alibaba-2.1.1.RELEASE/
- Compile:
mvn clean compile -U -DskipTests
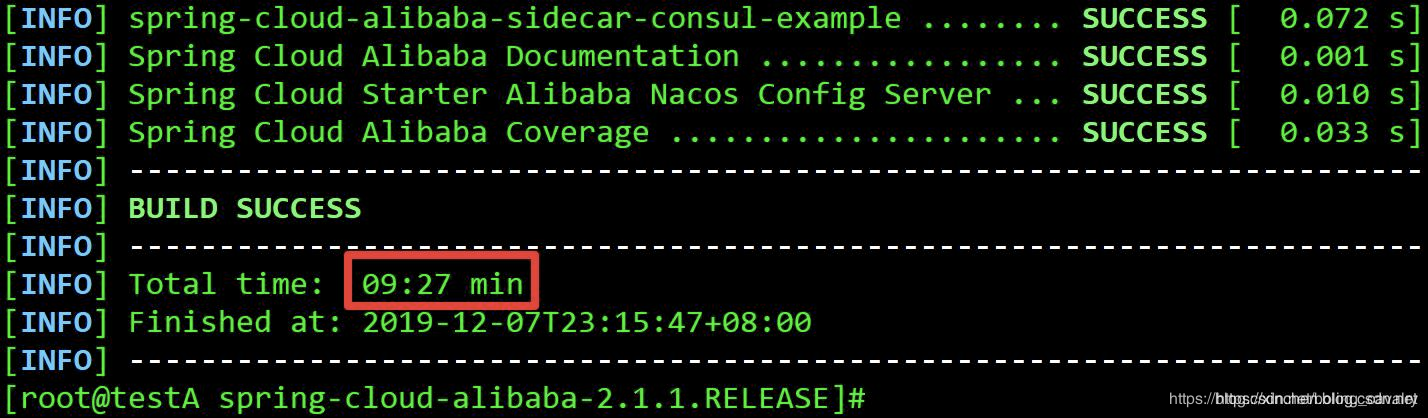
- Compilation is complete, as shown in the red box in the following figure, this compilation takes 9 minutes and 27 seconds:
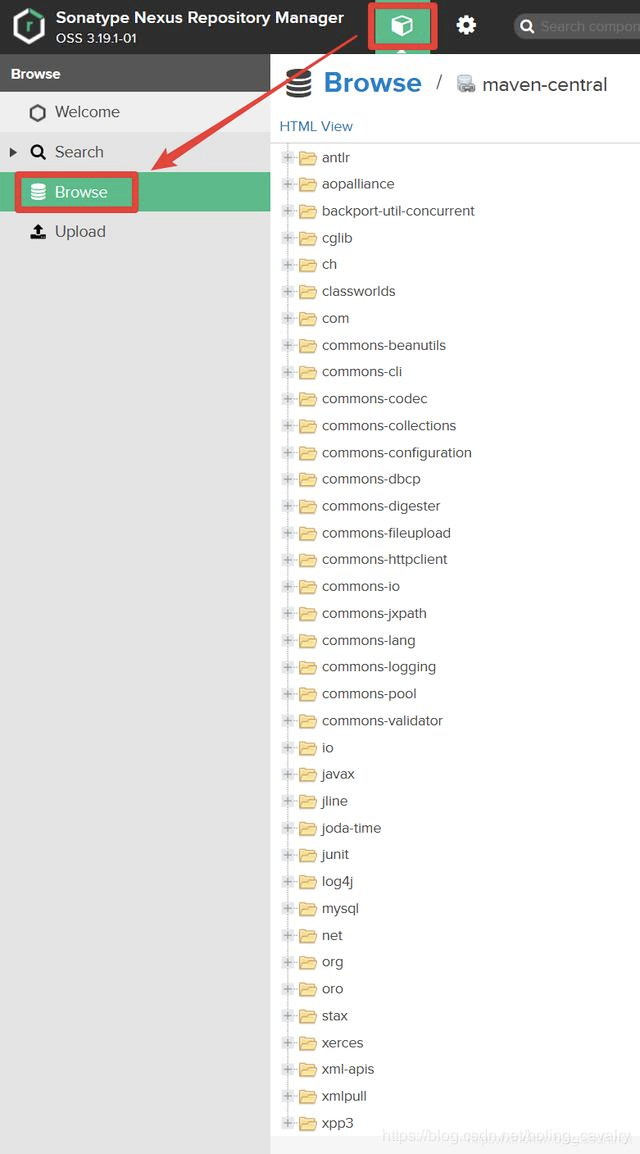
- Go to the Nexus webpage to see, as shown in the figure below, a lot of jars have been cached at this time:
Compile and build the project on computer B (should be fast)
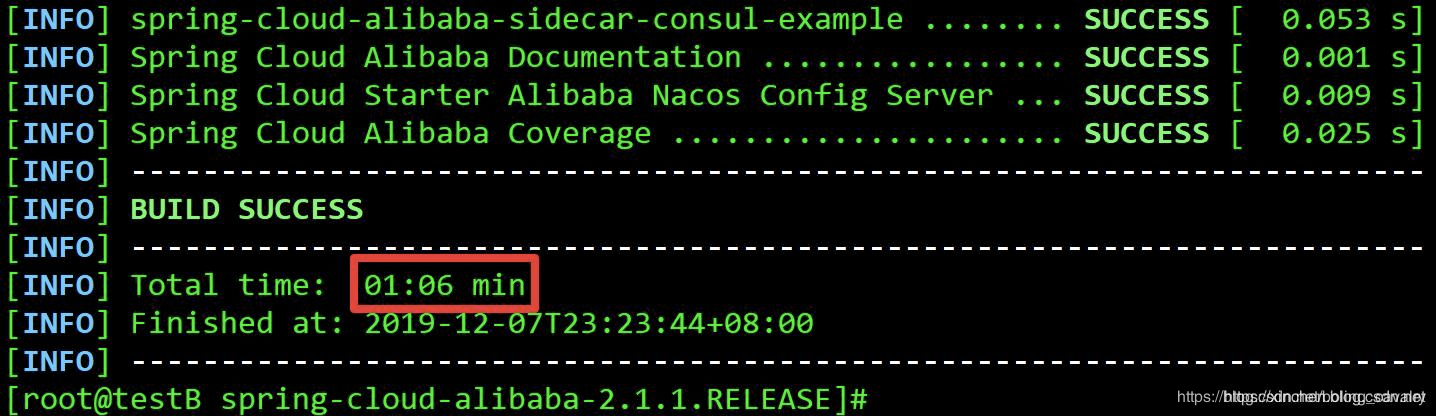
Do the same operation on computer B. At this time, the jar package required for compilation has been cached on Nexus, so the entire compilation process should be significantly faster. The final operation result is shown in the figure below, which only took 1 minute and 6 seconds:
At this point, the actual deployment and experience of Nexus3 on Ubuntu is complete. If you are looking for a simple and quick Nexus deployment plan, I hope this article can give you some reference.
Recommended Posts