Use Jexus 5.8.2 to deploy and run Asp.net core under Centos
The Jexus installed here is not a standalone version, so you need to install Mono first. Mono is just to support the running of the Jexus non-standalone version and has nothing to do with .net core. Use jexus "standalone version" to avoid the trouble of installing mono. Official website: https://www.jexus.org/
System version: Cenos7, Mono version: 5.0.1 Stable (5.0.1.1)
Mono official doc:http://www.mono-project.com/download/#download-lin-centos
1. Add Mono warehouse to the system#
Execute the following command as root:
yum install yum-utils
rpm --import"http://keyserver.ubuntu.com/pks/lookup?op=get&search=0x3FA7E0328081BFF6A14DA29AA6A19B38D3D831EF"
yum-config-manager --add-repo http://download.mono-project.com/repo/centos7/
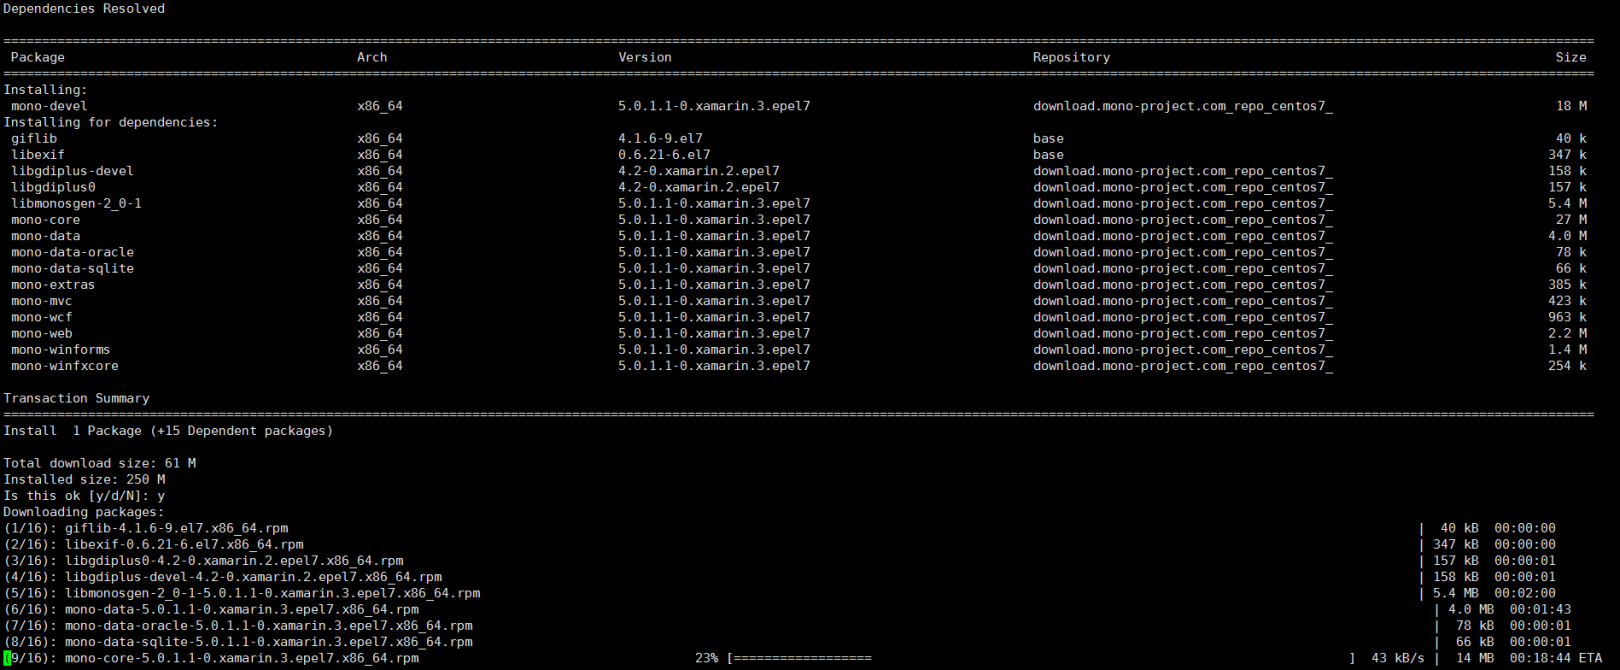
2. Install Mono
yum install mono-devel
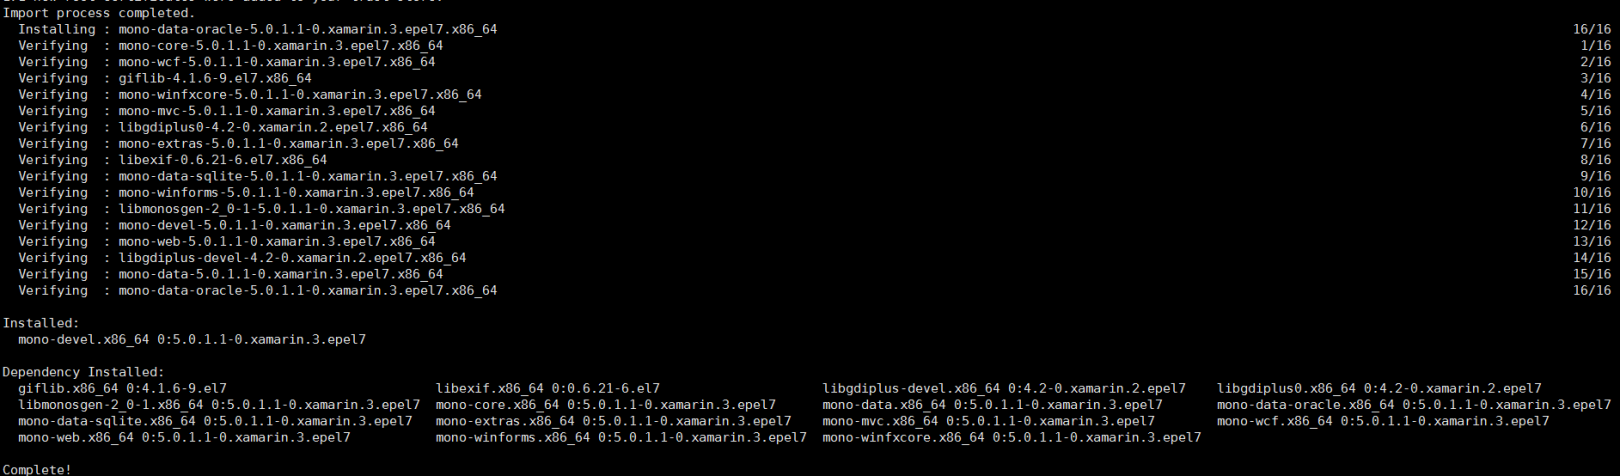
Waiting for the long installation process...
Successful installation:
Three. Test the Mono environment#
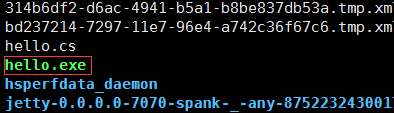
- Create a new file named hello.cs with the following content:
using System;publicclassHelloWorld{staticpublicvoidMain(){
   Console.WriteLine("Hello Mono World");}}
- Execute command compilation
mcs hello.cs
Hello.exe will appear after successful compilation
- Execute the command to run hello.exe
A successful operation will output a classic "Hello Mono Word"!

If the output is successful, then the mono environment is installed successfully
Four. Install Jexus5.8.2
- Execute the following command to install jexus
cd /tmp
wget linuxdot.net/down/jexus-5.8.2.tar.gz
tar -zxvf jexus-5.8.2.tar.gz
cd jexus-5.8.2
The following prompt will be displayed if the installation is successful!

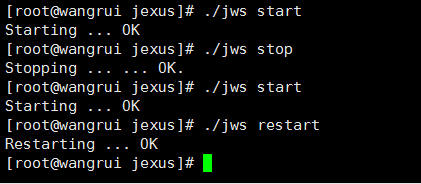
Five. Check whether Jexus is working properly#
Start /usr/jexus/jws start
Stop /usr/jexus/jws stop
Restart /usr/jexus/jws restart
Six. Create a site#
First of all, we have to create a "website configuration file". Each file in /usr/jexus/siteconf is a configuration file for a website, and each configuration file represents a website.
After installing jexus, there is already a default website configuration file in /usr/jexus/siteocnf, the file name is "default".
You can modify this configuration file, or copy and modify this configuration file to a new station.
In the configuration file, three key items are required:
port: port number definition
root: definition of virtual root path and physical root path
hosts: domain name definition
The port number (port) is an integer, generally 80, or other integers below 65535, but this port number must not be occupied by other service programs.
The root path (root) consists of two parts, separated by a space. The space before the space indicates the virtual root path of this website (usually "/"), and the space after the space is the physical path of the folder where the content of this website is stored (for example, "/var/www/default").
Domain name (hosts), fill in the domain name to visit this website, if there are multiple domain names, separate the domain names with English commas, and you can also use "pan-domain names" such as "*.mysite.com"
Website name: jexus takes the name of the website configuration file as the website name.
**It is emphasized that the website configuration file name cannot contain spaces, and the first character cannot be "~".
Detailed description: https://www.linuxdot.net/bbsfile-3500
Execute the following command to create a website directory:
mkdir /wwwroot/test
cd /wwwroot/test
Upload the website file to the test directory, and then modify the jexus site configuration, here the default configuration default is used
cd /usr/jexus/siteconf
vim defalut
Modify the configuration as shown below:
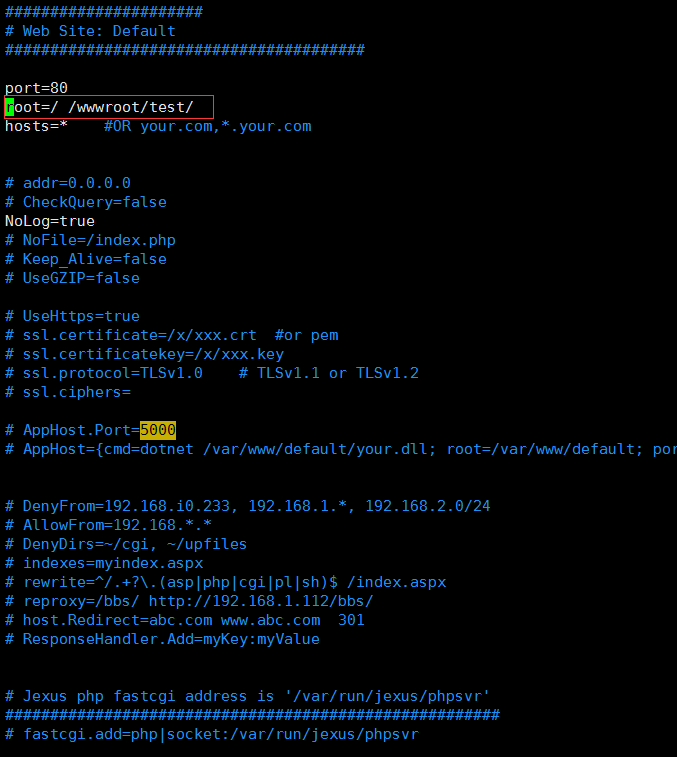
The modification is complete, save and exit!
Execute the command to restart jexus:
/usr/jexus/jws restart
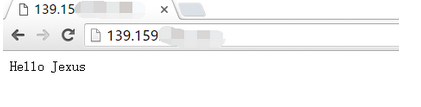
Then enter ip to access normally, here I am passing a simple html webpage
Seven. Set jexus to start automatically#
- Create a new jexus.service
cd /lib/systemd/system
vim jexus.service
Paste the following content to the file jexus.service and save:
[ Unit]
Description=jexus
After=network.target
[ Service]
Type=forking
ExecStart=/usr/jexus/jws start
ExecReload=/usr/jexus/jws restart
ExecStop=/usr/jexus/jws stop
PrivateTmp=true[Install]
WantedBy=multi-user.target
Execute the command to join the service:
systemctl enable jexus.service
Start the service:
systemctl start jexus.service
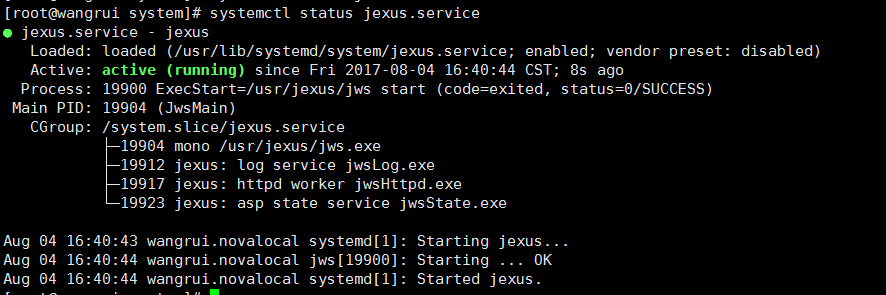
View service status:
systemctl status jexus.service
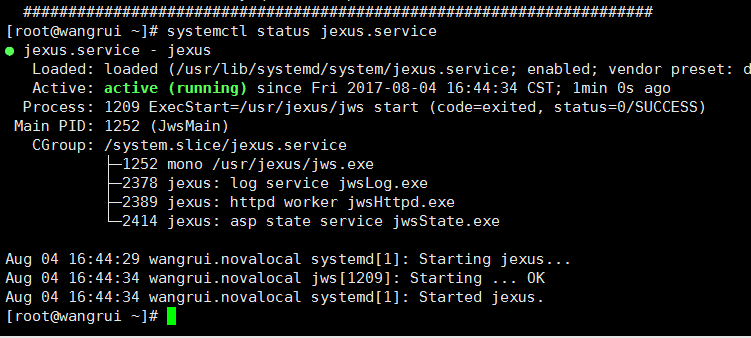
Restart the test:
reboot
Wait for the restart to complete, execute the command to view the service status, if it is started, the setting is successful!
At this point, the installation and configuration of Jexus are all over. It is still very simple. Here is how to use Jexus to run Asp.net core programs.
8. Install .net core
The centos version is used here, please check for other versions: https://www.microsoft.com/net/download/linux
- Execute command installation
 sudo yum install libunwind libicu

 curl -sSL -o dotnet.tar.gz https://go.microsoft.com/fwlink/?linkid=848821

 sudo mkdir -p /opt/dotnet && sudo tar zxf dotnet.tar.gz -C /opt/dotnet

 sudo ln -s /opt/dotnet/dotnet /usr/local/bin
- Verify the installation
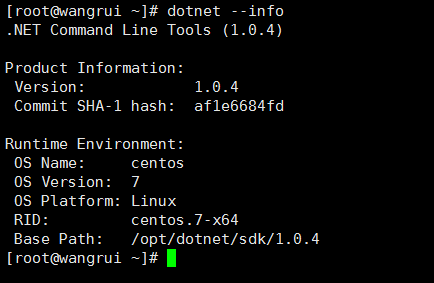
(1) Enter the command dotnet --info to view information
(2) Create a hello word program to verify
dotnet newconsole-o hwapp

cd hwapp

dotnet restore

dotnet run
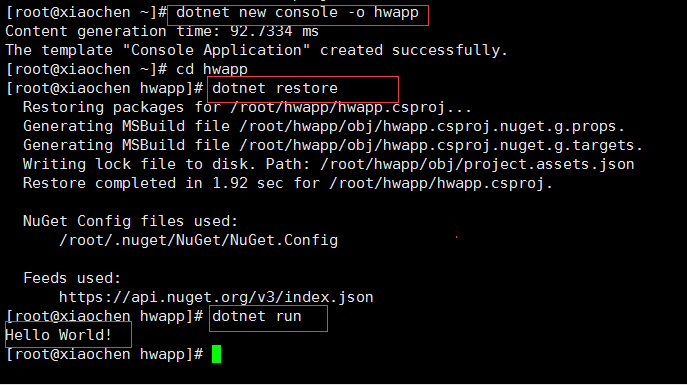
If you output Hello Word! It means that the .net core installation is successful!
The above picture I used is a screenshot of another machine. I don’t know why the machine I used before can’t use the dotnet new command to create a project. It says that the template cannot be found. It’s no problem to run the net core program.
Nine. Deploy asp.net core program#
- Use the command to publish the asp.net core program
dotnet publish
- Use ftp and other tools to upload to the server
Here I put it in /wwwroot/student
- Execute the dotnet command to run the program to ensure that the program can run correctly

- Configure Jexus
cd /usr/jexus/siteconf
vim default
The configuration is as follows:
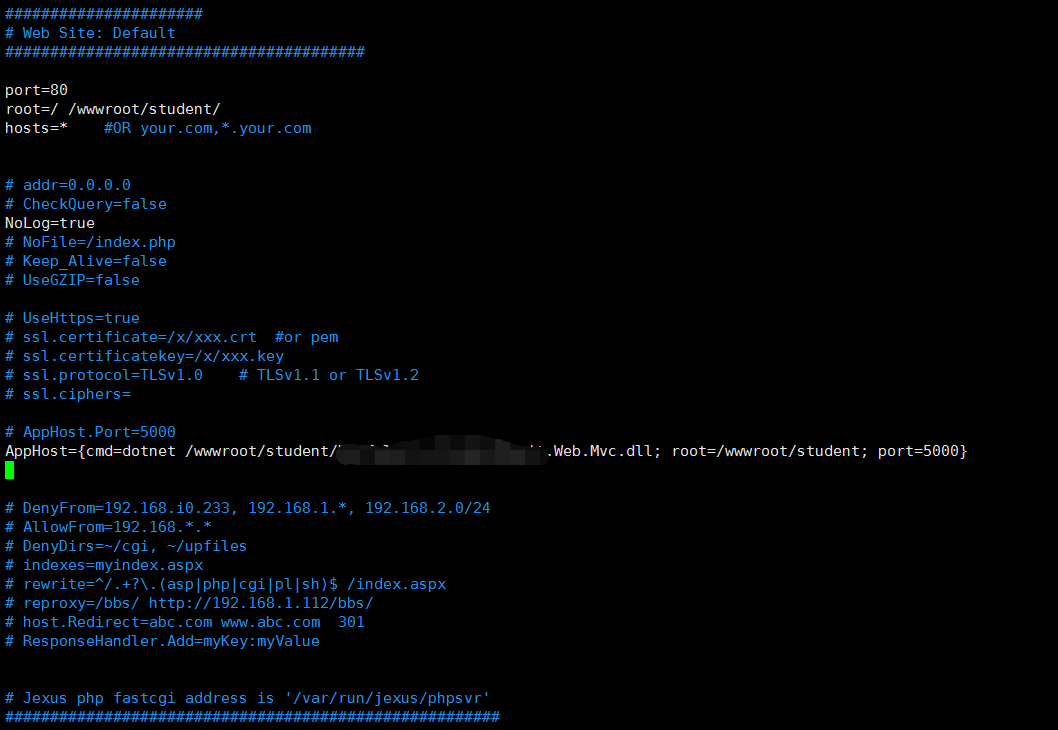
Mainly: AppHost={cmd=dotnet /wwwroot/student/xxxxx.dll; root=/wwwroot/student; port=5000}
The configuration format of AppHost is:
AppHost={CmdLine=application command line; AppRoot=application working directory; Port=application HTTP listening port}, where:
"CmdLine" means the command line to start the application, such as dotnet /var/www/site1/app.dll;
"AppRoot" represents the working directory of the application, such as: /var/www/site1;
"Port" represents the listening port used by this HTTP application, such as 5000 (Asp.Core default port is 5000).
For example, suppose the path where the Asp.Net Core application is stored is "/var/www/mysite", the startup program is stored in this folder, the name is "webapp", and the listening port after the program is started is 5000, then, AppHost configuration should be:
AppHost={CmdLine=/var/www/mysite/webapp;AppRoot=/var/www/mysite; port=5000 }
For more information, please check: http://www.cnblogs.com/yunei/p/5662642.html
- Start the jexus service and view the website
systemctl start jexus.service
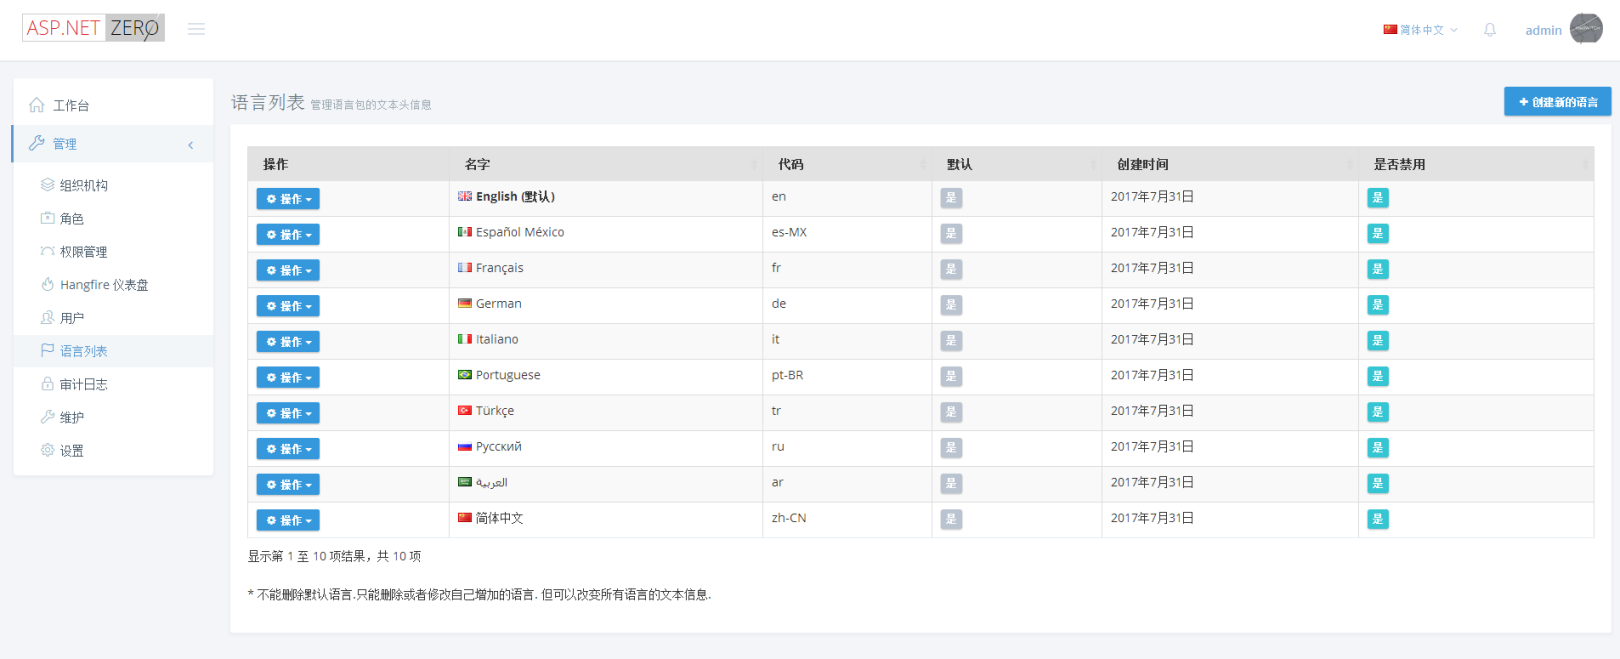
The demo here uses the asp.net zero project of the ABP framework
10. Benefits of using Jexus to run asp.net core#
1 , Easy to configure: On Jexus, Asp.net core is just a "site" on Jexus. Therefore, you only need to configure this site on Jexus without other configuration;
2 , Unified operation: Jexus will automatically stop the asp.net core application when stopping this site. Similarly, starting this site will automatically start the corresponding core application without multiple operations;
3 , High performance: Jexus itself is a high-performance web server with comparable performance to nginx, and between Jexus and Asp.net core, there is TCP forwarding, not HTTP forwarding such as reverse proxy, and no Http protocol. The performance consumption of parsing and reorganization, therefore, Jexus can better present the high-performance advantages of Asp.net Core;
4 , Port Adaptation: On Jexus, asp.net core does not need to set any port number, which effectively avoids port conflicts that may occur in multiple asp.net core applications, which is a headache for operation and maintenance personnel ;
5 , High reliability: If the core application crashes unexpectedly, Jexus will immediately pull it up, so as to achieve 7*24 uninterrupted operation;
6 , Support WebSocket: Because it is TCP forwarding, there is no restriction on the application layer protocol.
**7 , AppHost's port value is set to 0, to get the advantage of port adaptation. **
Mono installation is too troublesome, and the waiting time is long, use jexus "standalone" to avoid the trouble of installing mono. Official website: https://www.jexus.org/
related articles:
http://www.cnblogs.com/yunei/p/5662642.html
http://www.cnblogs.com/yunei/p/6077879.html
http://www.cnblogs.com/yunei/p/6215219.html
Finished~ Finally, I would like to thank the author Yunei Liuyun of jexus for writing such a useful server.
Recommended Posts