How to install and configure VNC on CentOS 8
Virtual Network Computing (VNC) is a graphical desktop sharing system that allows you to use a local keyboard and mouse to remotely control another computer.
This article covers the steps of how to install and configure VNC on CentOS 8. We will show you how to securely connect to the VNC server through SSH tunnel technology.
1. Prerequisites.
To continue this guide, you need to log in to the remote CentOS machine as a user with sudo privileges.
Two, install the desktop environment##
Usually, the server does not have any desktop environment installed. If you have a machine without a GUI, the first step is to install it. Otherwise, skip this step.
Run the following command to install Gnome on your remote machine, the default desktop environment under CentOS 8.
sudo dnf groupinstall "Server with GUI"
Depending on your system, downloading and installing Gnome packages, as well as dependent packages will take some time.
Three, install VNC server##
TigerVNC is an open source high-performance VNC server that is actively maintained. It is available in the default CentOS source repository, enter the following command to install it:
sudo dnf install tigervnc-server
Once the VNC server is installed, run the vncserver command to create the initial settings and set the password. Do not use sudo when running the following command:
vncserver
You will be prompted to enter and confirm a password, and whether to set a view-only password. If you choose to set a view-only password, the user will not be able to interact with the VNC instance through the keyboard and mouse.
You will require a password to access your desktops.

Password:
Verify:
Would you like to enter a view-only password(y/n)? n
/usr/bin/xauth:  file /home/linuxize/.Xauthority does not exist

New 'server2.linuxize.com:1 (linuxize)' desktop at :1 on machine server2.linuxize.com

Starting applications specified in/etc/X11/Xvnc-session
Log file is /home/linuxize/.vnc/server2.linuxize.com:1.log
The first time you run the vncserver command, it will create and store a password file in the ~/.vnc directory. If the folder has not been created, it will be created first.
Please pay attention to the :1 after the host name above. It means the display port number on the running VNC server. In our example, the server is running on TCP port 5901 (5900+1). If you create a second instance, it will run on the next free port, for example: :2, which means that the server is running on port number 5902 (5900+2).
When working with a VNC server, the most important point is that :X means to display the port number, namely: 5900+X.
Before proceeding to the following steps, the first step is to stop the VNC instance by using the vncserver command with the -kill option. In our example, the server is running on port number 5901 (:1), so stop it and run:
vncserver -kill :1
The output is as follows:
Killing Xvnc process ID 19681
Fourth, configure the VNC server##
Now that both Gnome and TigerVNC are installed on the remote CentOS machine, the next step is to configure TigerVNC to use Gnome. The VNC server uses the ~/.vnc/xstartup file to start the application when creating a new desktop. Open this file:
vim ~/.vnc/xstartup
And edit as follows:
#! /bin/sh
[- x /etc/vnc/xstartup ]&& exec /etc/vnc/xstartup
[- r $HOME/.Xresources ] && xrdb $HOME/.Xresources
vncconfig -iconic &
dbus-launch --exit-with-session gnome-session &
Save and close the file. When you start or restart TigerVNC server, the above script will be executed automatically.
If you want to pass additional options to the VNC server, open the ~/.vnc/config file and add one option per line. The most commonly used options are listed in the file. Uncomment and modify it to your liking.
Here is an example:
# securitytypes=vncauth,tlsvnc
# desktop=sandbox
geometry=1920x1080
# localhost
# alwaysshared
Five, create a Systemd Unit file##
Unit files allow you to easily start, stop, and restart services. Usually, the best location to store user unit files is ~/.config/systemd/user. Create a folder:
mkdir -p ~/.config/systemd/user
Copy the default vncserver unit file:
cp /usr/lib/systemd/user/[email protected] ~/.config/systemd/user/
Notify systemd that a new user unit file already exists:
systemctl --user daemon-reload
Start the VNC service, and enable boot-up:
systemctl --user enable vncserver@:1.service --now
The number 1 after @: defines the display port that the VNC service will listen on. We will use 1, which means that the VNC server will listen on the port 5901 we discussed earlier.
Enable lingering so that when the user is not logged in, the user service can be started and kept running.
loginctl enable-linger
To verify that the service started successfully, run:
systemctl --user status vncserver@:1.service
● vncserver@:1.service - Remote desktop service(VNC)
 Loaded:loaded(/home/linuxize/.config/systemd/user/[email protected]; enabled; vendor preset: enabled)
 Active:active(running) since Thu 2020-01-3022:14:08 UTC; 2s ago
 Process:20813 ExecStart=/usr/bin/vncserver :1(code=exited, status=0/SUCCESS)
 Process:20807 ExecStartPre=/bin/sh -c /usr/bin/vncserver -kill :1>/dev/null2>&1||:(code=exited, status=0/SUCCESS)
 CGroup:/user.slice/user-1000.slice/[email protected]/vncserver.slice/vncserver@:1.service
  ...
Six, connect to the VNC server##
VNC is not an encryption protocol and can be located and analyzed by packet sniffing tools. The recommended access method is to create an SSH tunnel from the port 5901 of your local machine to the same port of the remote server.
6.1 Setting up an SSH tunnel on Linux and macOS systems###
If you are running Linux, macOS or other Unix-like operating systems on your machine, you can easily use the following ssh command to create a tunnel:
ssh -L 5901:127.0.0.1:5901-N -f -l username remote_server_ip
You will be prompted to enter the user password.
Don't forget to replace username and server_ip_address with your own username and remote server IP address.
6.2 Setting up an SSH tunnel on Windows###
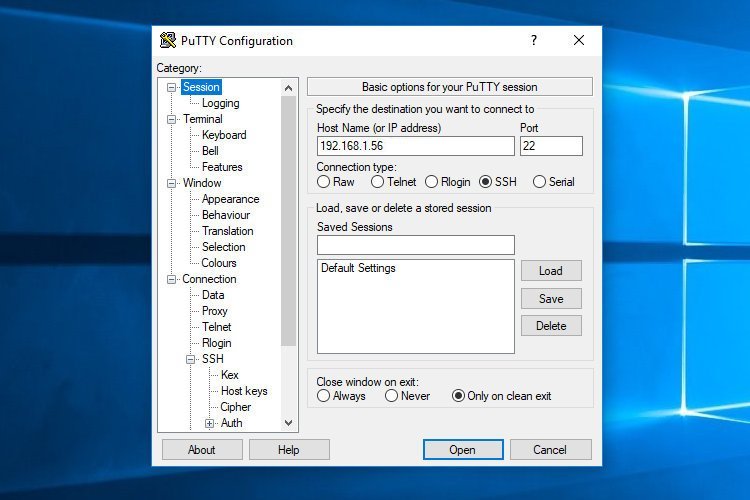
Use Putty on Windows to set up an SSH tunnel.
Open Putty and enter your server IP address in the Host name or IP address text field.
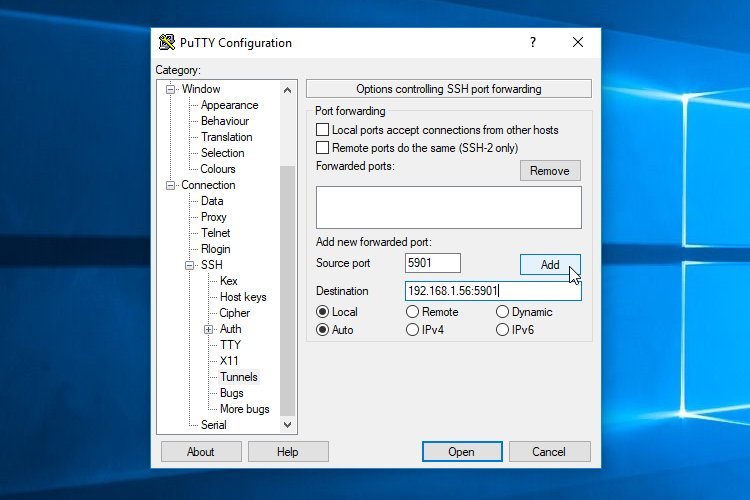
Under the Connection menu, expand SSH and select Tunnels. Enter the VNC server port (5901) in the text field Source Port, enter server_ip_address:5901 in the text field Destination, and click the Add button as shown below:
Return to the Session page to save the settings so that you don't have to enter them every time. To log in to the remote server, select the saved session and click the Open button.
6.3 Use Vncviewer to connect###
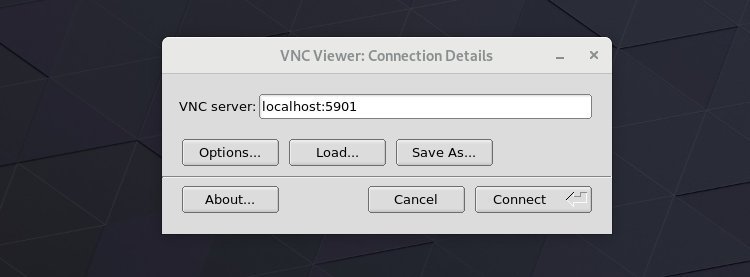
To connect to your remote server, open your VNC viewer and enter localhost:5901.
You can use any VNC viewer, such as: TigerVNC, TightVNC, RealVNC, UltraVNC, Vinagre, and VNC Viewer for Google Chrome.
We use TigerVNC:
When prompted, enter the password and you will see the default Gnome desktop. It should look like this:
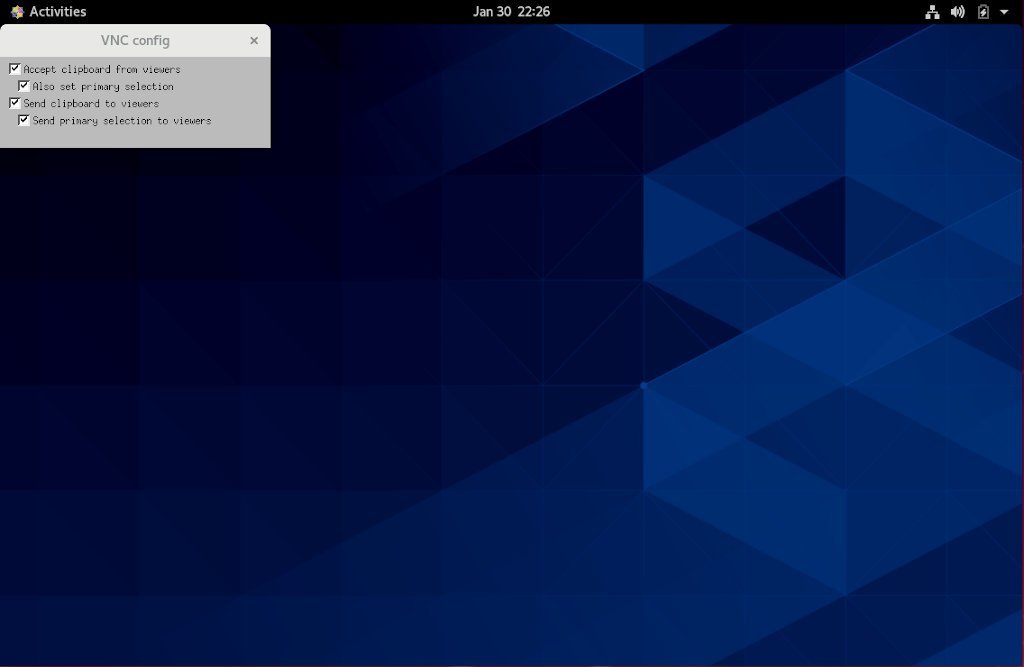
that's it! Now you can use your keyboard and mouse from your local machine to work on your remote desktop.
Seven, summary##
We have shown you how to set up a VNC server on a remote CentOS 8 machine and connect to it.
To create displays for multiple users, repeat the same steps. Create an initial configuration, use the vncserver command to set a password, and create a new service with a different port.
Recommended Posts