How to install and configure ownCloud on Ubuntu 16.04
Introduction
ownCloud is a file sharing server that allows you to store personal content (such as documents and pictures) in a centralized location, just like Dropbox. The difference with ownCloud is that it is free and open source software, allowing anyone to use and check it. It will also return control and security of sensitive data to you, thereby eliminating the use of third-party cloud hosting services.
In this tutorial, we will install and configure an ownCloud instance on an Ubuntu 16.04 server.
Preparation
To complete the steps in this tutorial, you need the following:
-
A user with sudo permission on the server. Those who don’t have a server can buy it from here, but I personally recommend you to use the free Tencent Cloud Developer Lab for experimentation, and then buy server.
-
LAMP stack: ownCloud requires a web server, database and PHP to function properly. Setting up a LAMP stack (Linux, Apache, MySQL and PHP) server can meet all these requirements.
-
To make full use of all the functions provided by ownCloud, please pay attention to the following PHP modules when installing:
php-bz2,php-curl,php-gd,php-imagick,php-intl,php-mbstring,php-xml, andphp-zip. -
SSL certificate: How to set up this certificate depends on whether you have a domain name that can be resolved to a server.
-
If you have a domain name, the easiest way to protect your website is to use Tencent Cloud SSL Certificate Service, which provides free trusted certificates. [Tencent Cloud SSL Certificate Installation and Operation Guide] (https://cloud.tencent.com/document/product/400/6814?from=10680) for setting.
-
If you don't have a domain name, it is recommended that you go here register a domain name first. If you only use this configuration for testing or personal use, you can use a self-signed certificate without purchasing a domain name. The self-signed certificate provides the same type of encryption, but there is no domain name verification announcement. For the self-signed certificate, you can refer to the two articles Create a self-signed SSL certificate for Apache and How to create a self-signed SSL certificate for Nginx.
Step 1-ownCloud installation
The ownCloud server package does not exist in Ubuntu's default repository. However, ownCloud maintains a dedicated repository for the release.
First, use the curl command to download its release key, and then use the add command to import it into the apt-key utility:
sudo curl https://download.owncloud.org/download/repositories/stable/Ubuntu_16.04/Release.key | sudo apt-key add -
... % Total    % Received % Xferd  Average Speed   Time    Time     Time  Current
         Dload  Upload   Total   Spent    Left  Speed
100135810013580020570--:--:----:--:----:--:--2057
OK
' The'Release.key' file contains a PGP (Pretty Good Privacy) public key, that is, apt will be used to verify whether the ownCloud package is authentic.
In addition to importing the key, a file owncloud.list called in the sources.list.d directory must be created for apt. This file will contain the address of the ownCloud repository.
echo 'deb https://download.owncloud.org/download/repositories/stable/Ubuntu_16.04/ /'| sudo tee /etc/apt/sources.list.d/owncloud.list
deb https://download.owncloud.org/download/repositories/stable/Ubuntu_16.04/ /
After adding a new source, use the apt-get utility and the update command to make apt aware of the changes:
sudo apt-get update
Output...
W: https://download.owncloud.org/download/repositories/stable/Ubuntu_16.04/Release.gpg: Signature by key DDA2C105C4B73A6649AD2BBD47AE7F72479BC94B uses weak digest algorithm(SHA1)
Finally, use the apt-get utility and the install command to install ownCloud:
sudo apt-get install owncloud
When the prompt Do you want to continue? [Y/n] appears, press the ENTER key to confirm the installation.
Setting up owncloud-deps-php7.0(9.1.1-1.2)...
Enabling conf owncloud.
To activate the newconfiguration, you need to run:
 service apache2 reload
apache2_invoke: Enable module rewrite
apache2_invoke owncloud: already enabled
Setting up owncloud(9.1.1-1.2)...
Processing triggers for libc-bin(2.23-0ubuntu4)...
Processing triggers for libapache2-mod-php7.0(7.0.8-0ubuntu0.16.04.3)...
As you can see in the output, the installation creates a new configuration for Apache. Use the systemctl utility with the reload command to make the Apache daemon aware of changes:
sudo systemctl reload apache2
After installing ownCloud server, we will continue to set up the database for its use.
Step 2-MySQL database configuration
To get started, log in to MySQL with an administrative account:
mysql -u root -p
Enter the password set for the MySQL root user when installing the database server.
ownCloud requires a separate database to store management data. Although you can call this database as you wish, we decided to use the name owncloud, which would be easier.
CREATE DATABASE owncloud;
**Note: **Each MySQL statement must end with a semicolon (;). If you encounter a problem, be sure to check for this problem.
Next, create a separate MySQL user account that will interact with the newly created database. From a management and security perspective, creating single-function databases and accounts is a good idea. As with the naming of the database, choose the username you like. In this tutorial we chose to use the name owncloud.
GRANT ALL ON owncloud.* to 'owncloud'@'localhost' IDENTIFIED BY 'set_database_password';
**Warning: **Be sure to enter the actual password where the command is located: set_database_password
After the user has assigned access rights to the database, perform the flush-privileges operation to ensure that the running MySQL instance knows the latest rights allocation:
FLUSH PRIVILEGES;
This completes the MySQL configuration, so we will enter the following command to exit the session:
exit
After installing the ownCloud server and setting up the database, we are ready to turn our attention to configuring the ownCloud application.
Step 3-ownCloud configuration
To access the ownCloud web interface, open a web browser and navigate to the following address:
https://server_domain_or_IP/owncloud
If you are using a self-signed certificate, you may be warned because the certificate is not signed by a trusted authority in your browser. This is expected and normal. We are only interested in the encryption aspect of the certificate, not the third-party verification of the authenticity of the host. Click the corresponding button or link to go to the ownCloud management page.
You should see something like this:
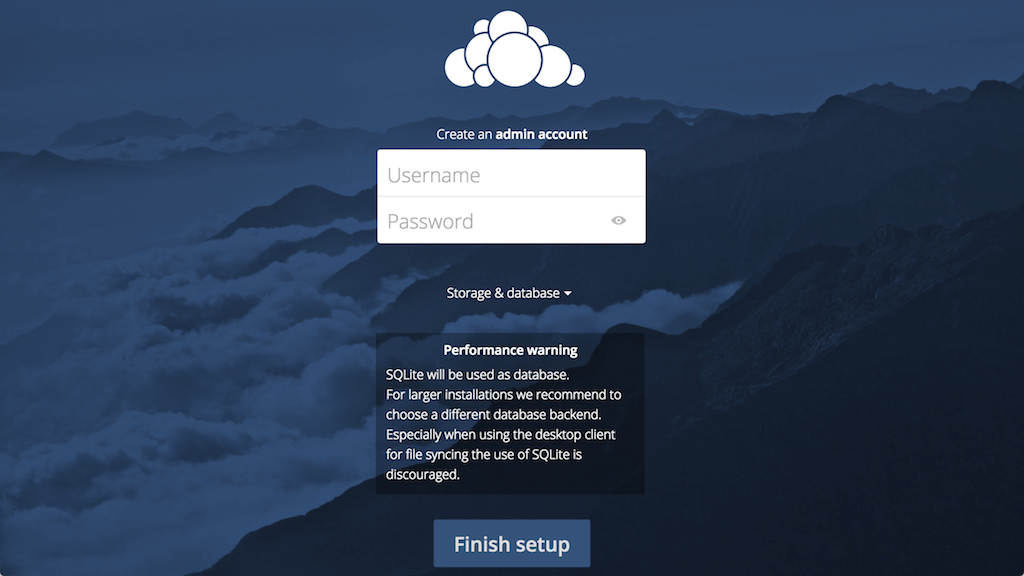
Create an administrator account by choosing a username and password. For security reasons, it is recommended not to use content such as "admin" for the username.

Before clicking the Finish Settings button, click the Storage and Database link:
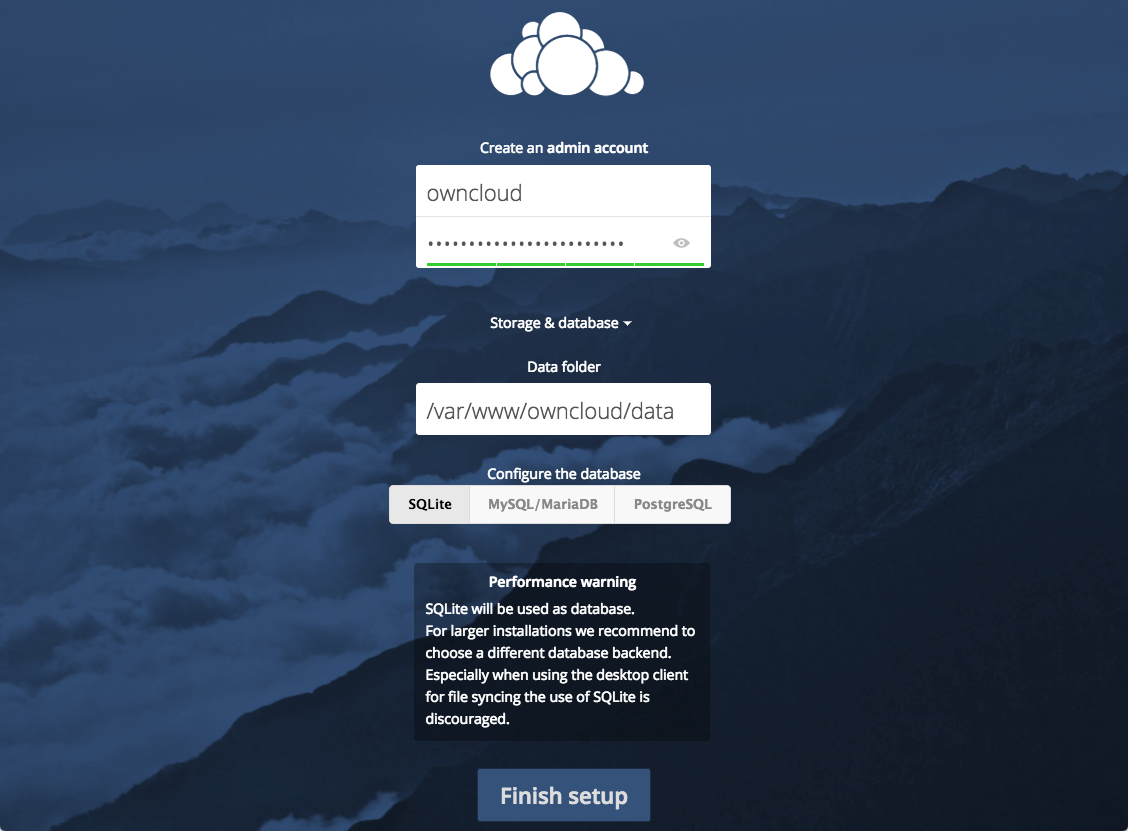
Leave the Data folder settings as they are, and click the **MySQL / **MariaDB button in the Configure the database section.

Enter the database information you configured in the previous step. Here is an example that matches the database credentials we used in this tutorial:
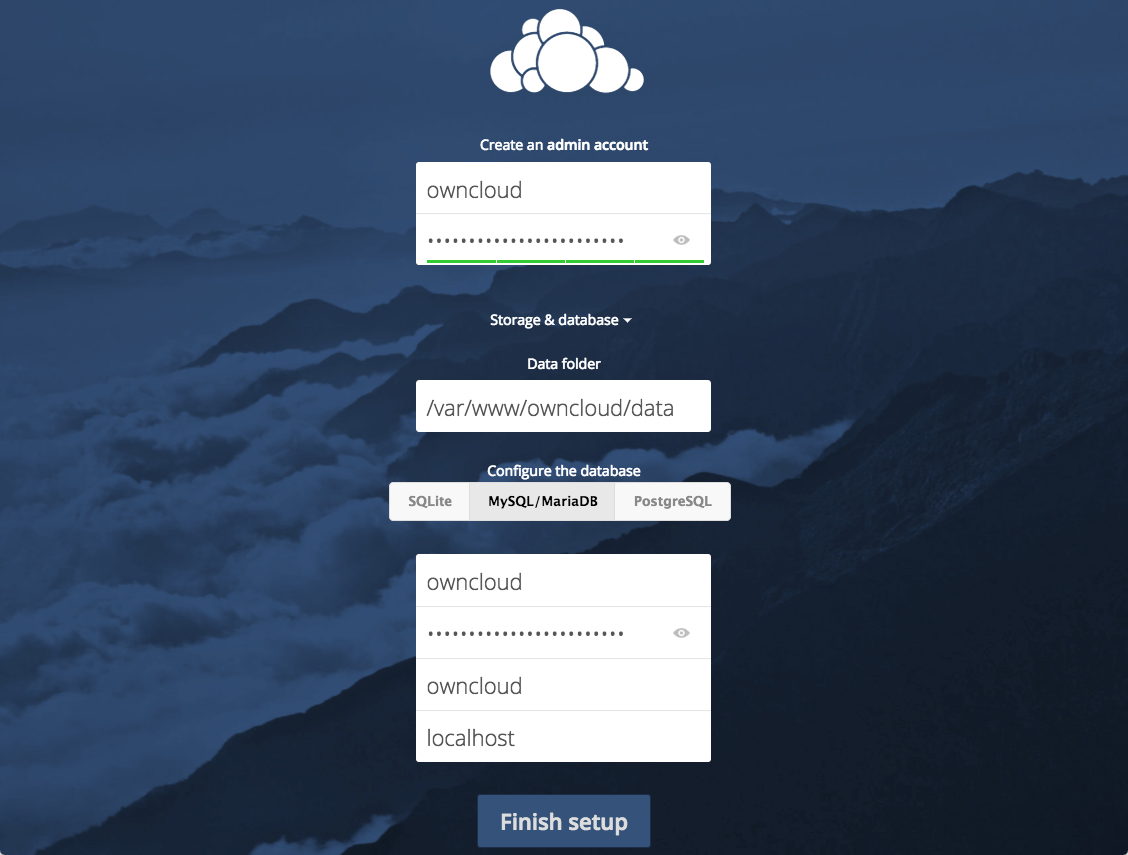
Click the Finish Setup button to log in to ownCloud. The secure homepage of the all data splash screen should be displayed:
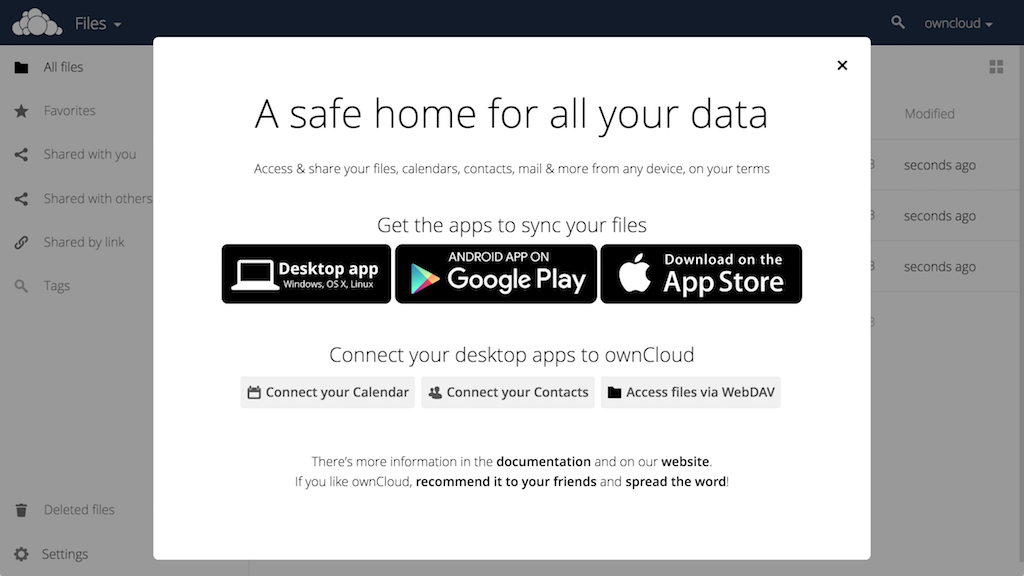
Click x in the upper right corner of the initial screen to access the main interface:
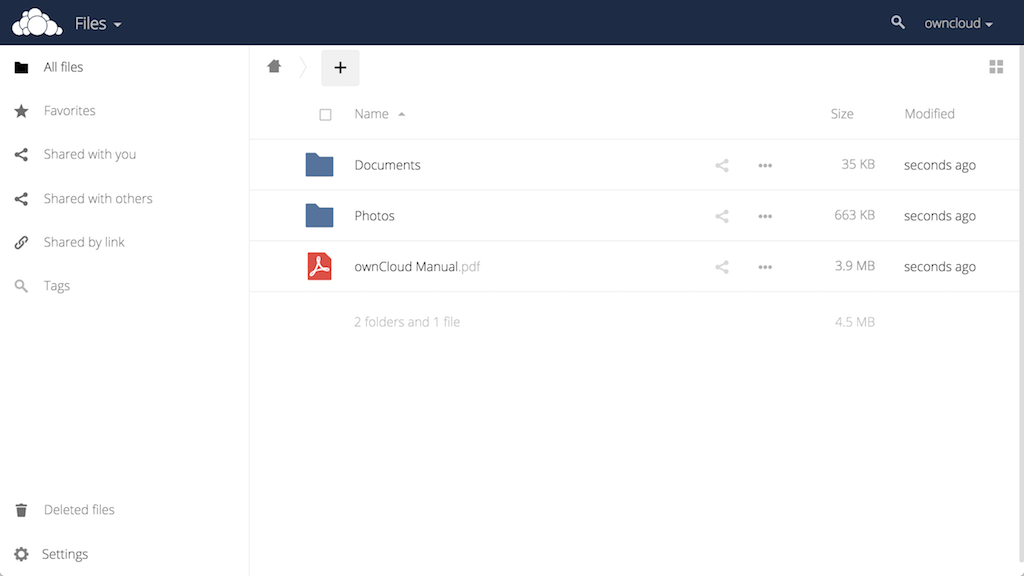
Here, you can create or upload files to your personal cloud.
in conclusion
ownCloud can replicate the functions of popular third-party cloud storage services. The content can be shared between users, or shared externally with public URLs. The advantage of ownCloud is that information is stored securely in a location under your control.
To browse the interface and other functions, use [ownCloud's application store] (https://apps.owncloud.com/) to install the plug-in.
To learn more about the installation and configuration of ownCloud related tutorials, please go to [Tencent Cloud + Community] (https://cloud.tencent.com/developer?from=10680) to learn more.
Reference: "How To Install and Configure ownCloud on Ubuntu 16.04"
Recommended Posts