CentOS builds a cloud service platform
Original blog: Doi Technical Team
Link address: https://blog.doiduoyi.com/authors/1584446358138
Original intention: record the learning experience of an excellent Doi technical team
table of Contents#
@ toc
Preface#
Recently I am learning to build a cloud service platform on centOS, so I wrote this article as the author's study notes for everyone to study together. Although we have no way to implement a cloud service platform as powerful as Baidu Cloud, Tencent Cloud, and Alibaba Cloud, we can learn from their thinking and make a simple cloud platform for our team or company to use.
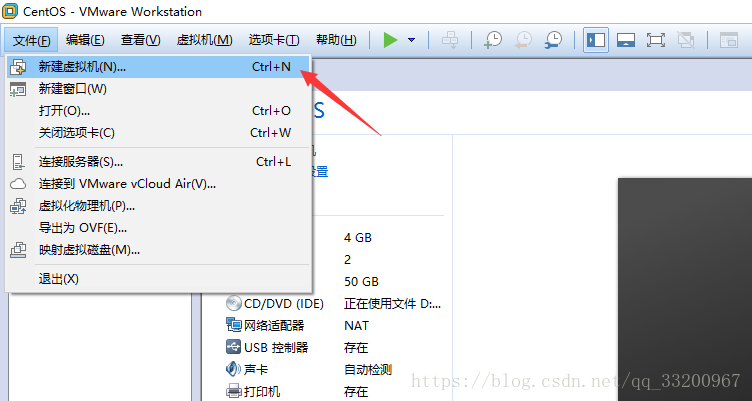
Create host#
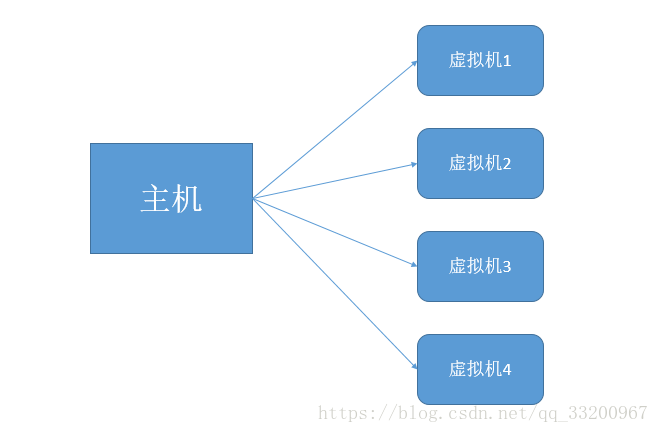
The structure of our [cloud server] (https://cloud.tencent.com/product/cvm?from=10680) platform is as follows:
 Write the picture description here
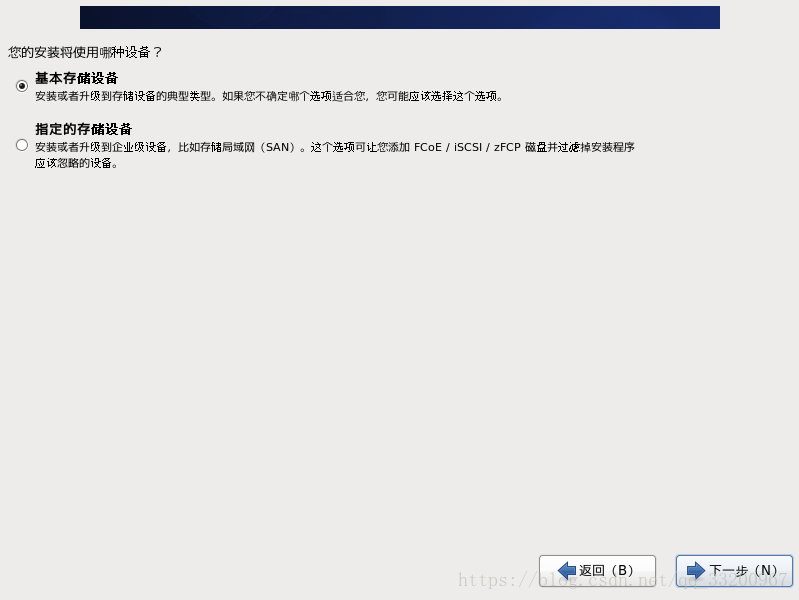
This platform is on a host, and then create multiple virtual machines in the host for users to use, so we must first have a host. This host is theoretically a real physical machine, and has a lot of physical resources, such as memory, disk, CPU, etc. To learn, we created a machine in VMware as our host, and the system used was CentOS6.5. We need to download this mirror first. The mirror I used is CentOS-6.5-x86_64-minimal.iso, and its download address is: http://vault.centos.org/6.5/isos/x86_64/CentOS-6.5-x86_64-minimal.iso.
We create a new virtual machine in VMware, the operation is like small:
 Write the picture description here
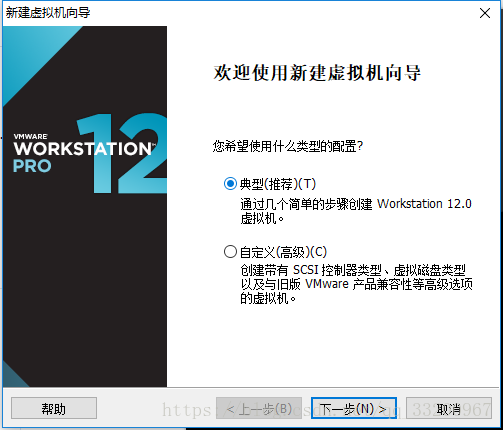
Then select the classic model to start creating:
 Write the picture description here
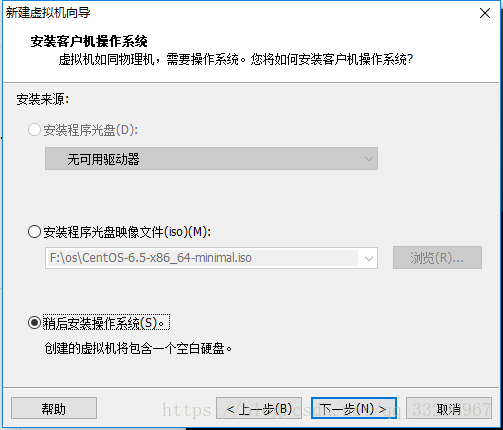
Next is to choose the third operating system to install later:
 Write the picture description here
The selected system type is Linux, specifically CentOS 64-bit:
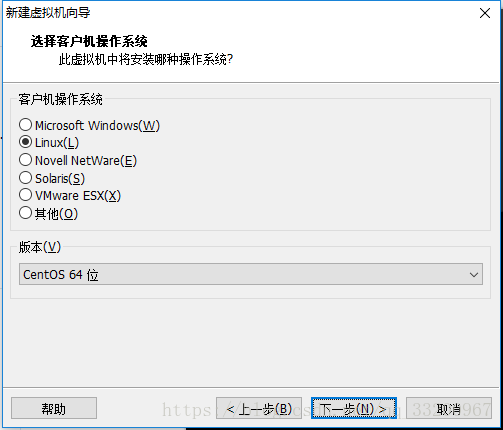 Write the picture description here
Then the name of the created virtual machine and the location of the disk:
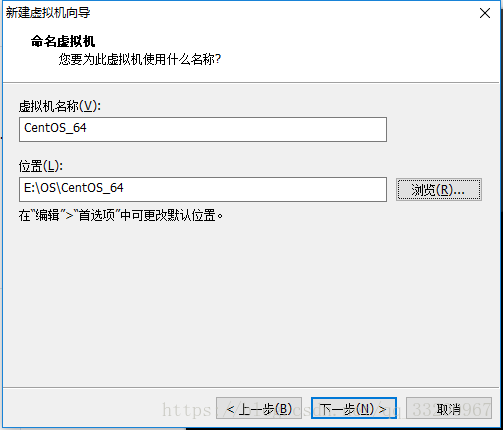 Write the picture description here
This step is the hardware selection, don't rush the next step, we have to do some processing on the hardware:
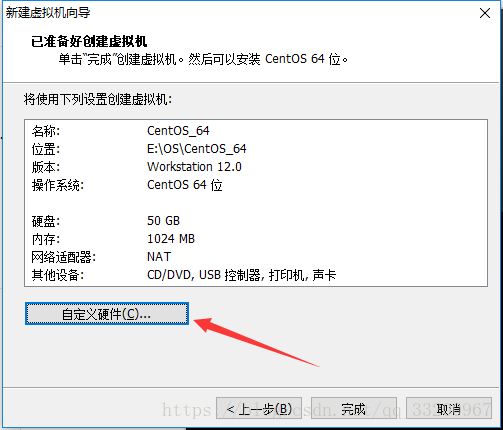 Write the picture description here
We choose as much memory as possible, and the number of CPUs, but it cannot exceed the value of the physical machine itself. The default network is NAT, no need to modify:
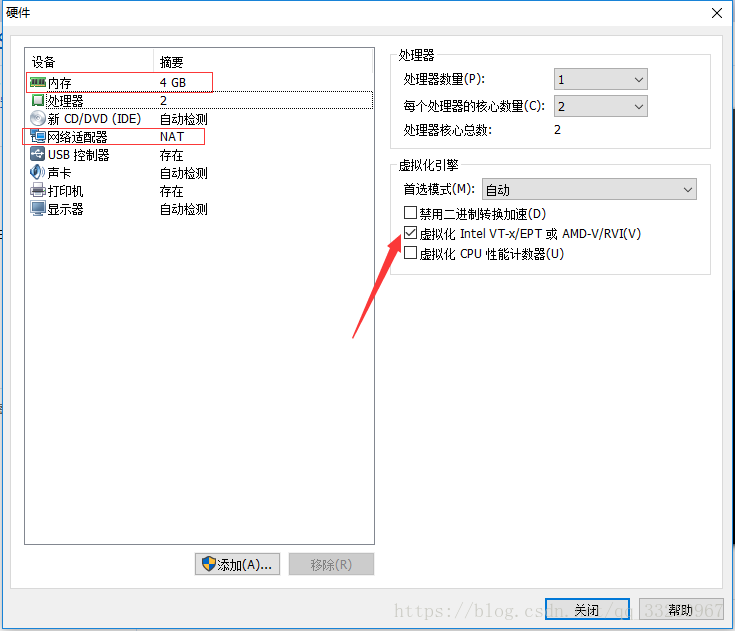 Write the picture description here
Finally, choose the mirror, which is to choose the CentOS-6.5-x86_64-minimal.iso mirror we downloaded just now:
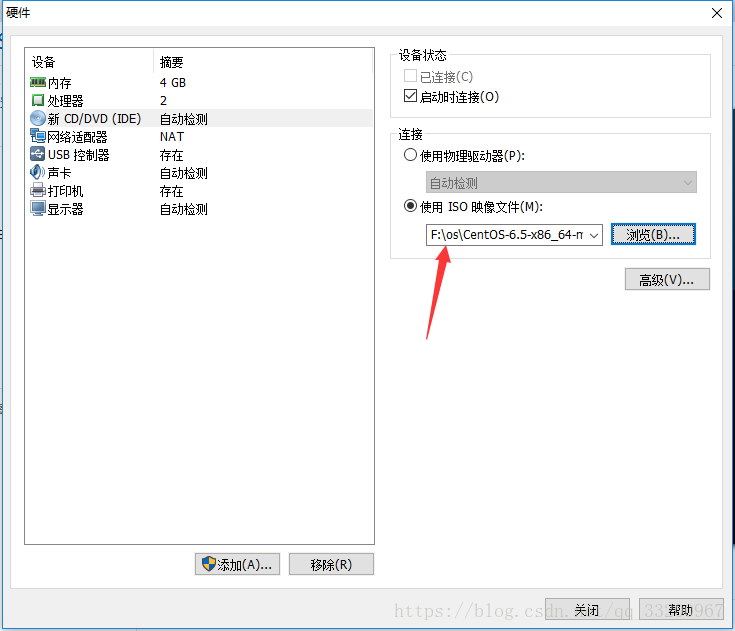 Write the picture description here
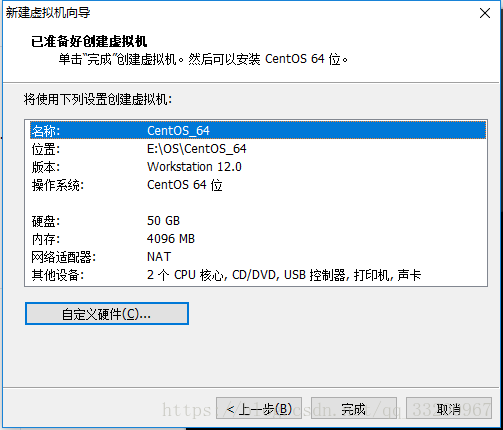
After closing, I returned to this, just complete it directly.
 Write the picture description here
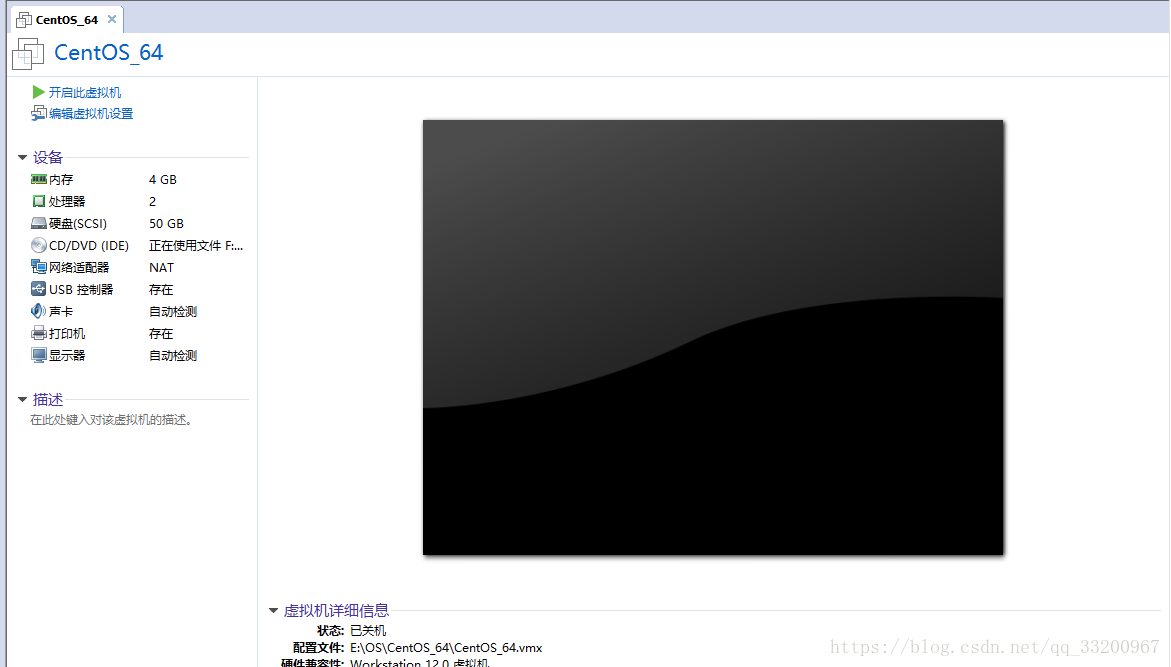
After completion, you can start the virtual machine.
 Write the picture description here
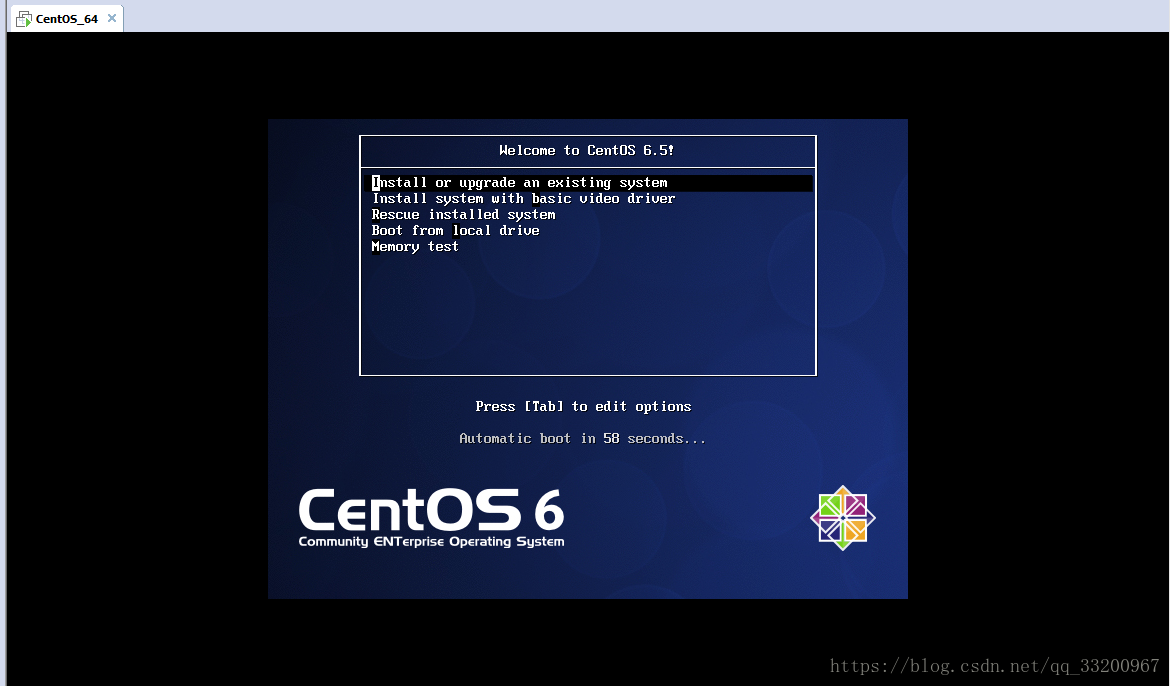
After booting, select the first one to start installing the image. By the way, unlock the Ctrl+Alt of the mouse.
 Write the picture description here
Choose to skip here:
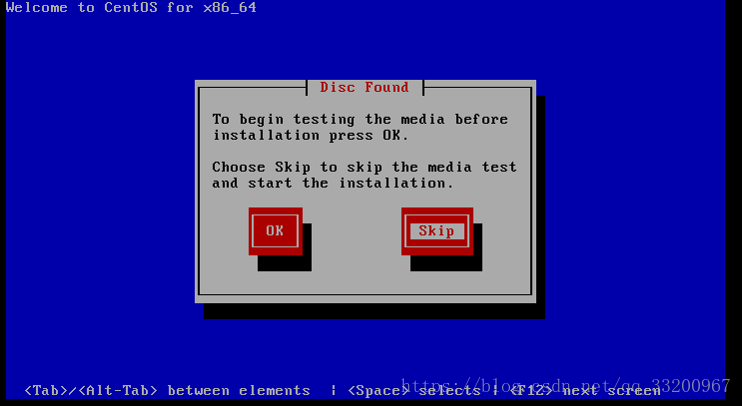 Write the picture description here
Then just one step directly:
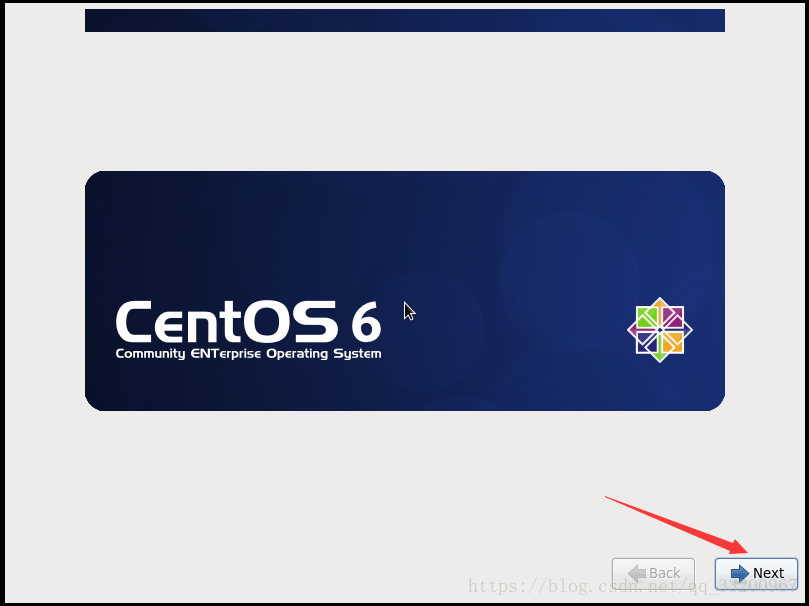 Write the picture description here
Choose the language of the system here, for example, the author chose Chinese:
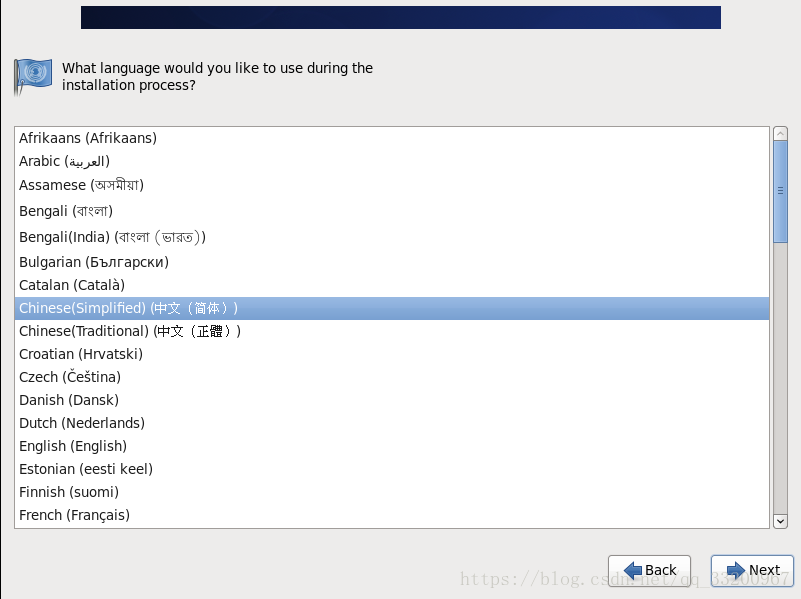 Write the picture description here
The layout of the keyboard is selected in this way. Our keyboards are basically the same layout, so the default is fine:
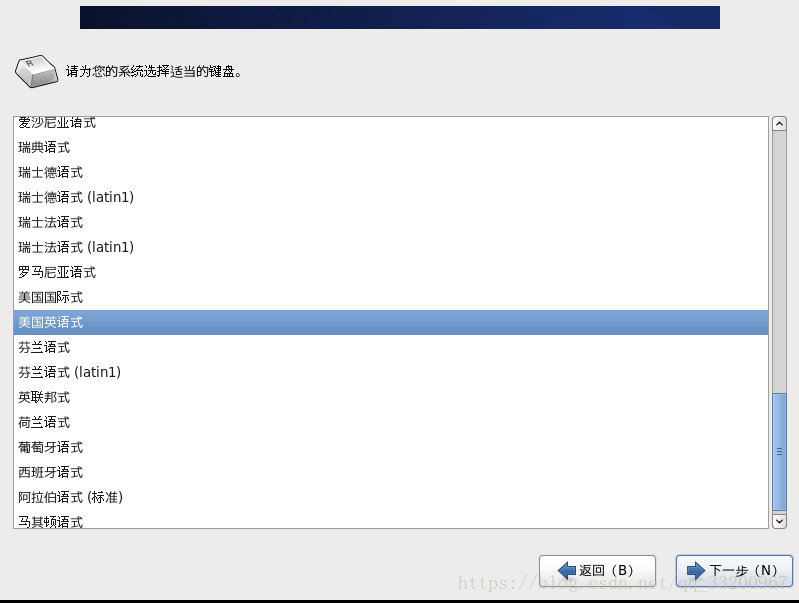 Write the picture description here
Here is also a direct default:
 Write the picture description here
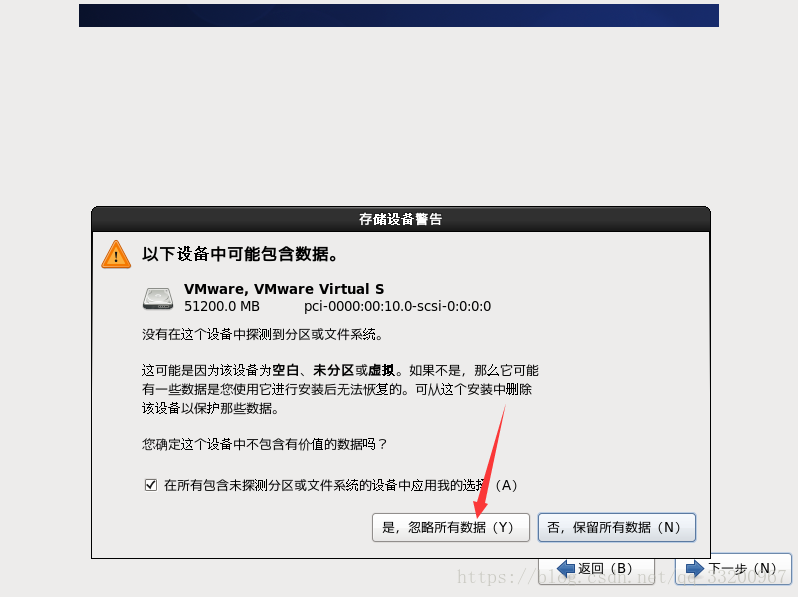
Ignore all data, there should be no data in our virtual disk itself:
 Write the picture description here
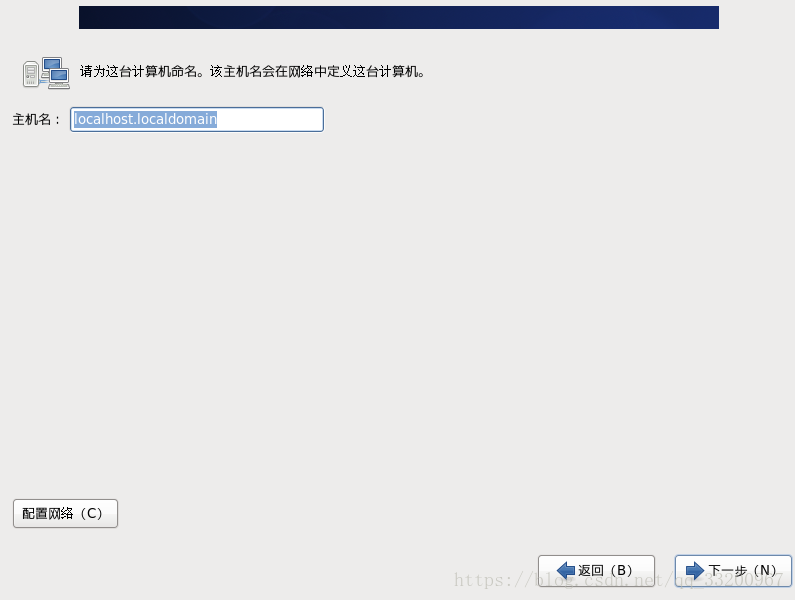
Here is to modify the host name, I will use the default host name:
 Write the picture description here
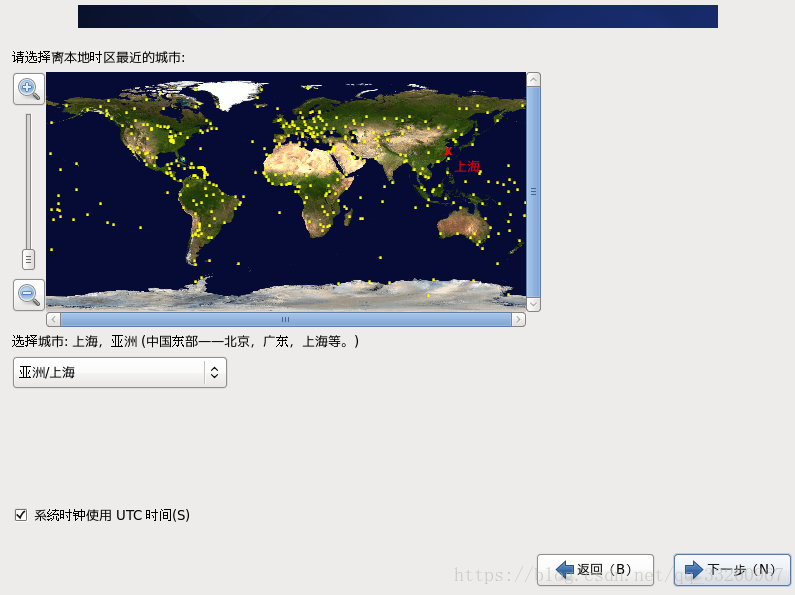
This is the time zone selection:
 Write the picture description here
Then create a system password, the length is not less than 6
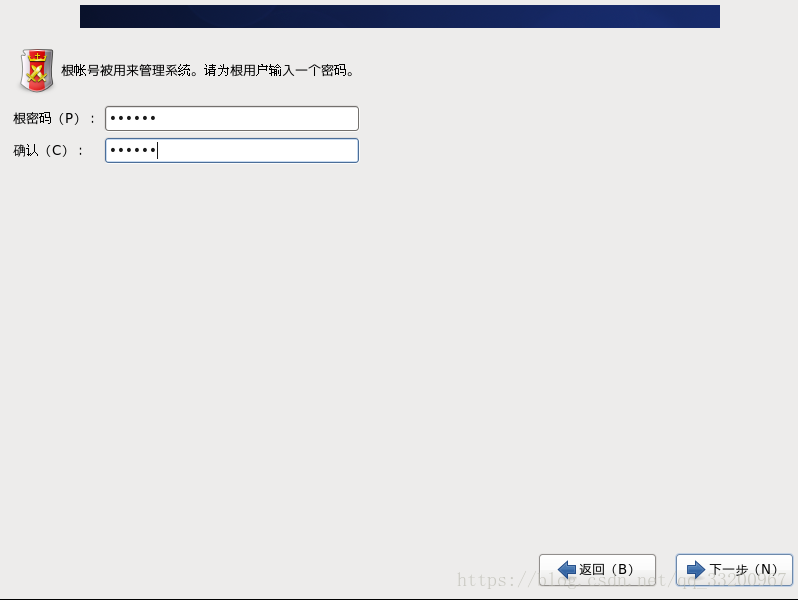 Write the picture description here
Finally choose to use all the space and start writing data:
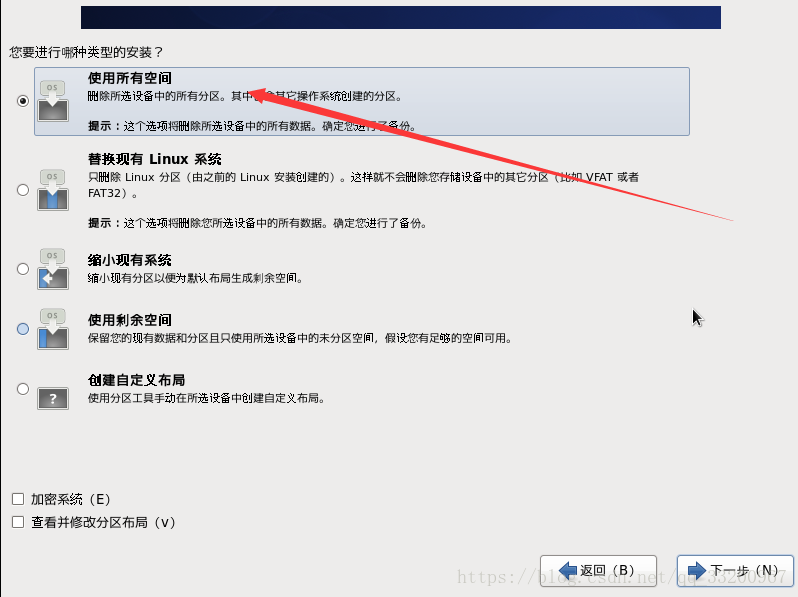 Write the picture description here
Wait for the installation, after a period of time, the installation can be successful:
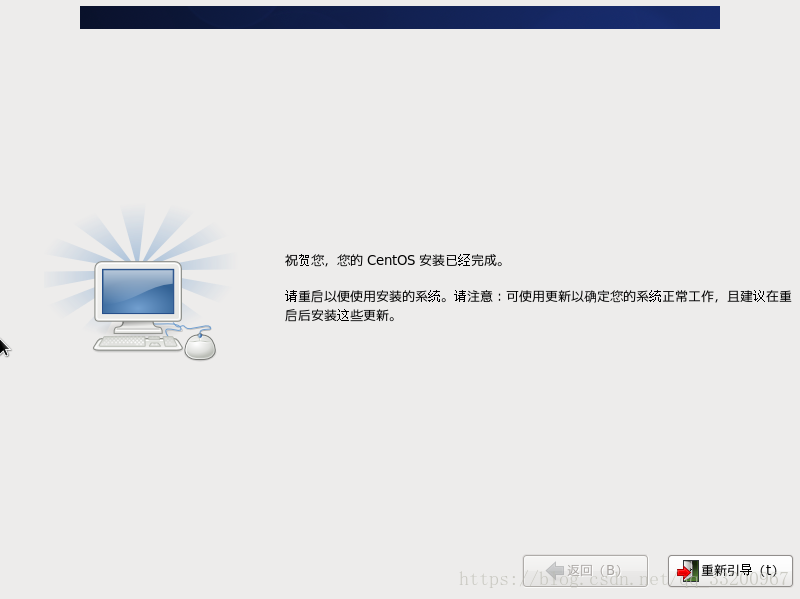 Write the picture description here
Configure host network#
After the installation is complete, the network cannot be connected yet, so we have to configure the network. First, I have to look at the network segment of the virtual machine:
 Write the picture description here
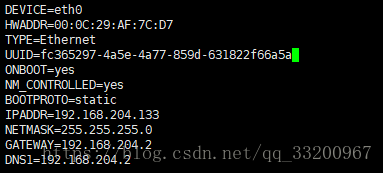
Here you can see that the network segment of VMnet8 is: 192.168.204.0
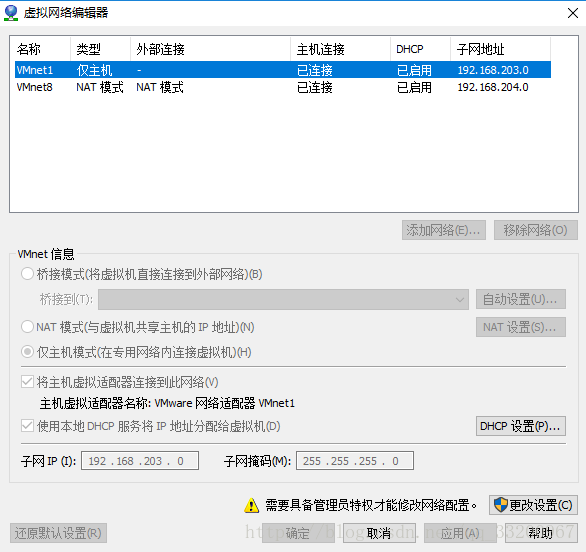 Write the picture description here
Then enter the following command in the terminal of the system to edit the network configuration:
vi /etc/sysconfig/network-scripts/ifcfg-eth0
The modification content is as follows, modify ONBOOT=yes, BOOTPROTO=static, add IP address, subnet mask, gateway address, DNS1:
 Write the picture description here
Finally restart the network:
service network restart
Finally, you can use ping to test whether the network is normal:
ping www.baidu.com
Installation Environment#
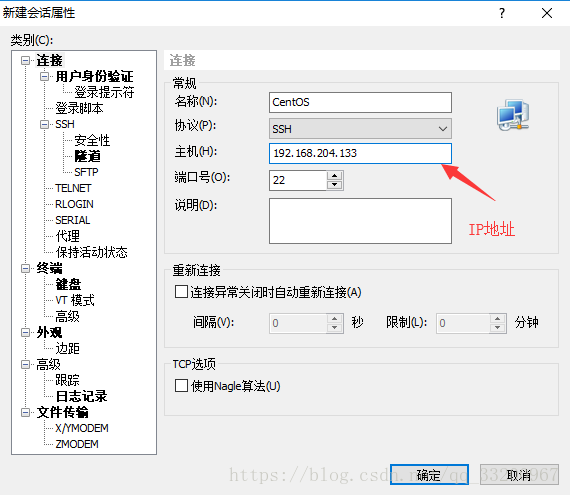
Use Xshell
In order to facilitate the operation, I use Xshell to connect to CentOS, and you can directly operate CentOS on Xshell, as follows:
- Download Xshell, the address is: https://www.netsarang.com/download/down_form.html?code=622&downloadType=0&licenseType=1
- Start Xshell to create a new connection as follows:
 Write the picture description here
- Enter the account and password to connect successfully, the Xshell is the same as the terminal of the original system
Modify the system mirror source##
In order to speed up the download of resources, the author changed the address of the download resources to Alibaba's mirror source, the operation is as follows:
- First back up the original CentOS-Base.repomv /etc/yum.repos.d/CentOS-Base.repo /etc/yum.repos.d/CentOS-Base.repo.backup
- Install the wget command, the command is as follows: yum -y install wget
- To download the mirror source, the command is as follows: wget -O /etc/yum.repos.d/CentOS-Base.repo http://mirrors.aliyun.com/repo/Centos-6.repo
- Finally generate the cache, the command is as follows: yum makecache
Start the installation environment##
To install the dependent environment, only one command is needed, the command is as follows:
yum -y install qemu-kvm virt-manager libvirt libvirt-python python-virtinst bridge-utils
After the installation is complete, you need to start a service to facilitate the installation of the virtual machine:
service libvirtd restart
Then turn off the firewall to connect to the virtual machine later, the command is as follows:
service iptables stop
Create a folder to save the image and virtual disk of the virtual machine, the command is as follows:
mkdir /kvmtest
Install an upload and download tool for uploading CentOS images, the installation command is as follows:
yum -y install lrzsz
Then use the command rz to upload the CentOS image to /kvmtest, the command is as follows:
cd /kvmtest
rz
Install virtual machine#
Now the virtual machine installed is the virtual machine installed on the CentOS system, this is the real cloud server.
- To create a virtual disk, the command is as follows: qemu-img create -f qcow2 /kvmtest/centos-6.5.qcow2 10G
- Then you can create a virtual machine. The first line is to specify the name and memory size of the virtual machine; the second line is to specify the number of CPUs; the third line is to specify the system image; the fourth line is to specify the location of the virtual disk, which is the upper The virtual disk created in one step. virt-install --virt-type kvm --name centos-6.5 --ram 1024 \
-
- vcpus 1 \
-
- cdrom=/kvmtest/CentOS-6.5-x86_64-minimal.iso \
-
- disk /kvmtest/centos-6.5.qcow2,format=qcow2 \
-
- network network=default \
-
- graphics vnc,listen=0.0.0.0 --noautoconsole \
-
- os-type=linux --os-variant=rhel6
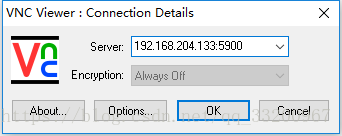
- Finally, use vnc to complete the installation. After executing the above command, we need to download a vnc. The download link of the official website is: https://www.realvnc.com/en/connect/download/vnc/, or you can search for
vnc-4_1_3-x86_win32_viewerto download on Baidu, and then open the software to start the connection. The IP address is the address of the host, and the port is 5900. If there are more virtual machines, the port is increased by 1, such as 5901. If the connection is unsuccessful and the virtual machine is started, it may be that the firewall has not been closed and the firewall needs to be closed.
 Write the picture description here
- After connecting to the virtual machine, you can install it. The installation process is the same as the process of installing the host at the beginning. This set will not repeat the introduction. By the way, this software can only be input under the Because input method.
 Write the picture description here
After the installation is complete, you must restart, the startup command is as follows:
virsh start centos-6.5
Since talking about the virsh command, let's talk about the use of the virsh command:
virsh list --all             #Show local active virtual machines
virsh start <Virtual machine name>      #Start an inactive virtual machine named ubuntu
virsh create <Virtual machine name.xml> #Create a virtual machine (after creation, the virtual machine starts immediately)
virsh resume <Virtual machine name>     #Start a suspended virtual machine
virsh shutdown <Virtual machine name>   #Shut down the virtual machine gracefully
virsh destroy <Virtual machine name>    #Force shutdown of the virtual machine
virsh dominfo <Virtual machine name>    #Display basic information of the virtual machine
virsh dumpxml <Virtual machine name>    #Display the current configuration file of the virtual machine
virsh setmem <Virtual machine name>51200 #Set the memory size for inactive virtual machines
virsh setvcpus <Virtual machine name>4 #Set the number of CPUs for inactive virtual machines
virsh edit <Virtual machine name>       #Edit the configuration file (usually used when the VM has just been defined)
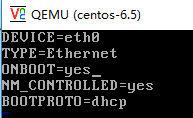
Configure virtual machine network#
Also use vi to edit the network configuration file:
vi /etc/sysconfig/network-scripts/ifcfg-eth0
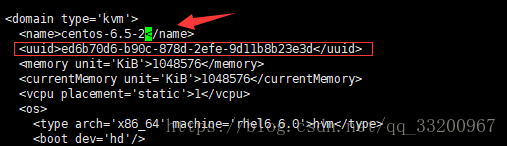
Then delete the physical address and UUID, and modify ONBOOT=yes, as follows:
 Write the picture description here
Finally restart the network, the command is as follows:
service network restart
To test whether the network can be used normally, use ping to test:
ping www.baidu.com
At this point, the installation of the virtual machine is completed. We can use vnc to connect to our virtual machine and use our virtual machine.
When introducing the virsh command, it was introduced to use shutdown to shut down the virtual machine on the host, but it cannot be used directly. You also need to install acpid in the virtual machine, start acpid, and add it to the boot service. The command is as follows:
yum install acpid
service acpid start
chkconfig acpid on
In this way, you can use shutdown on the host to shut down the virtual machine.
Clone a virtual machine#
If you need multiple virtual machines, but you want to install them one by one, you can copy the previous files and make appropriate modifications to quickly create a new virtual machine.
- For complex virtual disks, we have created a virtual disk centos-6.5.qcow2 under
/kvmtest/, we can copy this file and rename it, the command is as follows: cp centos-6.5.qcow2 centos-6.5-2.qcow2 - Then enter the
/etc/libvirt/qemudirectory, copy centos-6.5.xml and rename it, the command is as follows: cp centos-6.5.xml centos-6.5-2.xml - Then modify the content in centos-6.5-2.xml, modify the name to be the same as the previous copy file name, and delete uuid. Modify the location of the virtual disk and specify the virtual disk copied above. Delete the physical address of the virtual machine. as follows:
 Write the picture description here
 Write the picture description here
 Write the picture description here
- Finally, create a virtual machine, the command is as follows: virsh create centos-6.5-2.xml
In this way, a virtual machine has been created. Use the command virsh list --all to view:
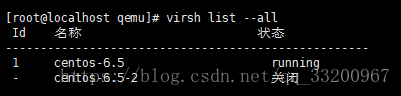 Write the picture description here
But you can’t connect to the network normally, you have to delete a file and restart the network service:
rm -rf /etc/udev/rules.d/70-persistent-net.rules
service network restart
In this way, a virtual machine is completely cloned.
Network Bridge#
When we use virtual machines, we use vnc to connect to the host's IP address plus port number, and map to the virtual machine through the host. This is very unreasonable. For example, the current cloud servers such as Tencent Cloud are directly connected to the IP address of the server, so we have to process the network of the virtual machine to make it directly accessible from the outside world. Because the virtual machine is now converted through routing, the outside world cannot directly access the virtual machine. We need to modify its network to bridge the way, so that the virtual machine can be directly accessed and connected from the outside world.
Modify the host network configuration##
Enter this directory and prepare to configure network files:
cd /etc/sysconfig/network-scripts/
Then copy the original network configuration file for later modification:
cp ifcfg-eth0 ifcfg-br100
Then edit the original network configuration file vi ifcfg-eth0, modify it as follows, log out the useless configuration, pay attention to adding BRIDGE and modifying BOOTPROTO=none:
DEVICE=eth0
TYPE=Ethernet
ONBOOT=yes
# NM_CONTROLLED=yes
BOOTPROTO=none
BRIDGE=br100
# IPADDR=192.168.171.127
# NETNASK=255.255.255.0
# GATEWAY=192.168.171.2
# DNS1=192.168.171.2
Then edit the original network configuration file vi ifcfg-br100, note that the author has modified DEVICE and TYPE, the IP address is still the original IP address, no need to modify:
DEVICE=br100
TYPE=Bridge
ONBOOT=yes
# NM_CONTROLLED=yes
BOOTPROTO=static
IPADDR=192.168.171.127
NETNASK=255.255.255.0
GATEWAY=192.168.171.2
DNS1=192.168.171.2
Then restart the network service, the command is as follows:
service network restart
Finally, you can use the command ifconfig to check whether the network configuration is successful.
Modify virtual machine network configuration##
Edit the configuration file of the virtual machine on the host, mainly to modify the network configuration, and operate after the virtual machine is closed. The command is as follows:
virsh edit centos-6.5
The main purpose is to modify the following configuration files, which modify type='bridge', and then delete the mac address. For the convenience of readers, it is displayed here. It is actually deleted. It will be automatically generated every time the virtual machine is restarted. Last modified<source bridge='br100'/> , modified as follows:
< interfacetype='bridge'><mac address='52:54:00:27:5a:65'/><source bridge='br100'/><model type='virtio'/><address type='pci' domain='0x0000' bus='0x00' slot='0x03'function='0x0'/></interface>
After the modification is completed, start the virtual machine, the command is as follows:
virsh start centos-6.5
Then turn off the firewall, because vnc will be used to connect to the virtual machine. The command to turn off the firewall is as follows:
service iptables stop
Then use vnc to connect to the virtual machine, the IP address and port number of the main host. After connecting, delete the network rules of the virtual machine, the command is as follows:
rm -rf /etc/udev/rules.d/70-persistent-net.rules
After deleting this file, you can restart the virtual machine and use the command init 6 to restart.
After restarting the virtual machine, use ifconfig to check whether the network configuration is successful, and then use the ping command to try to ping the external network, such as:
ping www.baidu.com
If the access to the external network is normal, then use Xshell to connect to the virtual machine we created, how to successfully connect, then we can achieve our needs, and really create a cloud server.
What is the use of multiple cloud servers? In the next article ["Using Nginx and Tomcat to Build a Highly Available and Highly Concurrent Website on CentOS"] (https://blog.doiduoyi.com/articles/1584972693454.html) introduces how to use multiple machines to build a highly available and highly concurrent website server, In this case, multiple servers are required. In this case, the cloud service platform can be used.
note#
What I want to say here is that in order to facilitate the outside world to access the server's port, we have turned off the firewall, but this is very insecure. So we can open a certain port alone, for example, we want to open the 3306 port number of the MySQL database, the operation is as follows:
Edit the firewall configuration file:
vim /etc/sysconfig/iptables
Add the following information:
- A INPUT -m state --state NEW -m tcp -p tcp --dport 3306-j ACCEPT
As shown below:
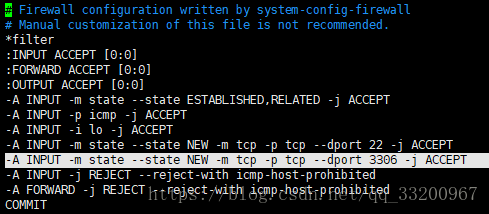 Write the picture description here
Save and exit, and finally restart the firewall:
service iptables restart
Opening other ports is the same.
References#
Recommended Posts