How to install Solr 5.2.1 on Ubuntu 14.04
Introduction
Solr is a search engine platform based on Apache Lucene. It is written in Java and uses the Lucene library to implement indexing. It can be accessed using various REST APIs, including XML and JSON. This is a list of features on their website:
- Advanced full-text search function
- Optimized for high-volume web traffic
- Standards-based open interface-XML, JSON and HTTP
- Comprehensive HTML management interface
- Server statistics exposed through JMX are used for monitoring
- Linear scalability, automatic index replication, automatic failover and recovery
- Near real-time index
- Flexible and adaptable to XML configuration
- Scalable plug-in architecture
In this article, we will install Solr using its binary distribution.
Preparation
To follow this tutorial, you need:
- At least 1 GB Ubuntu 14.04 CVM, but the amount of RAM required largely depends on your specific situation.
- A non-root user with
sudoprivileges. - Students who don’t have a server can buy it from here, but I personally recommend you to use the free Tencent Cloud Developer Lab for experimentation, and then buy server.
Step 1-Install Java
Solr requires Java, so in this step, we will install it.
This article details the complete Java installation process, but we will use a slightly different process.
First, install python-software-properties using apt-get:
sudo apt-get install python-software-properties
We will install the latest version of Java 8 instead of using the default-jdk or default-jre package. To do this, add the unofficial Java installer repository:
sudo add-apt-repository ppa:webupd8team/java
You need to press ENTER to accept adding the repository to the index.
Then, update the source list:
sudo apt-get update
Finally, install Java 8 using apt-get. You need to agree to the Oracle Binary Code License Agreement for Java SE platform products and JavaFX.
sudo apt-get install oracle-java8-installer
Step 2-Install Solr
In this section, we will install Solr 5.2.1. We will start by downloading the Solr distribution.
First, find a suitable mirror on this page. Then, copy the link of the mirror solr-5.2.1.tgz. For example, we will use http://apache.mirror1.spango.com/lucene/solr/5.2.1/.
Then, download the file in your home directory:
cd ~
wget http://apache.mirror1.spango.com/lucene/solr/5.2.1/solr-5.2.1.tgz
Next, unzip the service installation file:
tar xzf solr-5.2.1.tgz solr-5.2.1/bin/install_solr_service.sh --strip-components=2
And use the script to install Solr as a service:
sudo bash ./install_solr_service.sh solr-5.2.1.tgz
Finally, check if the server is running:
sudo service solr status
You should see output starting with this:
Found 1 Solr nodes:
Solr process 2750 running on port 8983
...
Step Three-Create Collection
In this section, we will create a simple Solr collection.
Solr can have multiple collections, but for this example, we only use one collection. To create a new collection, use the following command. In this case, we run it as the Solr user to avoid any permission errors.
sudo su - solr -c "/opt/solr/bin/solr create -c gettingstarted -n data_driven_schema_configs"
In this command, gettingstarted is the name of the set and the configuration set is specified with -n. Solr provides 3 configuration sets by default; in this case, we used a modeless one, which means that any field can be provided, any name, and the type will be guessed.
You have now added the collection and can start adding data. The default schema has only one required field: id. It has no other default fields, only dynamic fields. If you want to see the schema and explain everything clearly, please check the /opt/solr/server/solr/gettingstarted/conf/schema.xml file.
Step 4-Add and query documents
In this section, we will explore the Solr web interface and add some documents to our collection.
When you use a web browser to access http://your_server_ip:8983/solr, the Solr web interface should be displayed:
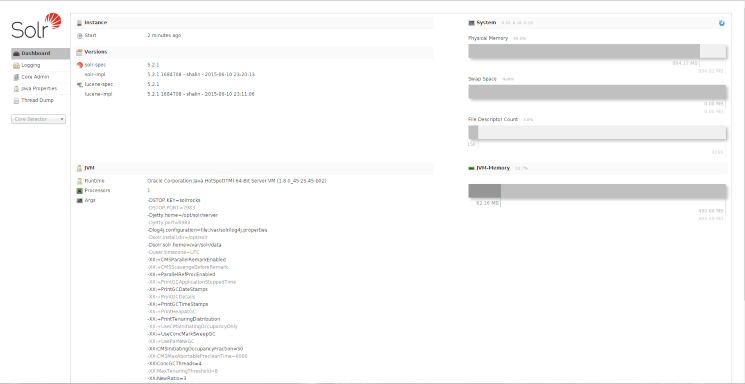
The web interface contains a lot of useful information that can be used to debug any problems you encounter during use.
The collection is divided into cores, which is why there are many references to cores in the web interface. Now, the collection gettingstarted contains only one core named gettingstarted. On the left, you can see the Core Selector drop-down menu, in which you can select gettingstarted to view more information.
After selecting gettingstarted, select "Document". The document stores the actual data that Solr can search. Because we used a modeless configuration, we can use any field. Let us use the following example JSON to indicate adding a single document by copying the following into the Document(s) field:
{" number":1,"president":"George Washington","birth_year":1732,"death_year":1799,"took_office":"1789-04-30","left_office":"1797-03-04","party":"No Party"}
Click "Submit Document" to add the document to the index. After a while, you will see the following:
Status: success
Response:{"responseHeader":{"status":0,"QTime":509}}
You can add more documents with similar or completely different structures, but you can also continue to use only one document.
Now, select Query on the left to query the document we just added. Using the default values in this screen, after clicking "Execute Query", you will see up to 10 documents, depending on the number you add:
{" responseHeader":{"status":0,"QTime":58,"params":{"q":"*:*","indent":"true","wt":"json","_":"1436827539345"}},"response":{"numFound":1,"start":0,"docs":[{"number":[1],"president":["George Washington"],"birth_year":[1732],"death_year":[1799],"took_office":["1789-04-30T00:00:00Z"],"left_office":["1797-03-04T00:00:00Z"],"party":["No Party"],"id":"1ce12ed2-add9-4c65-aeb4-a3c6efb1c5d1","_version_":1506622425947701200}]}}
in conclusion
There are more options, but you have now successfully installed Solr and can start using it on your own site.
To learn more about Ubuntu's open source information tutorial, please go to [Tencent Cloud + Community] (https://cloud.tencent.com/developer?from=10680) to learn more.
Reference: "How To Install Solr 5.2.1 on Ubuntu 14.04"
Recommended Posts