How to install Nginx on Ubuntu 16.04
Introduction
Nginx is one of the most popular web servers in the world, responsible for hosting some of the largest and most trafficked websites on the Internet. In most cases, it is more resource-friendly than Apache and can be used as a web server or reverse proxy.
In this guide, we will discuss how to install Nginx on an Ubuntu 16.04 server.
Preparation
An Ubuntu** server** with a non-root account that can use the sudo command has been set up, and the firewall has been turned on. Students who don’t have a server can buy it from here, but I personally recommend you to use the free Tencent Cloud Developer Lab for experimentation, and then buy server.
If you have an account available, please log in as a non-root user to get started.
Step 1: Install Nginx
Nginx can be used in Ubuntu's default repositories, so installation is very simple.
Since this is our first interaction with the packaging system in this session, we will update our local package index so that we can access the latest package list. After that, we can install nginx:
sudo apt-get update
sudo apt-get install nginx
After accepting the process, apt-get installs Nginx and any required dependencies to your server.
Step 2: Adjust the firewall
Before we test Nginx, we need to reconfigure the firewall software to allow access to the service. During installation, Nginx uses ufw to register itself as a firewall service. This makes it fairly easy to allow Nginx access.
We can use ufw to list the application configurations that we know how to use by typing:
sudo ufw app list
You should get a list of application configuration files:
Available applications:
 Nginx Full
 Nginx HTTP
 Nginx HTTPS
 OpenSSH
As you can see, Nginx has three configuration files:
- Nginx Full: This configuration file opens port 80 (normal, unencrypted web traffic) and port 443 (TLS/SSL encrypted traffic)
- Nginx HTTP: This configuration file only opens port 80 (normal, unencrypted web traffic)
- Nginx HTTPS: This configuration file only opens port 443 (TLS/SSL encrypted traffic)
It is recommended that you enable the most restrictive profile, which still allows the traffic you configure. Since we have not yet configured SSL for our server, in this guide, we only need to allow traffic on port 80.
You can enable this feature by typing
sudo ufw allow 'Nginx HTTP'
You can type the following to verify the changes:
sudo ufw status
You should see allowed HTTP traffic in the displayed output:
Status: active
To Action From
------------
OpenSSH ALLOW Anywhere
Nginx HTTP ALLOW Anywhere
OpenSSH(v6) ALLOW Anywhere(v6)
Nginx HTTP(v6) ALLOW Anywhere(v6)
Step 3: Check your web server
At the end of the installation process, Ubuntu 16.04 starts Nginx. The web server should already be up and running.
We can check the init system to ensure that the service is running by systemd by typing:
systemctl status nginx
● nginx.service - A high performance web server and a reverse proxy server
 Loaded:loaded(/lib/systemd/system/nginx.service; enabled; vendor preset: enabled)
 Active:active(running) since Mon 2016-04-1816:14:00 EDT; 4min 2s ago
 Main PID:12857(nginx)
 CGroup:/system.slice/nginx.service
   ├─12857 nginx: master process /usr/sbin/nginx -g daemon on; master_process on
   └─12858 nginx: worker process
As you can see, the service seems to have started successfully. However, the best way to test it is to actually request the page from Nginx.
You can visit the default Nginx login page to confirm that the software is running normally. You can access it through the server's domain name or IP address.
If you don’t have a domain name, it is recommended that you go here register a domain name first. If you just use this configuration for testing or personal use, you can use a self-signed certificate without buying a domain name. The self-signed certificate provides the same type of encryption, but there is no domain name verification announcement. For self-signed certificates, you can refer to the two articles Create a self-signed SSL certificate for Apache and How to create a self-signed SSL certificate for Nginx.
If you don't want to set a domain name for the server, you can use the server's public IP address. If you don't know the IP address of the server, you can get it from the command line in several different ways.
Try typing at the server's command prompt:
ip addr show eth0 | grep inet | awk '{ print $2; }'| sed 's/\/.*$//'
You will come back a few lines. You can try each in a web browser to see if they work.
Another way is to type this, it should provide you with a public IP address as seen from elsewhere on the Internet:
sudo apt-get install curl
curl -4 icanhazip.com
After obtaining the IP address or domain of the server, enter it into the address bar of the browser:
http://server_domain_or_IP
You should see the default Nginx login page, which should look like this:
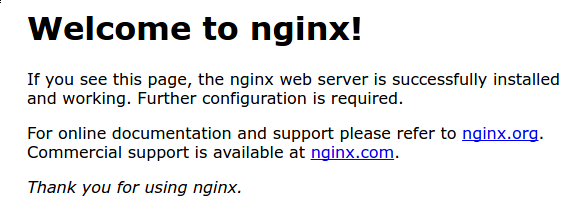
This page is only included in Nginx to show you that the server is running normally.
Step 4: Manage Nginx process
Now that you have the web server up and running, we can view some basic management commands.
To stop the web server, you can type:
sudo systemctl stop nginx
To start the web server when it is stopped, type:
sudo systemctl start nginx
To stop and start the service again, type:
sudo systemctl restart nginx
If you are just making configuration changes, Nginx can usually be reloaded without dropping the connection. To do this, you can use this command:
sudo systemctl reload nginx
By default, Nginx is configured to start automatically when the server boots. If this is not what you want, you can disable this behavior by typing:
sudo systemctl disable nginx
To re-enable the service to start on boot, you can type:
sudo systemctl enable nginx
Step 5: Familiarize yourself with important Nginx files and directories
Now that you know how to manage the service itself, you should spend a few minutes to familiarize yourself with some important directories and files.
Content
/var/www/html: The actual web content (by default only contains the default Nginx page you saw before) is provided from the/var/www/htmldirectory. This can be changed by changing the Nginx configuration file.
server configuration
/etc/nginx: Nginx configuration directory. All Nginx configuration files reside here./etc/nginx/nginx.conf: The main Nginx configuration file. This can be modified to change the Nginx global configuration./etc/nginx/sites-available/: The directory where the "server block" of each site can be stored. Nginx will not use configuration files in this directory unless they are linked to thesites-enableddirectory (see below). Generally, all server block configuration is done in this directory, and then enabled by linking to other directories./etc/nginx/sites-enabled/: The directory where each site "server block" is enabled. Usually, these are created by linking to configuration files in thesites-availabledirectory./etc/nginx/snippets: This directory contains configuration snippets that can be included in other locations in the Nginx configuration. Possibly repeatable configuration segments are good candidates for reconstruction into fragments.
Server log
/var/log/nginx/access.log: Unless Nginx is configured to perform other operations, every request to the web server will be recorded in this log file./var/log/nginx/error.log: Any Nginx errors will be recorded in this log.
in conclusion
Now that you have installed a web server, you can choose the type of content you want to provide and the technology you want to use to create a richer experience.
For more Ubuntu tutorials, please go to [Tencent Cloud + Community] (https://cloud.tencent.com/developer?from=10680) to learn more.
Reference: "How To Install Nginx on Ubuntu 16.04"
Recommended Posts