How to install PrestaShop on Ubuntu 16.04
What is PrestaShop?
If you have ever considered opening an online store, you may feel a variety of free and open source e-commerce solutions. Although having so many options means that there is almost certainly an effective solution available for your particular situation, it can also confuse novices. One of the options is the theme of this guide. It is PrestaShop, which is a comprehensive e-commerce solution used by thousands of merchants around the world.
PrestaShop's e-commerce breadth can make learning seem daunting; however, its menu structure is neat, the terminology is intuitive, and the interface is easy to navigate. In addition, customizing your website with many of PrestaShop's all you see is what you get (WYSIWYG) tools to make a user-friendly setup without having to check and modify the source code. In addition, PrestaShop also provides many out-of-the-box features and plug-ins to simplify setup and use.
Installing Prestashop on a remote server is more complicated and time-consuming than using cloud hosting, but the reward is greater: you will get better performance because you have saved server resources and greater flexibility, and you can freely adjust your The settings feel appropriate. You never have to wait for the cloud hosting support team to change the PHP settings for you. In addition, [High Availability] (https://www.linode.com/docs/websites/introduction-to-high-availability/), [Load Balancing] (https://www.linode.com/docs/platform/nodebalancer/getting-started-with-nodebalancers/), Advanced [Backup Solution] (https://www.linode.com/docs/platform/disk-images/linode-backup-service/) and other functions become easily accessible, allowing you to expand your business and improve the reliability of your site.
Before you start##
- Familiarize yourself with our Getting Started guide and complete the steps to set the Linode hostname and time zone.
- This guide will use
sudowhenever possible. Complete the "Protect Your Server" section to create a standard user account, strengthen SSH access and remove unnecessary network services. - Update your system:
sudo apt-get update && sudo apt-get upgrade
4. To obtain a free SSL certificate from Let's Encrypt, you need to purchase a fully qualified domain name (FQDN) and set it to point to your Linode. For details, please refer to our DNS Manager Overview guide.
Note In this guide, please replace example.com with your Linode's public IP address or fully qualified domain name (FQDN).
Server requirements##
In most cases, you can start with an Ubuntu 16.04 instance with 1GB RAM. As your online store grows, keep an eye on your memory usage; scale to a larger Linode if necessary. If your business becomes particularly large, it is best to divide your mall into at least three servers: one running Apache and hosting the PHP code that runs the e-commerce platform, one for the database, and one for storing static content, such as .jpg images .
Install Apache and MariaDB
This guide will use MariaDB instead of MySQL to run PrestaShop on the modified LAMP stack. You can read more about MariaDB and its features here. If you prefer to use the traditional LAMP stack, please refer to our guide, How to install LAMP stack on Ubuntu 16.04.
- Install Apache, PHP and MariaDB:
sudo apt-get install apache2 libapache2-mod-php mariadb-server
2. Use the following command to secure MariaDB installation:
sudo mysql_secure_installation
The script will ask a series of questions. You can keep the first question (the root password for MariaDB is empty), and then select "n" ("No") to refuse to create a new root password. Answer'yes' (yes) to the remaining questions.
Configure Apache
- The next step is to create a basic configuration file for Apache and tell it where it will find your website files and what your domain name is. First copy the default configuration file to use it as a template:
sudo cp /etc/apache2/sites-available/000-default.conf /etc/apache2/sites-available/example.com.conf
2. Edit the configuration file. Uncomment the ServerName line, replace example.com with your Linode's domain name or IP address, and edit the remaining lines as follows:
/etc/apache2/sites-available/example.com.conf1 2 3 4 5 6
. . . ServerName example.com ServerAdmin [email protected] DocumentRoot /var/www/html/example.com . . .
3. Create a directory for our website files:
sudo mkdir /var/www/html/example.com
4. Disable the default profile and enable the newly created profile:
sudo a2dissite 000-default.conf sudo a2ensite example.com.conf
5. Restart Apache:
sudo systemctl restart apache2.service
Allow PrestaShop to use .htaccess file###
PrestaShop can use .htaccess file. This allows it to automatically adjust Apache's settings, and can enable advanced features from the management backend (PrestaShop's management page), such as "pretty links", web page compression or https redirects.
- Edit the configuration file to enable .htaccess override:
/etc/apache2/sites-available/example.com.conf
| 123 | < Directory /var/www/html/example.com> AllowOverride All |
|---|
Install TLS (SSL) certificate to encrypt website traffic##
Obtaining the SSL certificate of the store helps to protect the customer's Data Security and avoid penalizing https for Google search ranking of unused websites. This step cannot be completed using Linode's public IP address; you need to have the FQDN already listed in the DNS server.
- Check if your domain name has been propagated to the DNS server:
dig @8.8.8.8 example.com
You should receive the following response:
example.com 36173 IN A 203.0.113.10
If the A value is equal to the server's IP address, you can continue. Otherwise, please check your Linode's DNS configuration and repeat this step after a few minutes.
2. Add the official personal package archive (PPA) of Let’s encryption team, update the package repository, and install certbot:
sudo apt-get install software-properties-common sudo add-apt-repository ppa:certbot/certbot sudo apt-get update sudo apt-get install python-certbot-apache
3. Request and install a TLS certificate:
sudo certbot --apache
4. When asked if https redirect is required, the answer 2.
Please choose whether or not to redirect HTTP traffic to HTTPS, removing HTTP access. ------------------------------------------------------------------------------- 1: No redirect - Make no further changes to the webserver configuration. 2: Redirect - Make all requests redirect to secure HTTPS access. Choose this for new sites or if you're confident your site works on HTTPS. You can undo this change by editing your web server's configuration. ------------------------------------------------------------------------------- Select the appropriate number [1-2] then [enter] (press 'c' to cancel):
5. Before proceeding, make sure https is working properly. You can do this by navigating to the https://example.com web browser.
6. Since the certificate expires after 90 days, it is a good idea to create an automatic renewal:
sudo crontab <<< "33 3 * * Sat /usr/bin/certbot renew -q"
Prepare the environment for PrestaShop and install dependencies##
Set the ownership /var/www/html/example.com to allow PrestaShop to enable plugins, automatic updates and other features.
sudo chown www-data:/var/www/html/example.com/
You can also use:
chown -R www-data *
chgrp -R www-data *
Download and unzip the files of PrestaShop###
- Change the working directory to the location where the website code will be installed:
cd /var/www/html/example.com/
2. Download the zip archive containing all necessary files. At the time of writing this tutorial, the latest version is 1.7.2.1. Please visit this website to get the latest version: PrestaShop's download page and change the link in the following command so that it reflects the current version:
sudo curl -O https://download.prestashop.com/download/releases/prestashop_1.7.2.1.zip
3. Install the unzip package:
sudo apt-get install unzip
4. Unzip the zip archive:
sudo unzip prestashop_1.7.2.1.zip
Install and configure PrestaShop dependencies###
- Install PrestaShop's PHP dependencies:
sudo apt-get install php7.0-curl php7.0-gd php7.0-mysql php7.0-zip php7.0-xml php7.0-intl
These modules allow PrestaShop to download content, process images, access databases, decompress files, process XML data, and access internationalization functions.
2. Enable Apache rewrite module:
sudo a2enmod rewrite
3. Restart Apache:
sudo systemctl restart apache2.service
4. PrestaShop uses SQL database to store information about products, users, categories, etc. Log in to MariaDB as a super user (root):
sudo mysql
5. Create databases and users with appropriate permissions. Replace your_database_name, prestashop_user and choose_password below. Record the information for later use.
CREATE DATABASE your_database_name; CREATE USER 'prestashop_user'@'localhost' IDENTIFIED BY 'choose_password'; GRANT ALL ON your_database_name.* TO 'prestashop_user'@'localhost'; exit
Install PrestaShop
- Navigate to the
https://example.combrowser. Be sure to include,httpsto ensure your connection is secure.
The installation wizard will guide you through the setup process. When prompted, fill in the database credentials previously set. Keep the first field: 127.0.0.1. The table prefix can remain unchanged as well.
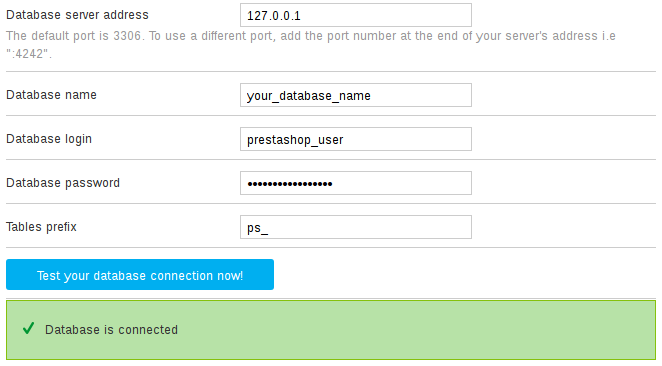
-
Test the connection to the database server.
-
After clicking "Next", the installer will create the necessary tables and finish setting the storage. You will see a page that looks like this:
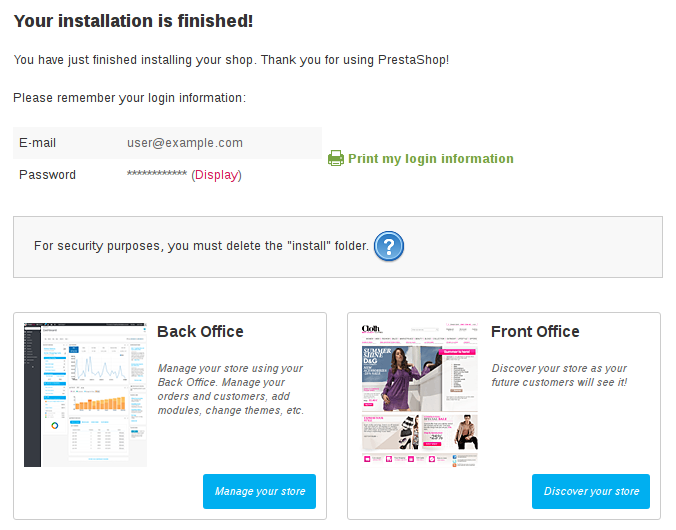
- Delete the
installdirectory and theziparchive:
cd /var/www/html/example.com sudo rm -r install prestashop_1.7.2.1.zip
Optimize Prestashop and enable TLS/SSLpermanent link
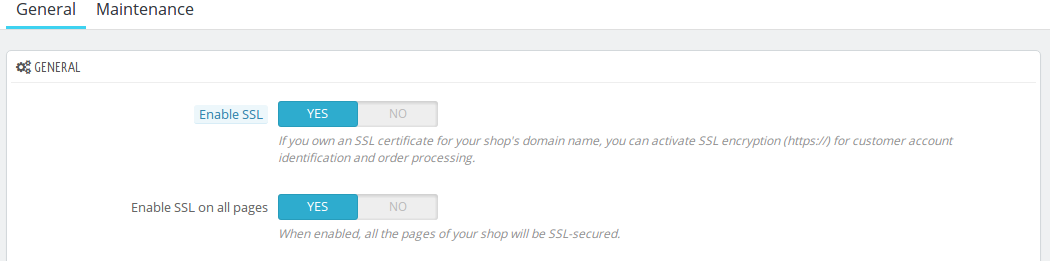
- Enable https redirection. In the leftmost menu of the PrestaShop backend, look for CONFIGURE. Click Shop Parameters below.
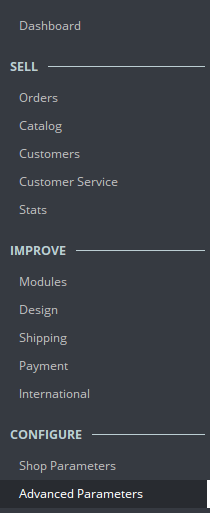
Select "Yes" to enable SSL and enable SSL on all pages. Scroll down and click "Save".
If you cannot enable "Enable SSL" on all pages**, please try again after enabling SSL and saving the settings.
- Return to the left menu. When the mouse pointer hovers over the top of Shop Parameters, you will see a pop-up submenu. Click Traffic and SEO. Scroll down until you find the setting shown in the image below:

Choose YES for the friendly URL and 301 Permanently Move to redirect to the canonical URL. Save your settings.
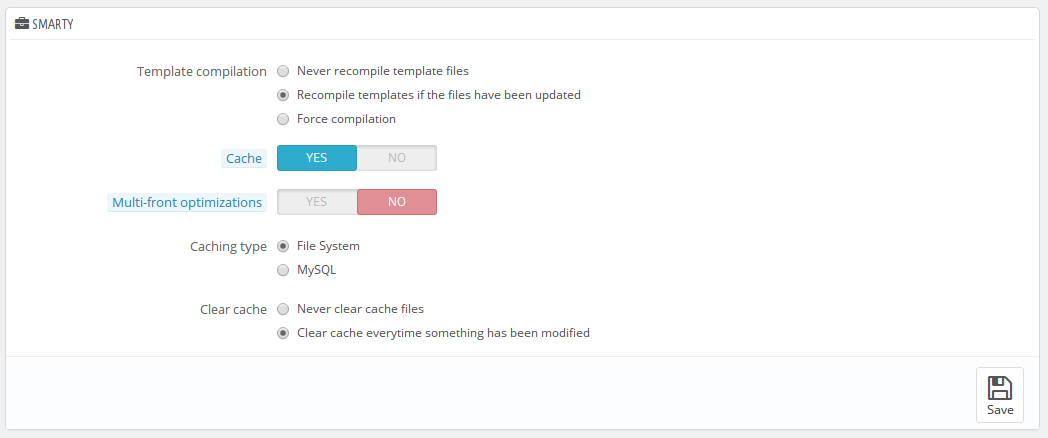
- Out of the box, PrestaShop includes some features to help you render pages to your customers faster. You can access these items from the leftmost menu. Under "Configuration", hover the mouse over "Advanced Parameters", and then click "Performance" in the submenu that opens. **If the file has been updated under Template Compilation, **then select **Re-compile the template, for Cache, select YES. This will activate Smarty caching and reduce the need for the server to compile part of the PHP code, thereby reducing front-end loading time. The final setting should look like this:
- Scroll down until you find CCC (COMBINE, COMPRESS and CACHE). Switch everything to YES. Save your settings.

-
Open /etc/php/7.0/apache2/php.ini in a text editor and find the following three settings:
/etc/php/7.0/apache2/php.ini1 2 3
memory_limit = 128M upload_max_filesize = 2M max_execution_time = 30 Changeupload_max_filesizeto 10M to enable uploading of larger images. There is no need to change the other two settings at this time, but if the memory usage of your site increases or you install a plugin that has slow scripts, you may need to consider increasingmemory_limitormax_execution_timerespectively. -
Restart Apache:
sudo systemctl restart apache2.service
Setting up mail delivery##
Setting up mail delivery in PrestaShop is crucial because many things happen via email: customer account confirmation, subscription, delivery status, order confirmation, etc. Although [like this] (https://www.linode.com/docs/email/postfix/email-with-postfix-dovecot-and-mysql/) email server can be hosted on Linode, it can be complicated to set up and maintain.
You can also use an all-in-one solution like Mail-in-a-Box, but the easiest way is to use a dedicated solution such as Google’s G Suite or Fastmail . This way, you can focus on maintaining your store and get a reliable email service without worrying about technical details.
After confirming the email provider, configure PrestaShop's email system: under Configuration in the left menu, hover the mouse over Advanced Parameters, and then click Electronics in the submenu mail. After loading the page, look for "Set my own SMTP parameters" (Advanced users only).
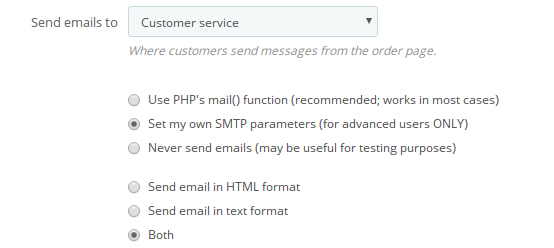
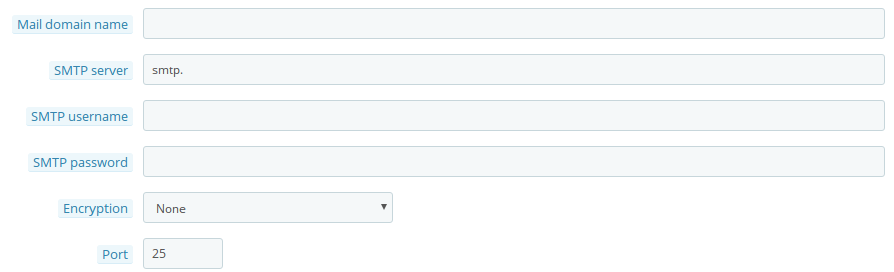
The new options will appear at the bottom of the page:
Next step##
Now that you have up and running PrestaShop, you can start customizing the site to meet your store needs. The official PrestaShop website has a list of [modules] (https://addons.prestashop.com/en/), and these [modules] (https://addons.prestashop.com/en/) can be installed to add functions such as online chat, SEO optimization and product statistics. It is also important to maintain the security of the site. Make sure to update PrestaShop, any installed modules or plugins, and your Linode system frequently.
Recommended Posts