Installation and cracking of Jira7 operation records under Centos
Confluence is a professional enterprise knowledge management and collaboration software that can be used to build enterprise wikis. It can achieve collaboration and knowledge sharing between team members. Most companies now deploy a set of confluence as an internal wiki. Now that confluence has been charged, the following will introduce the operation record of installing and cracking confluence (applicable to centos6/7 system environment):
1. Install jdk8 environment (note the confluence and jira environment, it is best to install oracle java, the default openjdk will not work.)
Jdk-8u131-linux-x64.rpm download to/opt directory
Download link: https://pan.baidu.com/s/1pLaAjPp
Extract password: x27s

[ root@test-vm03 ~]# cd /opt/[root@test-vm03 opt]# ll jdk-8u131-linux-x64.rpm
- rw-r--r--.1 root root 169983496 Sep 282017 jdk-8u131-linux-x64.rpm
[ root@test-vm03 opt]# rpm -ivh jdk-8u131-linux-x64.rpm

[ root@test-vm03 opt]# vim /etc/profile
......
JAVA_HOME=/usr/java/jdk1.8.0_131
JAVA_BIN=/usr/java/jdk1.8.0_131/bin
PATH=/usr/local/sbin:/usr/local/bin:/usr/sbin:/usr/bin:/root/bin:/bin:/sbin/
CLASSPATH=.:/lib/dt.jar:/lib/tools.jar
export JAVA_HOME JAVA_BIN PATH CLASSPATH

[ root@test-vm03 opt]# source /etc/profile
[ root@test-vm03 opt]# java -version
java version "1.8.0_131"Java(TM) SE Runtime Environment(build 1.8.0_131-b11)
Java HotSpot(TM)64-Bit Server VM(build 25.131-b11, mixed mode)
Second, install the mysql environment (here is MariaDB under centos7)
[ root@test-vm03 ~]# yum -y install mariadb mariadb-server
[ root@test-vm03 ~]# systemctl start mariadb
[ root@test-vm03 ~]# systemctl enable mariadb
Next, perform simple configuration of MariaDB, set a password, and you will be prompted to enter the password first
[ root@test-vm03 ~]# mysql_secure_installation
The first is to set a password, you will be prompted to enter the password first
Enter current password forroot(enter for none):<-Press Enter for the first time
set password
Set root password?[Y/n]<-Whether to set the root user password, enter y and press Enter or press Enter directly
New password:<-Set the password of the root user
Re-enter newpassword:<-Enter the password you set again
Other configuration
Remove anonymous users?[Y/n]<-Whether to delete anonymous users, press Enter
Disallow root login remotely?[Y/n]<-Whether to prohibit root remote login,Carriage return,
Remove test database and access to it?[Y/n]<-Whether to delete the test database, press Enter
Reload privilege tables now?[Y/n]<-Whether to reload the permission table, press Enter
[ root@test-vm03 ~]# mysql -p123456
Welcome to the MariaDB monitor. Commands end with; or \g.
Your MariaDB connection id is 3
Server version:5.5.56-MariaDB MariaDB Server
Copyright(c)2000,2017, Oracle, MariaDB Corporation Ab and others.
Type 'help;' or '\h'for help. Type '\c' to clear the current input statement.
MariaDB [(none)]> show databases;+--------------------+| Database |+--------------------+| information_schema || mysql || performance_schema |+--------------------+4 rows inset(0.01 sec)
MariaDB [(none)]>
Next, configure MariaDB's character set:->The first is the configuration file/etc/my.cnf, in[mysqld]Add under label
init_connect='SET collation_connection = utf8_unicode_ci'
init_connect='SET NAMES utf8'
character-set-server=utf8
collation-server=utf8_unicode_ci
skip-character-set-client-handshake
- > Then the configuration file/etc/my.cnf.d/client.cnf, in[client]Add in
default-character-set=utf8
- > Then the configuration file/etc/my.cnf.d/mysql-clients.cnf, in[mysql]Add in
default-character-set=utf8
Finally, restart MariaDB and log in to MariaDB to view the character set
[ root@test-vm001 my.cnf.d]# systemctl restart mariadb
[ root@test-vm03 ~]# mysql -p123456
Welcome to the MariaDB monitor. Commands end with; or \g.
Your MariaDB connection id is 4
Server version:5.5.56-MariaDB MariaDB Server
Copyright(c)2000,2017, Oracle, MariaDB Corporation Ab and others.
Type 'help;' or '\h'for help. Type '\c' to clear the current input statement.
MariaDB [(none)]> show variables like "%character%";show variables like "%collation%";+--------------------------+----------------------------+| Variable_name | Value |+--------------------------+----------------------------+| character_set_client | utf8 || character_set_connection | utf8 || character_set_database | utf8 || character_set_filesystem | binary || character_set_results | utf8 || character_set_server | utf8 || character_set_system | utf8 || character_sets_dir |/usr/share/mysql/charsets/|+--------------------------+----------------------------+8 rows inset(0.00 sec)+----------------------+-----------------+| Variable_name | Value |+----------------------+-----------------+| collation_connection | utf8_unicode_ci || collation_database | utf8_unicode_ci || collation_server | utf8_unicode_ci |+----------------------+-----------------+3 rows inset(0.00 sec)
MariaDB [(none)]>
Create the corresponding database, username and password for Confluence
MariaDB [(none)]> create database confluence default character set utf8 collate utf8_bin;
Query OK,1 row affected(0.00 sec)
MariaDB [(none)]> grant all on confluence.* to 'confluence'@'%' identified by 'confluencepasswd';
Query OK,0 rows affected(0.00 sec)
MariaDB [(none)]> flush privileges;
Query OK,0 rows affected(0.00 sec)
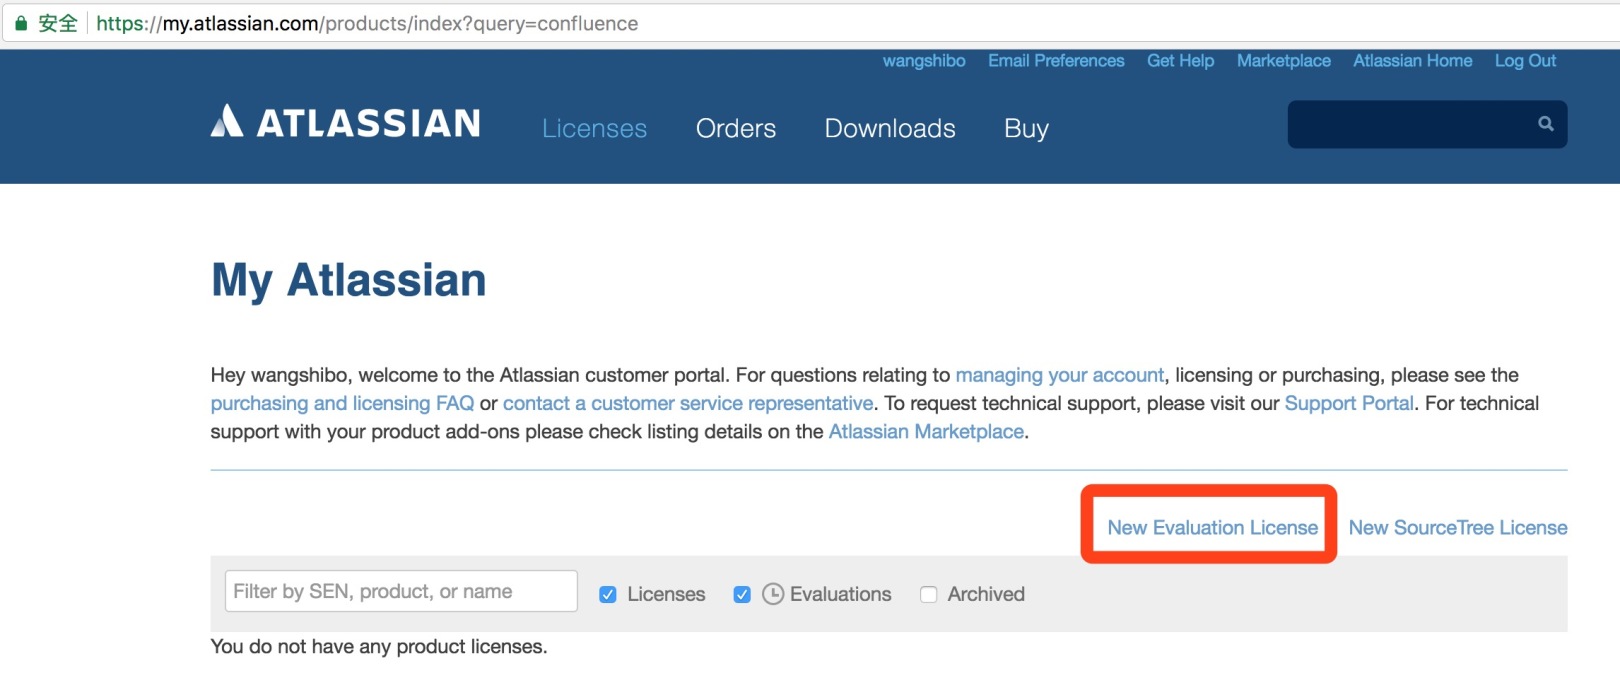
Three, download and install the cracked confluence6.3
atlassian-confluence-6.3.1-x64.bin
Download link: https://pan.baidu.com/s/1skD5DQt Get password: 5vmk

atlassian-extras-decoder-v2-3.2.jar
Download link: https://pan.baidu.com/s/1eRKDDOA Obtaining password: mbjp

atlassian-universal-plugin-manager-plugin-2.22.jar
Download link: https://pan.baidu.com/s/1o7Lfv6M Extract password: 1i3y

Download the above two packages to the local/opt directory,Grant execute permission to the binary file, and then install
[ root@test-vm03 opt]# ls
atlassian-confluence-6.3.1-x64.bin  atlassian-extras-decoder-v2-3.2.jar
[ root@test-vm03 opt]# chmod +x atlassian-confluence-6.3.1-x64.bin
[ root@test-vm03 opt]# ./atlassian-confluence-6.3.1-x64.bin

From the above figure, we can see that confluence has been installed in the /opt/atlassian/confluence and /var/atlassian/application-data/confluence directories, and the default listening port of confluence is 8090. You can install it all the way by default!
Note: The main configuration file of confluence is /opt/atlassian/confluence/conf/server.xml, which is similar to jira. This server.xml is equivalent to the server.xml configuration file in tomcat. If you want to modify the access port, you can modify it here.
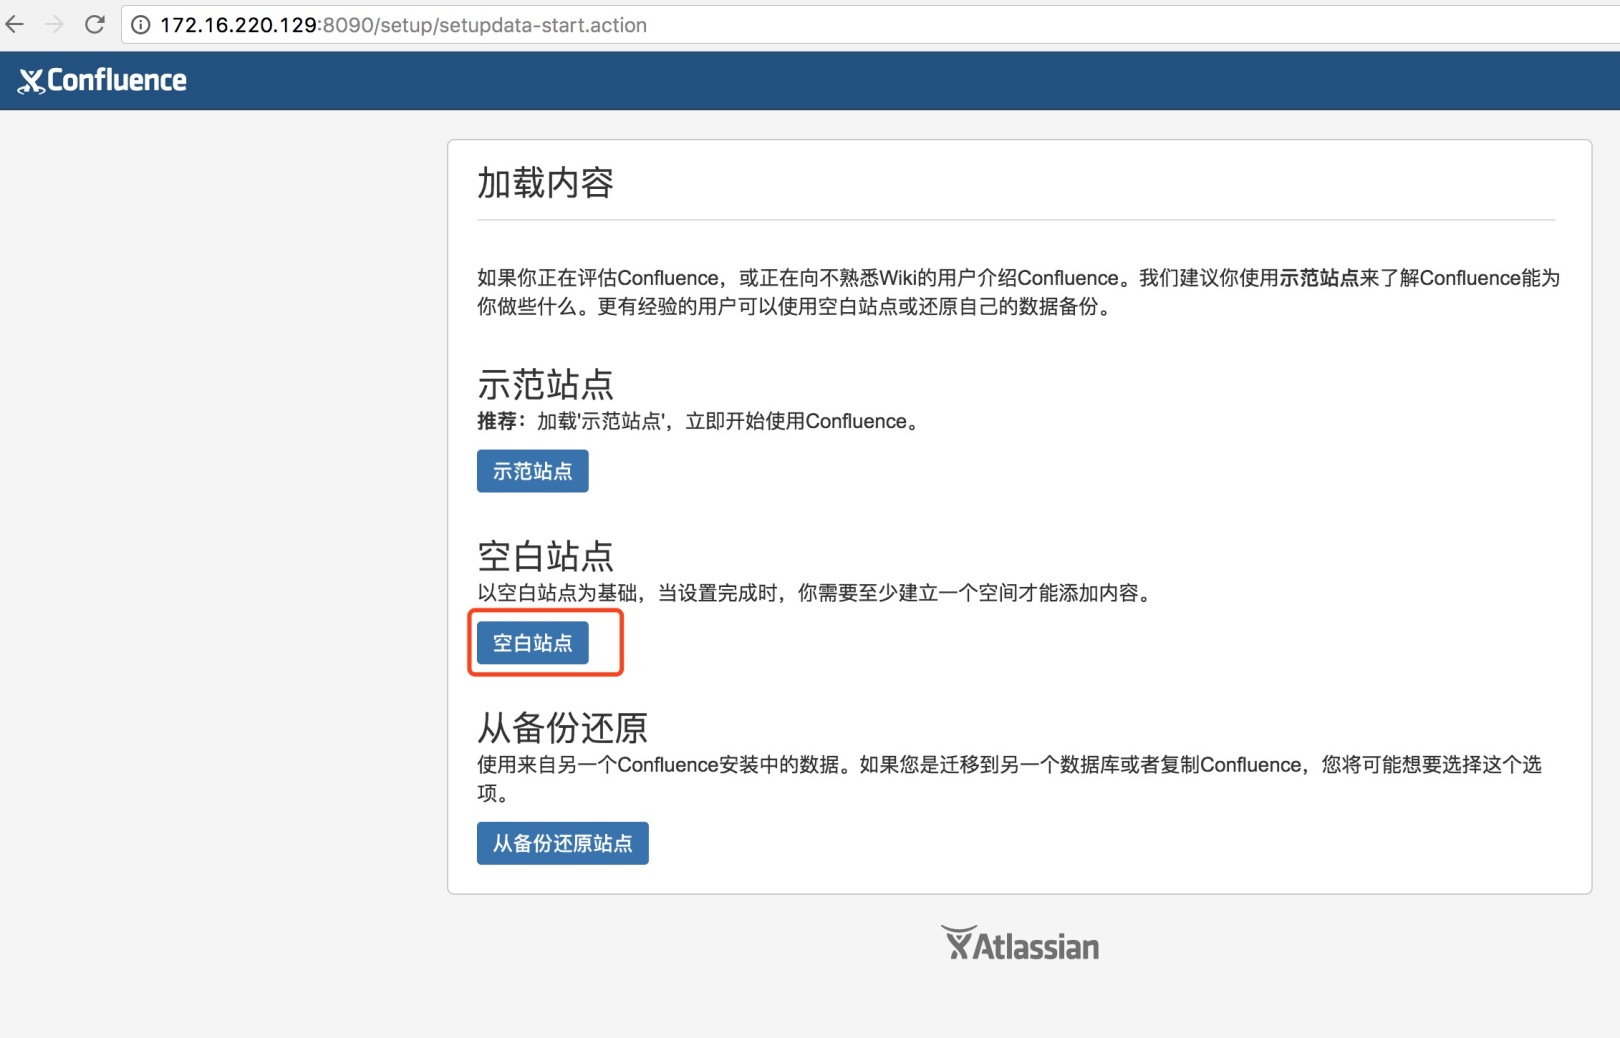
If you want to modify the data directory of confluence, you can change it during the installation process (the default is /var/atlassian/application-data/confluence)
Check if the confluence port is up
[ root@test-vm03 opt]# lsof -i:8090
COMMAND   PID       USER   FD   TYPE DEVICE SIZE/OFF NODE NAME
java    18100 confluence   36u  IPv6 188496      0t0  TCP *:8090(LISTEN)

Restart confluence command
[ root@test-vm03 opt]# /etc/init.d/confluence restart
Enter http://172.16.220.129:8090 in the browser to access confluence
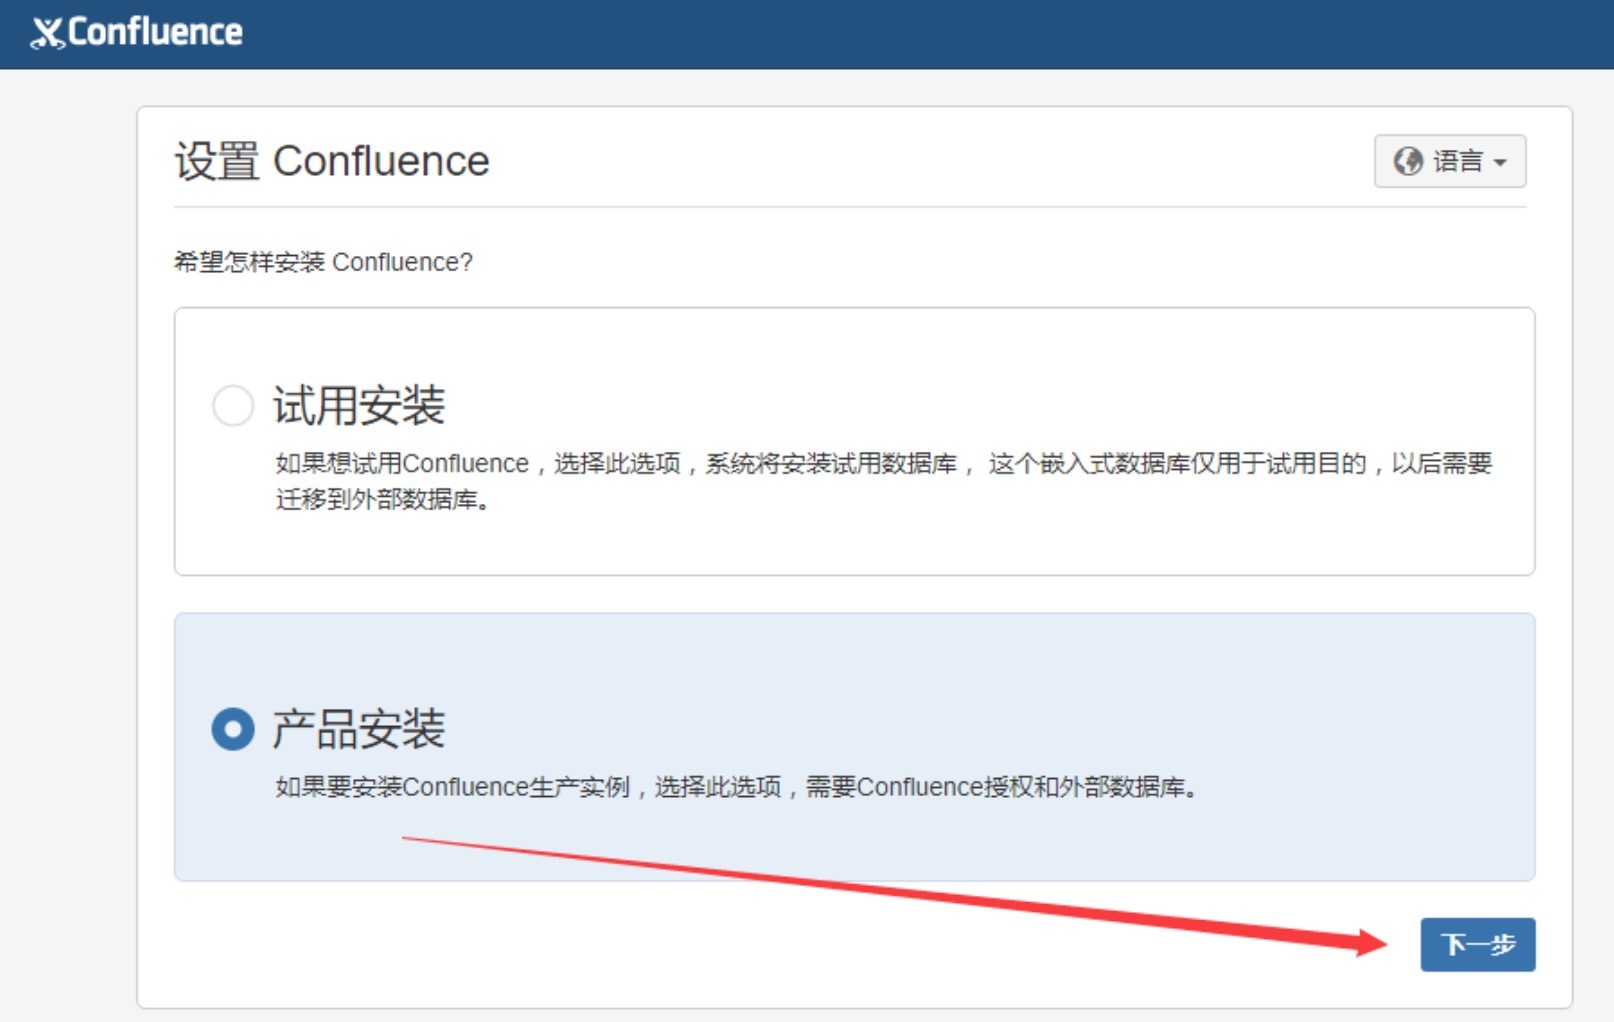
Select product installation and click Next to continue installation

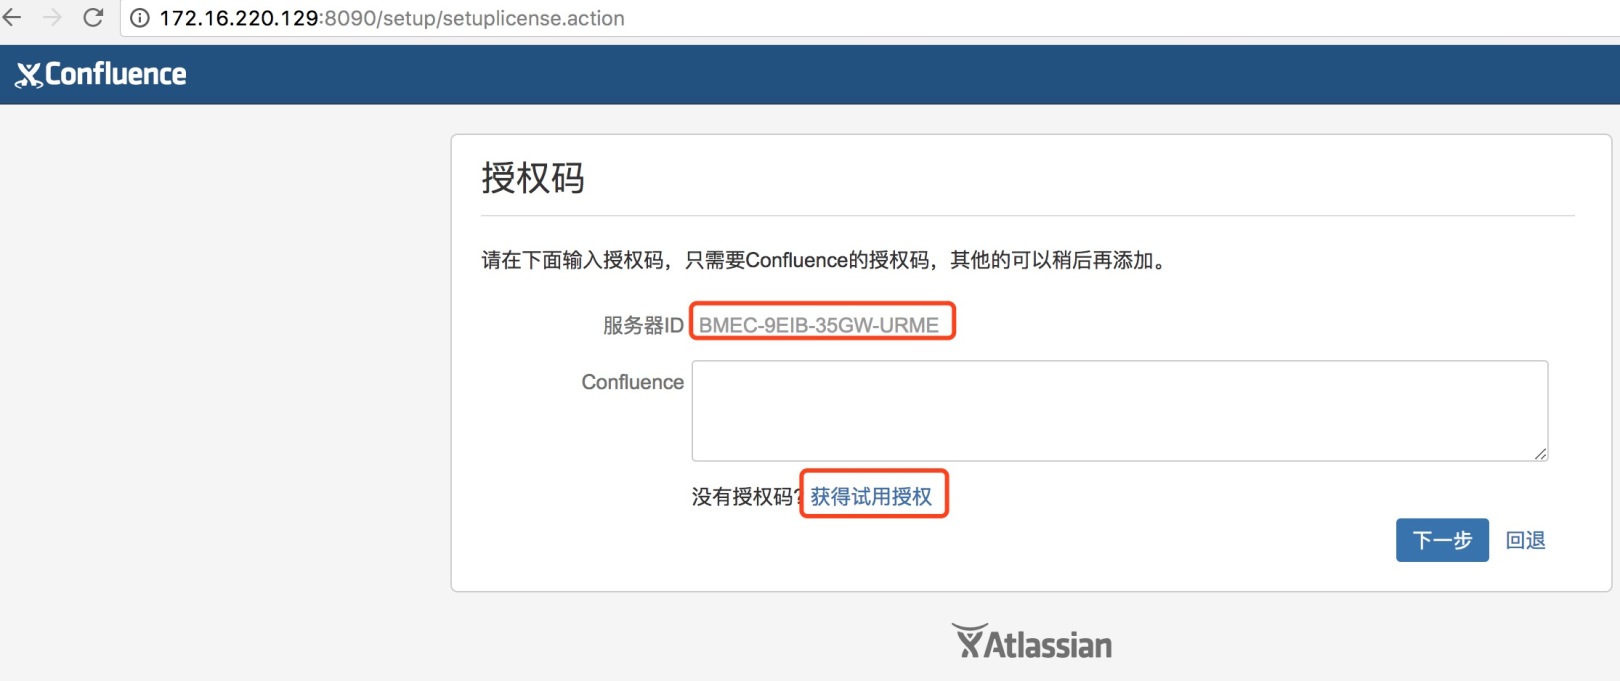
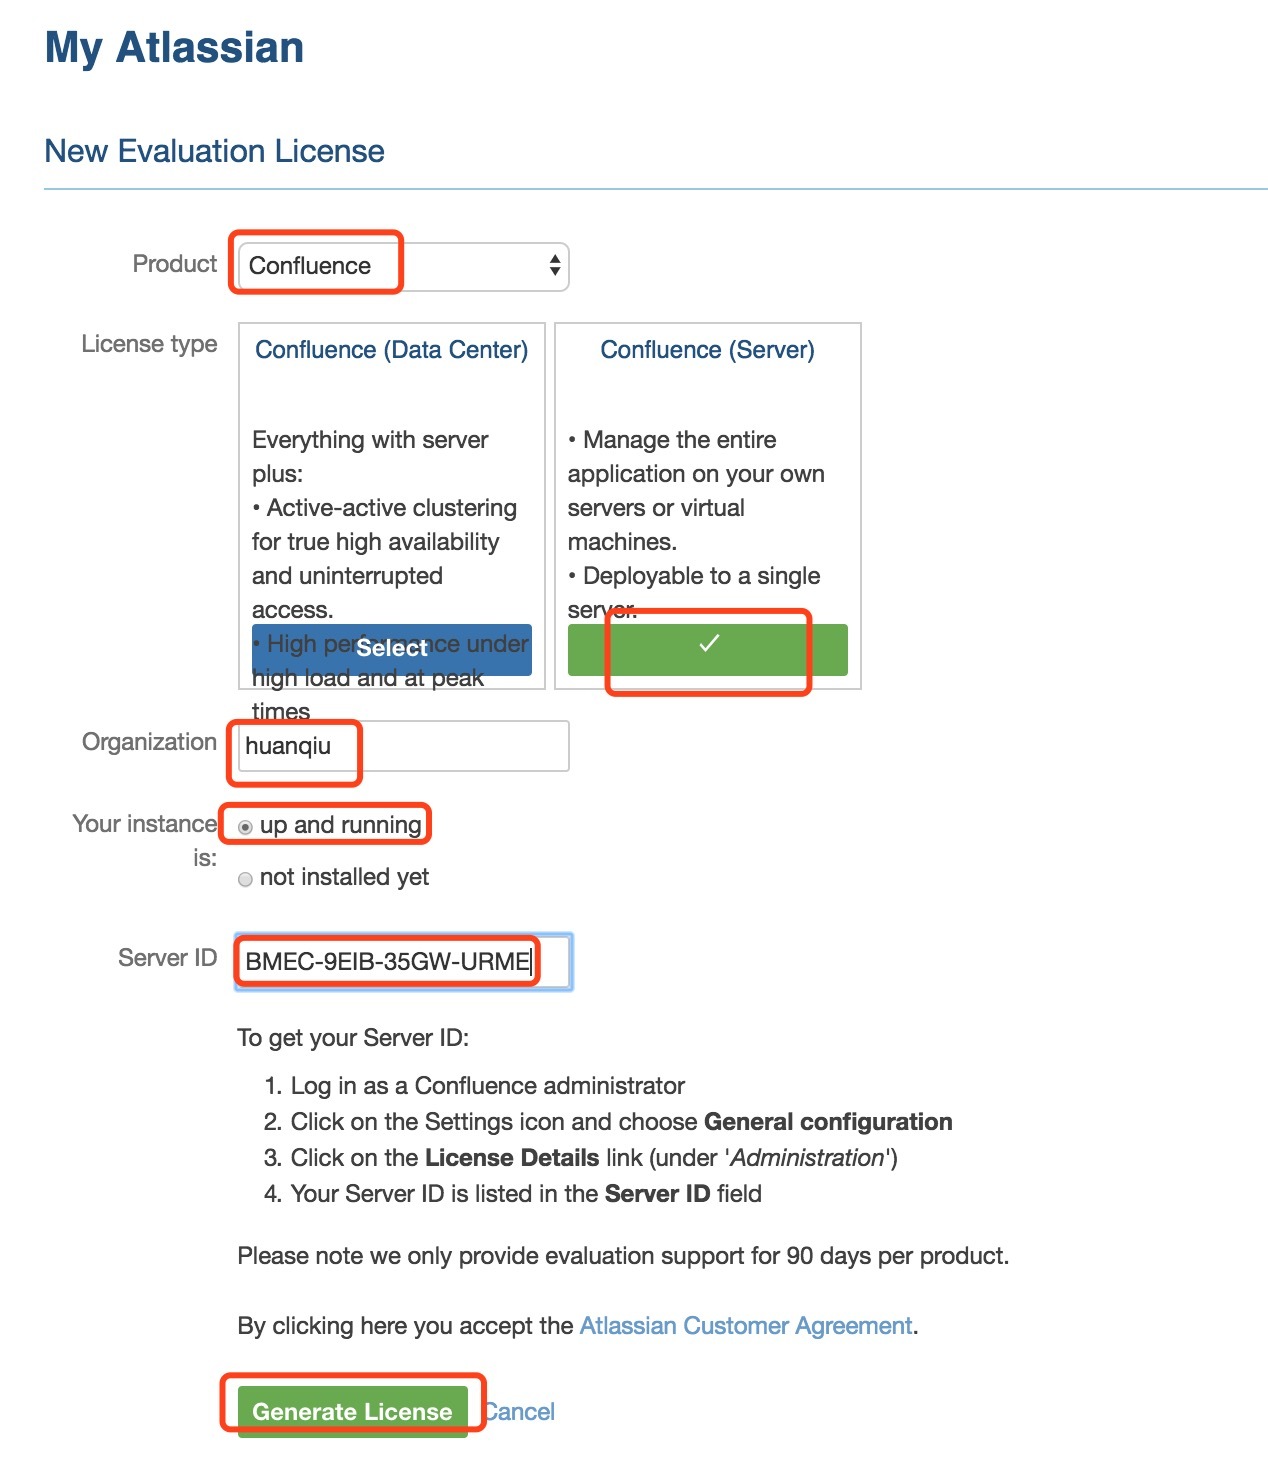
From the figure above, you can see that you need to enter the authorization code. Here is how to crack the confluence authorization code:
Copy the Server ID in the above screenshot (ie BBMEC-9EIB-35GW-URME), and then close confluence
[ root@test-vm03 opt]# /etc/init.d/confluence stop
[ root@test-vm03 opt]# lsof -i:8080[root@test-vm03 opt]#

Replace atlassian with the downloaded file-extras-decoder-v2-3.2.jar file (the file is downloaded to/Under opt, the previous file backup must be done before replacement to facilitate rollback)
[ root@test-vm03 opt]# cp /opt/atlassian/confluence/confluence/WEB-INF/lib/atlassian-extras-decoder-v2-3.2.jar /mnt/[root@test-vm03 opt]# cp /opt/atlassian-extras-decoder-v2-3.2.jar /opt/atlassian/confluence/confluence/WEB-INF/lib/atlassian-extras-decoder-v2-3.2.jar

Replace the atlassian that comes with confluence with the downloaded file-universal-plugin-manager-plugin-2.22.1.jar (the file is downloaded to/Under opt, the previous file backup must be done before replacement to facilitate rollback)
[ root@test-vm03 opt]# mv /opt/atlassian/confluence/confluence/WEB-INF/atlassian-bundled-plugins/atlassian-universal-plugin-manager-plugin-2.22.1.jar /mnt/[root@test-vm03 opt]# cp atlassian-universal-plugin-manager-plugin-2.22.jar /opt/atlassian/confluence/confluence/WEB-INF/atlassian-bundled-plugins/[root@test-vm03 opt]# /etc/init.d/confluence start
[ root@test-vm03 opt]# lsof -i:8090
COMMAND   PID       USER   FD   TYPE DEVICE SIZE/OFF NODE NAME
java    18100 confluence   36u  IPv6 188496      0t0  TCP *:8090(LISTEN)
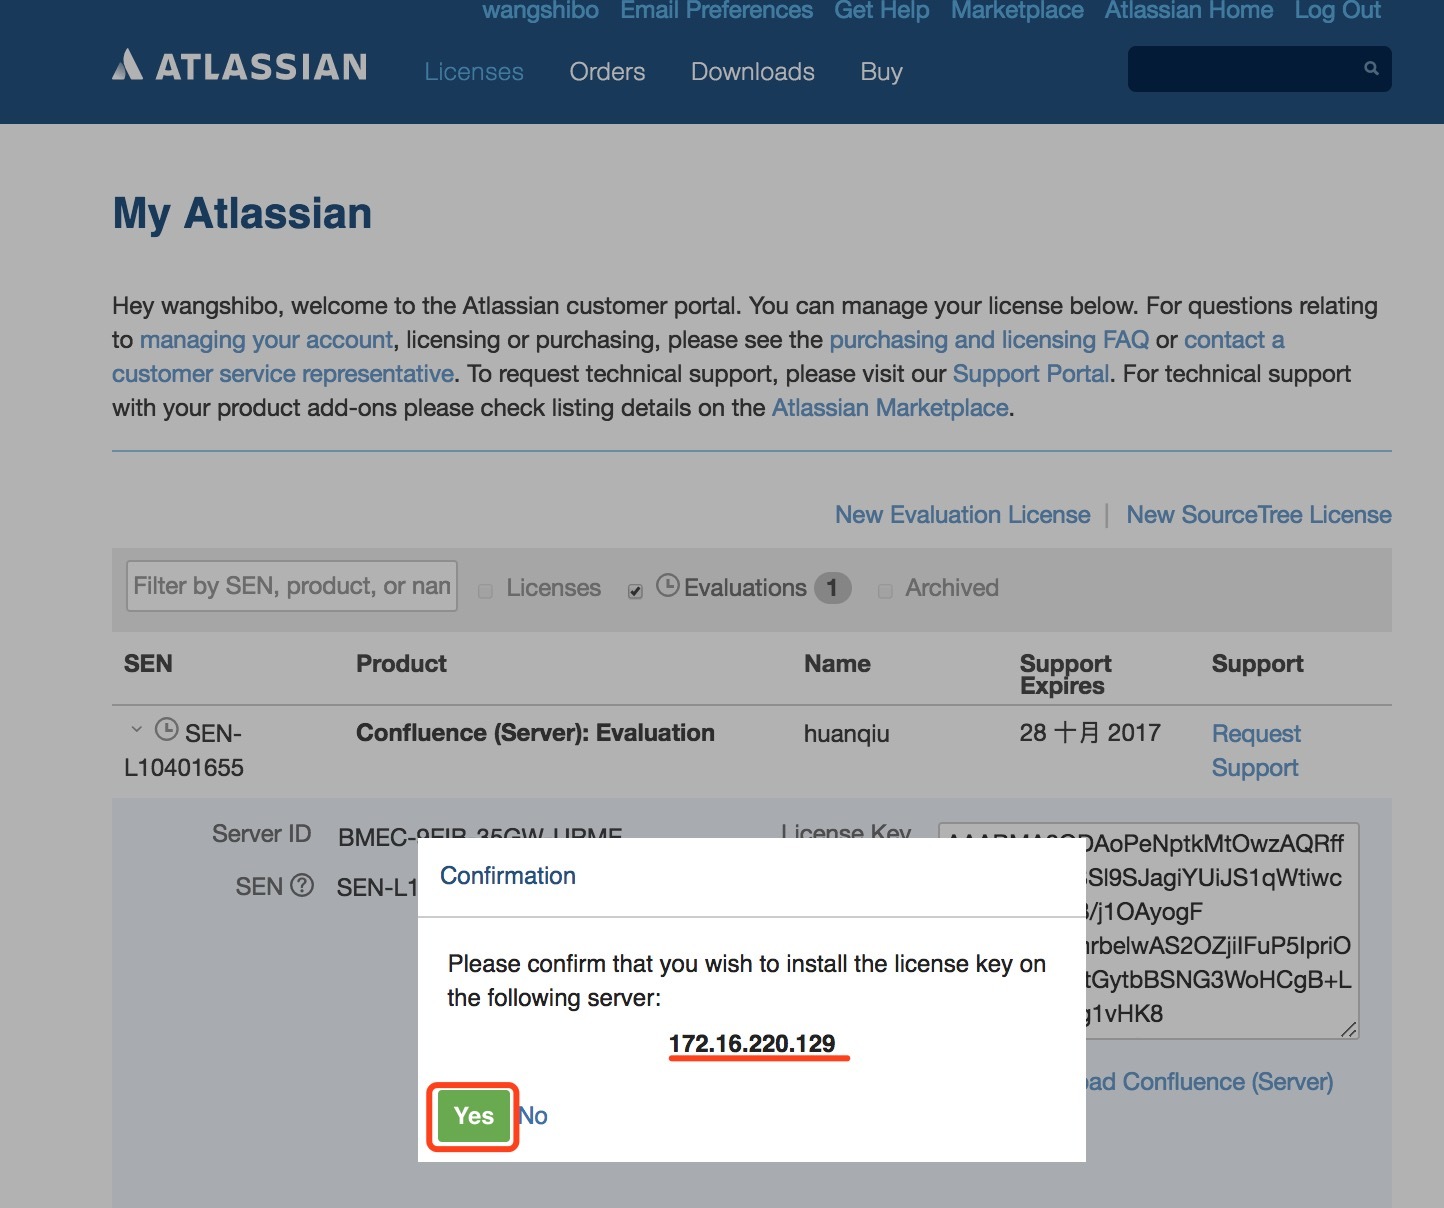
Then continue to visit http://172.16.220.129:8090, and then register the confluence key
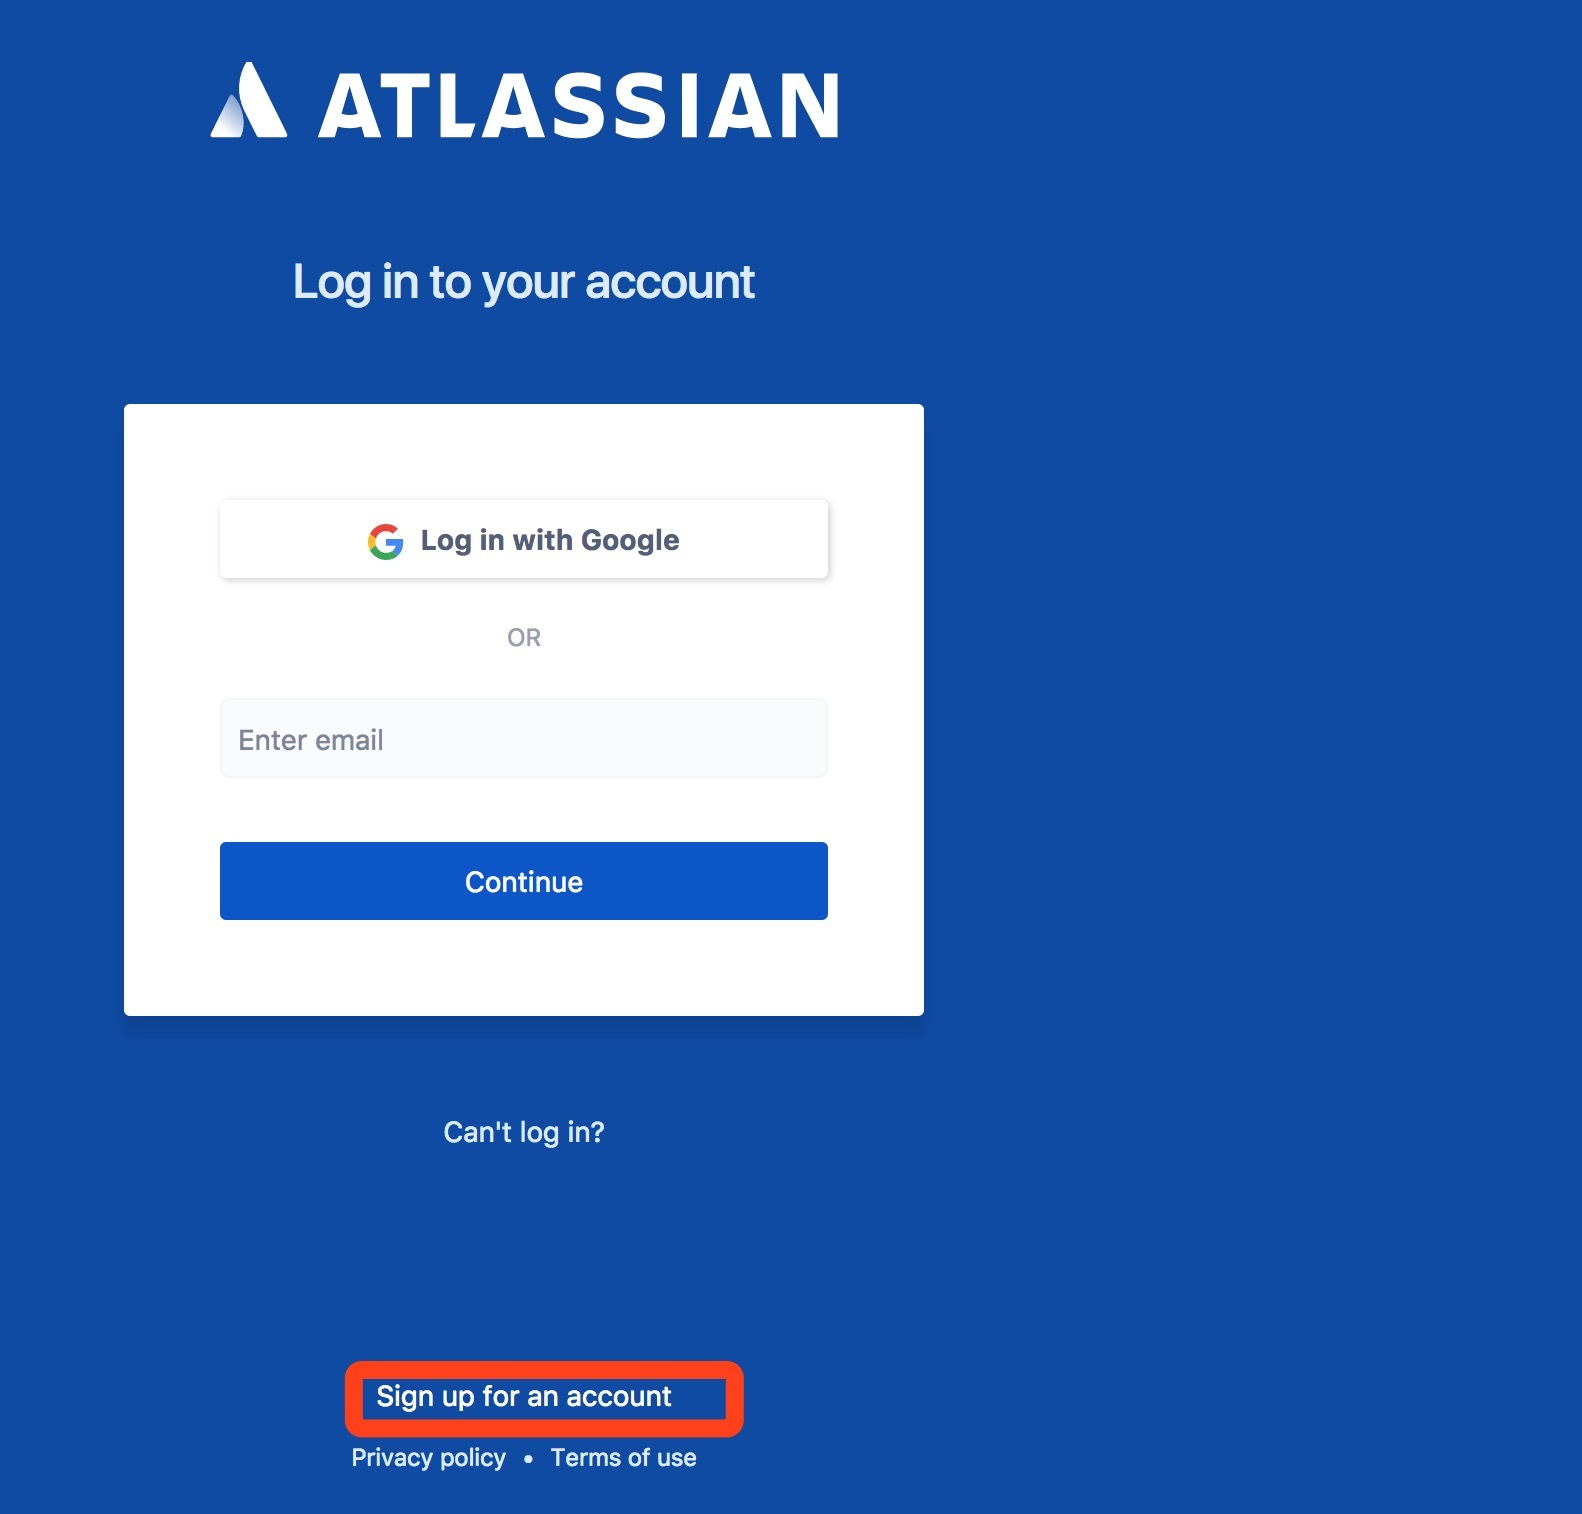
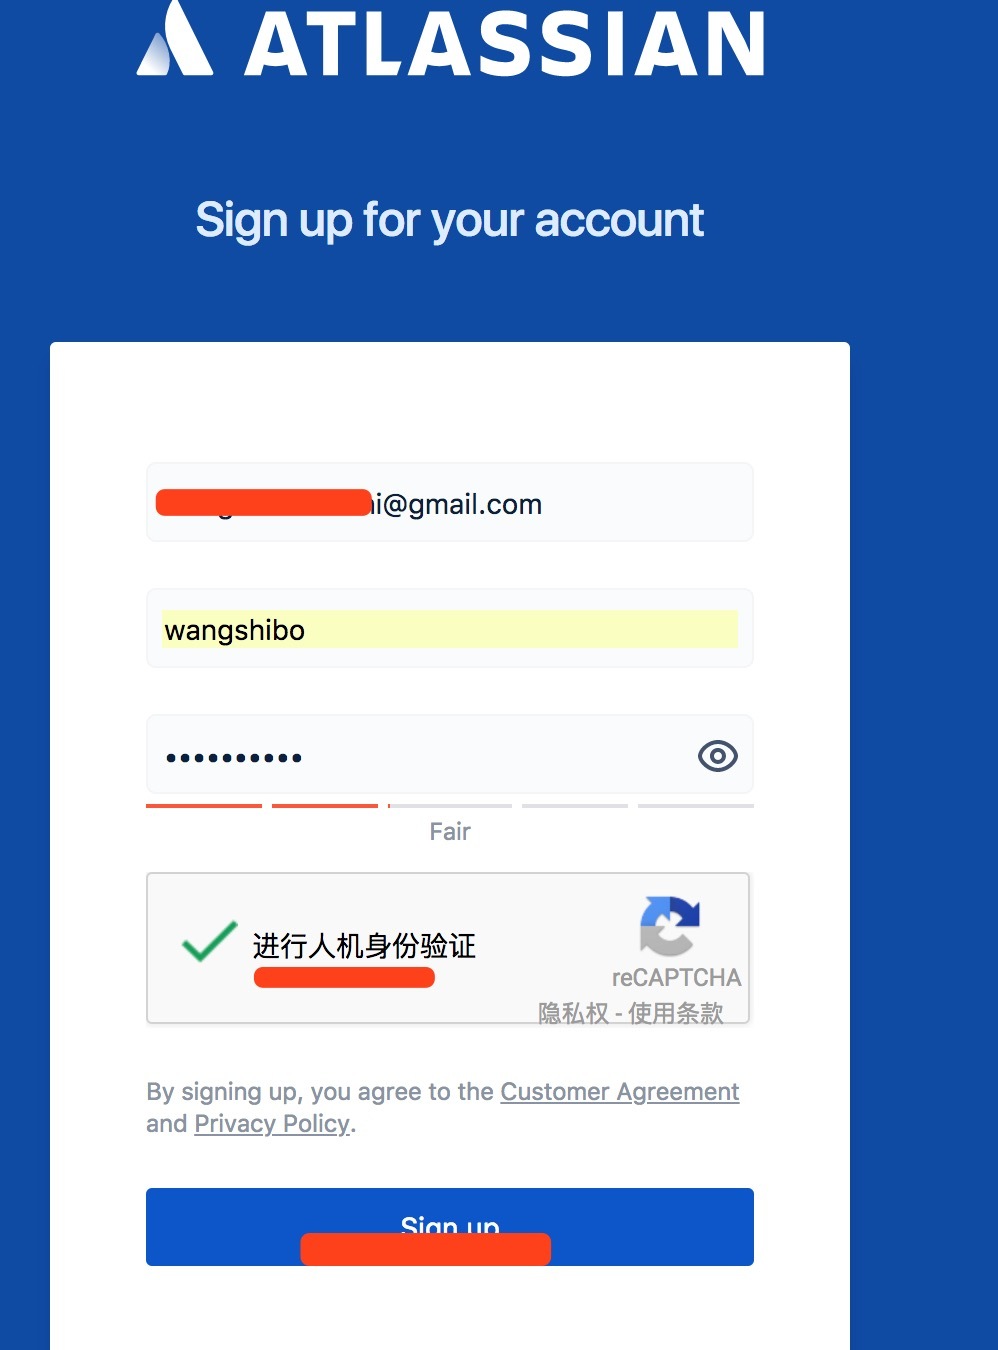
The following operations need to be performed under the premise of FQ (I use Tianyantong's browser plug-in method for FQ, http://www.tianyantong.org.cn), and use google email to register

After a while, the following message will automatically pop up, click "Yes"
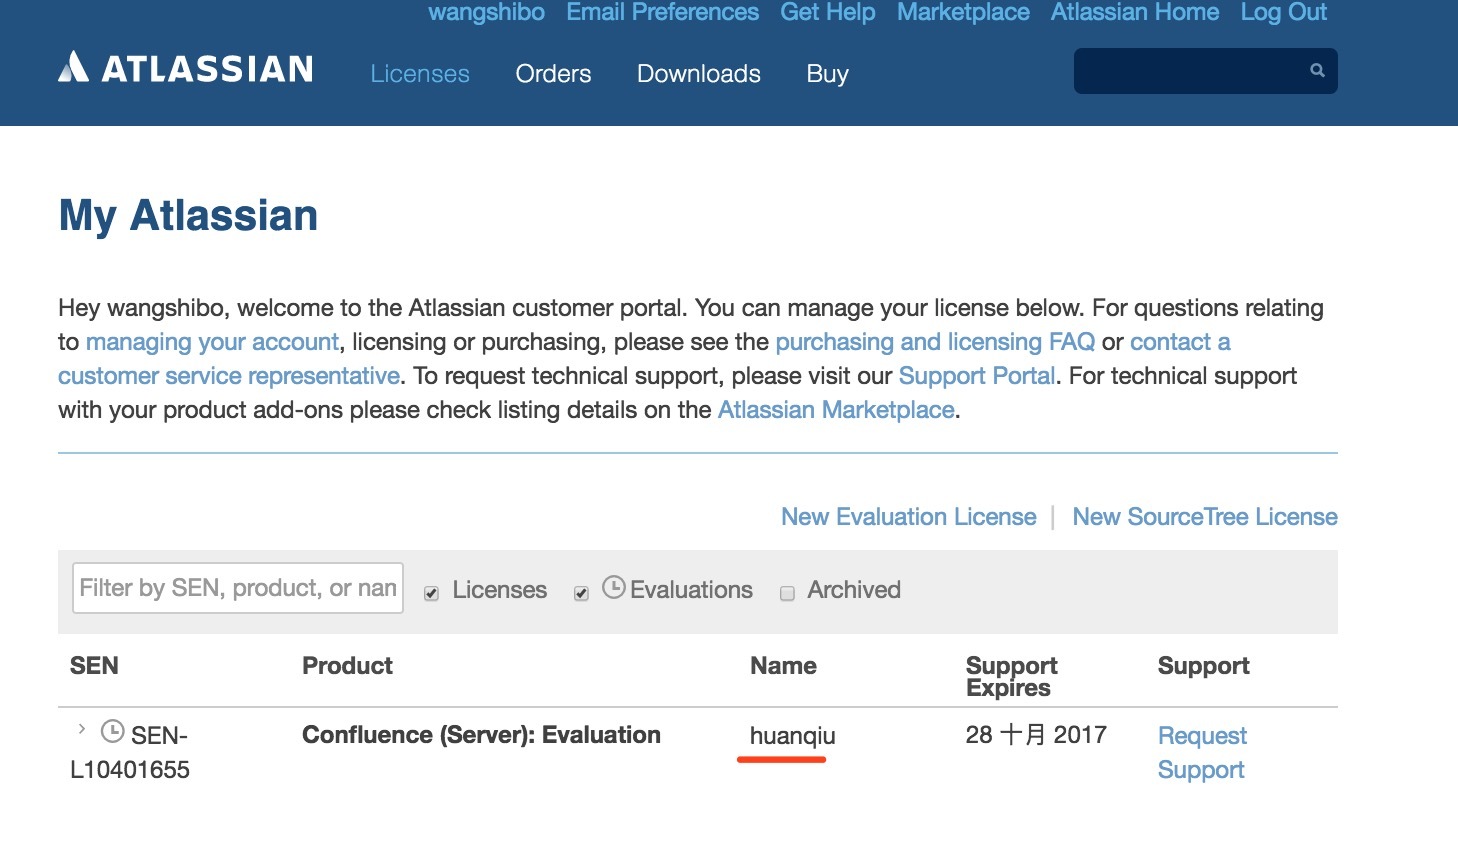
As above, you can see the license key of this confluence on the right (manually paste these keys into the blank box under the "server ID" of the "authorization code" in the above confluence installation)

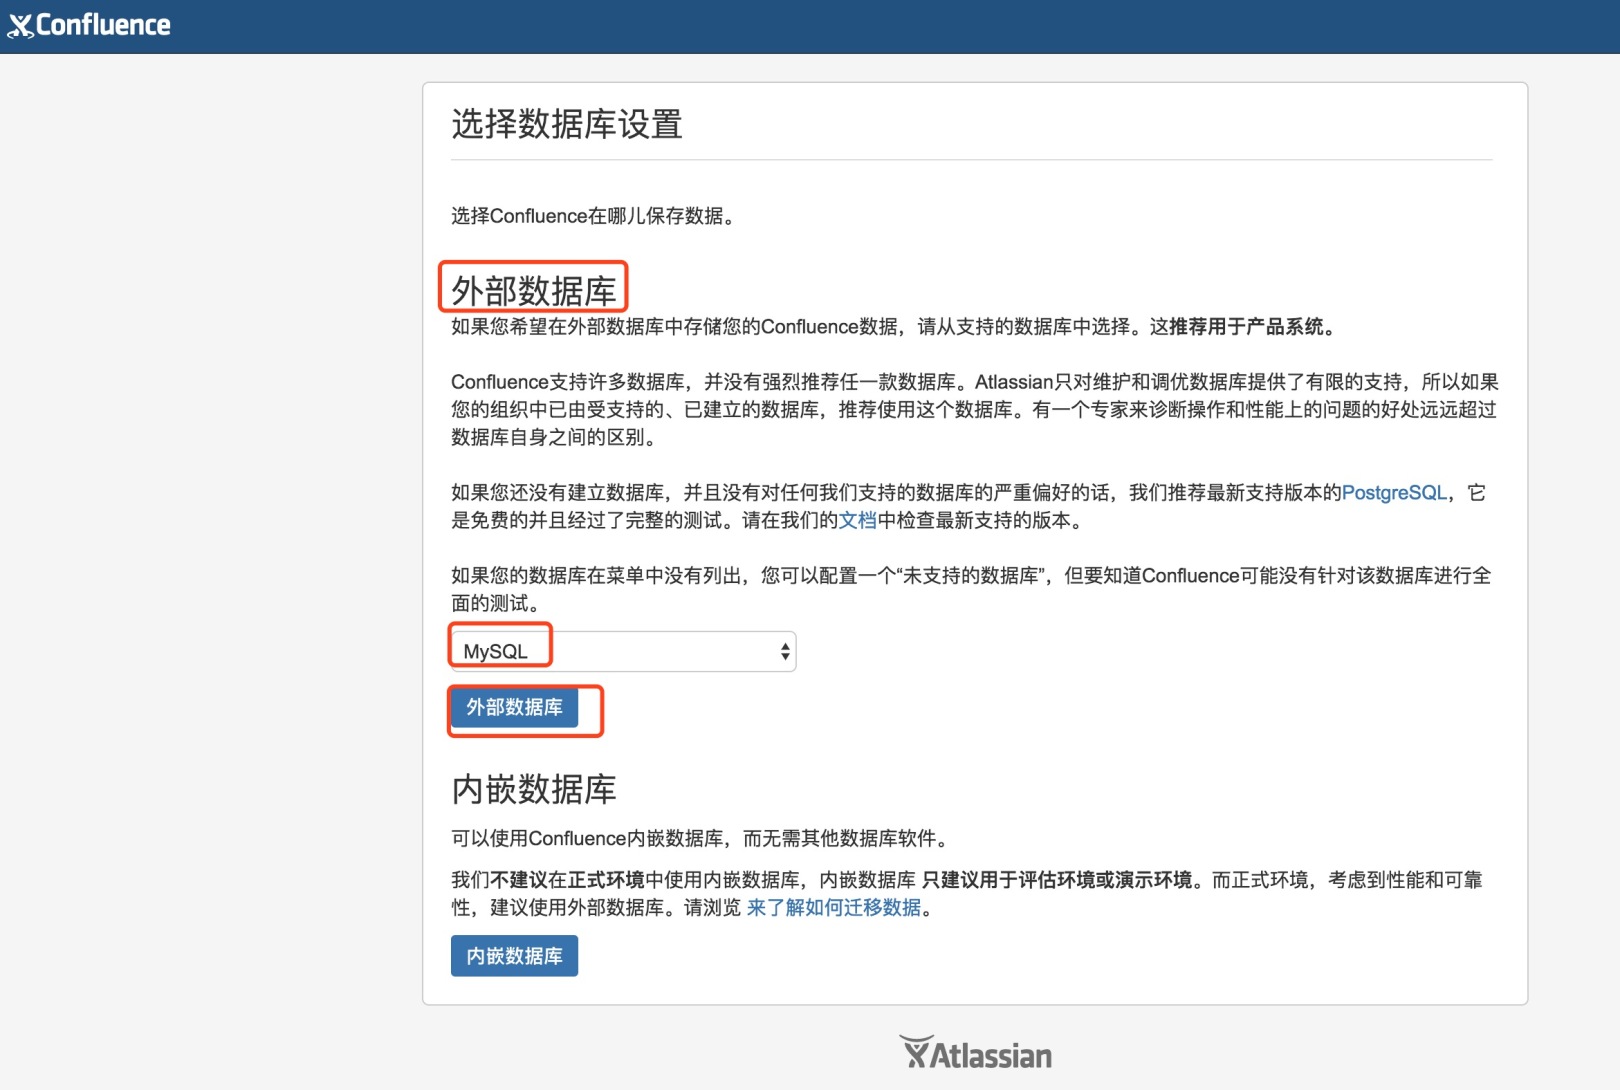
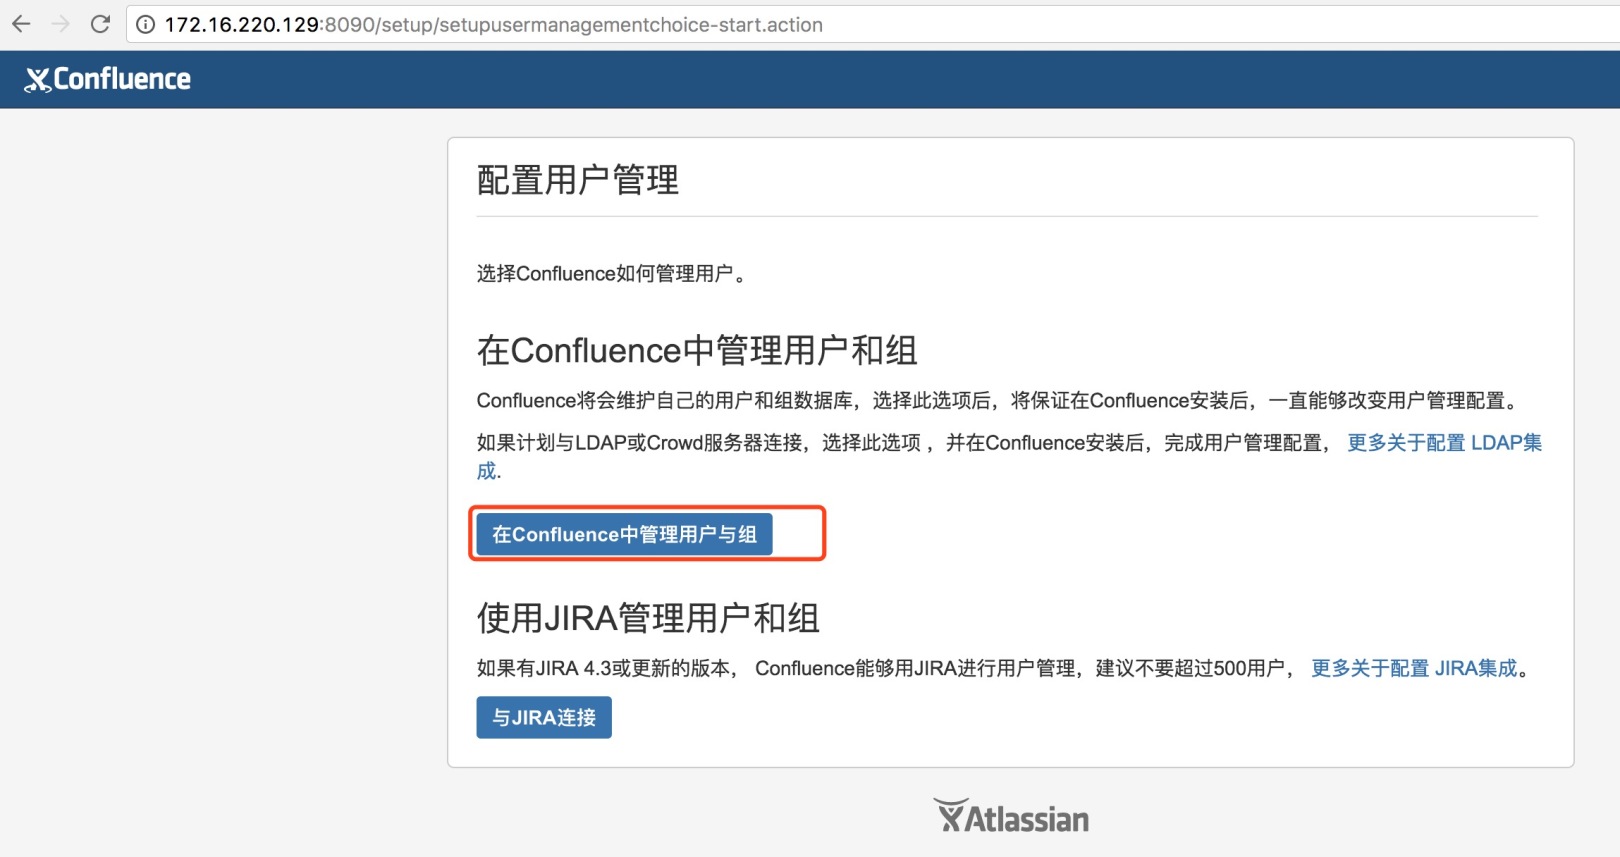
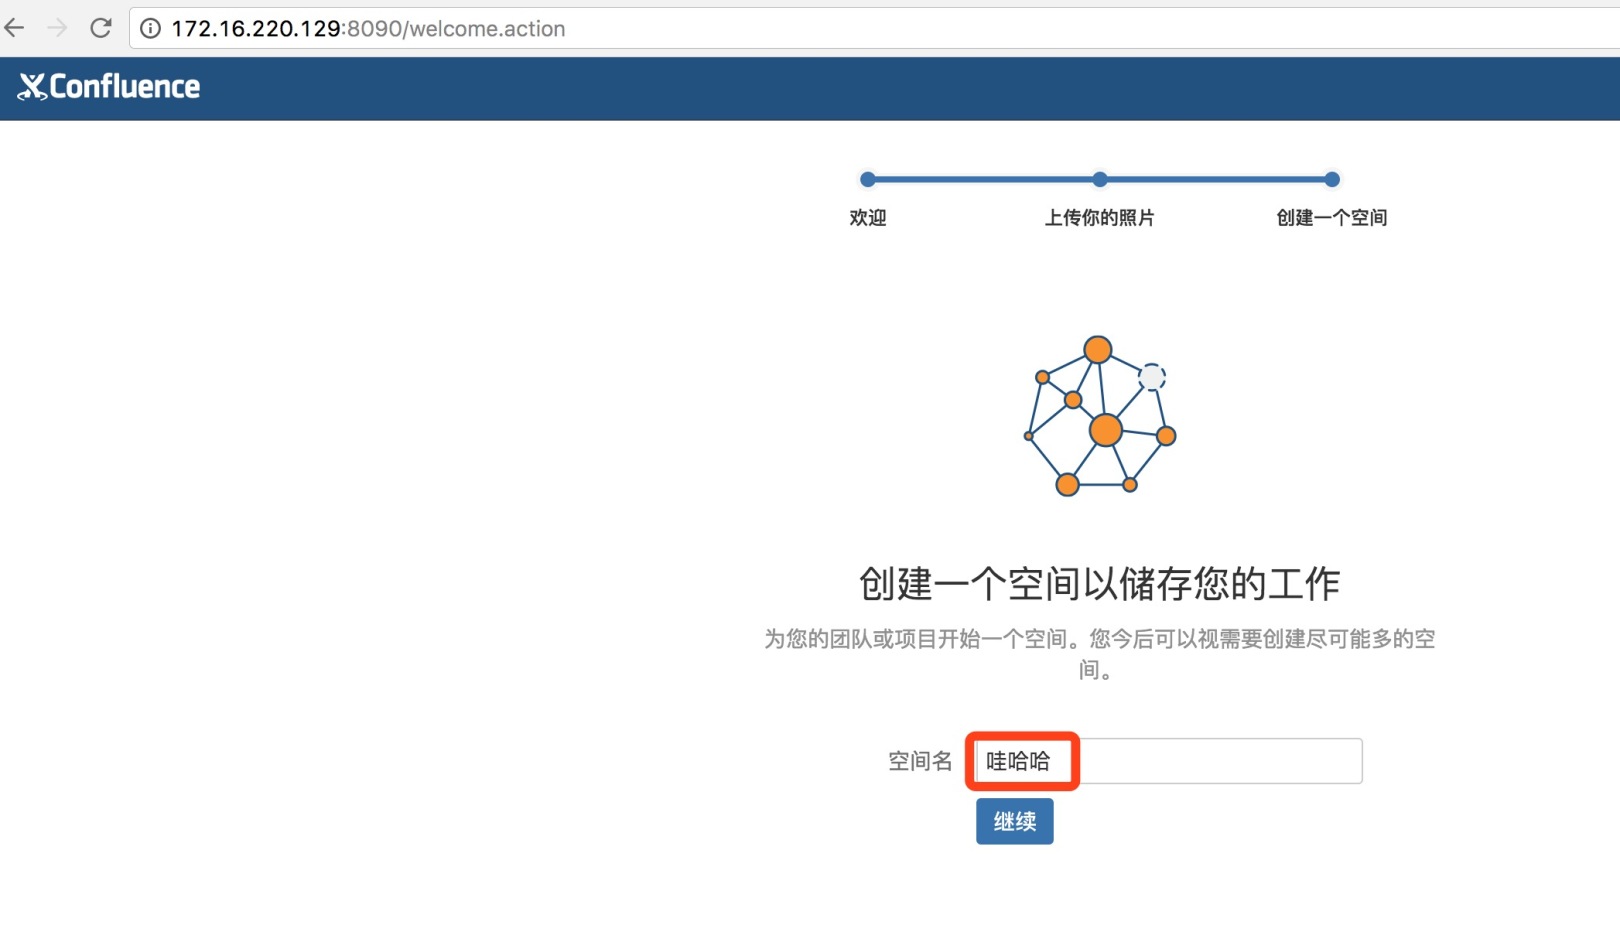
As follows, select the external database
**- - - - - - - - - - - - - - - - - - - - - - - - - - - - - - - - - - - - - - - - - - - - - - - - - - - - - - - - - - - - - - - - - - - - - - - - - - - - - - - - - - - - - - - - - - - - - - - - - - - - - - - - - - - - - - - - - - - **
If the following error occurs (missing java mysql driver):
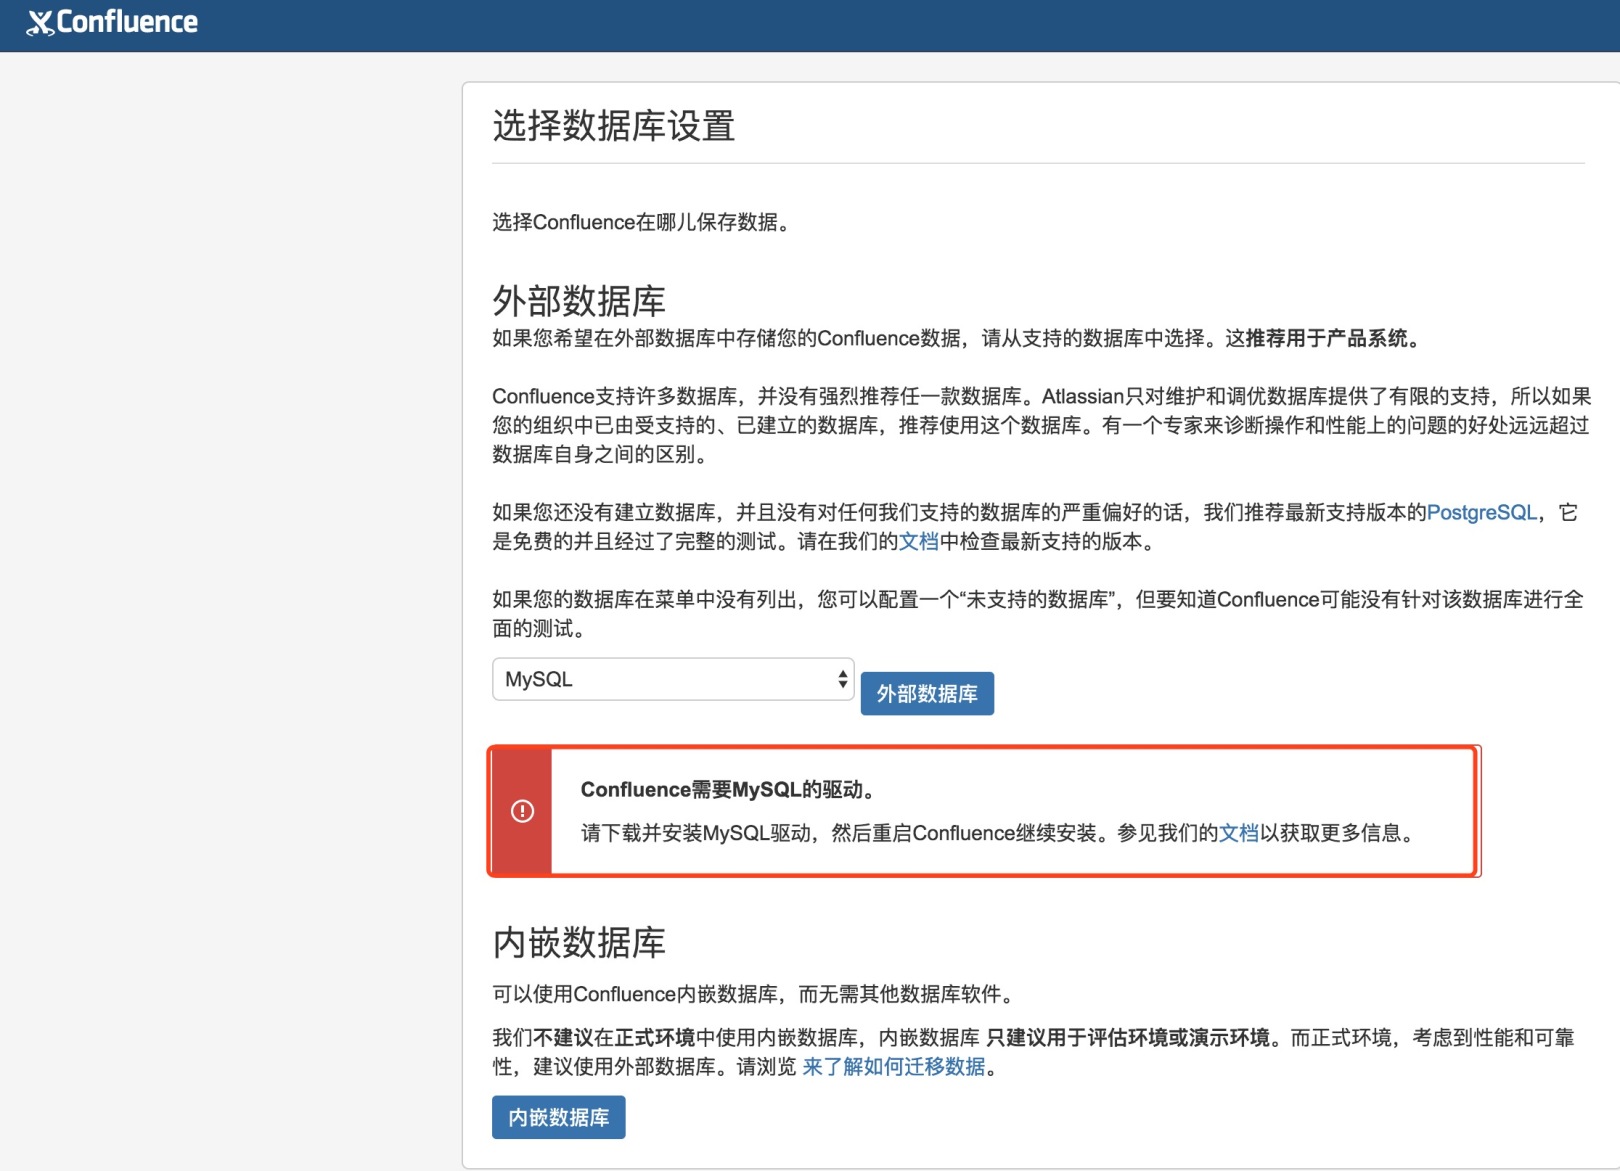
Solution:
Download the mysql driver for java: mysql-connector-java-5.0.8-bin.jar
Download link: https://pan.baidu.com/s/1c2CQzcO
Extract password: ku8s
[ root@test-vm03 opt]# cp mysql-connector-java-5.0.8-bin.jar /opt/atlassian/confluence/lib/[root@test-vm03 opt]# /etc/init.d/confluence restart
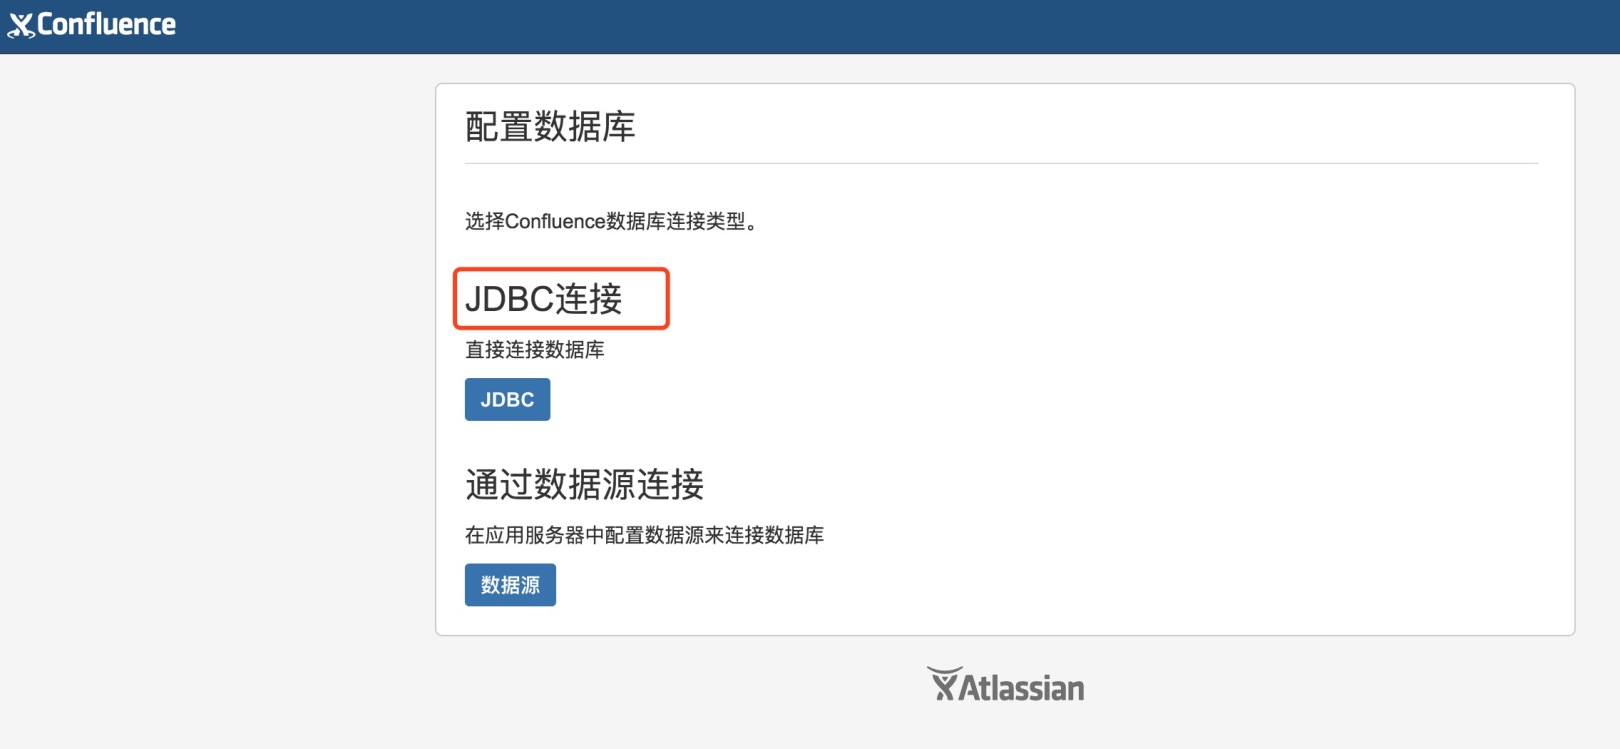
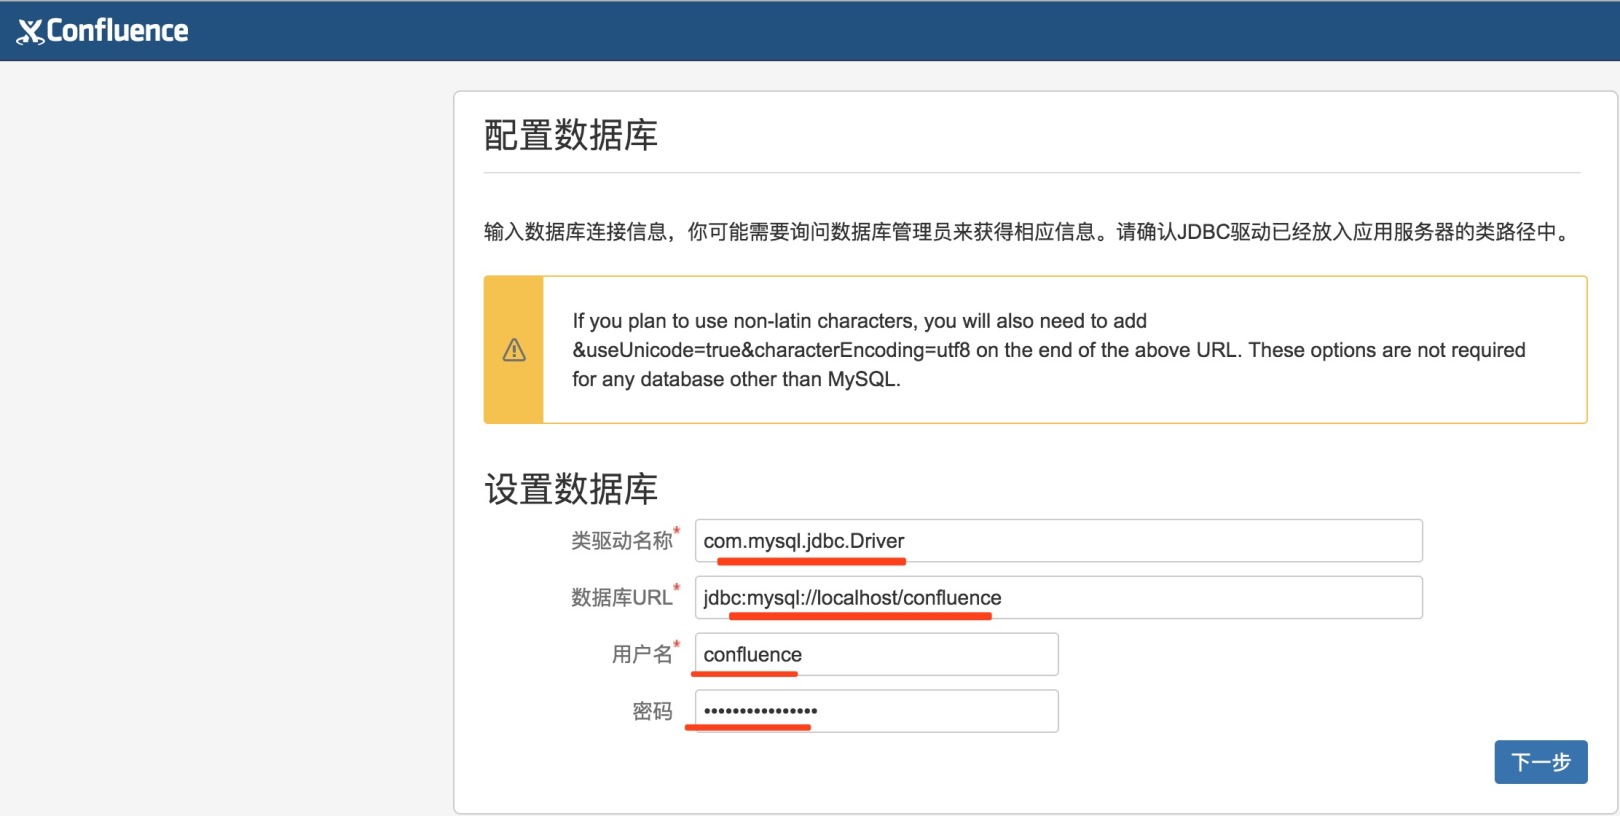
Then continue to visit http://172.16.220.129:8090/, Configuration database
**- - - - - - - - - - - - - - - - - - - - - - - - - - - - - - - - - - - - - - - - - - - - - - - - - - - - - - - - - - - - - - - - - - - - - - - - - - - - - - - - - - - - - - - - - - - - - - - - - - - - - - - - - - - - - - - - - - - **
When connecting to mysql for the first time (using the information authorized in MariaDB above, that is, username: confluence, password: confluencepasswd), it may be a bit slow, wait patiently~

------------------------------------------------------------------------------------------------
Let's talk about the confluence mailbox function (not to go into details, just look at the screenshot):
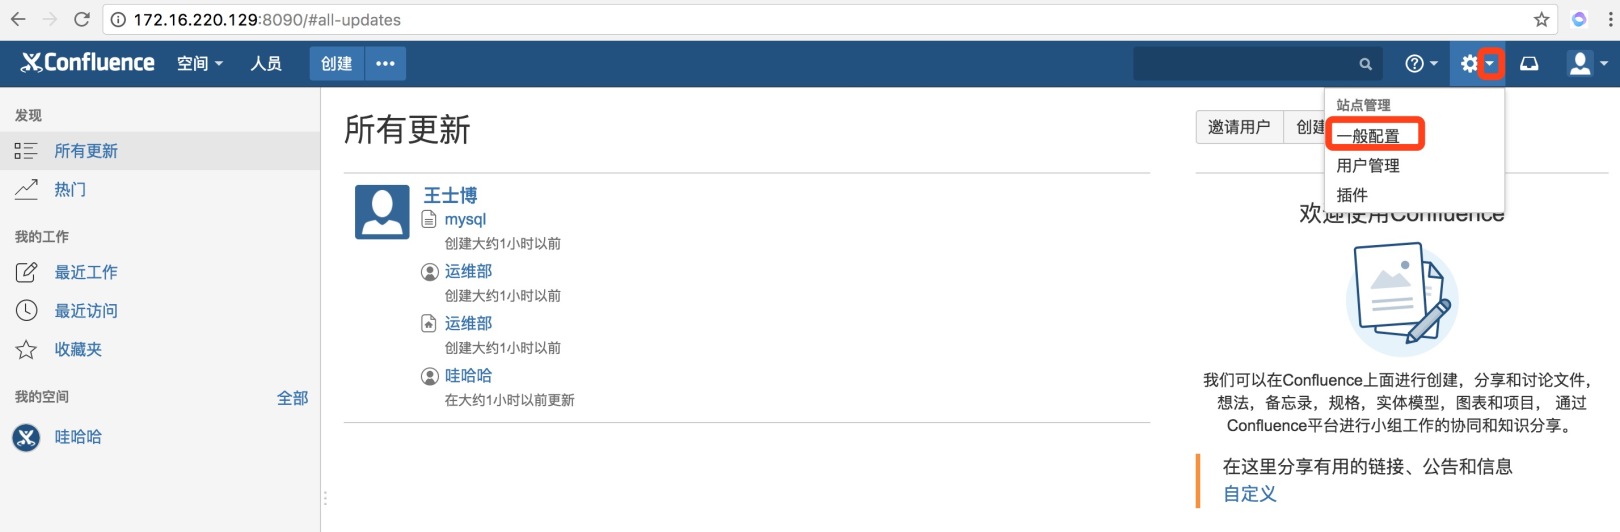
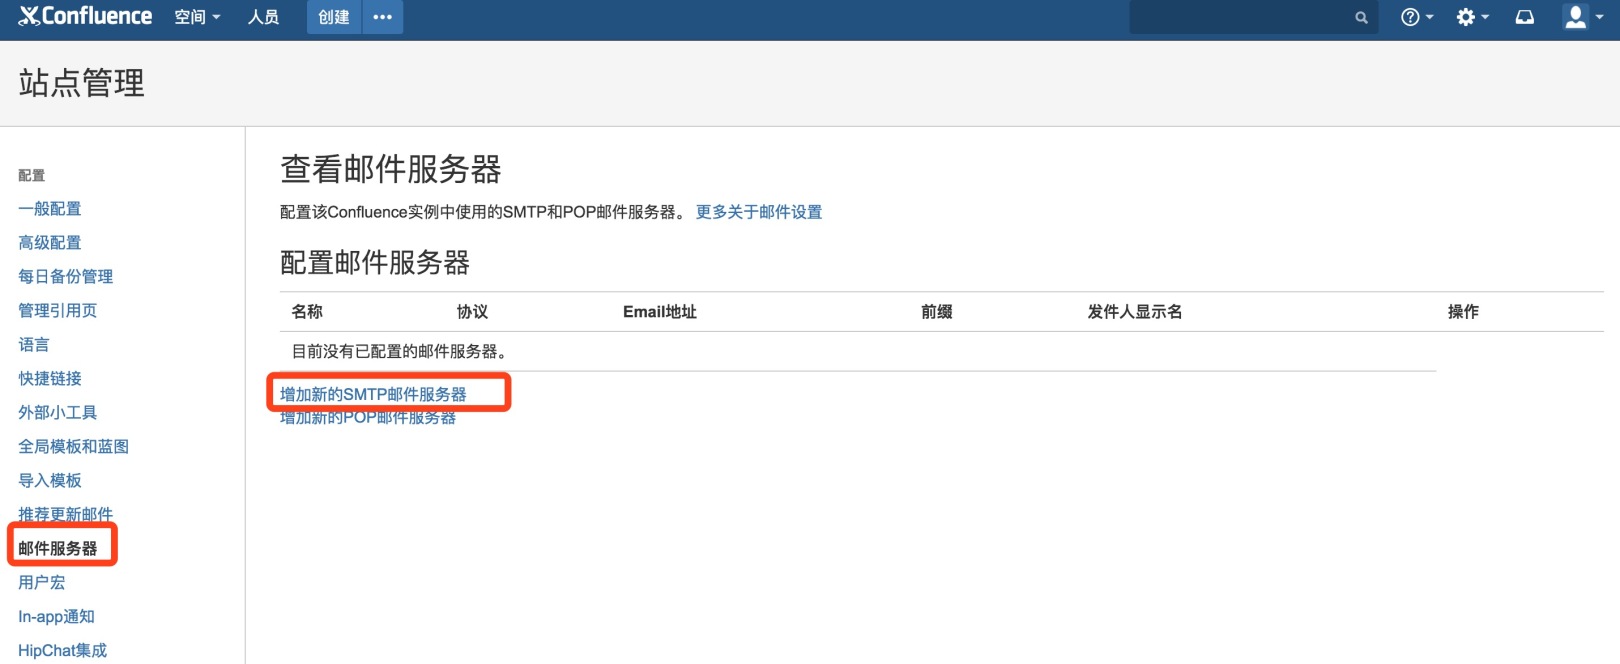
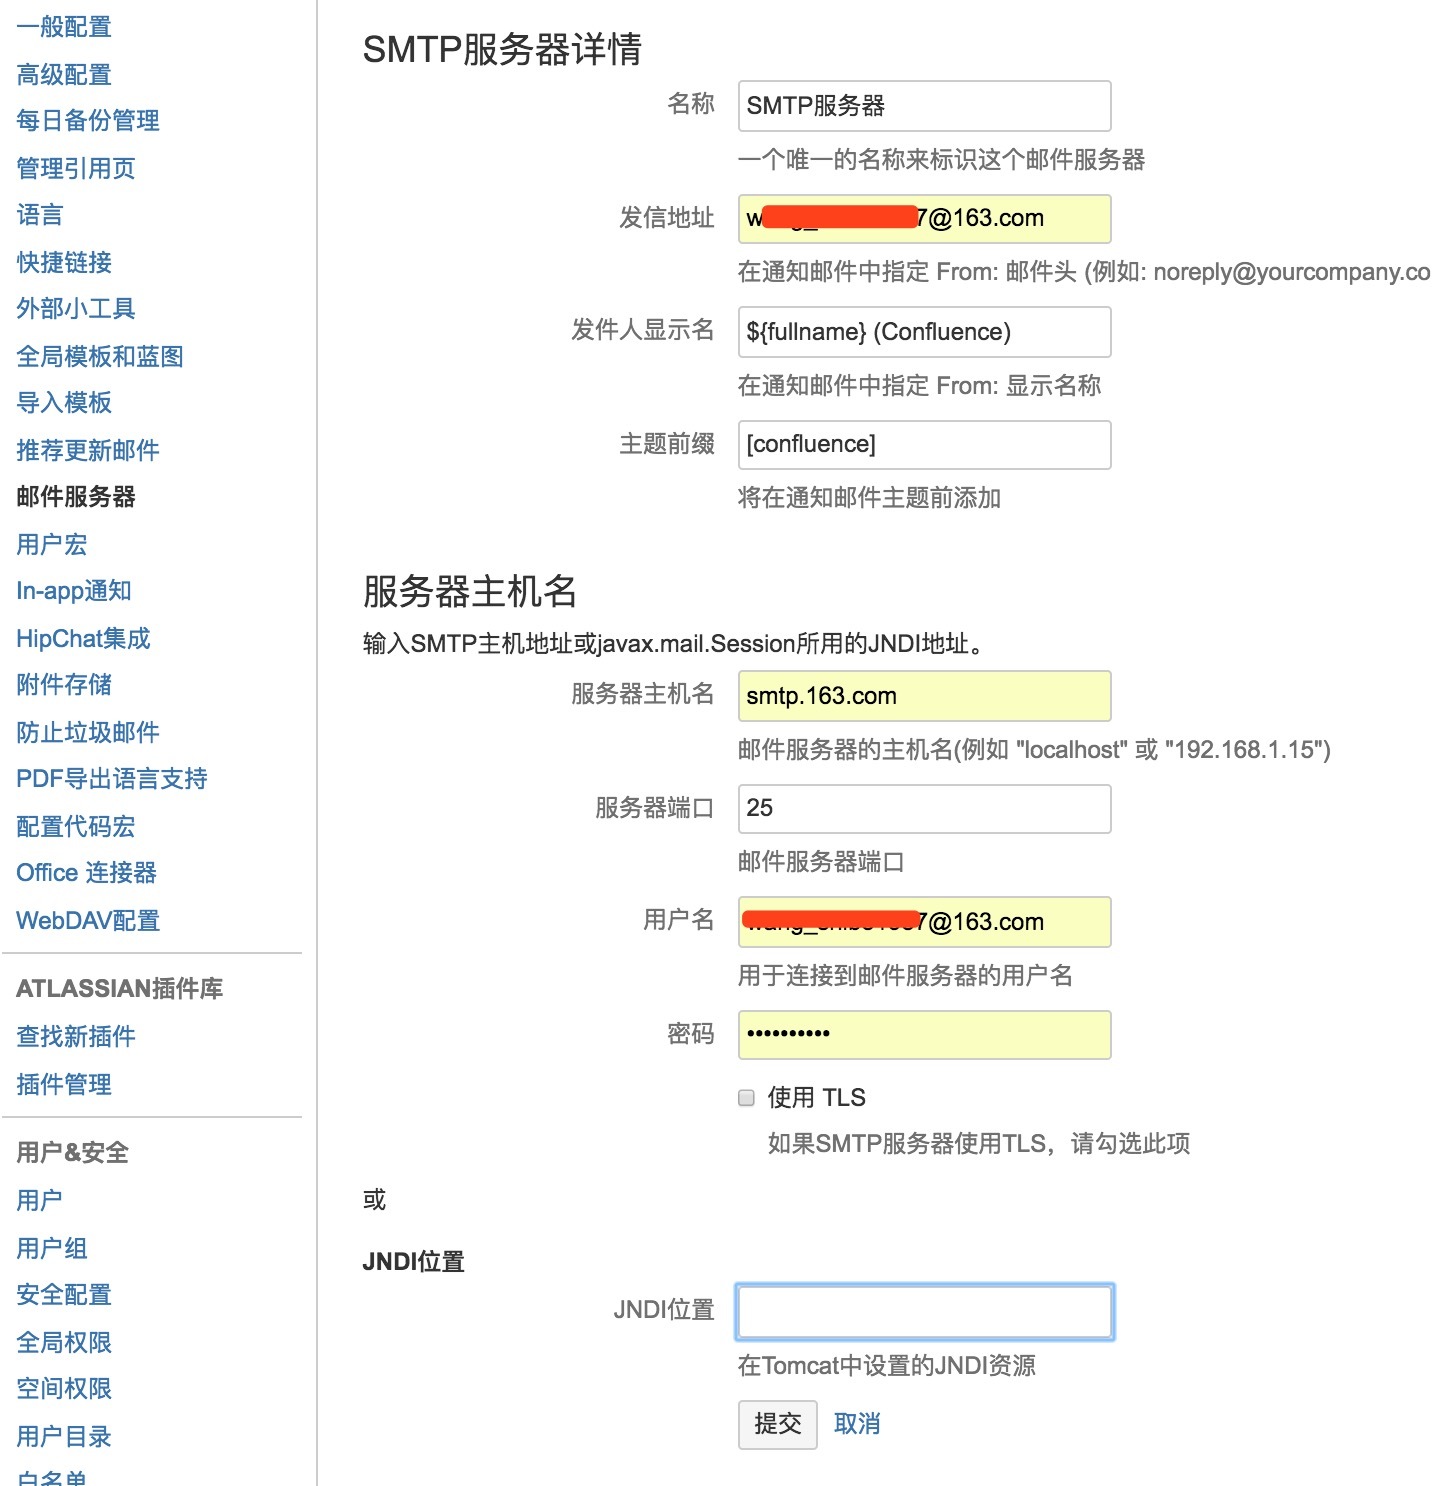
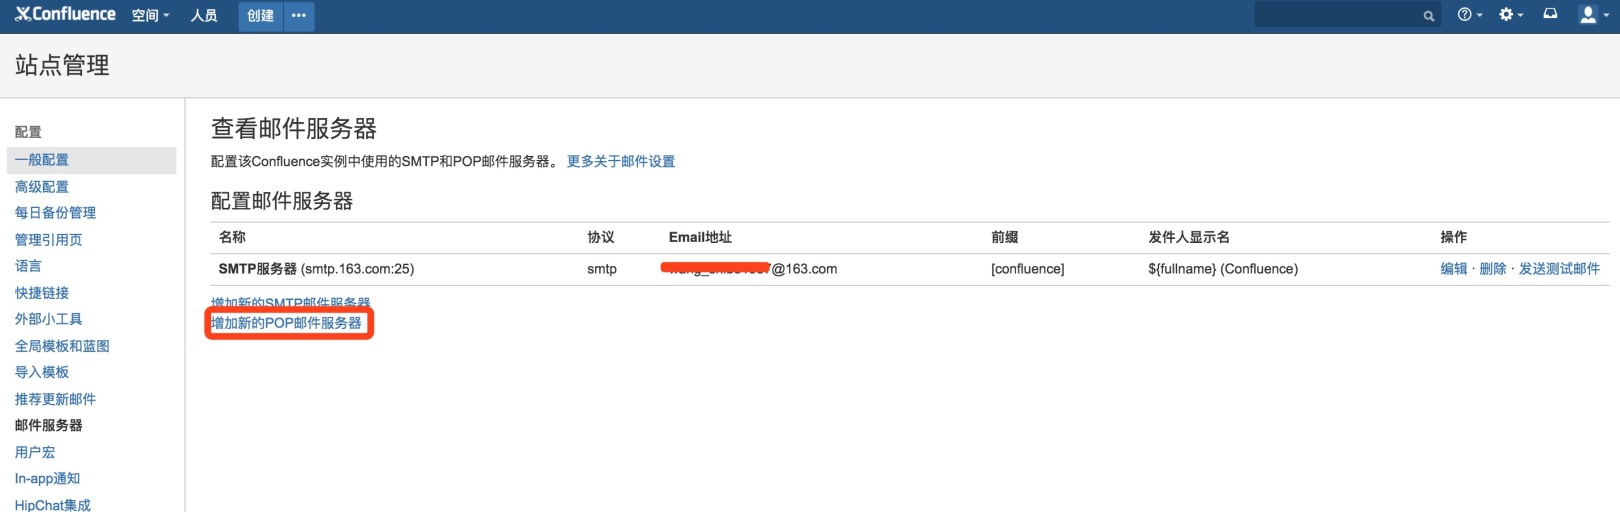
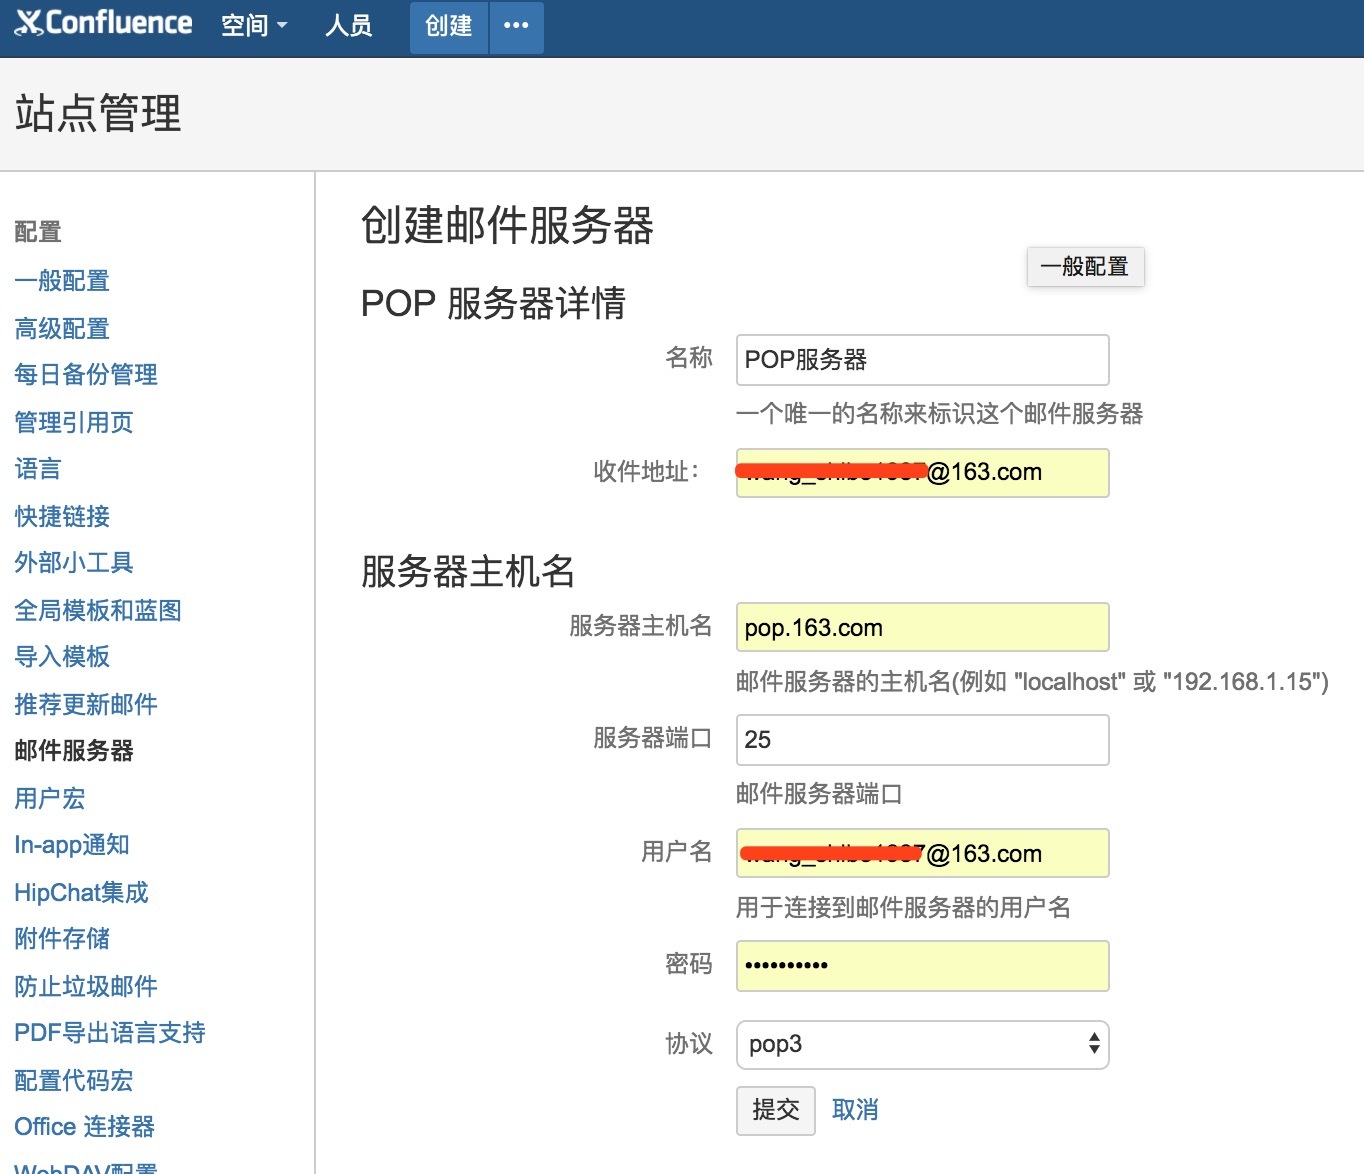
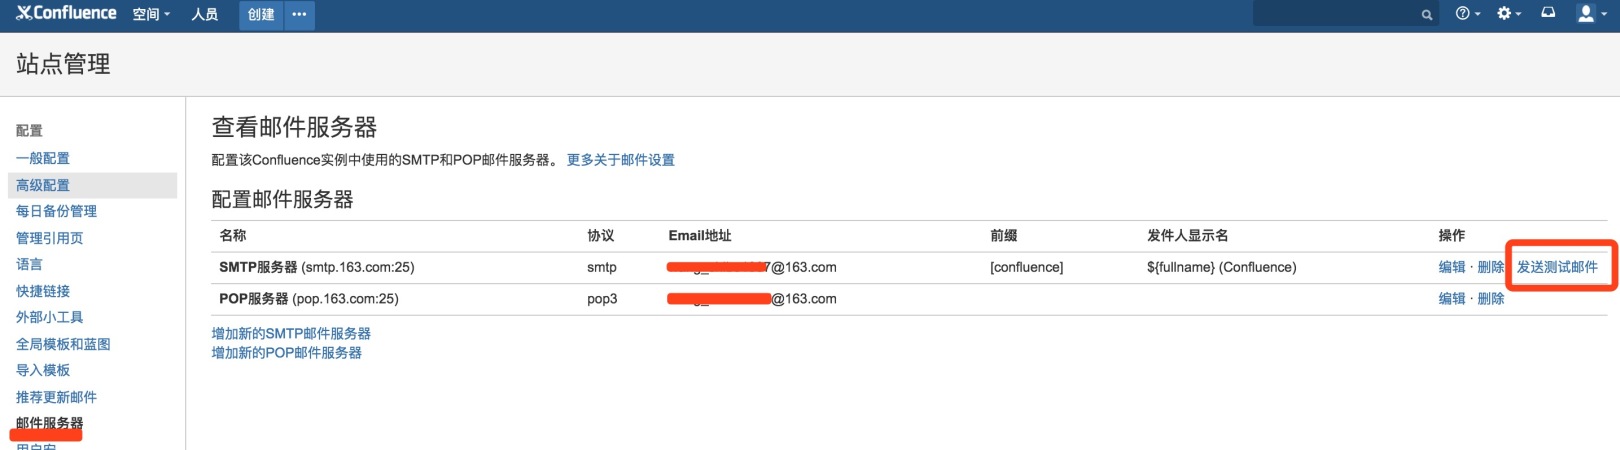
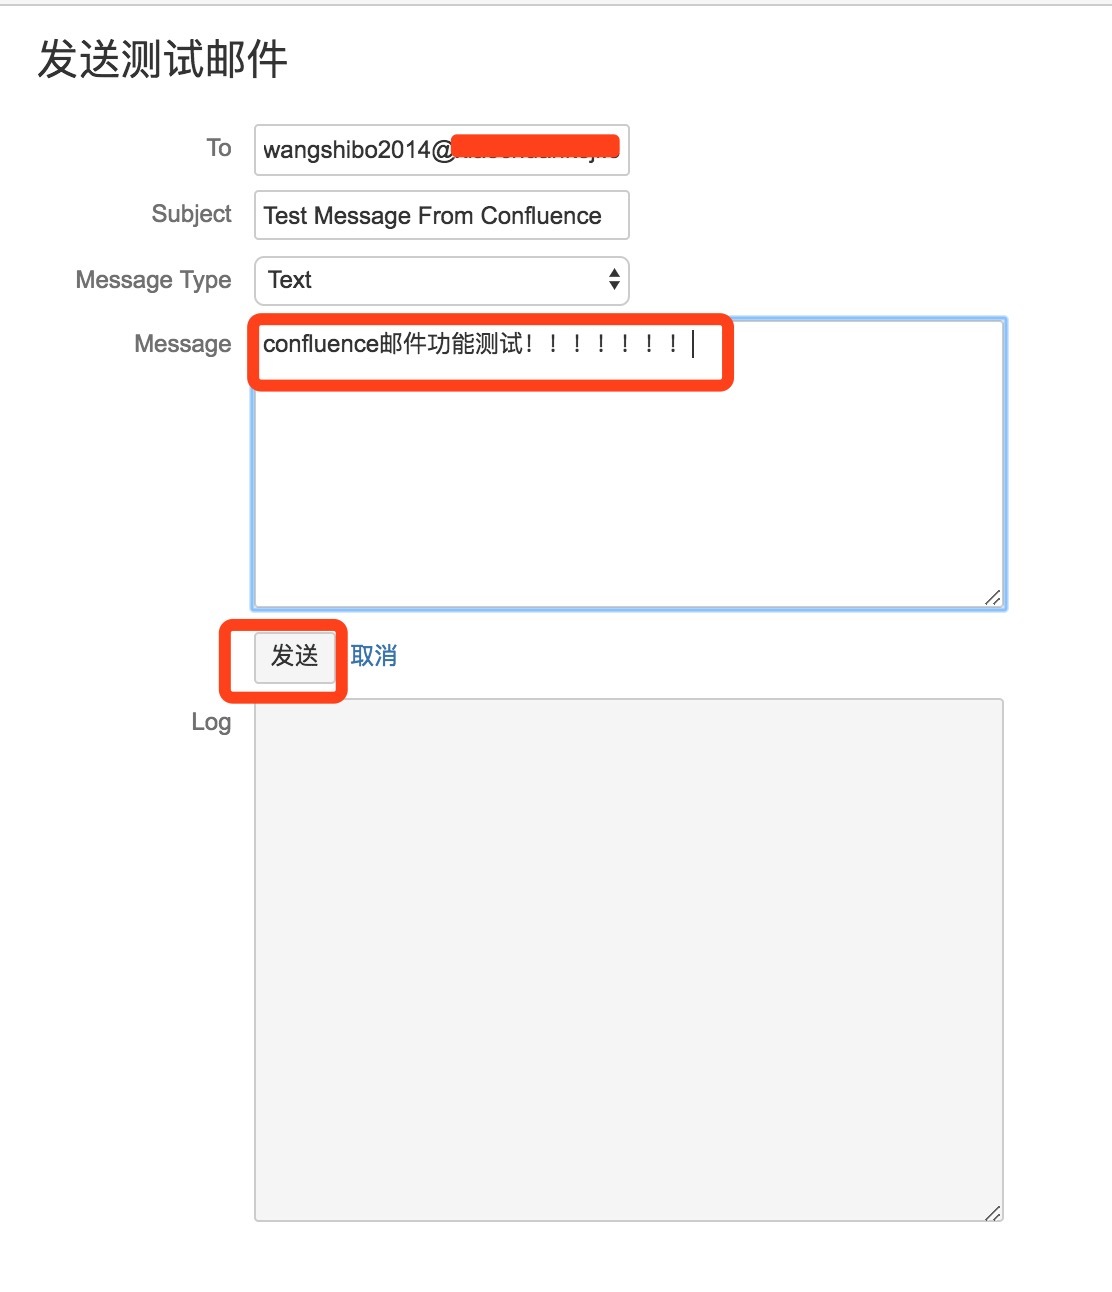
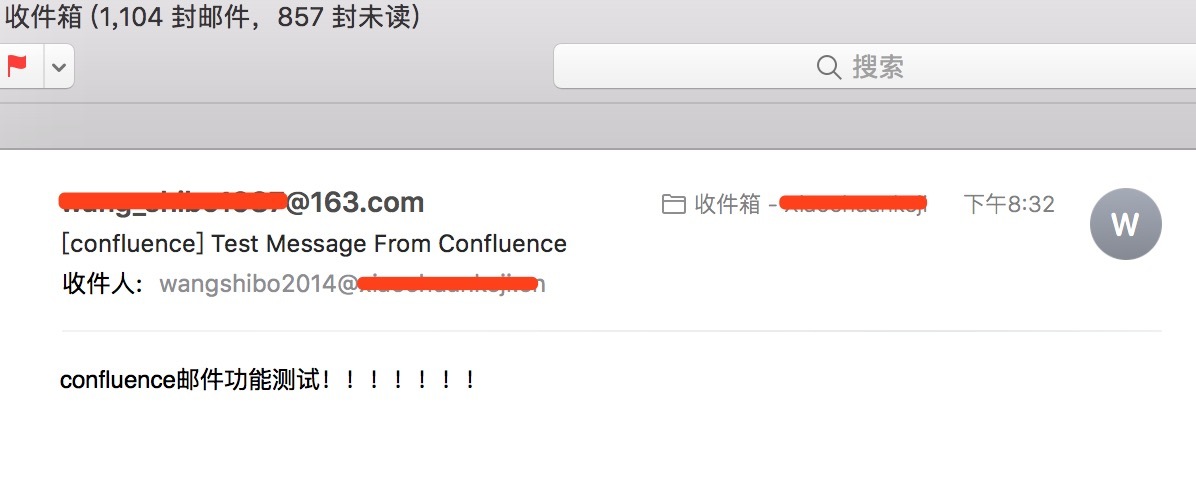
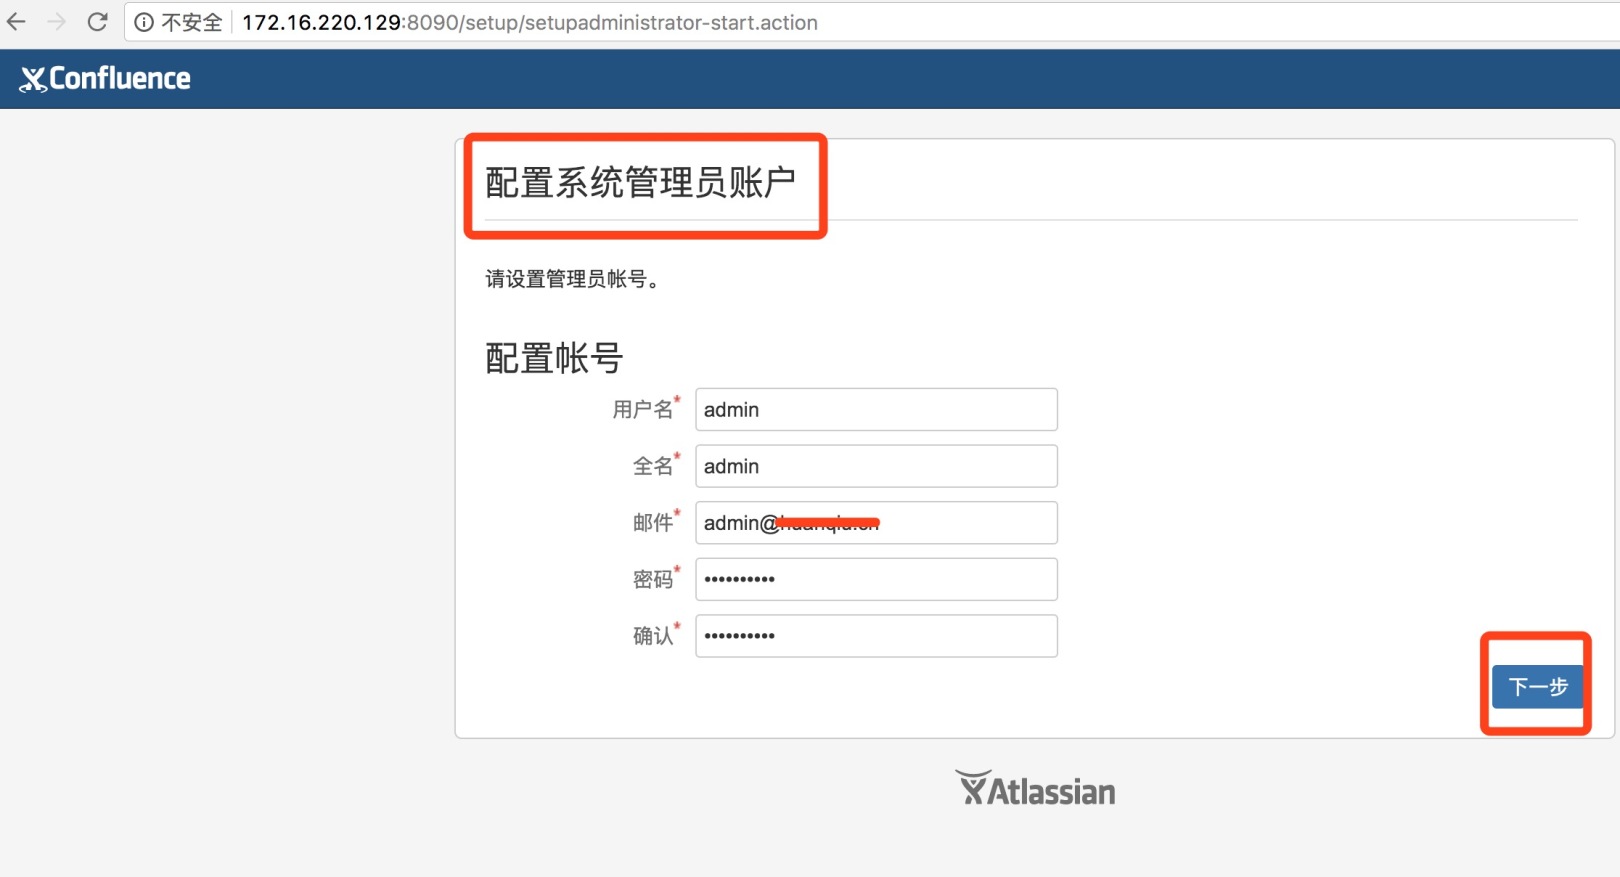
After the above configuration, the mail function of confluence has been configured. Here's how to create or invite other users under the administrator account:
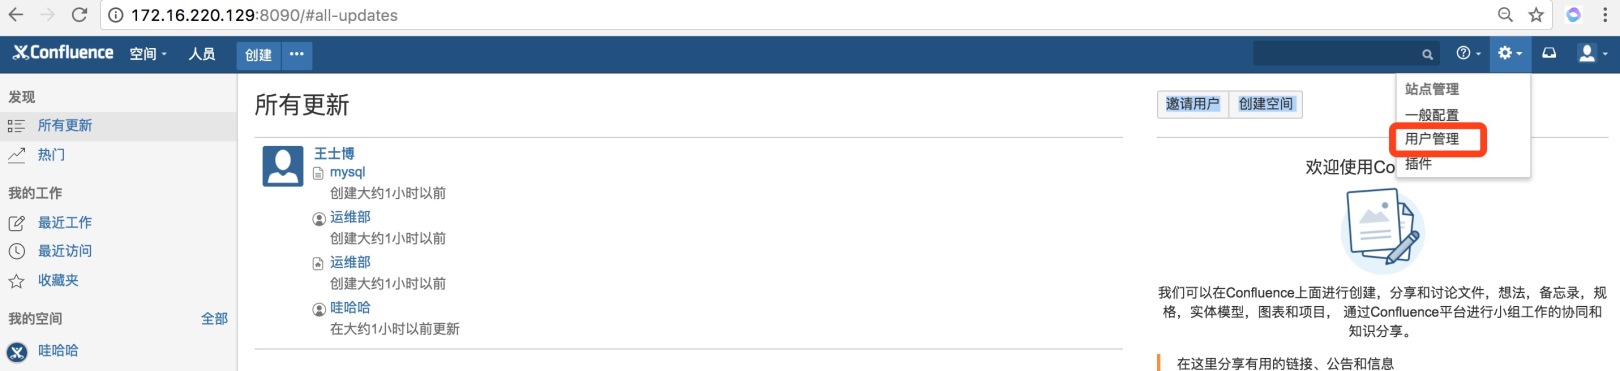
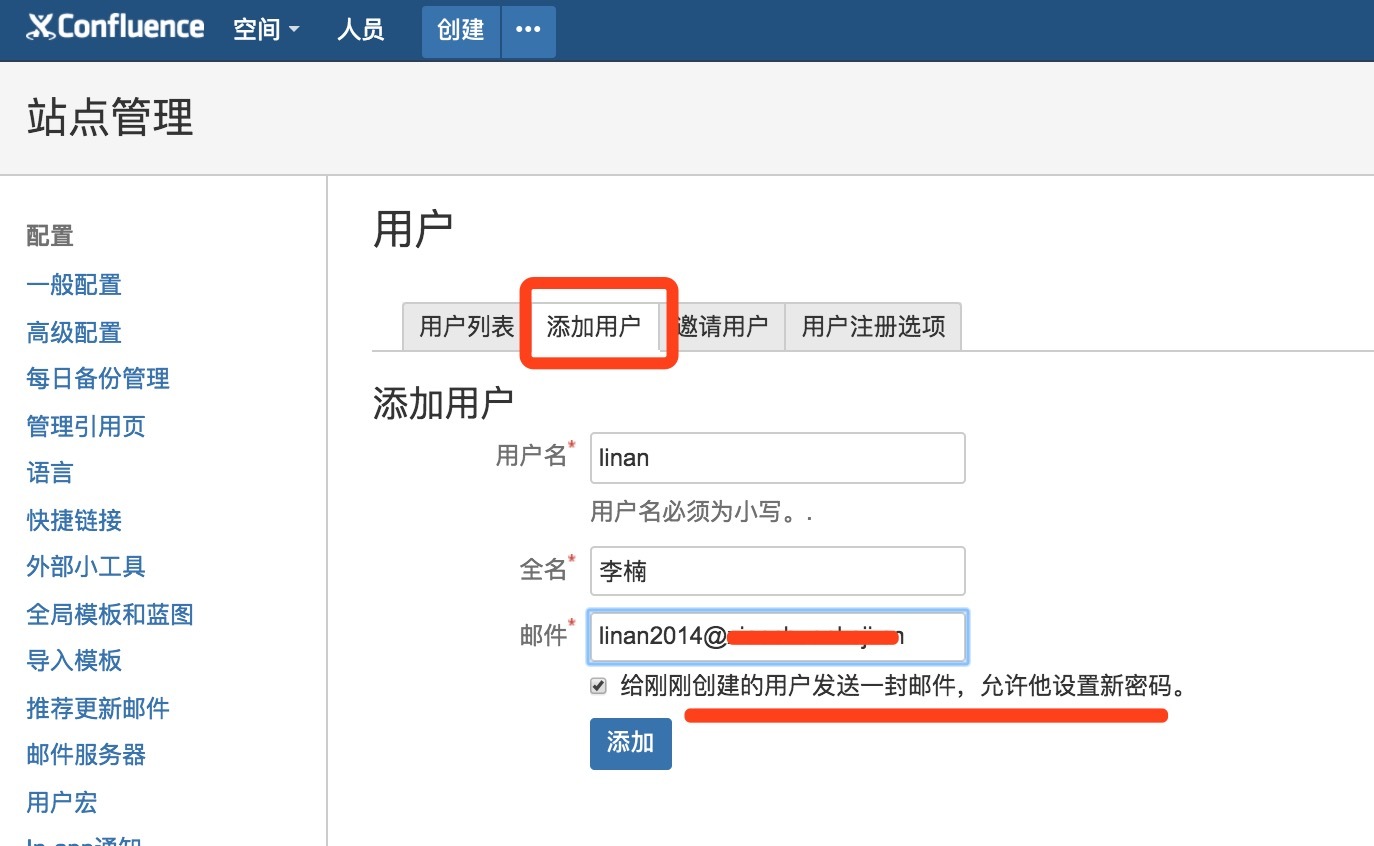
Generally, users are prohibited from registering to register by themselves, and new users should be created or invited under the administrator account (via email)
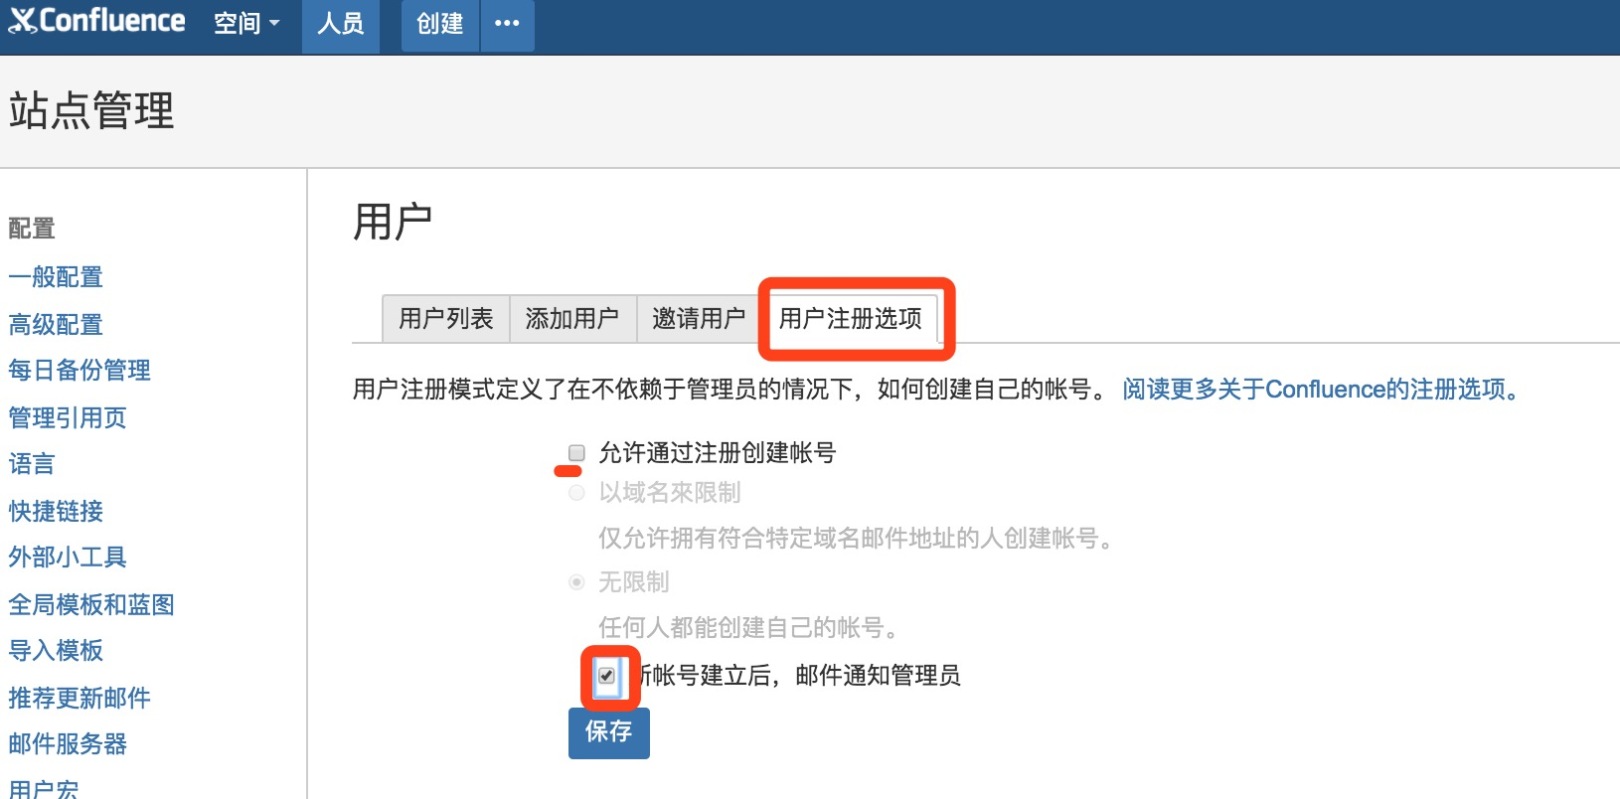
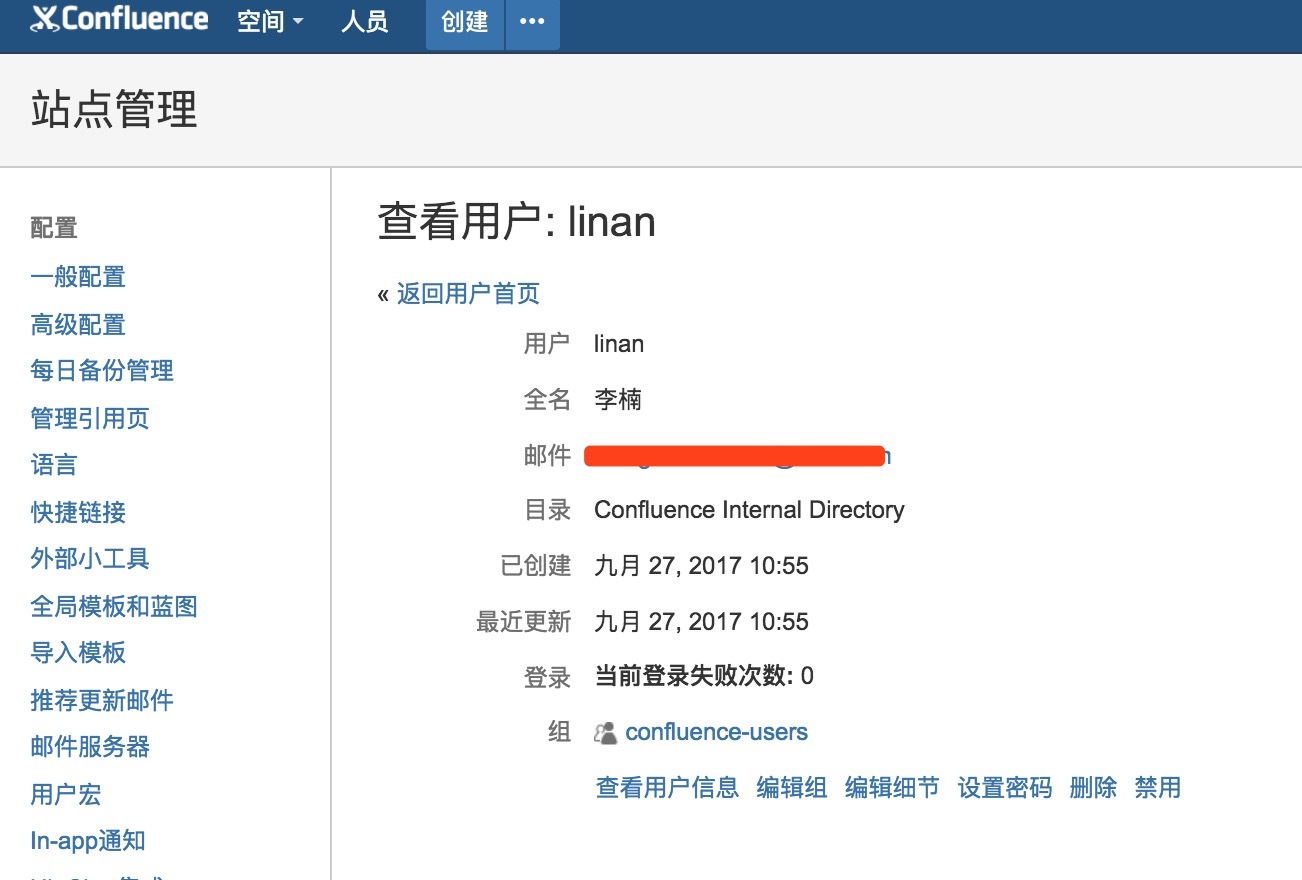
**As follows, "Add User" under the administrator account. After adding, set an initial password for the user. After receiving the email, the user can log in to change the password. **
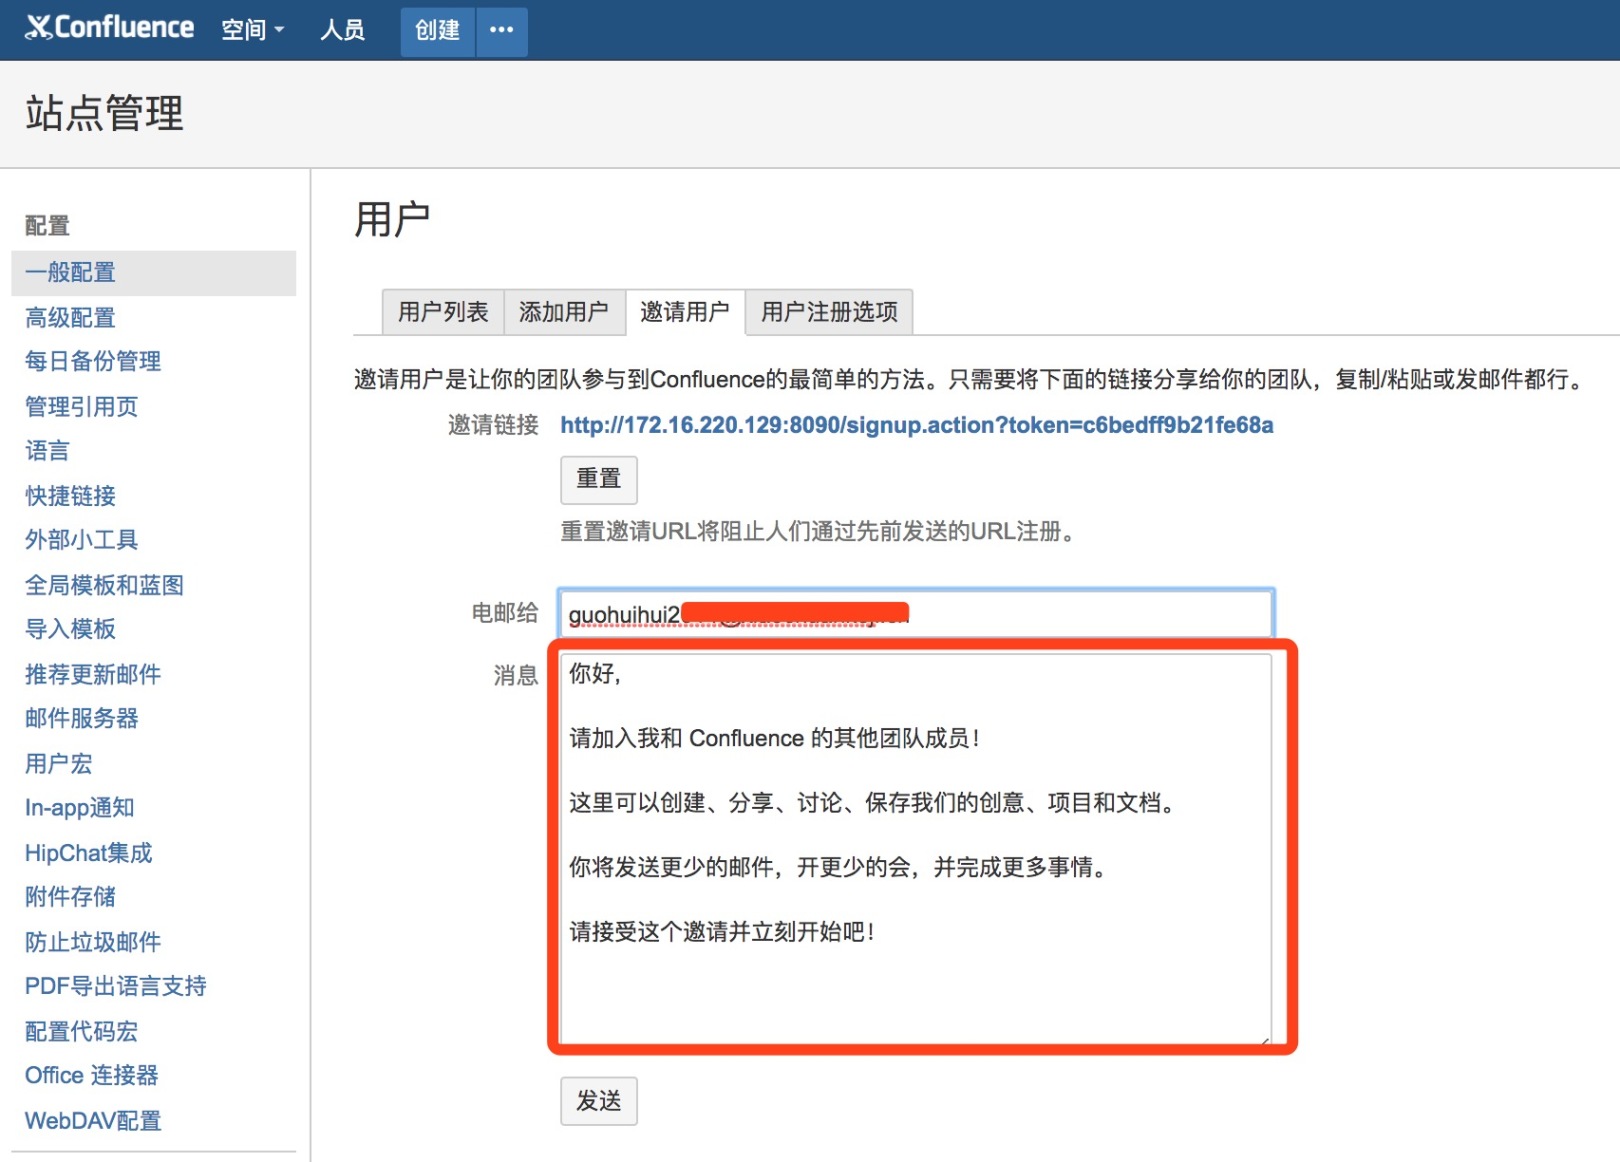
**- - - - - - - - - - - - - - - - - - - - - - - - - - - - - - - - - - - - - - - - - - - - - - - - - - - - - - - - - - - - - - - - - - - - - - - - - - - - - - - - - - - - - - - - - - - - - - - - - - - - - - - - - - - **You can also create a new user by "invite users". After the user receives the email, follow the email prompts to create the user
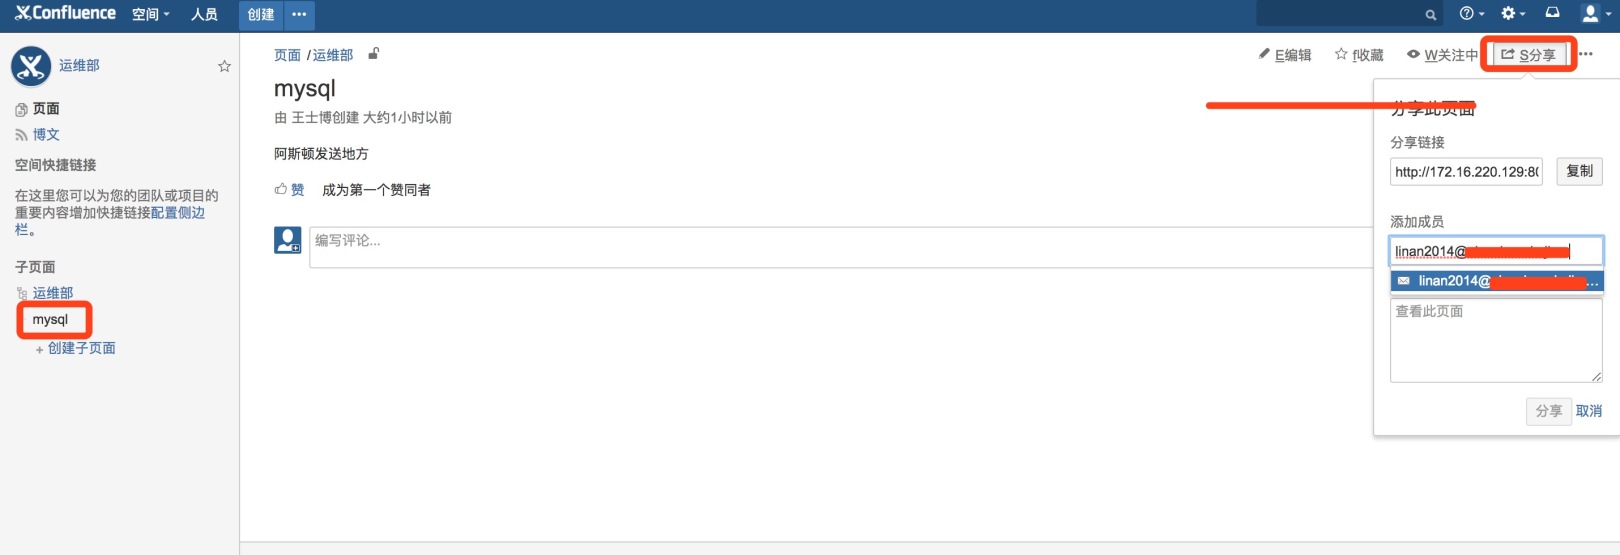
**- - - - - - - - - - - - - - - - - - - - - - - - - - - - - - - - - - - - - - - - - - - - - - - - - - - - - - - - - - - - - - - - - - - - - - - - - - - - - - - - - - - - - - - - - - - - - - - - - - - - - - - - - - - ****After the mail function is set up, when sharing articles, you can share it in the user's mailbox by mail. **
Note: When creating an article, when creating the page or subpage on the left, you can click "Space Management"-"Configure Sidebar" in the lower left corner
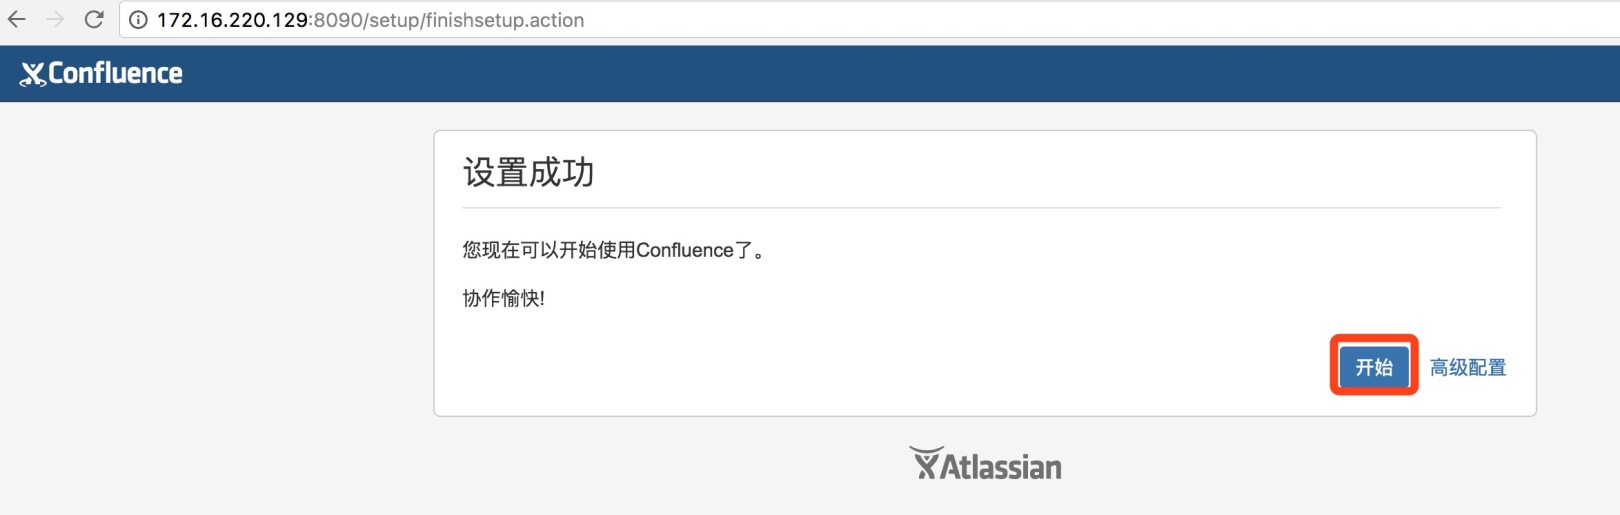
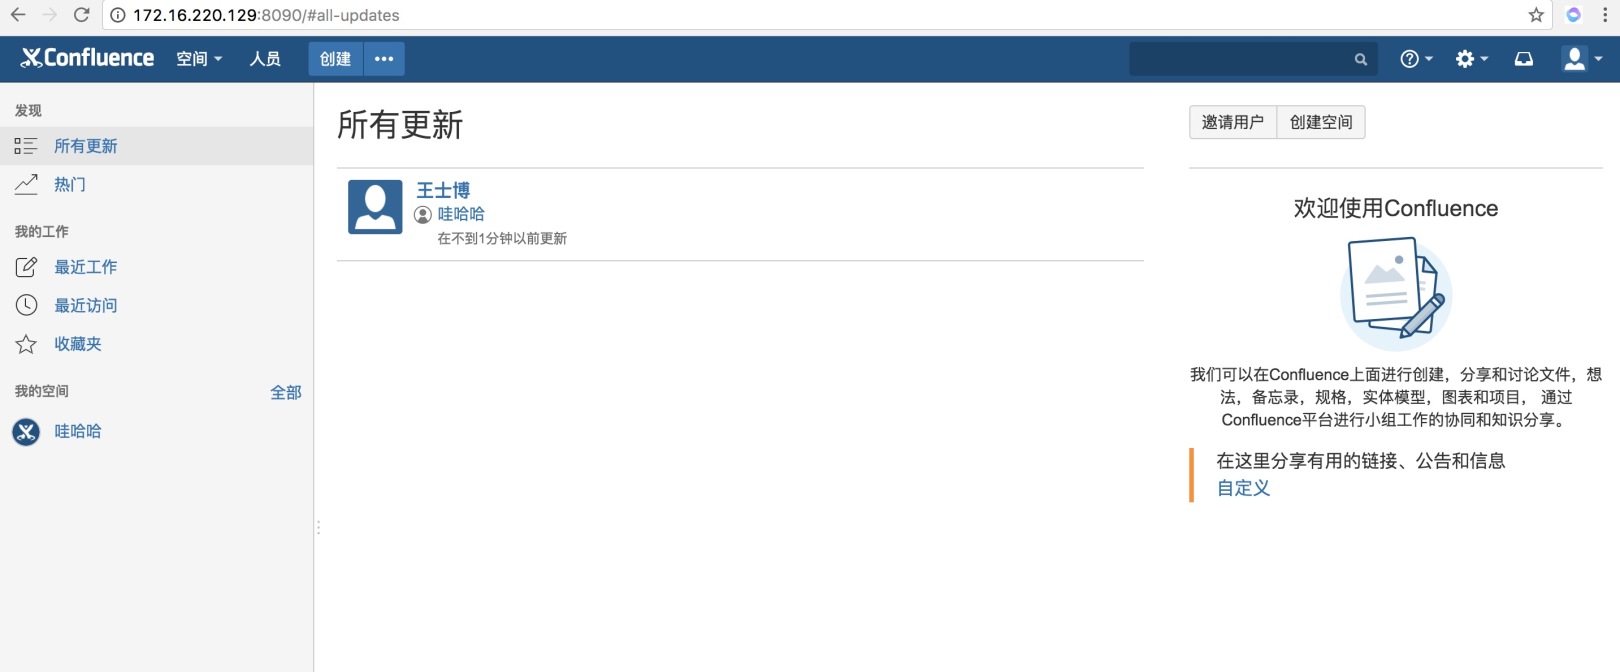
**At this point, the installation and cracking of confluence has been completely completed! Later, I will introduce the connection between confluence and jira and how they connect to LDAP! **
Recommended Posts