Jmeter (18)_Ubuntu deploy jmeter and ant
**The third step of Docker deployment interface automation continuous integration environment, containerized Jmeter and ant! **
**Continue from above: **Docker_containerized jenkins
In order to integrate continuous integration tools for interface automation, I deployed both jmeter and ant in the Jenkins container and configured build.xml
One: ubuntu deploy jdk
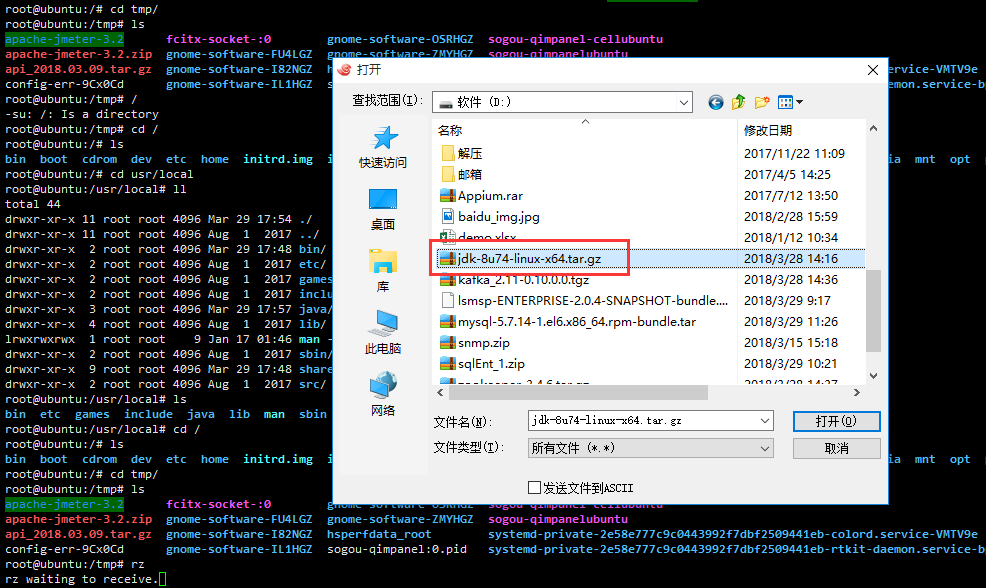
1: First download jdk-8u74-linux-x64.tar.gz and upload it to the server. The upload file here uses **lrzsz under ubuntu. **
**Execute directly under ubuntu sudo apt-get install lrzsz **
lrzsz is split into two commands, sz and rz
**The sz command sends the file to the local: **
** # sz filename**
rz command to upload files locally to the server
** # rz**
I create a new java folder under the /user/local directory, execute the rz command under the java folder, and directly transfer the jdk package from the local to the server
2: Decompress the tar package.
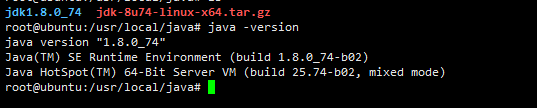
Execute tar -xvf jdk-8u74-linux-x64.tar.gz to decompress the jdk package and generate the jdk1.8.0_74 directory

3: Configure environment variables
vi /etc/profile
Add two lines at the end
export JAVA_HOME=/usr/local/java/jdk1.8.0_74
export PATH=
Execute command: source /etc/profile, the configured environment variables take effect
4: Check whether the installation is successful, execute the command: java-version
Two: install jmeter
-
Pack the local Jmeter file into a zip file: apache-jmeter-3.2.zip, and upload it to the server using the rz command
-
Unzip on the server to generate jmeter-3.0 directory
-
Install unzip: apt-get install unzip
-
Unzip: unzip apache-jmeter-3.0_json.zip
-
Put the jmeter-3.0 directory under /usr/local
-
Configure Jmeter environment variables. vi /etc/profile, then add the following variables
export JMETER= /usr/local/apache-jmeter-3.2
export PATH=
-
Execute the command: source /etc/profile, the configured environment variables take effect
-
Check the installation result: jmeter -v

Three: script trial run
Execute the command: # jmeter -n -t /tmp/apache-jmeter-3.2/bin/lsmsp.jmx -l log.jtl, view the result
Parameter Description:
-n: Run the script in non-GUI mode
-t: followed by the script name
-l: followed by the log name, save the running results

View the result log through cat log.jtl
Four: ubuntu deployment Ant
1: Install apache-ant-1.9.9 to the /user/local directory on ubuntu, the method is the same as the jmeter deployment above
2: Configure Ant environment variables
vi /etc/profile
Add two sentences at the end
export Ant=/usr/local/apache-ant-1.9.9
export PATH=
source /etc/profile makes the configured environment variables take effect
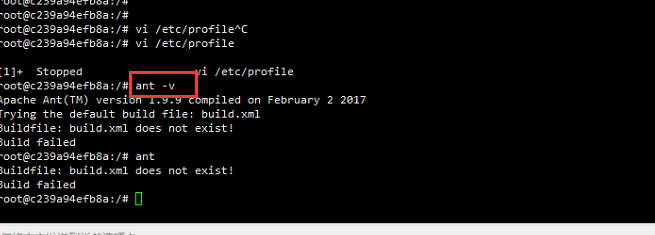
Enter ant -v to view the ant version
3: Copy the ant-jmeter-1.1.3.jar file in the jmeter/extras folder to the ant/lib path
Five: Configure the build.xml file
The purpose of the build.xml file configuration is to let ant fetch the code to execute the build. There are two ways to build
1 :The script is directly uploaded to the jmeter directory and built directly through the ant plug-in of jenkins. The content of the file is as follows
< project name="ant-jmeter-test" default="run" basedir=".">
< tstamp>
< format property="time" pattern="yyyyMMddhhmm" />
< /tstamp>
< property environment="env"/>
< property name="ReportName" value="TestReport" />
<!- - Local Jmeter directory -->
< property name="jmeter.home" value="/usr/local/apache-jmeter-3.2" />
<!- - The path where jmeter generates the report -->
< property name="jmeter.result.jtl.dir" value="/usr/local/apache-jmeter-3.2/bin/demo.jmx" />
<!- - Generate reports in jtl and html format, named after the build ID -->
< property name="jmeter.result.jtlName" value="
< target name="run">
< echo message="start..."/>
< antcall target="clean" />
< antcall target="test" />
< antcall target="report" />
< /target>
< target name="clean">
< mkdir dir="
< /target>
< target name="test">
< taskdef name="jmeter" classname="org.programmerplanet.ant.taskdefs.jmeter.JMeterTask" />
< jmeter jmeterhome="
<!- - Declare the script to be run and the jmeter script in this directory -->
< testplans dir="/usr/local/apache-jmeter-3.2/bin/demo" includes="demo.jmx" />
< property name="jmeter.save.saveservice.output_format" value="xml"/>
< /jmeter>
< /target>
< target name="report">
< xslt in="
style="${jmeter.home}/extras/jmeter-results-detail-report_21.xsl" />
< /target>
< /project>
2 : Configure the path where gitlab takes the code in the xml file. Jenkins takes the script out of gitlab through the git plugin, saves it to a local path, and then executes the build
< project name="ant-jmeter-test" default="run" basedir=".">
< tstamp>
< format property="time" pattern="yyyyMMddhhmm" />
< /tstamp>
< property environment="env"/>
< property name="ReportName" value="TestReport" />
<!- - Need to change to your own local Jmeter directory -->
< property name="jmeter.home" value="/usr/local/apache-jmeter-3.2" />
<!- - The path where jmeter generates the result report in jtl and html format -->
< property name="jmeter.result.dir" value="/usr/local/apache-jmeter-3.2/resultLog/
< target name="run">
< echo message="start..."/>
< antcall target="clean" />
< antcall target="test" />
< antcall target="report" />
< /target>
< target name="clean">
< mkdir dir="
< /target>
< target name="test">
< taskdef name="jmeter" classname="org.programmerplanet.ant.taskdefs.jmeter.JMeterTask" />
< jmeter jmeterhome="
<!- - The script "*.jmx" declared to be run means to include all jmeter scripts in this directory. The files in includes can also be separated by commas -->
< testplans dir="${githome}" includes="demo.jmx" />
< property name="jmeter.save.saveservice.output_format" value="xml"/>
< /jmeter>
< /target>
< path id="xslt.classpath">
< fileset dir="
< /path>
< target name="report">
< tstamp>
< xslt
classpathref="xslt.classpath"
force="true"
in="${jmeter.result.jtlName}"
out="${jmeter.result.htmlName}"
style="${jmeter.home}/extras/jmeter.results.shanhe.me.xsl">
< param name="dateReport" expression="${report.datestamp}"/>
< /xslt>
<!- - Because when the report is generated above, the relevant pictures will not be copied to the target directory together, so you need to copy manually -->
< copy todir="
< include name="collapse.png" />
< include name="expand.png" />
< /fileset>
< /copy>
< /target>
< /project>
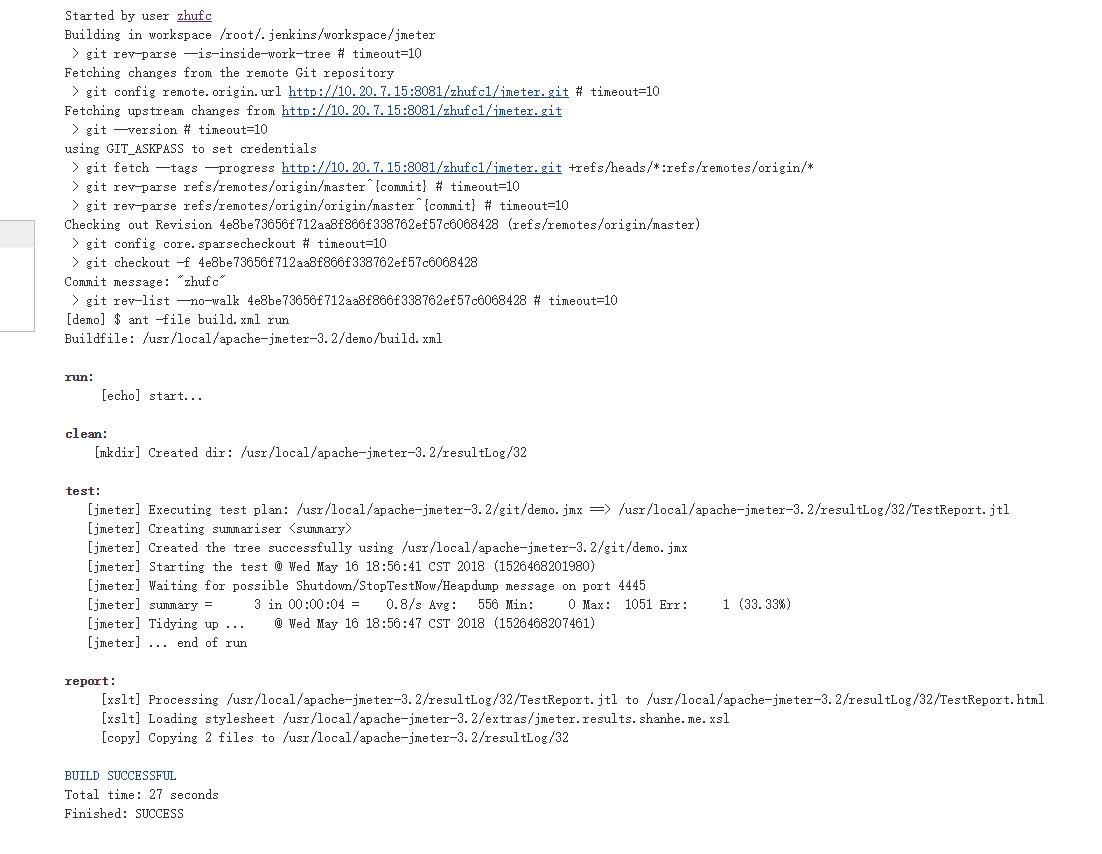
Build result
**Join the QQ group: 317765580, let's discuss it together! **
Recommended Posts