CentOS 7 install Docker
Preface#
First, make sure your CentOS version is 7.x. The centos-extras repository must be enabled. This repository is enabled by default, but if it has been disabled, you will need to re-enable it. Docker is divided into enterprise edition and community edition. The enterprise edition is charged. This article discusses installing the community edition.
Uninstall the old version#
The old version of Docker is called docker or docker-engine. If these are installed, please uninstall them and their associated dependencies.
sudo yum remove docker \
     docker-client \
     docker-client-latest \
     docker-common \
     docker-latest \
     docker-latest-logrotate \
     docker-logrotate \
     docker-selinux \
     docker-engine-selinux \
     docker-engine
Install Docker CE (CE stands for Community Edition)
You can install Docker CE in different ways according to your needs:
- Most users set up a Docker repository and install from it to facilitate installation and upgrade tasks. This is the recommended method.
- Some users download RPM packages and install them manually and manage the upgrade manually. This is useful in situations such as installing Docker on an interstitial system without access to the Internet.
- In testing and development environments, some users choose to use automated convenience scripts to install Docker.
Install using the repository##
Before installing Docker CE on a new host for the first time, you need to set up a Docker repository. After that, you can install and update Docker from the repository.
Install the repository###
- Install the necessary packages.
yum-utilsprovidesyum-config-managerutility, anddevice-mapper-persistent-dataandlvm2requiredevicemapperstorage driver.
sudo yum install -y yum-utils \
 device-mapper-persistent-data \
 lvm2
- Use the following command to set up a stable repository. You always need a stable repository, even if you also want to install and build from an edge or test repository.
sudo yum-config-manager \
 - - add-repo \
 https://download.docker.com/linux/centos/docker-ce.repo
- Optional: Enable test and edge. These repositories are included in the docker.repo file above, but are disabled by default. You can enable them together with the stable version library.
sudo yum-config-manager --enable docker-ce-edge

sudo yum-config-manager --enable docker-ce-test
You can disable the edge or test library by running the yum-config-manager command with the --disable flag. To re-enable it, use the --enable flag. The following command disables the edge repository.
sudo yum-config-manager --disable docker-ce-edge
Starting from Docker 17.06, the stable version has also been pushed to the edge and test repositories
Install DOCKER CE
- Install the latest version of Docker CE, or go to the next step to install a specific version.
sudo yum install docker-ce
Warning: If multiple Docker repositories are enabled, not installing or updating the version in the
yum installoryum updatecommand will always install the highest possible version, which may not suit your stability needs.
If this is your first time installing a package from a recently added repository, you will be prompted to accept the GPG key and display the fingerprint of the key. Verify that the fingerprint is correct, and if so, accept the key. Fingerprints should match
060 A 61C5 1B55 8A7F 742B 77AA C52F EB6B 621E 9F35
Docker is installed but not started. The Docker group has been created, but no users have been added to the group.
- On a production system, you should install a specific version of Docker CE instead of always using the latest version. List the available versions. This example uses the sort
-rcommand to sort the results, the version number is from highest to lowest, and truncated.
yum list docker-ce --showduplicates | sort -r

docker-ce.x86_64            17.09.ce-1.el7.centos             docker-ce-stable
The content of the list depends on which repositories are enabled, and will be specific to your CentOS version (in this example by the version's .el7 suffix). Select the specific version to install. The second column is the version string. You can use the entire version string, but you need to include at least the first hyphen. The third column is the repository name, which indicates the repository of the package and its stability level. To install a specific version, append the version string to the package name and separate it with a hyphen (-).
The version string is the package name plus the version up to the first hyphen. In the example above, the fully qualified package name is
docker-ce-17.09.ce.
sudo yum install <FULLY-QUALIFIED-PACKAGE-NAME>
- Start Docker
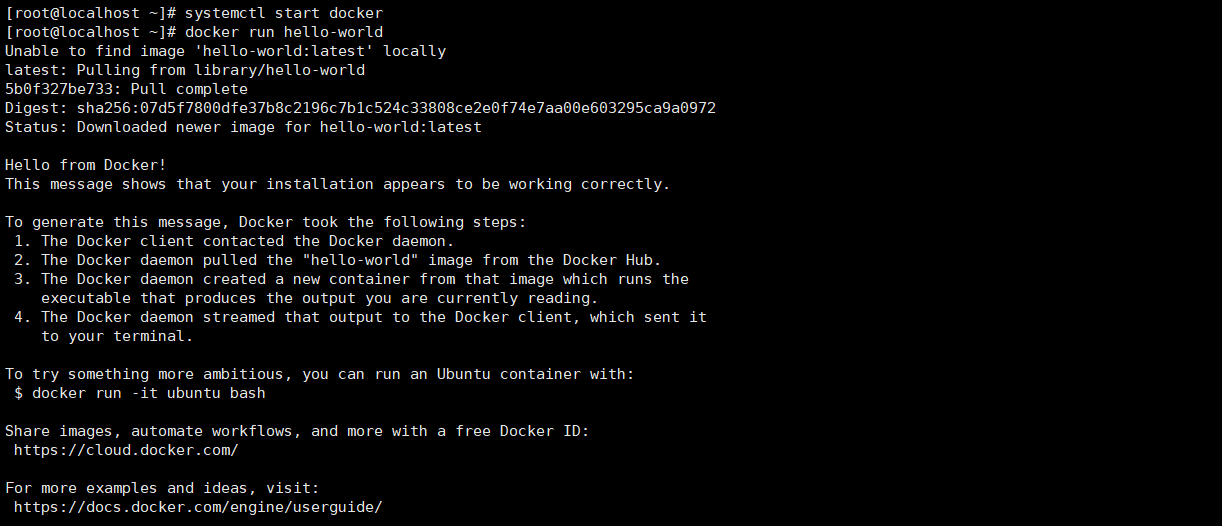
sudo systemctl start docker
- Verify that Docker is installed correctly by running the hello-world image.
sudo docker run hello-world
This command downloads the hello-world image and runs it in the container. When the container is running, it prints an information message and exits.
Docker CE is installed and running. You need to use sudo to run Docker commands. After continuing the Linux installation, allow non-privileged users to run Docker commands and other optional configuration steps.
Upgrade DOCKER CE
To upgrade Docker CE, follow the installation instructions and select the new version to install.
Install from package##
If you cannot use Docker's repository to install Docker, you can download the .rpm file for your version and install it manually. Every time you want to upgrade Docker, you need to download a new file.
1 Visit https://download.docker.com/linux/centos/7/x86_64/stable/Packages/ and download the .rpm file of the Docker version to be installed.
To install the edge package, change the stable in the above URL to edge.
- Install Docker CE, change the path below to the path where you downloaded the Docker package.
sudo yum install /path/to/package.rpm
Docker is installed but not started. The Docker group has been created, but no users have been added to the group.
- Start Docker
sudo systemctl start docker
- Verify that Docker is installed correctly by running the hello-world image.
sudo docker run hello-world
This command downloads the hello-world image and runs it in the container. When the container is running, it prints an information message and exits.
Docker CE is installed and running. You need to use sudo to run Docker commands. Proceed to the post-installation steps for Linux to allow non-privileged users to run Docker commands and other optional configuration steps.
Upgrade Docker
To upgrade Docker CE, download the newer package file and repeat the installation process, use yum -y upgrade instead of yum -y install, and point to the new file.
Install using convenient script##
Docker provides convenient scripts on get.docker.com and test.docker.com to quickly and non-interactively install stable and test versions of Docker CE into the development environment. The source code of the script is located in the docker-install repository. It is not recommended to use these scripts in a production environment. You should understand the potential risks before using these scripts:
- The script requires root or sudo privileges to run. Therefore, you should carefully check and review the script before running it.
- These scripts try to detect your Linux distribution and version, and configure your package management system for you. In addition, the script does not allow you to customize any installation parameters. This can lead to unsupported configurations, whether from a Docker perspective or from your own organization's guidelines and standards.
- The script installs all the dependencies and suggestions of the package manager without asking for confirmation. This may install a large number of packages, depending on the current configuration of your host.
- If Docker is already installed on the host using other mechanisms, do not use convenience scripts.
This example uses the script on get.docker.com to install the latest Docker CE version on Linux. To install the latest test version, use test.docker.com instead. In each of the following commands, replace each occurrence of get with test.
Warning: Always check scripts downloaded from the Internet before running locally.
 curl -fsSL get.docker.com -o get-docker.sh
 sudo sh get-docker.sh

< output truncated>

If you would like to use Docker as a non-root user, you should now consider
adding your user to the "docker" group with something like:

 sudo usermod -aG docker your-user

Remember that you will have to log out and back inforthis to take effect!

WARNING: Adding a user to the "docker" group will grant the ability to run
   containers which can be used to obtain root privileges on the
   docker host.
   Refer to https://docs.docker.com/engine/security/security/#docker-daemon-attack-surface
   for more information.
Docker CE has been installed. It starts automatically on DEB-based distributions. In RPM-based distributions, you need to manually start it using the appropriate systemctl or service command. The message shows that non-root users cannot run Docker commands by default.
Upgrade after using convenient script####
If you install Docker using a convenient script, you should upgrade Docker directly using your package manager. There is no benefit to re-running the convenience script. If you try to re-add a repository that has already been added to the host, it may cause problems.
Uninstall Docker CE
- Uninstall the Docker package
sudo yum remove docker-ce
- Mages, containers, volumes or custom configuration files on the host will not be deleted automatically. Delete all mages, containers, volumes:
sudo rm -rf /var/lib/docker
You must manually delete any defined configuration files.
Recommended Posts