virtualBox install centos, and build tomcat
Preface
There is no difficulty in this article, I just found that I have a bad memory, especially when building a tomcat service, I always need to check the information again, hereby write this blog to strengthen my memory, and also for everyone's reference;
Environmental preparation
VirtualBox + CentOS6.7 ---> build a linux system
jdk8 + tomcat7 ---> build tomcat service
Xshell + Xftp ---> remote control and file upload (you can install an XManager directly, which includes Xshell and Xftp, and other tools)
As shown below:

Build a linux system
1. VirtualBox installation, because there are already a lot of content on the local VirtualBox, it is not convenient to uninstall, so I will not demonstrate the installation of VirtualBox. I am sorry here! In fact, its installation is the same as ordinary exe software installation. Pay attention to the path problem and it is ok!
2. centOS installation
Start VirtualBox, click New, enter the name of the virtual machine, select Linux and Red Hat, as shown below

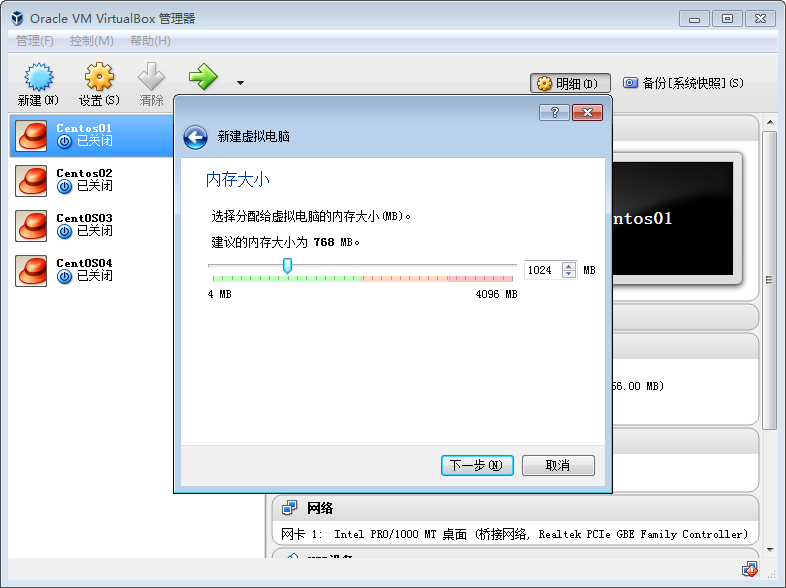
Click Next, memory allocation, it is recommended not to be too small, it is recommended to come 1G, as shown below
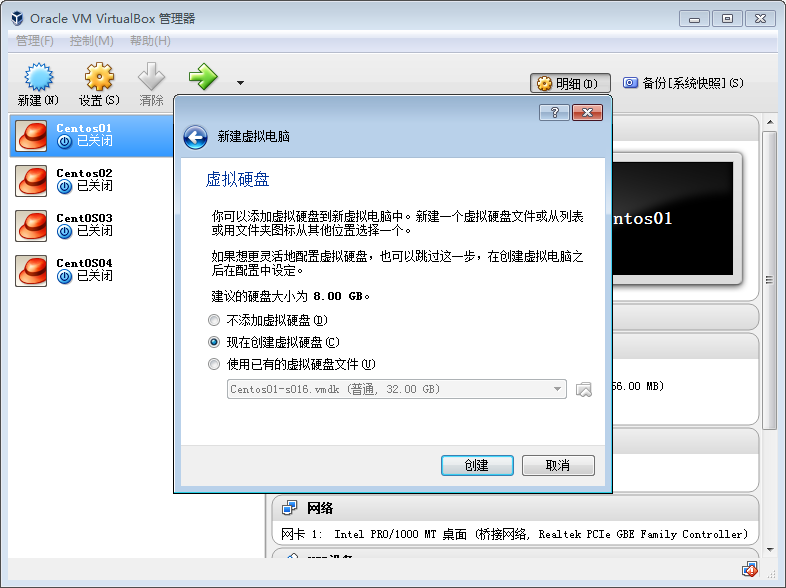
Click Next to create a virtual hard disk, select Create virtual hard disk now, as shown below
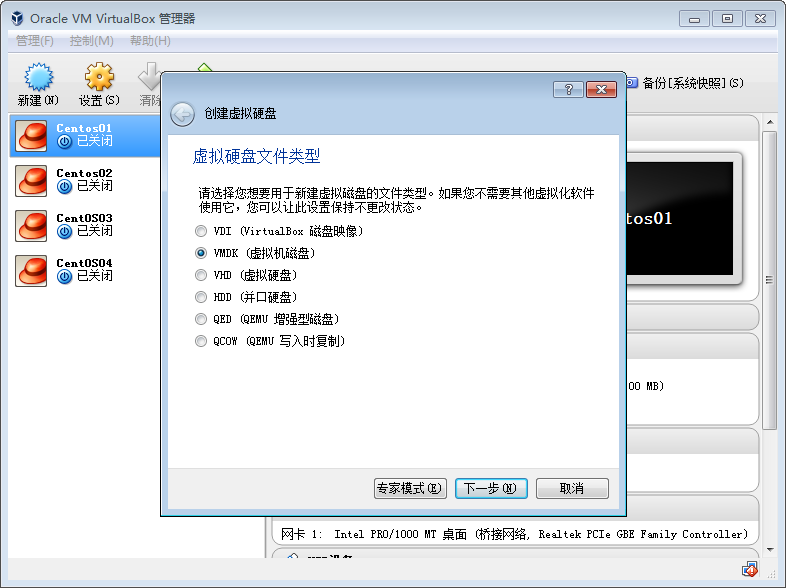
After clicking Create, select the virtual hard disk file type, select the vmdk type, it is a common type of virtual machine, and other virtual machines can also be interpreted, which is convenient for future movement, as shown below
Click Next, select the storage method of the virtual hard disk, select dynamic allocation, and check the check box of the files divided into 2GB size. The advantages have been stated. You can take a closer look. Don't take the next step, just pass the next step.

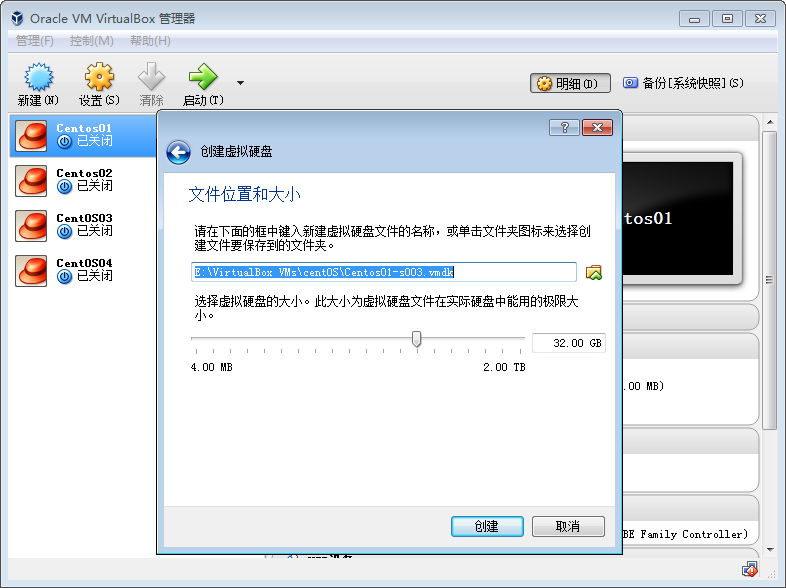
Click Next, the location and size (maximum capacity) of the virtual hard disk storage, this is set according to your own preferences, mine is as follows
Finally, click Create, and the basic creation is complete. The next step is to make some settings. Right-click the virtual machine and select Settings, as shown below

In the general settings, the basic settings do not need to be changed, just use our previous settings. In the advanced settings, you can make some settings. I suggest you only modify the backup location and do not put it on the C drive. Share the pasteboard and drag and drop to keep the default disabled Just do
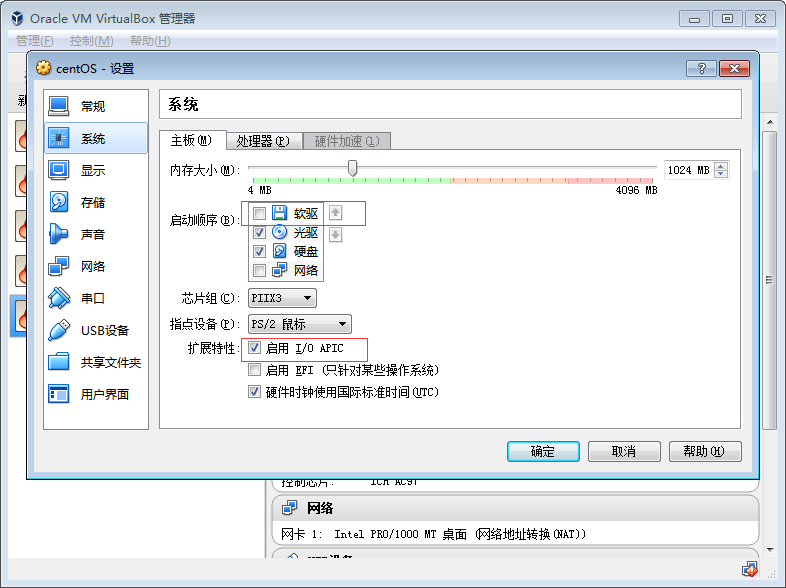
In the system settings, you only need to set the motherboard options, remove the tick in front of the floppy drive, and enable I/O APIC on the tick, as shown below
In the network settings, select the bridged network card as the link mode, as shown in the figure below

In the storage settings, you need to import the centos image file we downloaded, click the disc image on the far right of the distribution drive, and select the image file we downloaded. If the image file is divided into two, select DVD1, as shown below

Keep the other settings as default. If you need to set them in the future, you can learn by yourself. After clicking OK, select our virtual machine and click Start to enter the centos installation interface, as shown below
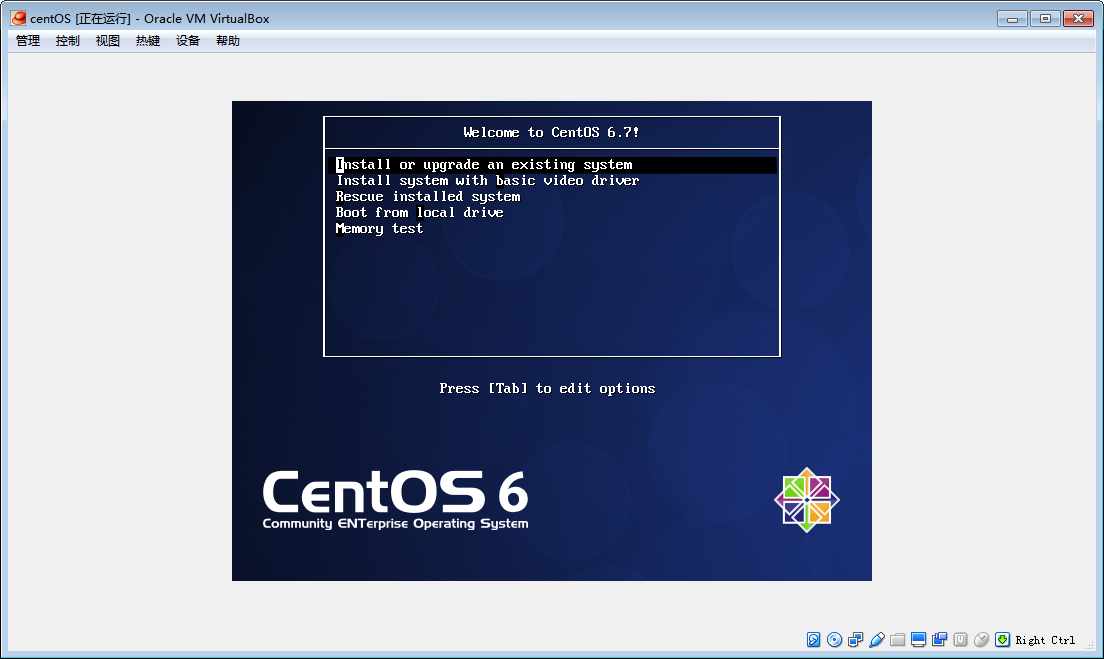
Press up and down keys to select, here we select the first one, then press Enter, and then come to the following picture
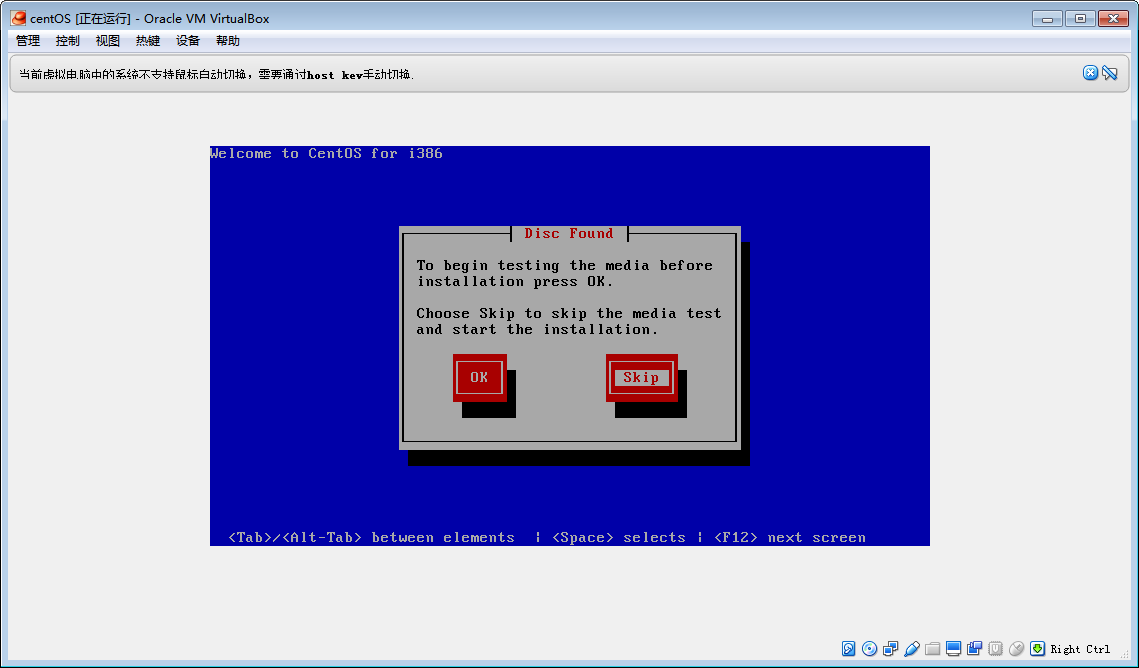
Here we are prompted whether to perform mirror file detection, we select Skip to skip, the Tab key and left and right keys can be selected, and then press Enter, the system enters the installation process, after the installation is complete, make some settings for the system, as shown below

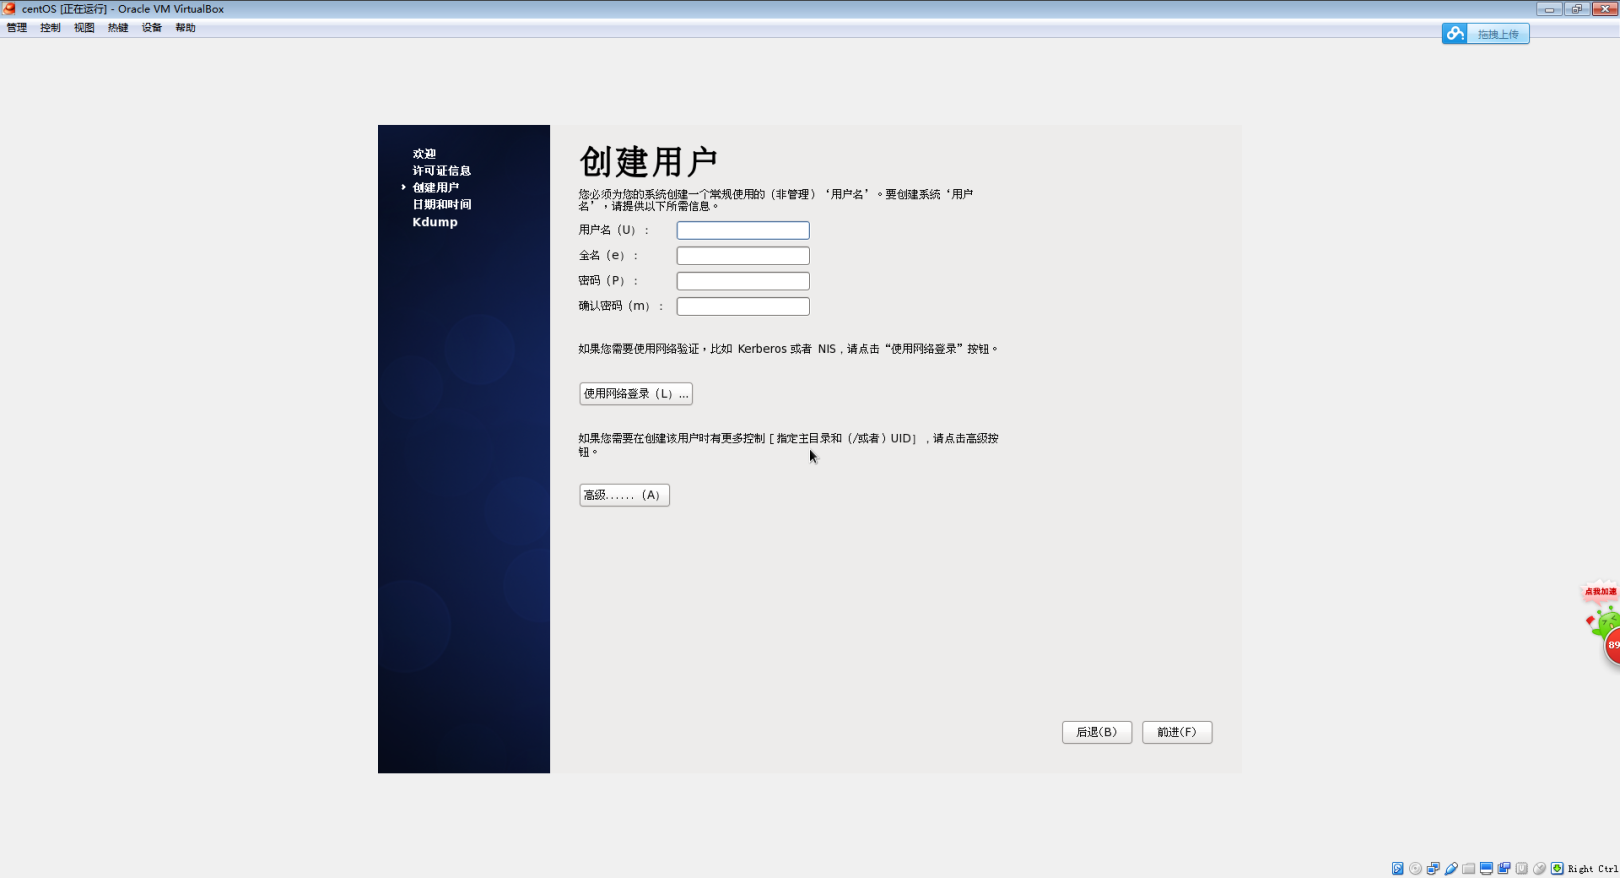
I will not demonstrate some of the unimportant settings here, only the important or need to pay attention to, click Next, set the language, we choose simplified Chinese; next, select the keyboard, the default American keyboard is fine; next, install For that device, use the default basic storage device; the next step is as shown below

We choose yes, Ignore all data, press Enter, set the host name, here I named god; next step, set the clock, the default Asia/Shanghai will do; next step, set the password of the root user, here everyone set it up and don’t forget ; Next, select the installation type, select the first item --> Use all space; next, select to write the modification to the disk, press Enter, the system will format the virtual hard disk; come to the following figure

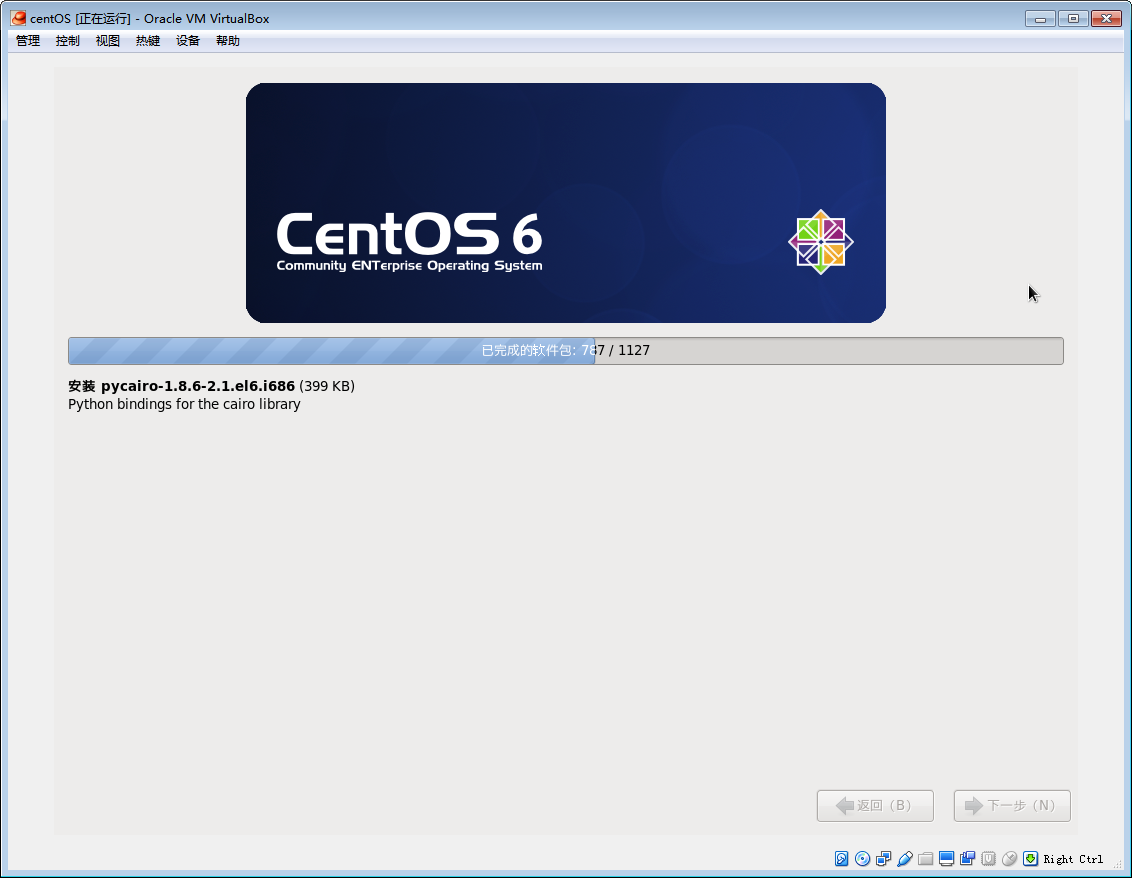
The default is OK, select Next, enter the software package installation interface, here you can choose --> Customize now, to select the software that needs to be installed and cancel the software that does not need to be installed, the correct approach should also be customized; I will take a picture convenient!
After rebooting, come to the welcome interface, the next step, the next step, come to the following interface
After setting, click forward, and then keep pressing enter;
After entering the centos system, I found something like this
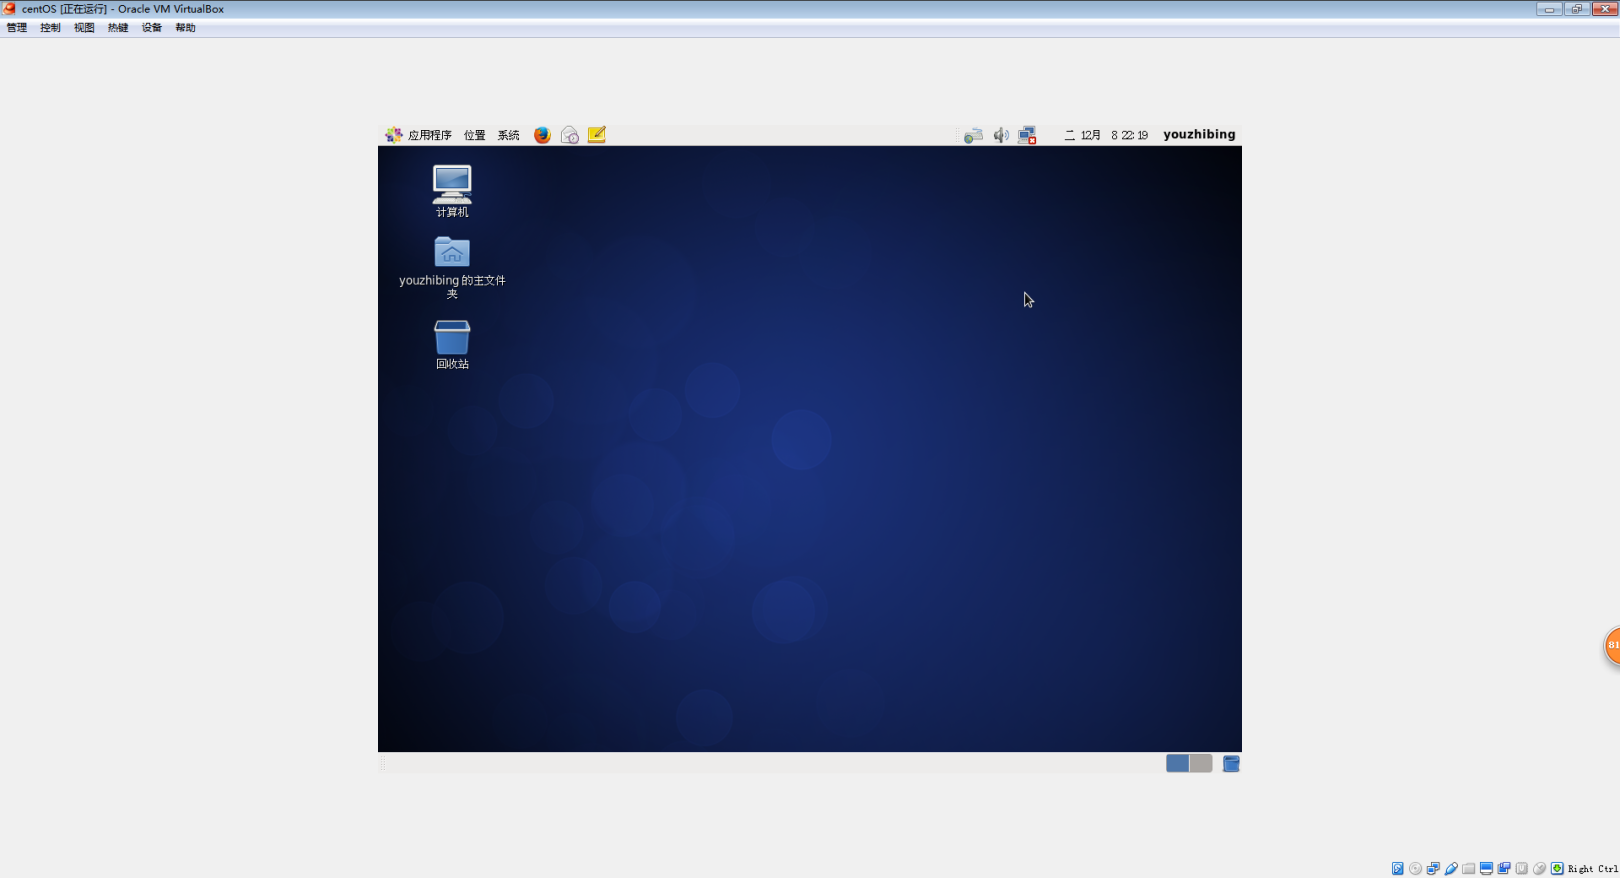
It is particularly inconvenient to operate the centos system. We need to set up, click on the device, install enhancements, after the installation is complete, restart the system, and then it will be normal;
Build tomcat service
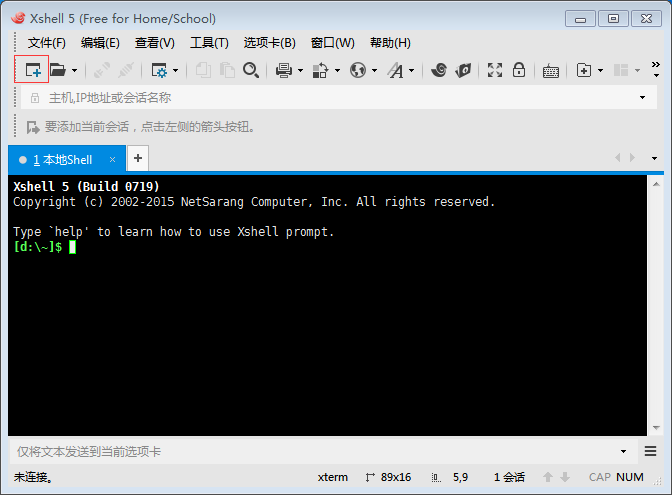
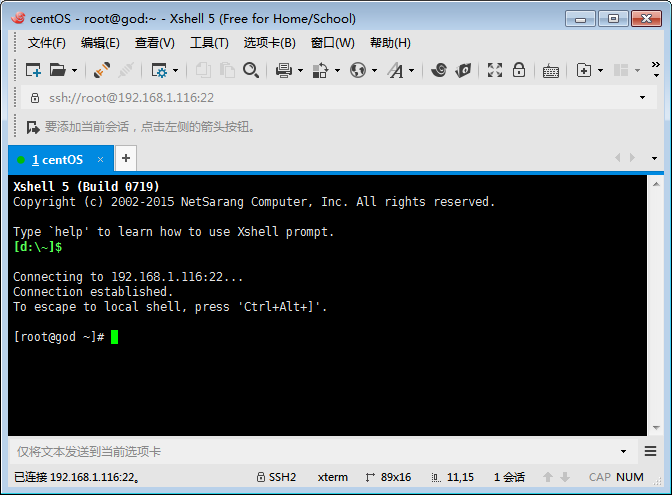
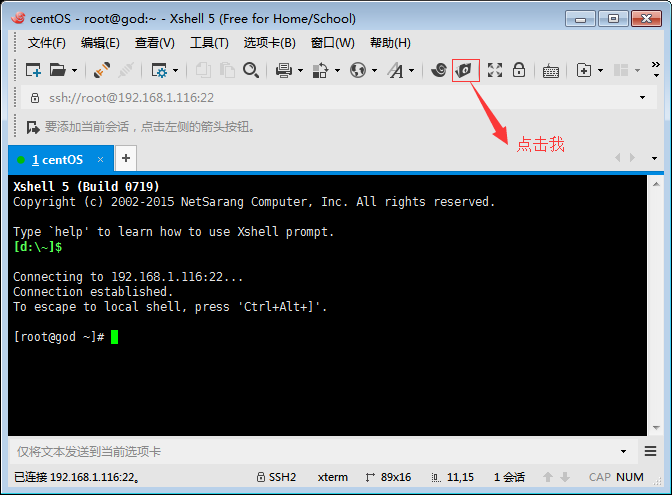
- Install Xshell and Xftp, the installation process will not be demonstrated, use Xshell to connect remotely, you need to connect to the Linux system, and connect remotely according to ip, open Xshell, and create a new one, as shown below
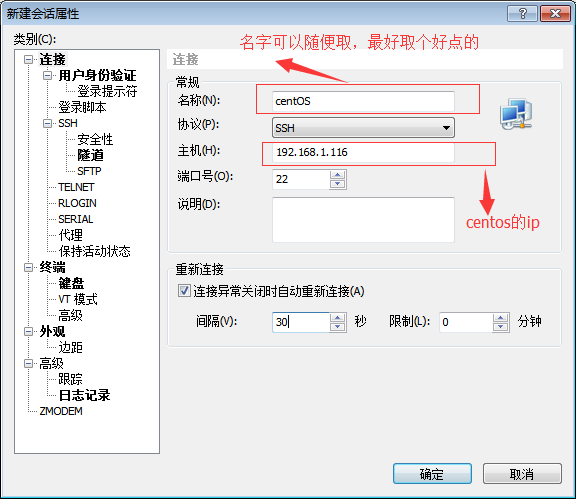
Then connect, the user name can be root, or the login name we set when installing the system, and the password can be matched. After connecting, as shown below
Then you can use Xshell to operate
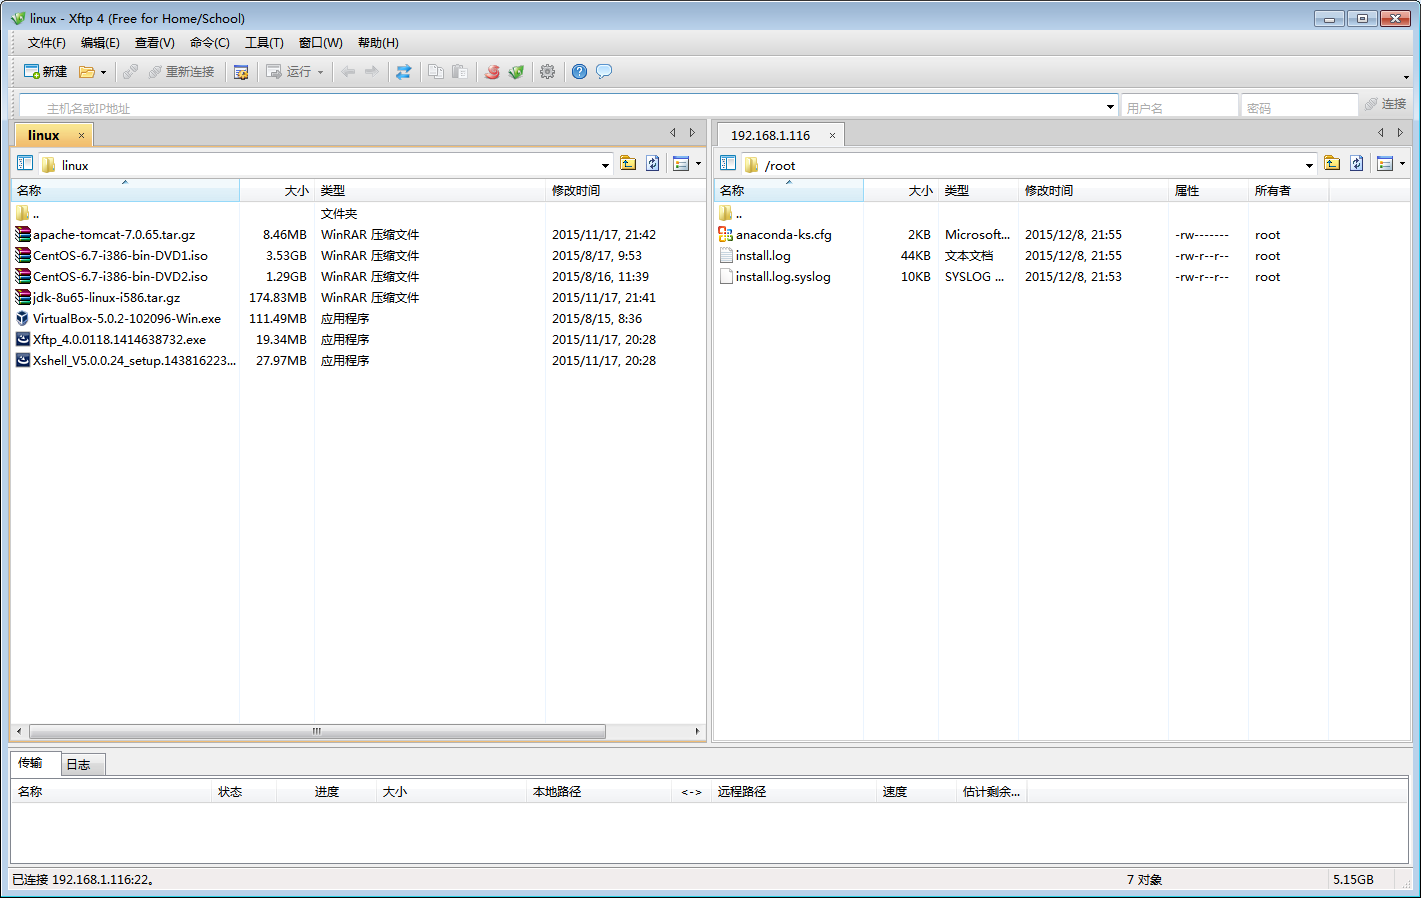
- Upload jdk and tomcat
Use Xftp to upload the compressed files of jdk and tomcat, of course, you can directly download it directly in Linux. The reason why I wrote this is for future work needs, because you may not have an interface to operate the Linux system in the future, or even remotely! As shown below
Open Xftp, as shown below, you can copy the left and right sides of each other
- Install jdk and tomcat
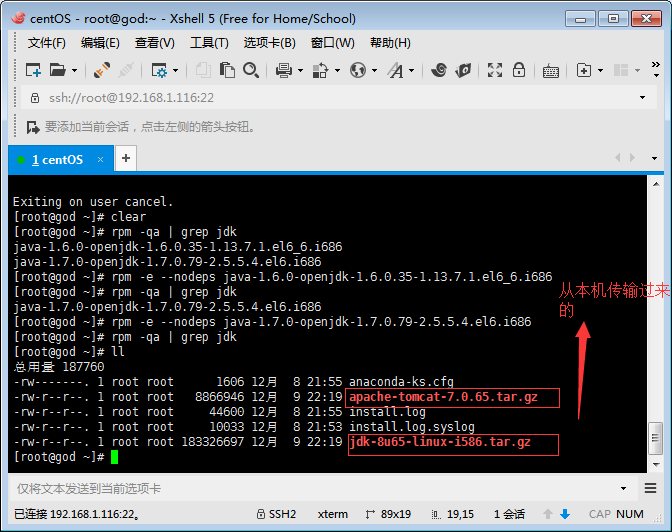
Since the previous system installations are all by default and there is no customization, the system automatically installs jdk, we need to uninstall it, and then install our own, first check the default installed jdk version, as shown below

Found that there are two, no matter what, uninstall them, as shown below; note that when uninstalling, the names can be copied/pasted, don't be stupid to type one by one!

After uninstalling, let’s take a look at our current directory, as shown below
Decompress jdk and tomcat directly, and use the command tar -zxvf to compress the file name (tar -zxvf jdk-8u65-linux-i586.tar.gz, the Tab key can be used to complete the command line, don’t be too serious, just type the full name ! For example, enter tar -zxvf jd and press Tab, the jdk compressed file name will be completed), after both compressed files are decompressed, as shown below

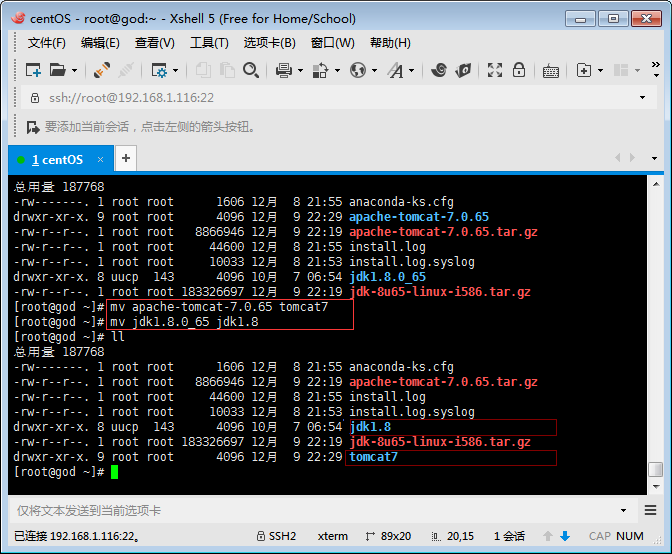
Found that the folder name is a bit long, let's modify it, as shown below
Move these two folders to /usr/local/. It is okay not to move them, but the linux folder has a default meaning. What content is stored in each folder is not within the scope of this blog. Go to linux, as shown below

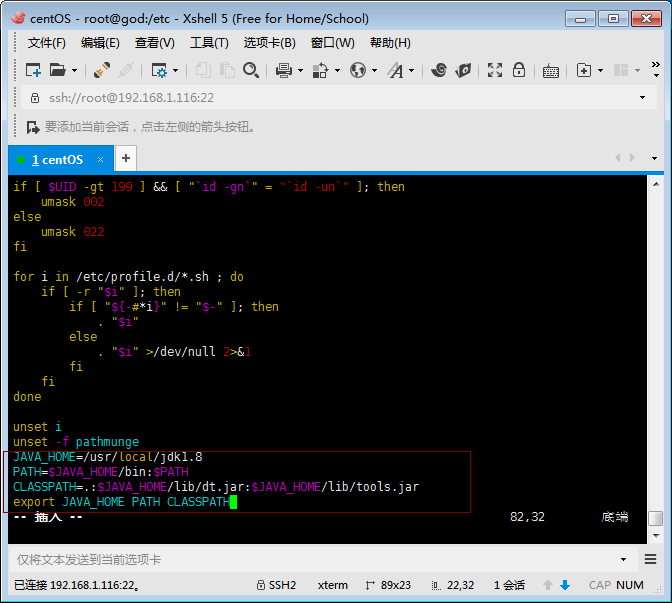
Enter java -version, and it prompts that the java command is not found! What the hell? In fact, the environment has not been configured yet, and the principle is the same as that of configuring the environment under windows. Then configure Luo, edit the profile file in the etc directory, and append our configuration at the end of the file (as for linux vim operations, you need to do it yourself if you don’t know Brain-filling), as shown below

Restart the system after saving and exiting, it's fine, as shown below

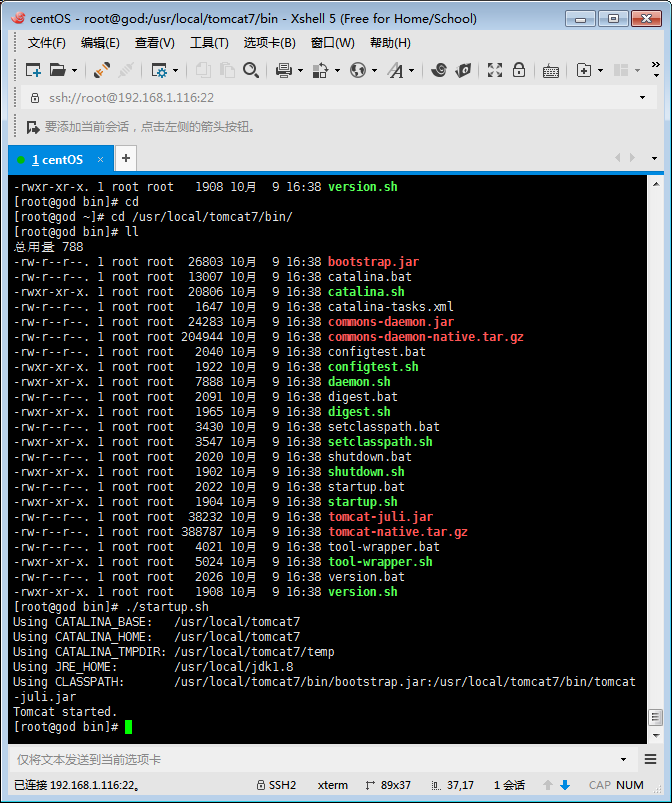
Start the tomcat service, and start tomcat in the tomcat directory, as shown below
Tomcat starts successfully, we go to the browser to visit, as follows (remember to turn off the firewall of 192.168.1.116 when accessing externally: service iptables stop)

At this point, the **tomcat service has been successfully built! Have you successfully built it? Please give feedback in the comment area. Haha!
Afterword
Although it is not difficult, there are still many detailed problems. In the process of writing this blog, I encountered a lot of small problems in setting up the environment, otherwise I won't write it for so long (I started writing yesterday). The reason for not recording is that the environment is different, and everyone may encounter different problems; at the same time, these small problems are also left. When you encounter them, you can check the information by yourself to mobilize everyone's enthusiasm; If all the small issues are recorded, the blog will be too long, and everyone will not read it; after all, it is a small issue, I believe everyone can solve it.
In the end, it is the old saying, Listen to the book a thousand times, it is better to practice!
Recommended Posts