How to set up vsftpd for anonymous downloads on Ubuntu 16.04
Introduction
FTP is the abbreviation of File Transfer Protocol, a network protocol that was once widely used to move files between clients and servers. It has been replaced by faster, safer and more convenient file transfer methods. Many casual netizens want to download directly from their web browser with https, and command line users prefer to use secure protocols such as scp or SFTP
FTP is often used to support legacy applications and workflows with specific requirements. If you can choose which protocol to use, consider exploring more modern options. However, when you do need FTP, vsftpd is a good choice. vsftpd is optimized for security, performance and stability, can well prevent many security problems existing in other FTP servers, and is the default setting for many Linux distributions.
In this tutorial, we will show you how to set up vsftpd for anonymous FTP download sites that aim to distribute public files widely. Instead of using FTP to manage files, the sudo permissions of local users are expected to use scp, sFTP or any other secure protocol of their choice to transfer and maintain files.
prerequisites
To follow this tutorial, you need:
- A non-root user Ubuntu 16.04 server with sudo privileges, students who don’t have a server can buy it from here, but I personally recommend you to use the free Tencent Cloud Developer Lab experiment, learn to install and then buy server.
Once you have a server, you can start.
Step 1-Install vsftpd
We first update our package list and install the vsftpd daemon:
sudo apt-get update
sudo apt-get install vsftpd
After the installation is complete, we will copy the configuration file so that we can start with a blank configuration and save the original file as a backup.
sudo cp /etc/vsftpd.conf /etc/vsftpd.conf.orig
By backing up the configuration, we are ready to configure the firewall.
Step 2-Turn on the firewall
First, let's check the firewall status to see if it is enabled, and if it is, check what is currently allowed so that when testing the configuration, you will not encounter firewall rules that block you.
sudo ufw status
In our example, we see the following:
OutputOutput
Status: active
To Action From
------------
OpenSSH ALLOW Anywhere
OpenSSH(v6) ALLOW Anywhere(v6)
You may have other rules or no firewall rules at all. In this example, only ssh traffic is allowed, so we need to add rules for FTP traffic.
For many applications, you can use sudo ufw app list and enable them by name, but FTP is not one of them. Because ufw also checks whether /etc/services has the service port and protocol, we can still add FTP by name. We need ftp-data on port 20 and ftp on port 21 (for commands):
sudo ufw allow ftp-data
sudo ufw allow ftp
sudo ufw status
Now our firewall rules are as follows:
Status: active
To Action From
------------
OpenSSH ALLOW Anywhere
21 /tcp ALLOW Anywhere
20 /tcp ALLOW Anywhere
OpenSSH(v6) ALLOW Anywhere(v6)21/tcp(v6)ALLOW Anywhere(v6)20/tcp(v6)ALLOW Anywhere(v6)
With the installation of vsftpd and the necessary ports opened, we are ready to continue.
Step 3-Prepare space for files
First, we will create the directory where we plan to host the files, using the -p flag to create an intermediate directory. The directory structure allows you to keep all FTP directories together, and then add other folders that require authentication:
sudo mkdir -p /var/ftp/pub
Next, we set the directory permissions to nobody:nogroup. Later, we will configure the FTP server to show that all files are owned by ftp users and groups.
sudo chown nobody:nogroup /var/ftp/pub
Finally, we will create a file in the directory for later testing.
echo "vsftpd test file"| sudo tee /var/ftp/pub/test.txt
With this sample file, we can configure the vsftpd daemon.
Step 4-Configure anonymous access
We are setting up for sudo users with permissions to maintain files for widespread distribution to the public. For this, we will configure vsftpd to allow anonymous downloads. We will expect file administrators to use scp, sftp or any other secure method to maintain files, so we will not allow file uploads via FTP.
The configuration file contains many configuration options of vsftpd.
We will first change what has been set:
sudo nano /etc/vsftpd.conf
Find the following value and edit it to match the following value:
...
# Allow anonymous FTP?(Disabled by default).
anonymous_enable=YES
#
We’ll set the local_enable setting to “NO” because we’re not going to allow users with local accounts to upload files via FTP. The comment in the configuration file can be a little confusing, too, because the line is uncommented by default.
# Uncomment this to allow local users to log in.
local_enable=NO
...
In addition to changing the existing settings, we will also add some other configurations.
**Note: **You can use the man vsftpd.conf command to understand all the options.
Add these settings to the configuration file. They do not depend on the order, so you can place them anywhere in the file.
#
# Point users at the directory we created earlier.
anon_root=/var/ftp/
#
# Stop prompting for a password on the command line.
no_anon_password=YES
#
# Show the user and group as ftp:ftp, regardless of the owner.
hide_ids=YES
#
# Limit the range of ports that can be used for passive FTP
pasv_min_port=40000
pasv_max_port=50000
**Note: **If you are using UFW, these settings can be run as-is. If you are using iptables, you may need to add rules to open the port between pasv_min_port and pasv_max_port that you specify.
After adding, save and close the file. Then, restart the daemon using the following command:
sudo systemctl restart vsftpd
systemctl does not display the results of all service management commands, so if you want to be sure that it has succeeded, use the following command:
sudo systemctl status vsftpd
If the last line looks like this, you are successful:
Aug 1717:49:10 vsftpd systemd[1]: Starting vsftpd FTP server...
Aug 1717:49:10 vsftpd systemd[1]: Started vsftpd FTP server.
Now we are ready to test our work.
Step 5-Test anonymous access
From the web browser, enter the ftp: // IP address behind *server.
ftp:// 203.0.113.0
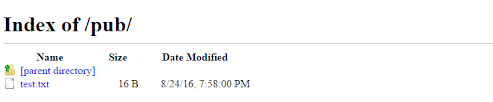
If everything works as expected, you should see the pub directory:

You should also be able to click pub, view test.txt, and right-click to save the file.
You can also test from the command line, which will provide more feedback about your configuration. We will ftp to the server in passive mode, which is the -p flag on many command line clients. Passive mode allows users to avoid changing the local firewall configuration to allow server and client connections.
**Note: **The native Windows command line FTP client ftp.exe does not support passive mode at all. Windows users may wish to view another Windows FTP client, such as WinSCP.
ftp -p 203.0.113.0
When prompted for a username, you can enter "ftp" or "anonymous". They are equivalent, so we will use the shorter "ftp":
Connected to 203.0.113.0.220(vsftpd 3.0.3)Name(203.0.113.0:21:sammy): ftp
After pressing Enter, you should receive the following message:
Output
230 Login successful.
Remote system type is UNIX.
Using binary mode to transfer files.
ftp>
Make sure that the passive mode works as expected:
ls
Output227 Entering Passive Mode(45,55,187,171,156,74).150 Here comes the directory listing.
drwxr-xr-x    2 ftp      ftp          4096 Aug 1719:30 pub
226 Directory send OK.
As an anonymous user, you should be able to transfer files to your local computer using the following get command:
cd pub
get test.txt
Outputftp>get test.txt
227 Entering Passive Mode(45,55,187,171,156,73).150 Opening BINARY mode data connection for test.txt(14 bytes).226 Transfer complete.16 bytes received in0.0121seconds(1325 bytes/s)
This output tells you that the file has been downloaded successfully, and you can check if it is on your local file system if you wish.
We also want to make sure that anonymous users will not fill out our file system, so to test, we will turn right and try to put the same file back on the server, but with a new name:
put test.txt upload.txt
Output227 Entering Passive Mode(104,236,10,192,168,254).550 Permission denied.
Now that we have confirmed this, we will exit the monitor to prepare for the next step:
bye
Now that we have confirmed that the anonymous connection is working as expected, we will turn our attention to what happens when the user tries to connect.
Step 6-Try to connect as a user
You may also want to ensure that cannot connect as a user with a local account, because this setting does not encrypt their login credentials. When prompted to log in, try using your sudo user instead of typing "ftp" or "anonymous":
ftp -p 203.0.113.0
OutputConnected to 203.0.113.0:21.220(vsFTPd 3.0.3)Name(203.0.113.0:21:your_user)530 This FTP server is anonymous only.
ftp: Login failed.
ftp>
These tests confirm that you only set up the system for anonymous downloads.
in conclusion
In this tutorial, we explained how to configure vsftpd for anonymous downloads only. This allows us to support legacy applications that cannot use more modern protocols that are more difficult to update or widely published FTP URLs.
For more Ubuntu tutorials, please go to [Tencent Cloud + Community] (https://cloud.tencent.com/developer?from=10680) to learn more.
Reference: "How To Set Up vsftpd for Anonymous Downloads on Ubuntu 16.04"
Recommended Posts