Construction of Zabbix monitoring platform under CentOS7
Zabbix is an enterprise-level open source solution based on WEB interface that provides distributed system monitoring and network monitoring functions.
Zabbix can monitor various network parameters to ensure the safe operation of the server system; and provide a flexible notification mechanism to allow system administrators to quickly locate/solve various problems.
Zabbix consists of 2 parts, zabbix server and optional component zabbix agent.
Zabbix server can provide remote server/network status monitoring, data collection and other functions through SNMP, zabbix agent, ping, port monitoring and other methods. It can run on Linux, Solaris, HP-UX, AIX, Free BSD, Open BSD, OS X and other platforms
The following describes the construction of the Zabbix monitoring platform under CentOS7
**1. Install **MariaDB
yum -y install centos-release-scl-rh centos-release-scl
yum --enablerepo=centos-sclo-rh -y install rh-mariadb102-mariadb-server
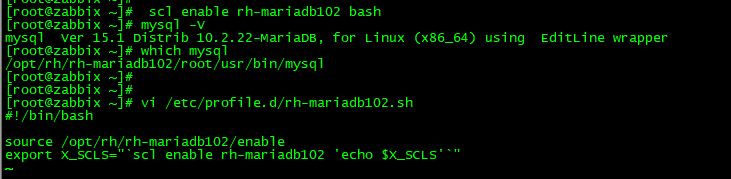
[ root@zabbix ~]# scl enable rh-mariadb102 bash
[ root@zabbix ~]# mysql -V
mysql Ver 15.1 Distrib 10.2.22-MariaDB, for Linux (x86_64) using EditLine wrapper
[ root@zabbix ~]# which mysql
/opt/rh/rh-mariadb102/root/usr/bin/mysql
[ root@zabbix ~]#
[ root@zabbix ~]# vi /etc/profile.d/rh-mariadb102.sh
#! /bin/bash
source /opt/rh/rh-mariadb102/enable
export X_SCLS="scl enable rh-mariadb102 'echo $X_SCLS'"
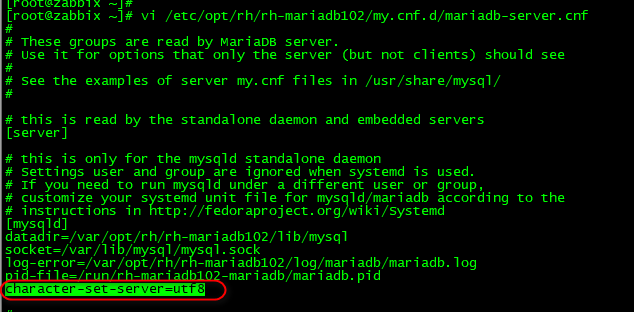
vi /etc/opt/rh/rh-mariadb102/my.cnf.d/mariadb-server.cnf
Add character-set-server=utf8
[ root@zabbix ~]# systemctl start rh-mariadb102-mariadb
[ root@zabbix ~]# systemctl enable rh-mariadb102-mariadb

Initialize the database
[ root@zabbix ~]# mysql_secure_installation
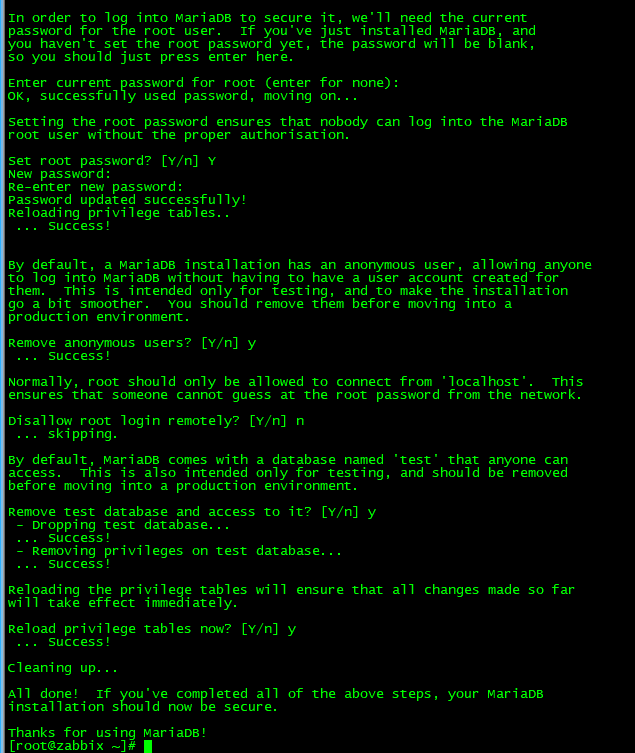
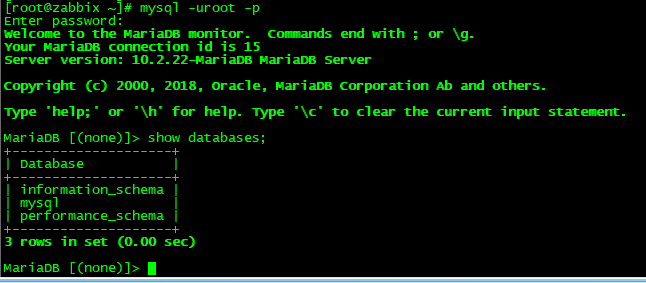
Verify that the database is installed successfully
If there is a firewall
[ root@zabbix ~]# firewall-cmd --add-service=mysql --permanent
[ root@zabbix ~]# firewall-cmd --reload
Two, install Zabbix-Server
- Install zabbix-release-4.2-2.el7.noarch.rpm
rpm -Uvh https://repo.zabbix.com/zabbix/4.2/rhel/7/x86_64/zabbix-release-4.2-2.el7.noarch.rpm
2 )yum -y install zabbix-server-mysql zabbix-web-mysql zabbix-agent
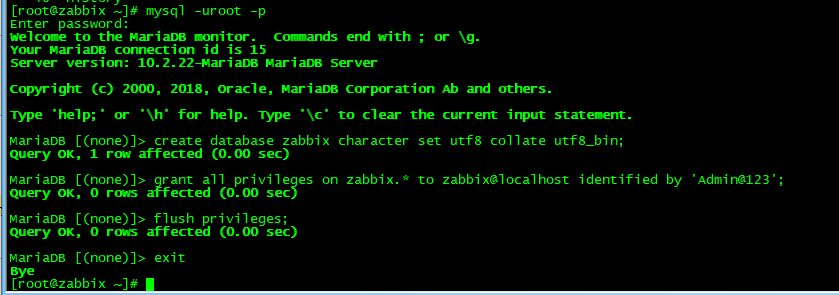
3 ) Initialize the database, create zabbix user and zabbix database
[ root@zabbix ~]# mysql -uroot -p
Enter password:
Welcome to the MariaDB monitor. Commands end with ; or \g.
Your MariaDB connection id is 15
Server version: 10.2.22-MariaDB MariaDB Server
Copyright (c) 2000, 2018, Oracle, MariaDB Corporation Ab and others.
Type 'help;' or '\h' for help. Type '\c' to clear the current input statement.
MariaDB [(none)]> create database zabbix character set utf8 collate utf8_bin;
Query OK, 1 row affected (0.00 sec)
MariaDB [(none)]> grant all privileges on zabbix.* to zabbix@localhost identified by 'Admin@123';
Query OK, 0 rows affected (0.00 sec)
MariaDB [(none)]> flush privileges;
Query OK, 0 rows affected (0.00 sec)
MariaDB [(none)]> exit
- Import zabbix table data
cd /usr/share/doc/zabbix-server-mysql-4.2.5/
gzip -d create.sql.gz
mysql -uzabbix -p zabbix < create.sql

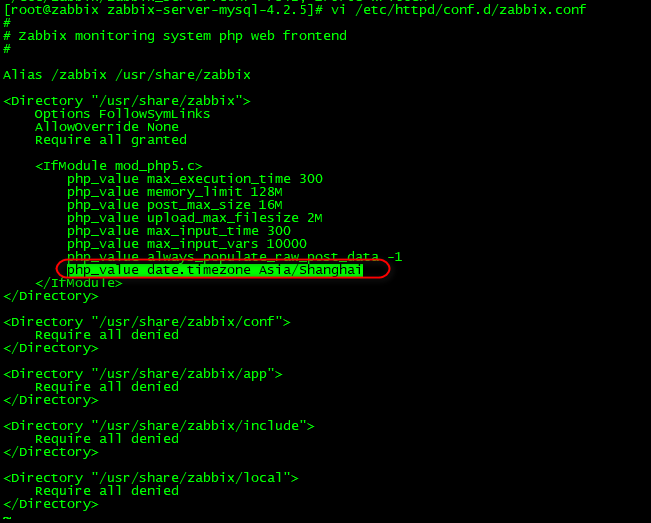
5 ) Modify the configuration zabbix_server.conf file and /etc/httpd/conf.d/zabbix.conf configuration file
vi /etc/zabbix/zabbix_server.conf
DBHost=localhost
DBPassword=Admin@123 (the password of the database)
vi /etc/httpd/conf.d/zabbix.conf, modify the time zone
- Start zabbix-server zabbix-agent httpd service, and set it to start automatically
[ root@zabbix ~]# systemctl restart zabbix-server zabbix-agent httpd
[ root@zabbix ~]# systemctl enable zabbix-server zabbix-agent httpd
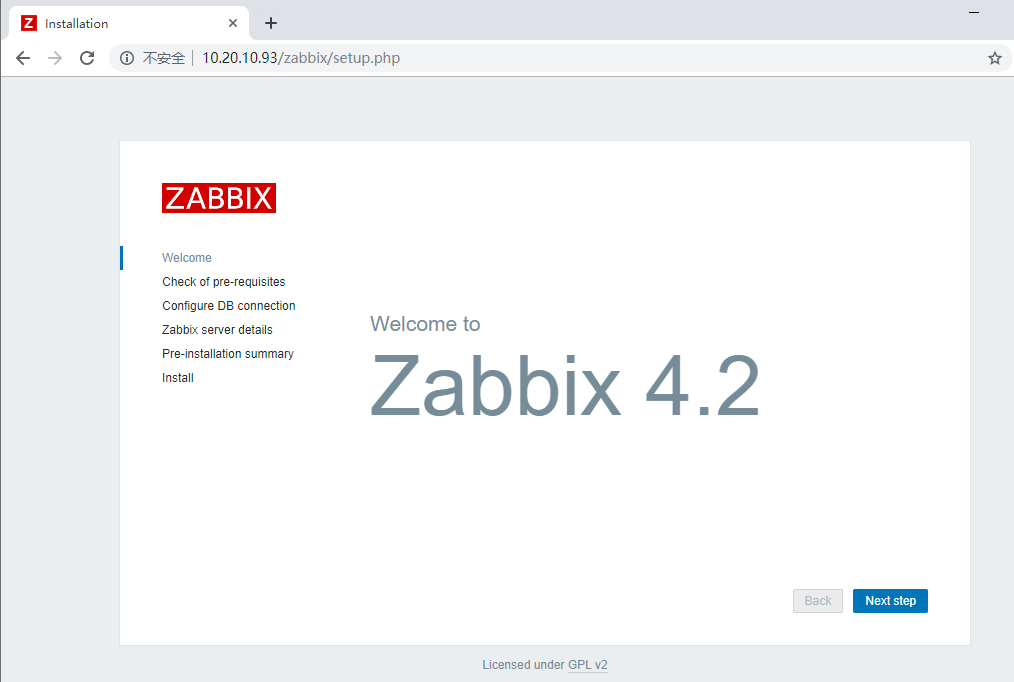
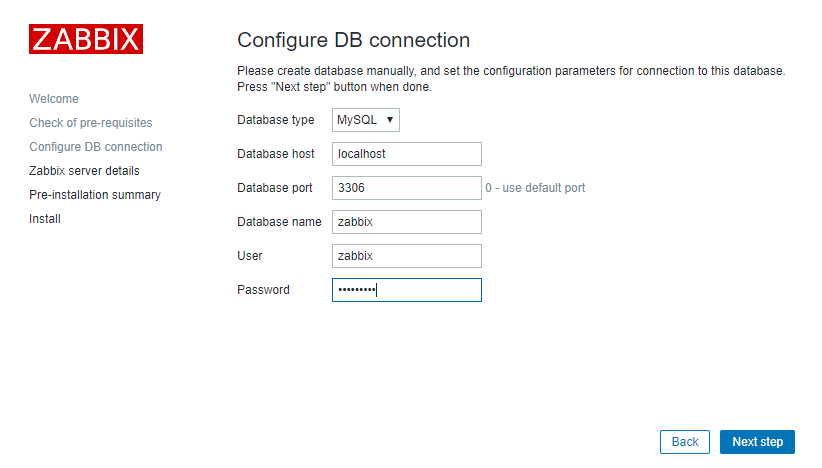
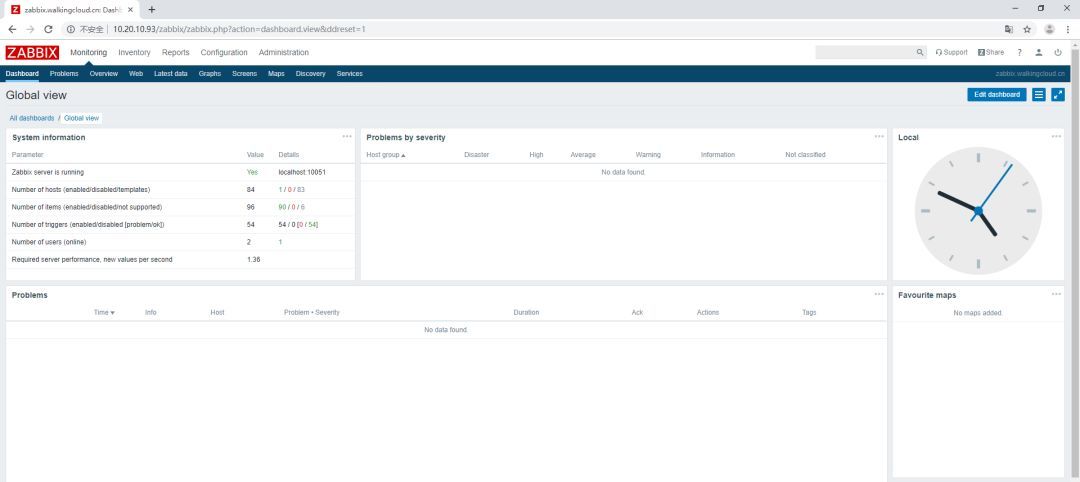
- Perform web initialization

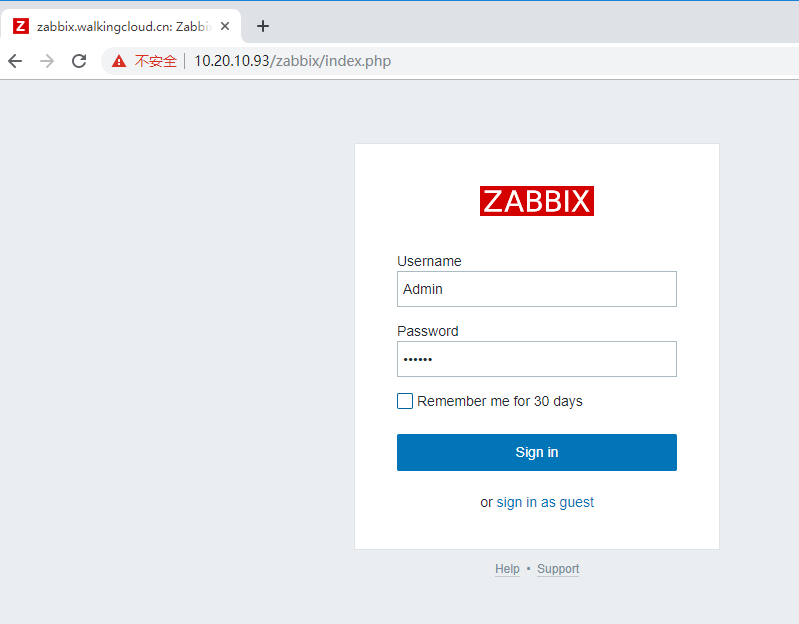
The initial account Admin, password zabbix
3. Agent installation and monitoring resource addition
Take a host of CentOS6.9 as an example
- rpm -ivh install agent
rpm -ivh zabbix-agent-4.2.5-1.el6.x86_64.rpm
- Modify the configuration file to specify the IP of the Server
vi /etc/zabbix/zabbix_agentd.conf
Server=10.20.10.93
ServerActive=10.20.10.93
- Enable agent and set agent service to start automatically
[ root@localhost ~]# service zabbix-agent start
Starting Zabbix agent: [ OK ]
[ root@localhost ~]# chkconfig zabbix-agent on
[ root@localhost ~]# chkconfig zabbix-agent --list
zabbix-agent 0:off 1:off 2:on 3:on 4:on 5:on 6:off
- Add a host on the Zabbix Web management interface, set the template

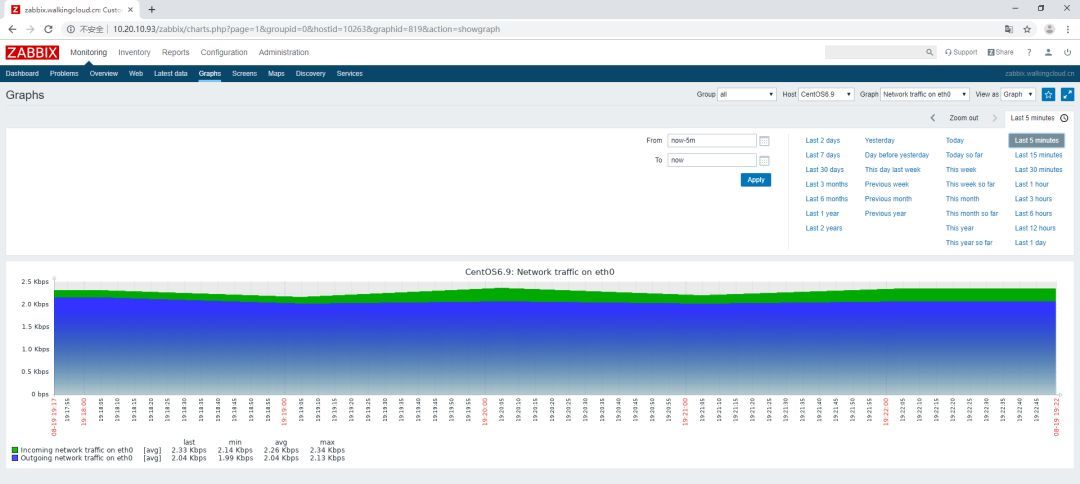
- Verify the effect, such as viewing network port traffic information
Recommended Posts