How to install gcc compiler faster under Ubuntu

Recently, the operating system started to take experimental classes. I glanced at the experiment catalog and saw the words "gcc", which suddenly evoked bad memories. I remember I tried to install gcc on my computer’s virtual machine last semester when I was in the group. However, the speed was 0% every time. After a few hours, I was motionless, which was very crashing. At that time, I knew that it was a software source problem, but I didn't know what I was thinking about, and the source change failed. Later, I decided to use the computer in the school computer room to get it, so I didn't care about this problem. But now is a special period (online class), all experiments have to be done on my own computer, so I decided to spend some time to solve this problem.
Change source###
As usual, when I was about to use sudo apt update to check the update, I was stuck at 0% as always, so the first step to install gcc is to change the source. Find the sources.list file under the /etc/apt/ folder. This file is the configuration file used by the package management tool apt to record the location of the package repository. You can open it and have a look. The format of each line is similar to deb http:*//mirrors.aliyun.com/ubuntu/ bionic main restricted universe multiverse*, deb is the file type, the middle is the mirror address, and bionic is The version number, the rest is the package classification.
Since you want to change the source, you must edit this file. Since this file is more important, we first make a backup with sudo cp sources.list sources.list.bak. Later when we want to edit this file, it will prompt us that we do not have permission to modify it. Because we log in as a normal user by default, the file is only open to us with read-only permissions. There are two ways for us to modify this file.
Modify file read and write permissions
Simple and crude method, use directly:
sudo chmod 777/etc/apt/sources.list
Modify file permissions to the highest 777. Originally, the file is only open to ordinary users with read-only permission, so the setting opens the read, write, and execute permissions, and we can modify the content of the file. (But it doesn’t seem to be good to change the permissions of important files randomly?)
root login graphical interface
To be honest, if you use this method just to modify files, it is troublesome and unnecessary. However, after logging in to the graphical interface as root, various file operations will be more convenient (the permissions are open), and the command line no longer requires sudo, so it is barely a solution.
To be safe, Ubuntu does not allow root login to the graphical interface by default, so we need to make some modifications.
Step 1: Log in to the system as a normal user, and then create the root user's password through sudo passwd root (if you have created it, you can ignore this step), and then sudo su to switch to the root user. Now, our terminal is switched to root, but the login identity is still a normal user.
Step 2: Open the file as root via sudo gedit /usr/share/lightdm/lightdm.conf.d/50-ubuntu.conf (the default is read-only, ordinary users cannot edit it), and add the following at the end of the text Two lines and save:
greeter-show-manual-login=true
all-guest=false
Step 3: Open the file as root via sudo gedit /etc/pam.d/gdm-autologin, comment out the following line and save:
auth required pam_succeed_if.so user != root quiet_success
Open the gdm-password file in the same way, and note the same as above.
Step 4: Open the file as root through sudo gedit /root/.profile, replace mesg n || true at the end of the file with tty -s&&mesg n || true, and save.
Step 5: Restart the system and it will be ok. By default, only the user name of the ordinary user is displayed. Click on the below Not listed? to manually enter the root user name and corresponding password, so that you can log in to the graphical interface as root.
Then you can right-click to view the properties of the sources.list file, you can see that we have read and write permissions.
Install gcc
The next step is simple. The mirror in the sources.list file is not domestic by default, so we empty the contents (we backed it up at the beginning, and can restore it if something goes wrong). In the next step, some blogs on the Internet may say that you need to manually copy and paste the domestic mirror address by yourself. In fact, it does not need to be so troublesome. The official provides a method to change the source (of course, you can also go online to find the source, here is Don't say it).
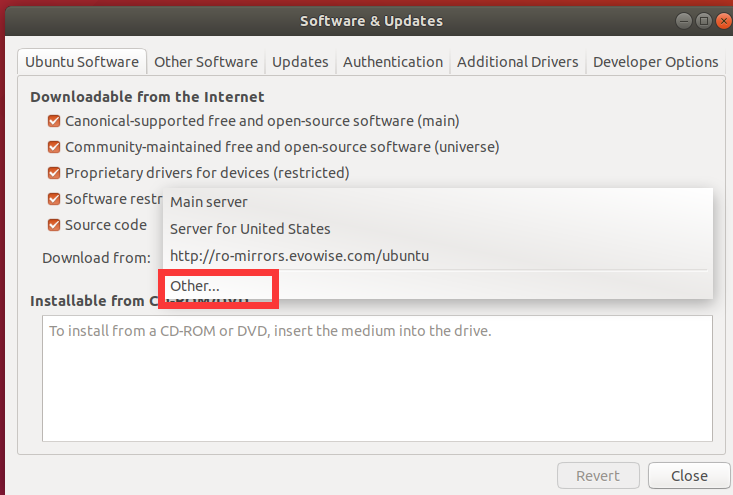
Search for "software & update" (the Chinese version is software and update"), click to open. Here you can check the first tab, and then select "others" in "download from":
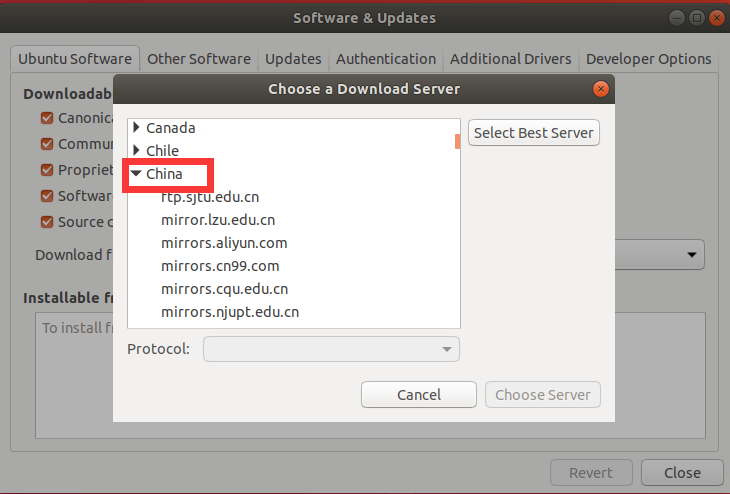
This will pop up a list of download servers, and then we can manually select a domestic mirror, such as Alibaba Cloud.
Of course, you can also directly click "select best server" on the right side, in this case, it will automatically match the server with the best speed. It will take about a few minutes to test:

After reminding you to reload, click OK:

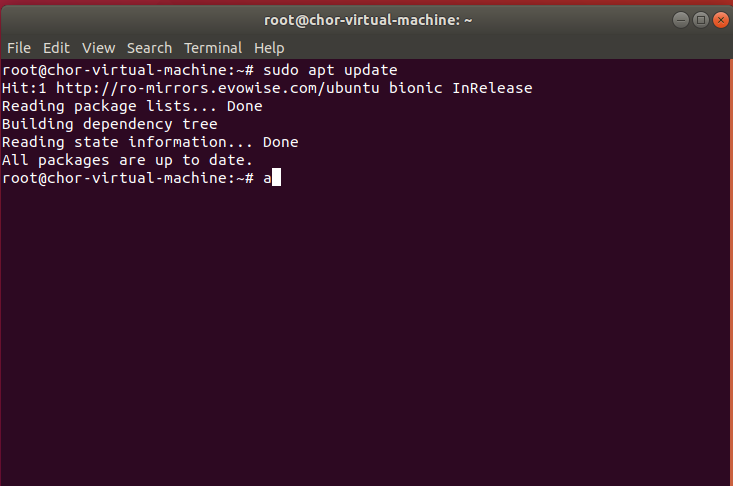
Now we come back to sudo apt update, we can see that the speed is very fast, there is no lagging situation (it is so cool and there is no way!):
Then install gcc. But we do not directly install gcc separately here, but install the build-essential package provided by Ubuntu through sudo apt install build-essential, which relies on gcc and g++, so as long as this package is installed, gcc and g++ will be automatically It will be installed too.
Finally, we use gcc -v to check whether gcc is successfully installed:
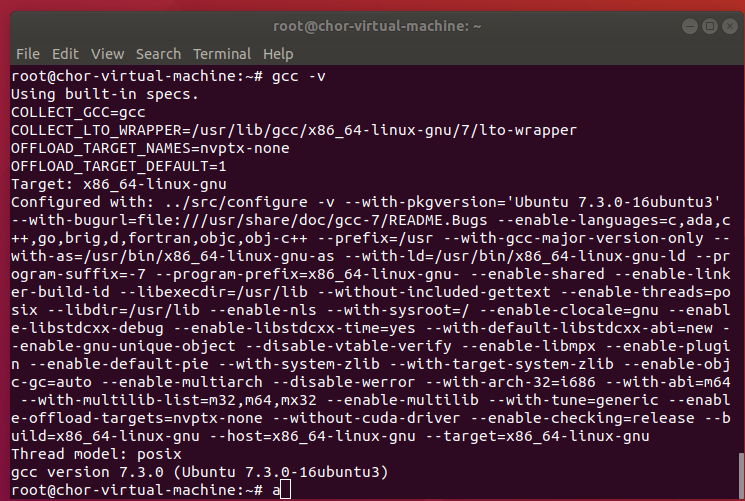
That's it!
Recommended Posts