Install MySQL under Ubuntu 18.04 (graphic tutorial)
Tip: The following operations are performed under root authority.
Check if MySQL is installed:
dpkg -l | grep mysql
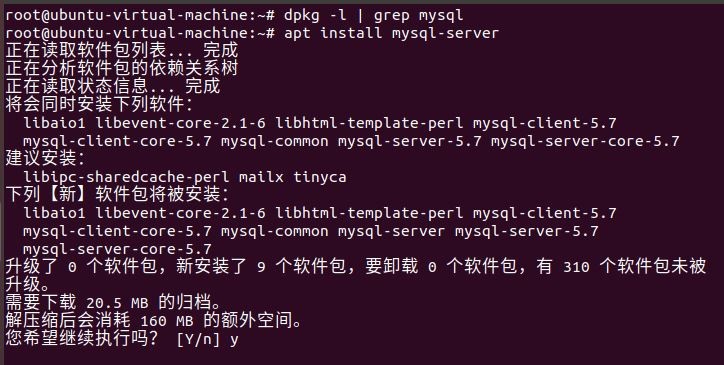
Install MySQL:
apt install mysql-server
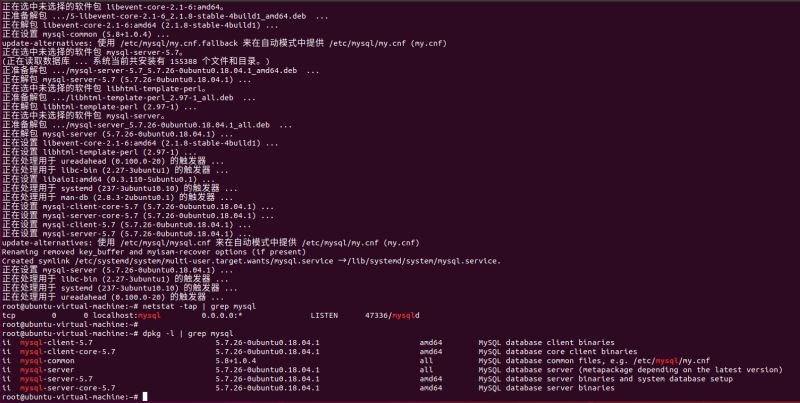
After the installation is complete, you can use the following command to check whether the installation is successful:
netstat -tap | grep mysql
After checking the above command, if you see that the mysql socket is in the LISTEN state, the installation is successful.
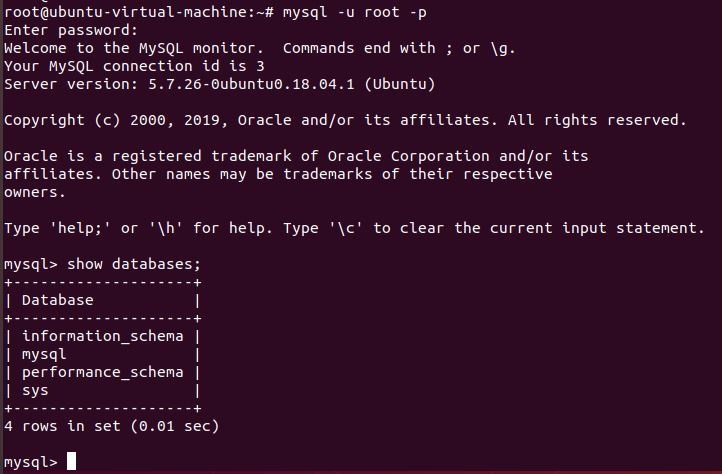
You can log in to the mysql database through the following command:
mysql -u root -p
- u represents the user name that you chose to log in, -p represents the password of the user who logged in, now there is no password in the mysql database, and press Enter directly at Enter password: to enter the mysql database.
Then through show databases; you can view all current databases.
Next, in order to ensure the security and normal operation of the database, the database is initialized. This initialization operation involves the following 5 steps.
(1) Install the verification password plug-in.
(2) Set the special password of the root administrator in the database.
(3) Then delete the anonymous account and use the root administrator to log in to the database remotely to ensure the security of the business running on the database.
(4) Delete the default test database and cancel a series of access permissions for the test database.
(5) Refresh the authorization list to make the initialized settings take effect immediately.
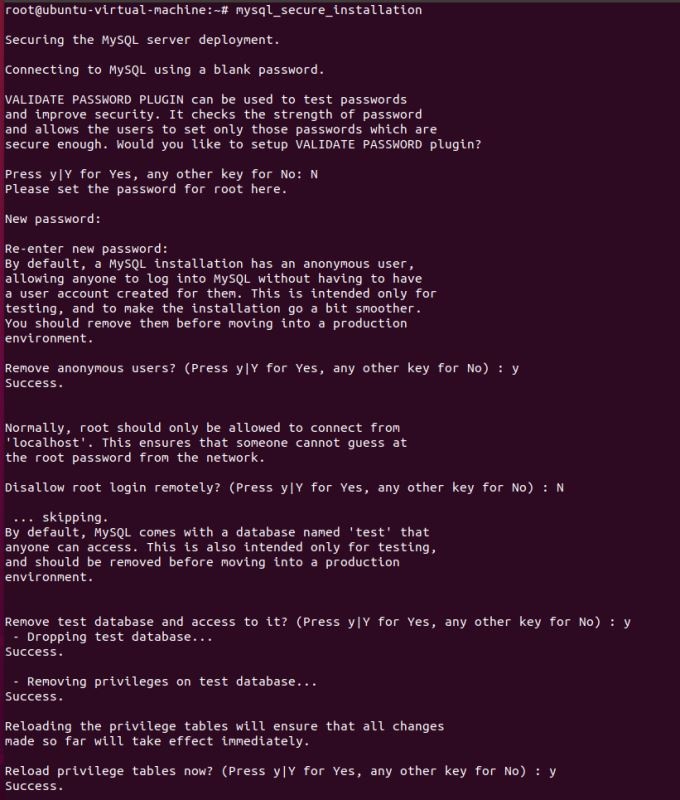
For the above steps of database initialization, I made a simple note next to the output information below.
root@ubuntu-virtual-machine:~# mysql_secure_installation
Securing the MySQL server deployment.
Connecting to MySQL using a blank password.
VALIDATE PASSWORD PLUGIN can be used to test passwords
and improve security. It checks the strength of password
and allows the users to set only those passwords which are
secure enough. Would you like to setup VALIDATE PASSWORD plugin? #Do you want to install the verification password plugin?
Press y|Y for Yes, any other key for No: N # Here I choose N
Please set the password for root here.
New password: #Enter the database password to be set for the root administrator
Re-enter new password: #Enter the password again
By default, a MySQL installation has an anonymous user,
allowing anyone to log into MySQL without having to have
a user account created for them. This is intended only for
testing, and to make the installation go a bit smoother.
You should remove them before moving into a production
environment.
Remove anonymous users? (Press y|Y for Yes, any other key for No): y #Delete anonymous accounts
Success.
Normally, root should only be allowed to connect from
‘localhost’. This ensures that someone cannot guess at
the root password from the network.
Disallow root login remotely? (Press y|Y for Yes, any other key for No): N #Forbid root administrator to log in remotely, here I did not prohibit
… skipping.
By default, MySQL comes with a database named ‘test’ that
anyone can access. This is also intended only for testing,
and should be removed before moving into a production
environment.
Remove test database and access to it? (Press y|Y for Yes, any other key for No): y #Delete the test database and cancel access to it
– Dropping test database…
Success.
– Removing privileges on test database…
Success.
Reloading the privilege tables will ensure that all changes
made so far will take effect immediately.
Reload privilege tables now? (Press y|Y for Yes, any other key for No): y #Refresh the authorization table to make the initialized settings take effect immediately
Success.
All done!
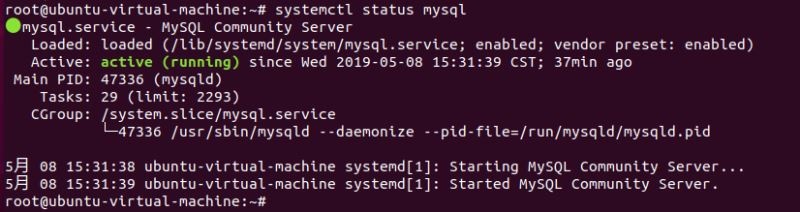
Check the mysql service status:
systemctl status mysql
The following results show that the mysql service is running normally:
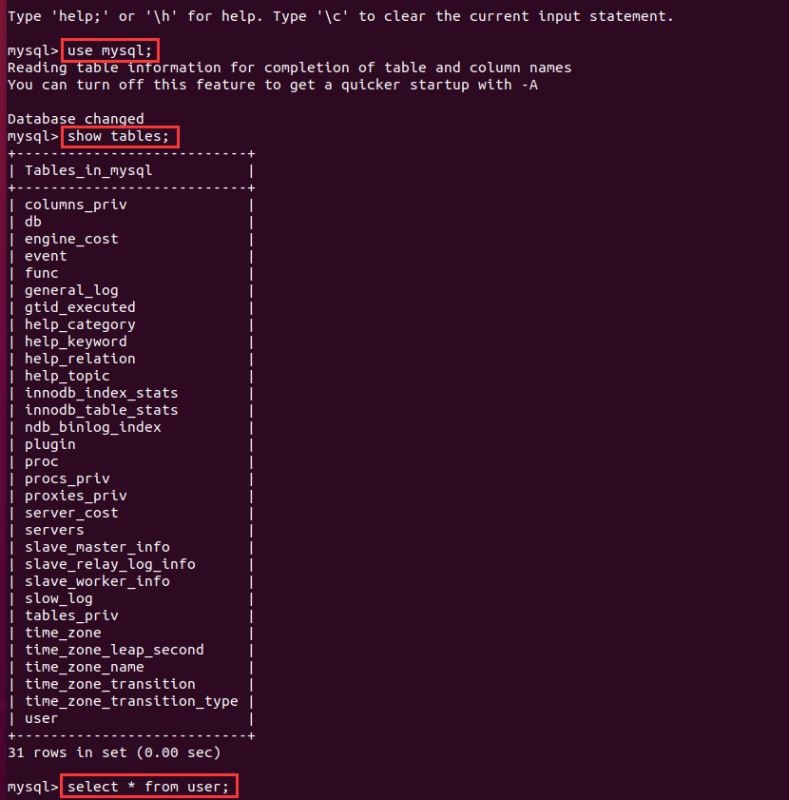
Use the mysql -u root -p command again, enter the password you just set at Enter password: and press Enter to enter the mysql database.
Use the use mysql; command to open the database named by mysql, and display the tables of the current database: show tables; query the data in the user table: select * from user; (the user table contains all the account information of the mysql database)
Now to configure mysql to allow remote access, first edit the /etc/mysql/mysql.conf.d/mysqld.cnf configuration file:
vim /etc/mysql/mysql.conf.d/mysqld.cnf
Comment out bind-address = 127.0.0.1

Save and exit, then enter the mysql database and execute the authorization command:
mysql -u root -p
mysql> grant all on *.* to root@'%' identified by 'Your password'with grant option;
mysql> flush privileges; #Refresh permissions
mysql> exit
Then execute the exit command to exit the mysql service, and then execute the following command to restart mysql:
systemctl restartmysql
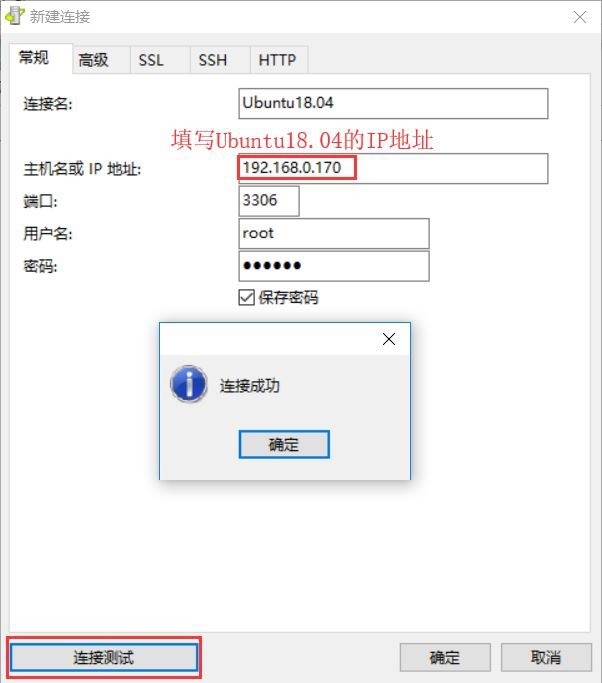
Now under Windows, you can use Navicat graphical tools to remotely connect to the MySQL database under Ubuntu, and enter the password for the newly authorized remote permissions.
Share here by the way: Navicat for MySQL 10.1.7 installation package
Link: https://pan.baidu.com/s/12P1BcvQsRetBY0jGIvwILw&shfl=shareset Extraction code: 8bft
OK, the installation of MySQL under Ubuntu 18.04 has been completed.
During the operation, I encountered the following error:
E: Unable to obtain lock /var/lib/dpkg/lock-frontend – open (11: The resource is temporarily unavailable)
E: Unable to acquire the dpkg frontend lock (/var/lib/dpkg/lock-frontend), is another process using it?
Solution, refer to the article: https://www.zalou.cn/article/172460.htm
to sum up
The above is the method of installing MySQL under Ubuntu 18.04 introduced by the editor. I hope it will be helpful to you. If you have any questions, please leave me a message. The editor will reply to you in time. Thank you very much for your support to the ZaLou.Cn website!
If you think this article is helpful to you, welcome to reprint, please indicate the source, thank you!
Recommended Posts