centos7 install lamp
Recently, I somehow became obsessed with the various configurations built in the php environment. No matter what version of CentOS, I always want to try it, step on the pit, and find something to do for yourself. The steps are directly
How to set up a lamp(CentOS7+Apache+MySQL+PHP) environment#
Summarize the steps to build my LAMP environment.
Start to build our LAMP environment step by step.
One, install the virtual machine
Two, install CentOS7
Note: The following installations, I use root privileges.
Three, install Apache
- installation
yum -y install httpd - Open apache service
systemctl start httpd.service - Set the apache service to start
systemctl enable httpd.service - Verify that the apache service is installed successfully
Enter the ip address of the virtual machine in the local browser, and the CentOS7 method to view the ip address is:
ip addr
(Alibaba Cloud does not need to check in this way, the external network ip has been written for you in your host list;)
Here is the unsuccessful visit
(Alibaba Cloud uses the external network to access, can be successful, do not need to do the following steps)
After checking the information, it is said that CentOS7 uses Firewall-cmd, and CentOS7 previously used iptables firewall; if you want the external network to access the apache home directory, you need to do the following:
firewall-cmd --permanent --zone=public --add-service=http``firewall-cmd --permanent --zone=public --add-service=https``firewall-cmd --reload
Then visit the external network ip, if you see the apache default page-with the words Testing 123..., the apache service has been successfully installed;
Fourth, install PHP
- installation
yum -y install php - Restart apache service
systemctl restart httpdorsystemctl restart httpd.service
Then, you can write a php file and run it in the browser;
eg:
vi /var/www/html/info.php
i
<? php phpinfo(); ?>
Esc
: wq
Then, enter 192.168.1.1/info.php in your computer browser
Run, some php information will appear
Five, install MySQL
I installed MariaDB here
- installation
yum -y install mariadb-service mariadb - Start MySQL service
systemctl start mariadb.service - Set to start MySQL service at boot
systemctl enable mariadb.service - Set the password of the root account
mysql_secure_installation
Then there will be a string of things, you can read it carefully. If you are too lazy to read it, just press Enter when prompted. When you are asked to set a password, you can just enter the password you want, and then continue in Let you choose y/n, just Enter; when everything is over, you can entermysql -uroot -pto verify;
Six, link PHP and MySQL
yum search php, choose the installation you need: yum -y install php-mysql
Seven, install commonly used PHP modules
For example, GD library, curl, mbstring,...
- installation:
yum -y install php-gd php-ldap php-odbc php-pear php-xml php-xmlrpc php-mbstring php-snmp php-soap curl curl-devel - Restart apache service
systemctl restart httpd.service
Then, run info.php in the browser again, you will see the information of the installed modules;
At this point, the LAMP environment has been set up, but the version is relatively low, follow-up to continue to update the upgraded version on this basis···
supplement:
1. System environment#
The system version after yum update upgrade is
[ root@yl-web yl]# cat /etc/redhat-release
CentOS Linux release 7.1.1503(Core)
Two, mysql installation#
Generally, the information given on the Internet is
# yum install mysql
# yum install mysql-server
# yum install mysql-devel
The installation of mysql and mysql-devel were successful, but the installation of mysql-server failed, as follows:
[ root@yl-web yl]# yum install mysql-server
Loaded plugins: fastestmirror
Loading mirror speeds from cached hostfile
 * base: mirrors.sina.cn
 * extras: mirrors.sina.cn
 * updates: mirrors.sina.cn
No package mysql-server available.
Error: Nothing to do
Checking the information found that the CentOS 7 version removed the MySQL database software from the default program list and replaced it with mariadb.
There are two solutions:
1、 Method 1: Install mariadb
The MariaDB database management system is a branch of MySQL, which is mainly maintained by the open source community and is licensed under GPL. One of the reasons for the development of this branch is that after Oracle acquired MySQL, there is a potential risk of closing MySQL to the source, so the community uses branching to avoid this risk. The purpose of MariaDB is to be fully compatible with MySQL, including API and command line, so that it can easily become a substitute for MySQL.
Install mariadb, size 59 M.
[ root@yl-web yl]# yum install mariadb-server mariadb
The related commands of the mariadb database are:
systemctl start mariadb #Start MariaDB
systemctl stop mariadb #Stop MariaDB
systemctl restart mariadb #Restart MariaDB
systemctl enable mariadb #Set boot up
So start the database first
[ root@yl-web yl]# systemctl start mariadb
Then you can use mysql normally
[ root@yl-web yl]# mysql -u root -p
Enter password:
Welcome to the MariaDB monitor.  Commands end with; or \g.
Your MariaDB connection id is 3
Server version:5.5.41-MariaDB MariaDB Server

Copyright(c)2000,2014, Oracle, MariaDB Corporation Ab and others.

Type 'help;' or '\h'for help. Type '\c' to clear the current input statement.

MariaDB [(none)]> show databases;+--------------------+| Database           |+--------------------+| information_schema || mysql              || performance_schema || test               |+--------------------+4 rows inset(0.00 sec)

MariaDB [(none)]>
MariaDB [(none)]> is displayed after installing mariadb, which may seem a bit unaccustomed. Here is the second method.
2、 Method 2: Download and install mysql-server from the official website
# wget http://dev.mysql.com/get/mysql-community-release-el7-5.noarch.rpm
# rpm -ivh mysql-community-release-el7-5.noarch.rpm
# yum install mysql-community-server
After the installation is successful, restart the mysql service.
# service mysqld restart
When mysql is installed for the first time, the root account has no password.
[ root@yl-web yl]# mysql -u root
Welcome to the MySQL monitor.  Commands end with; or \g.
Your MySQL connection id is 3
Server version:5.6.26 MySQL Community Server(GPL)Copyright(c)2000,2015, Oracle and/or its affiliates. All rights reserved.

Oracle is a registered trademark of Oracle Corporation and/or its
affiliates. Other names may be trademarks of their respective
owners.

Type 'help;' or '\h'for help. Type '\c' to clear the current input statement.

mysql> show databases;+--------------------+| Database           |+--------------------+| information_schema || mysql              || performance_schema || test               |+--------------------+4 rows inset(0.01 sec)

mysql>
set password
mysql>set password for'root'@'localhost'=password('password');
Query OK,0 rows affected(0.00 sec)

mysql>
No need to restart the database to take effect.
The following content during the mysql installation:
Installed:
 mysql-community-client.x86_64 0:5.6.26-2.el7                mysql-community-devel.x86_64 0:5.6.26-2.el7
 mysql-community-libs.x86_64 0:5.6.26-2.el7                  mysql-community-server.x86_64 0:5.6.26-2.el7

Dependency Installed:
 mysql-community-common.x86_64 0:5.6.26-2.el7

Replaced:
 mariadb.x86_64 1:5.5.41-2.el7_0          mariadb-devel.x86_64 1:5.5.41-2.el7_0   mariadb-libs.x86_64 1:5.5.41-2.el7_0
 mariadb-server.x86_64 1:5.5.41-2.el7_0
So after installation, mariadb is automatically replaced and will no longer take effect.
[ root@yl-web yl]# rpm -qa |grep mariadb
[ root@yl-web yl]#
Three, configure mysql
1、 coding##
The mysql configuration file is /etc/my.cnf
Finally add the encoding configuration
[ mysql]default-character-set=utf8
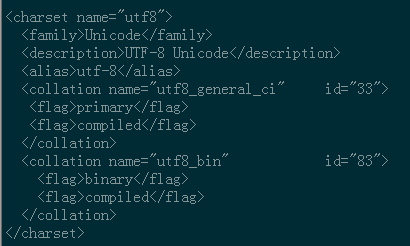
The character encoding here must be the same as in /usr/share/mysql/charsets/Index.xml.
2、 Remote connection settings##
Assign all permissions of all tables in all databases to the root user at all IP addresses.
mysql> grant all privileges on *.* to root@'%'identified by 'password';
If it is a new user instead of root, you must first create a new user
mysql>create user 'username'@'%' identified by 'password';
At this point, you can connect remotely.
Recommended Posts