The most complete centos installation tutorial in history
vmware mirror download and use:
vmware 12.x
- x is a relatively good version, with excellent stability and functionality. The supported versions of each system are also relatively new and comprehensive, suitable for teaching and personal use.
vmware15.x
The reason for choosing 15.x is because a certain major version of win10 requires a mandatory upgrade after the update. There is no way, just upgrade~ It is also good to use the latest version directly. This tutorial is based on 12.x, and the initial steps will be slightly different.
**1. vmware and centos mirror download address: **
- - - Copy link to open in browser
(Contains 12 and 15 virtual machine software, download is available)
https://pan.baidu.com/share/init?surl=zVvGtyVcKgEEBswlC0HHiw
Extraction code: bpxt
iso image (including centos7, centos6)
https://pan.baidu.com/share/init?surl=k7Gp90oqjRTPKopiFMpxYA
Extraction code: cktb
2. Go directly to vmware official website to download the latest version of the virtual machine:
vmware official website: https://www.vmware.com/
To download, you need to register an account in advance
Xiaobai can operate according to the picture, old bird skip download


vmware installation
All operations here are under windows. If you are using a mac system, you need to download the .dmg package.
1. Double-click the package of vmware15/12

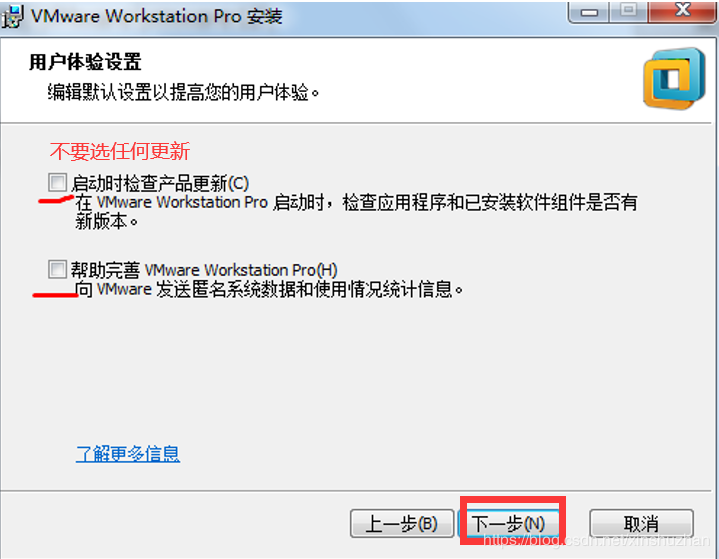
**2. Follow the prompts and click Next to install **
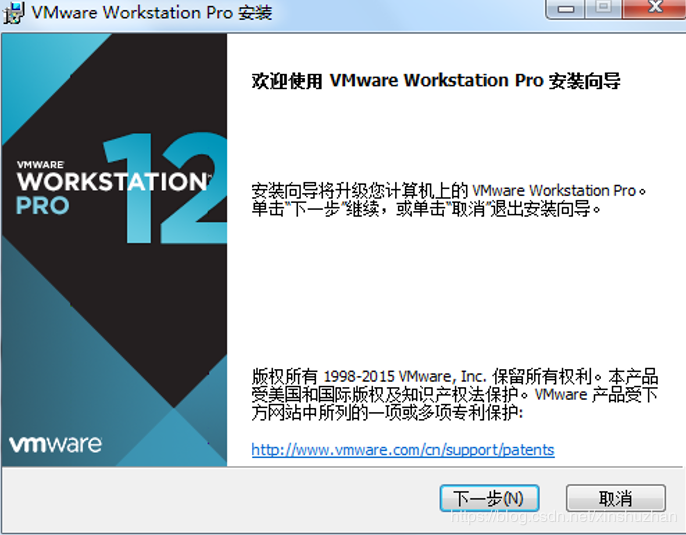


The license can be found in Baidu cloud disk or Baidu!


After completion, you can see the vmware12 icon on the desktop
3. Install virtual machine using vmware
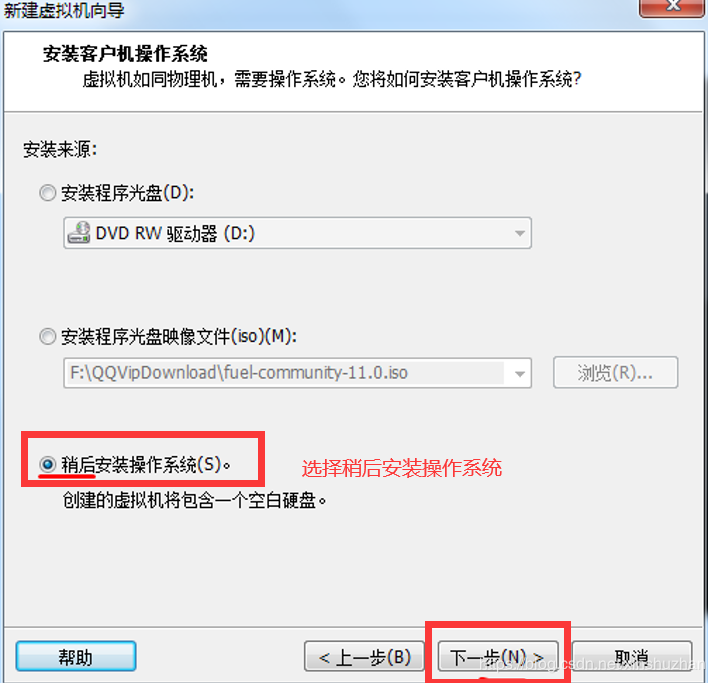
- Create a new virtual machine


Note: The name of the virtual machine should be defined to be easier to identify, not all called centos, in case you have 10 units and one of them wants to be deleted, you can't tell which one is.
You define the location of the storage virtual machine yourself, because the virtual machine file is relatively large, do not put it in the C drive.

If your physical cpu is 4 cores, it is recommended to use 4 cores, so that the later virtual machine runs faster.

Remarks: 2-4G of RAM will do, depending on the content of your computer. And even if you give 4G, the later virtual machines may not all occupy 4G, so it is a dynamic memory.

Note: Sometimes the company network does not allow bridge mode, this time you can change to NAT mode
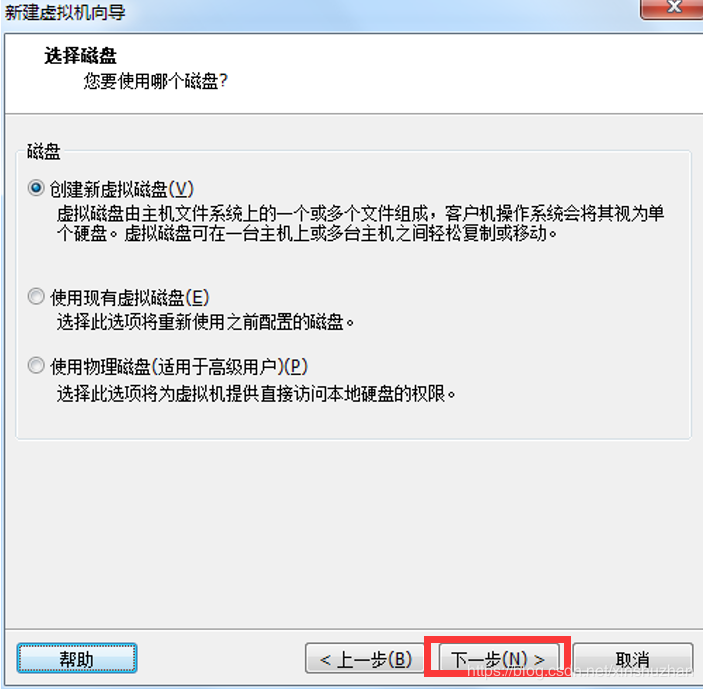

Remarks: It should be noted here that some experiments may require a hard disk of 20G or more, but 20G is sufficient for most experiments, so 20G is selected here. When it is not enough, add a new hard disk and format the partition to use.


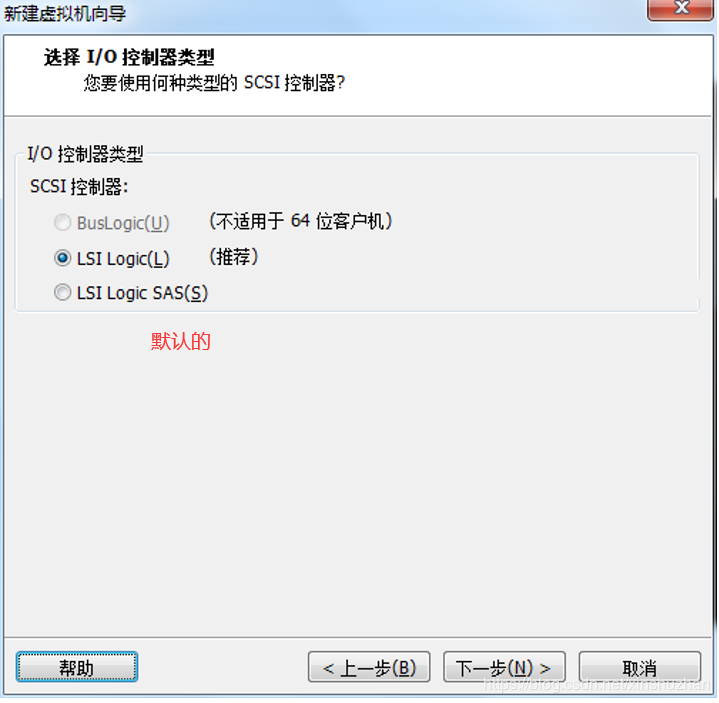
Here select custom hardware to set the path of the mirror, delete the printer and sound card

After clicking close, click finish
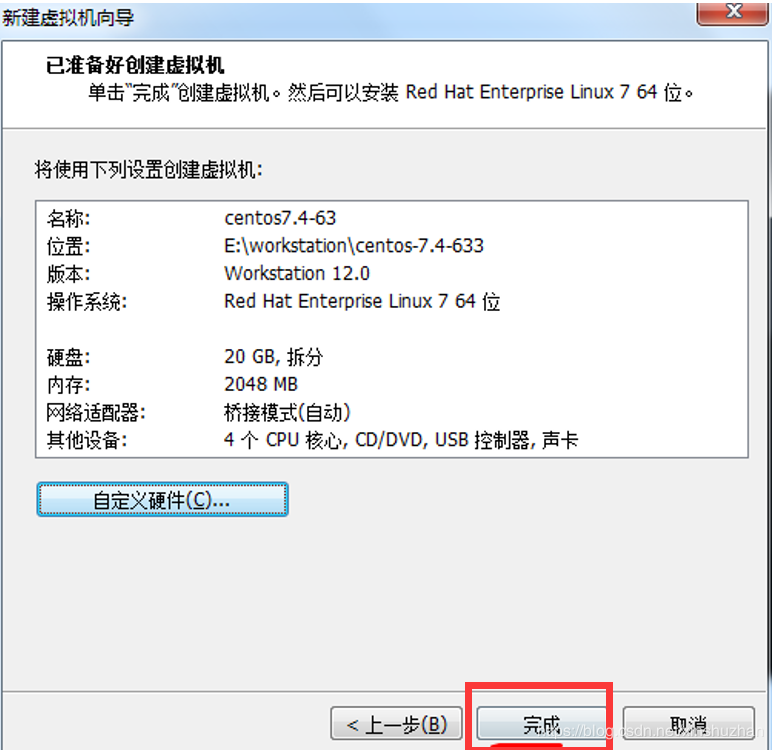
If there is no error reported here, it is basically done, but some students will appear as shown below:
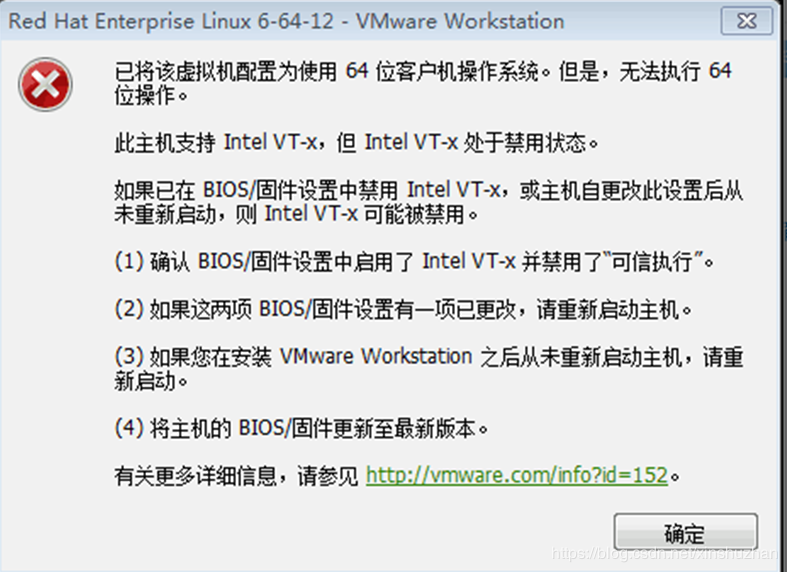
This kind of problem is generally because the BIOS does not support virtualization. We will explain in detail how to solve this problem at the end of the article. If you encounter it, you can jump directly to the end of the article.
4. Turn on the virtual machine to start installing the operating system
- Turn on the virtual machine


Remarks:
Interface description
Install CentOS 7 Install CentOS 7 Test this media&install CentOS 7 Test the installed CD image and install CentOS 7Troubleshooting to repair the fault, this will be mentioned later when repairing the Linux system that cannot be started
- Select install centos7 to start the installation
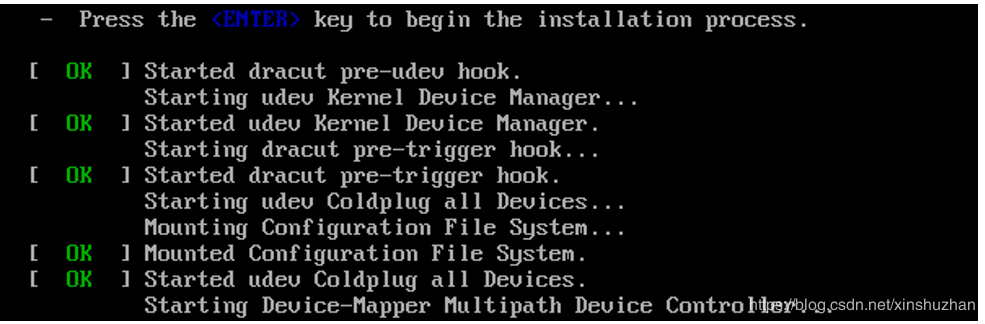
When the following picture appears, press Enter
- Select language: Chinese-Simplified Chinese (China)
Just start learning, it is recommended to use Chinese language, learning itself is anti-human, don't torture yourself, you are not a sufferer.

- Enter the one-stop installation interface (here is a big difference from centos6)
1 ) Time zone select Shanghai
2 ) Keyboard selection default
3 ) The installation source selects the default installation source
4 ) The choice of software package, it is recommended to use a server with GUI
Not to mention that all companies are minimization. You must first learn to think about minimization on the desktop. Learning needs to be done step by step. Not everyone can practice the eighteenth style of Jianglong Eighteen Palms.

5 ) The configuration of the partition can be selected by default, and the partition can be manually partitioned later.
Manual partition:

Select-Other storage options-Partition-I want to configure the partition, click "Finish" in the upper left corner, enter the following interface, in the partition scheme there are standard partitions, btrfs, LVM, LVM simple configuration, here you can select "standard partition".

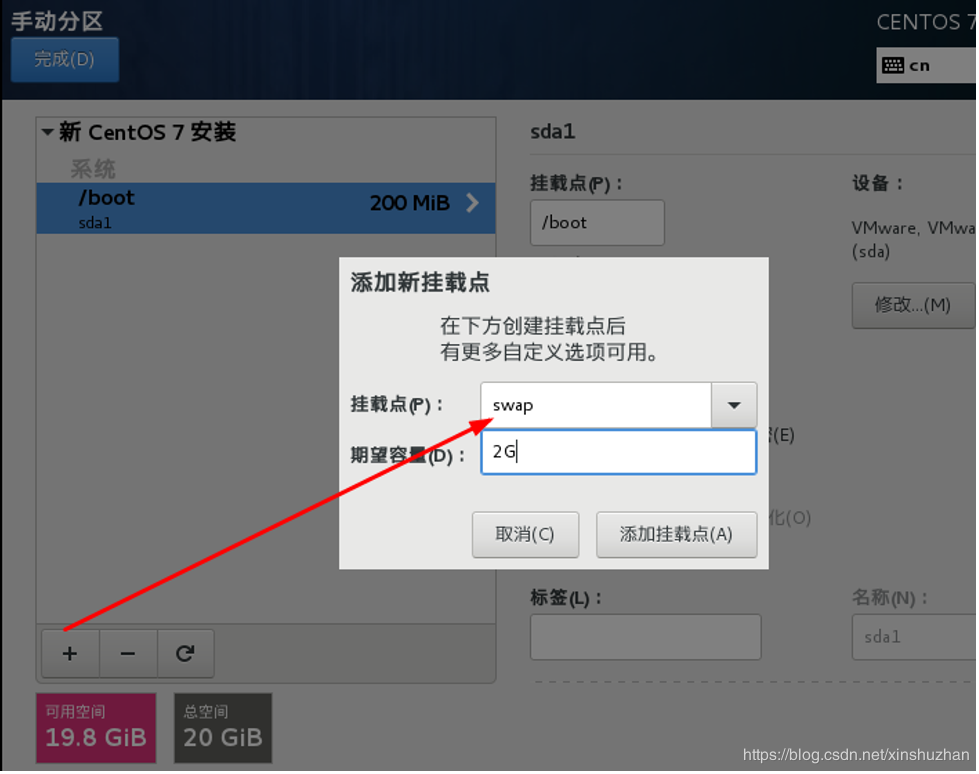
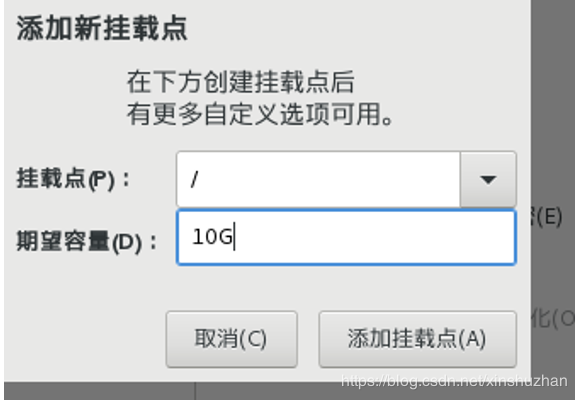
Then click to create a new partition. The partition is planned in advance. The /boot partition is 200M. Generally, the swap partition is 1.5~2 times the physical memory. When the physical machine memory is more than 16G, the swap partition can be 8-16G. /Root partition 10G, data partition can be created in actual work, generally separate data and system.
Create /boot partition as shown in figure
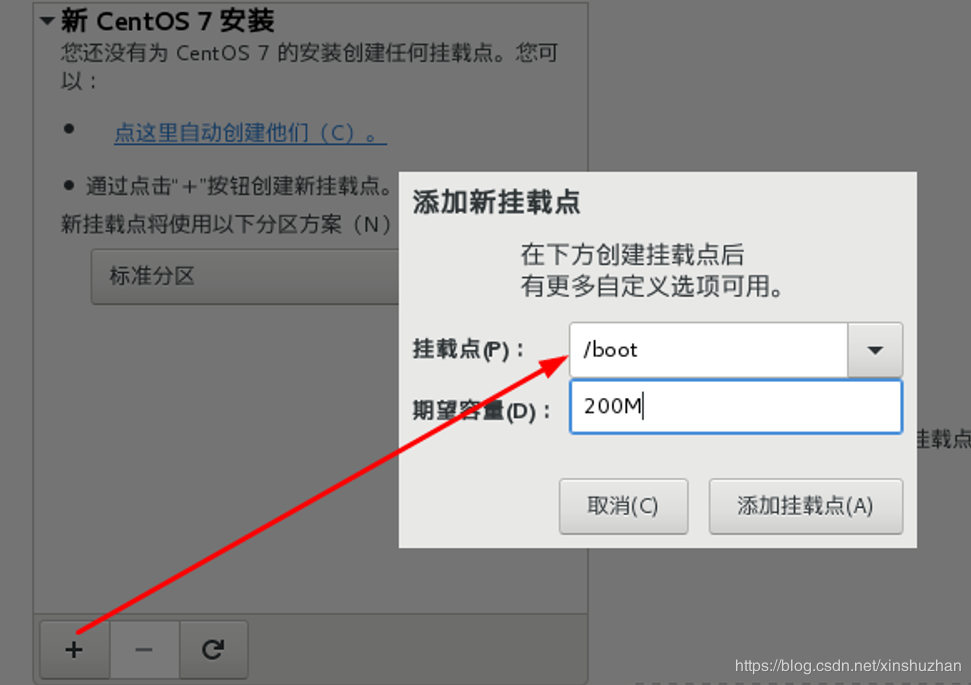
Note: Sometimes it is necessary to upgrade the kernel in the company. After the upgrade, the boot partition will become smaller, and zabbix will give an alarm, so the company can choose a 500M partition
Select the default standard partition for the device type. The file system type is xfs. Centos7 supports brtfs. It is not recommended for the production environment. The btrfs file system is not yet mature and is just a forward-looking technology.

Expansion: Many students can’t tell what a file system is
centos7 XFS
CentOS6 ext4
Create a swap partition (there is no swap partition in Alibaba Cloud by default, but the physical machine still needs it)
Create root partition
**After the partition is created, click the button, and the remaining space can be used to practice manual partitioning in later learning. **


Close kdump

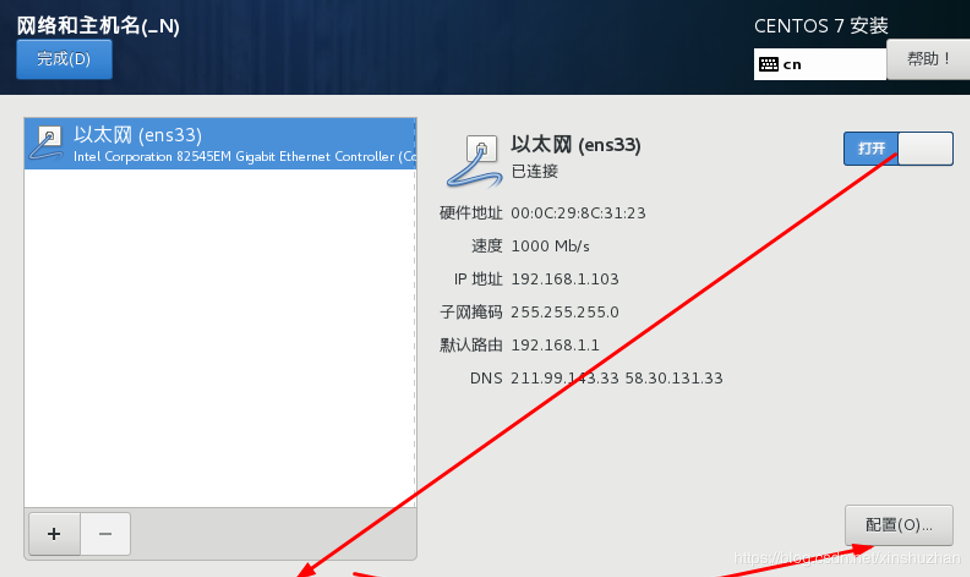
Network Configuration
Network configuration, the default centos7 is to close the network, we must open the Ethernet connection here, it will automatically obtain an IP address
You can use the default security policy

After all is completed, the stand-alone installation will start and the system will be installed

Enter the installation interface, here you need to configure the user name and password, root users and ordinary users must be set up

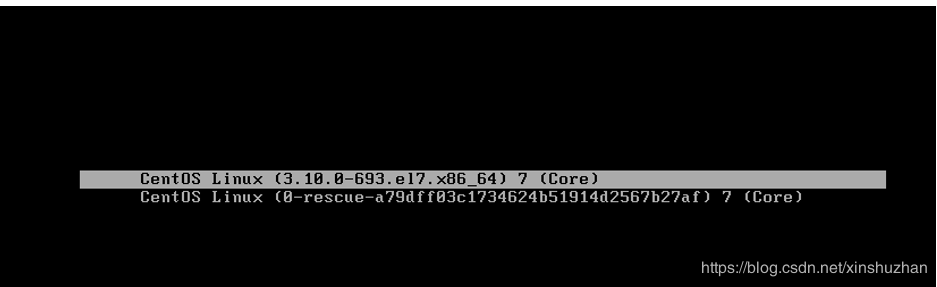
After the installation is complete, restart the server

**System startup is complete: **
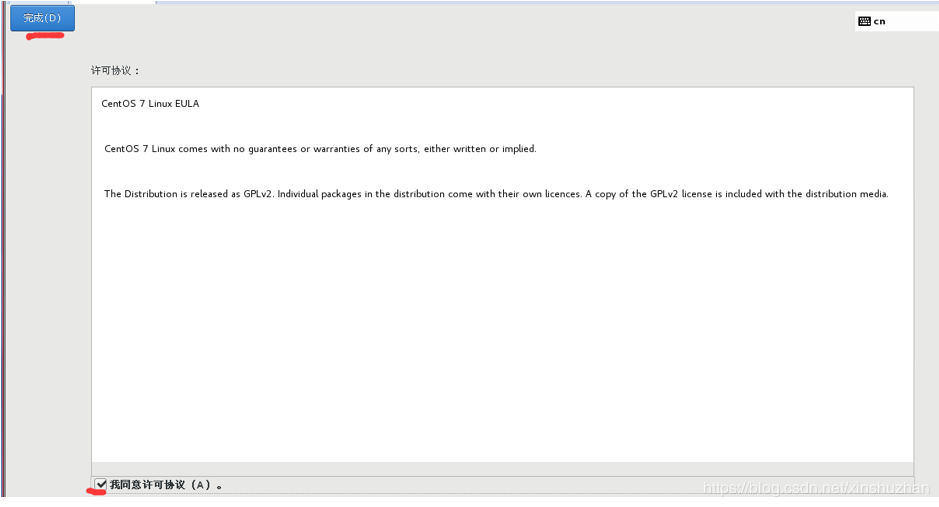
Start the configuration for the first time, click licensing to accept the license certification

Log in for the first time for Gnome-initial-setup (GNOME initialization settings)
Language selection, default is OK, go ahead

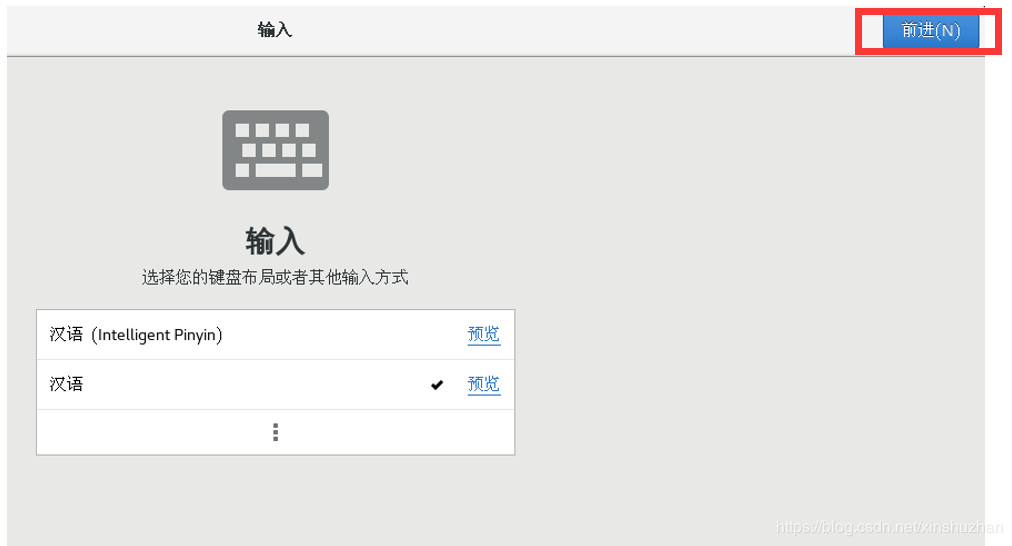
Go forward when you encounter the forward point, and click skip when you encounter skip
Finally, it appears as shown below:

After the operating system is installed, right click on a blank area on the screen-open the terminal

Basic configuration of centos7, check whether you can go online normally
ping www.baidu.com
Summary of common pits
1. When creating a Linux virtual machine, "intel vt -x cannot be opened when disabled" solution appears
Generally this happens, mostly because bios does not support virtualization
Take ASUS as an example:
Boot into bios f2 -f12 del
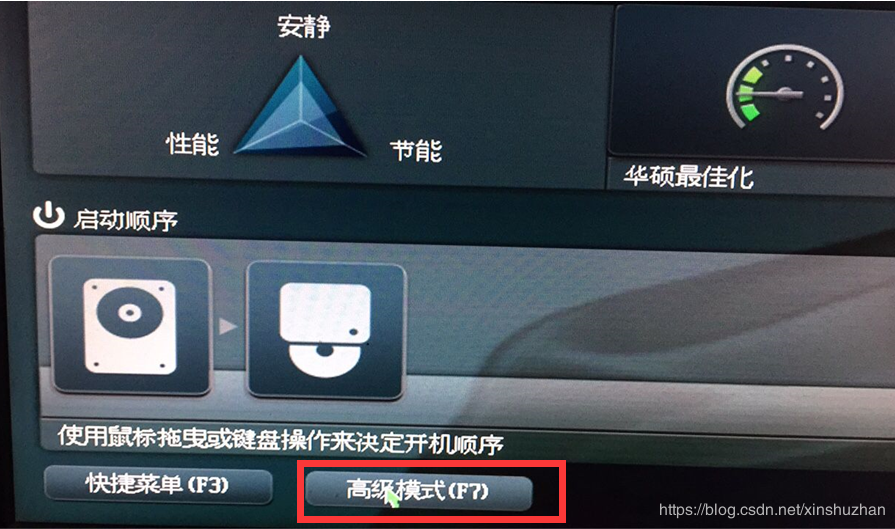


Steps: Enter advanced mode-enter advanced menu-open intel virtual technology

F10 save and exit.
2. Black screen when booting virtual machine
Run cmd as an administrator, enter the command: netsh winsock reset, press Enter, it prompts you to restart the computer after successfully resetting the network service
3. xxx link socket too many times
Solution:
"My Computer", right click, "Manage", find the service of the virtual machine, set all the services of the virtual machine to "started", and restart the virtual machine.
Recommended Posts