Install Oracle11gR2 database under CentOS6.9
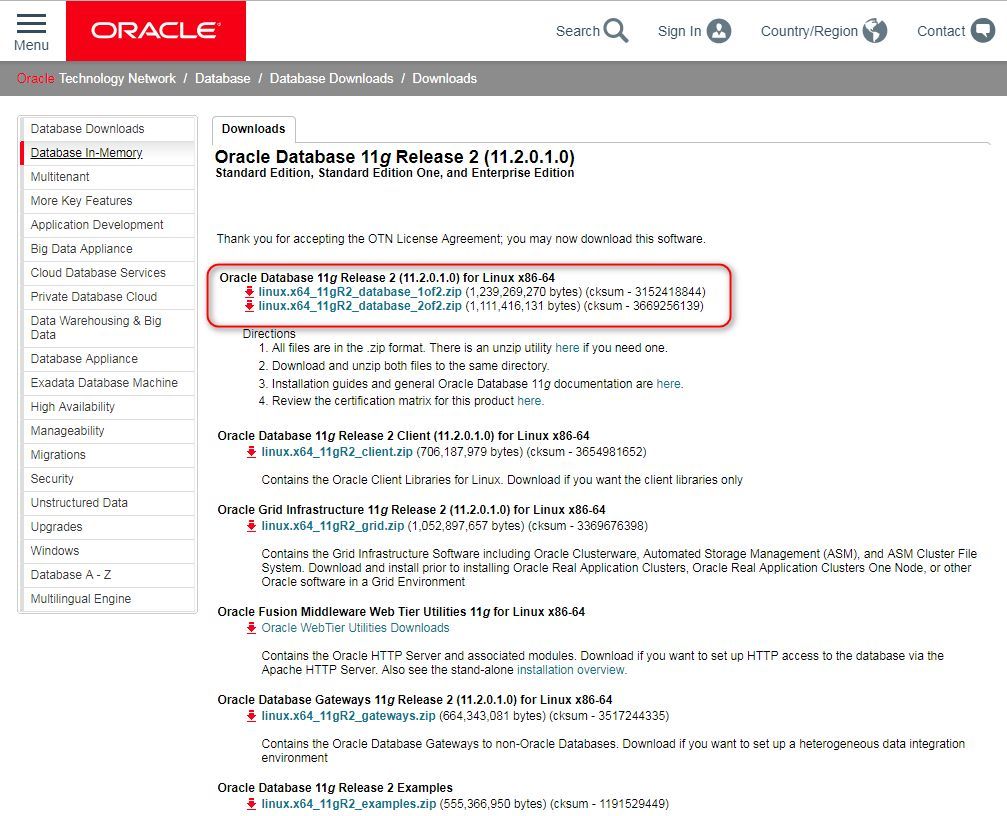
1、 Download the 11g R2 database Linux installation package from the Oracle official website
https://www.oracle.com/technetwork/database/enterprise-edition/downloads/112010-linx8664soft-100572.html
2、 You can refer to the official website installation guide document to check the installation environment of the Linux server
https://docs.oracle.com/cd/E11882_01/install.112/e24326/toc.htm
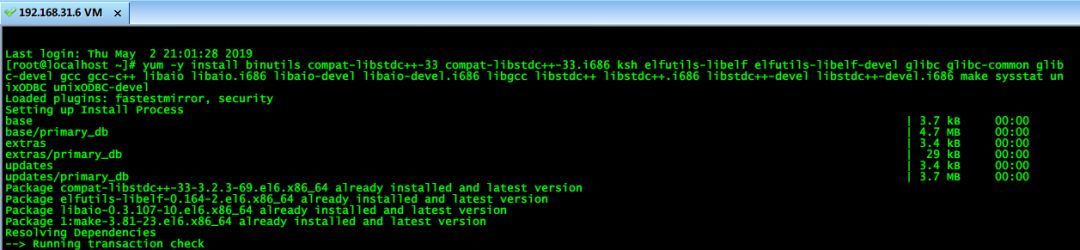
1) Install the RPM support package required by Oracle
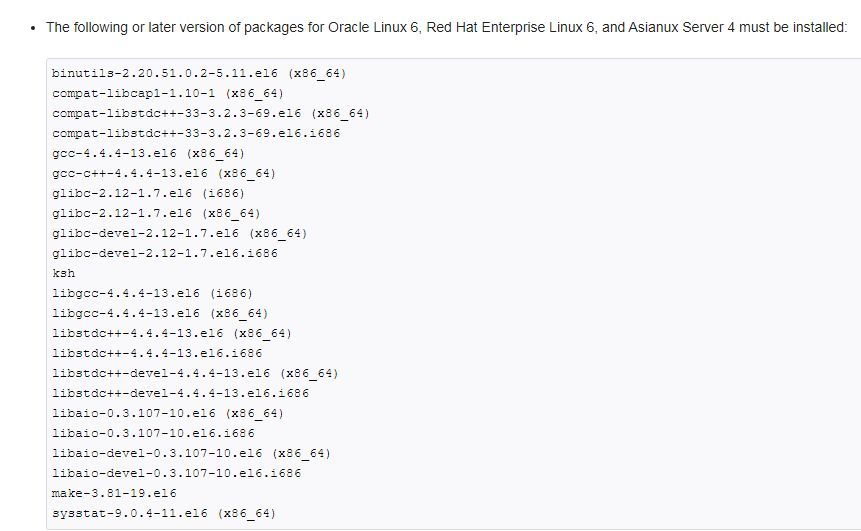
yum -y install binutils compat-libstdc++-33 compat-libstdc++-33.i686 ksh elfutils-libelf elfutils-libelf-devel glibc glibc-common glibc-devel gcc gcc-c++ libaio libaio.i686 libaio-devel libaio-devel.i686 libgcc libstdc++ libstdc++.i686 libstdc++-devel libstdc++-devel.i686 make sysstat unixODBC unixODBC-devel
2) Configure kernel parameters
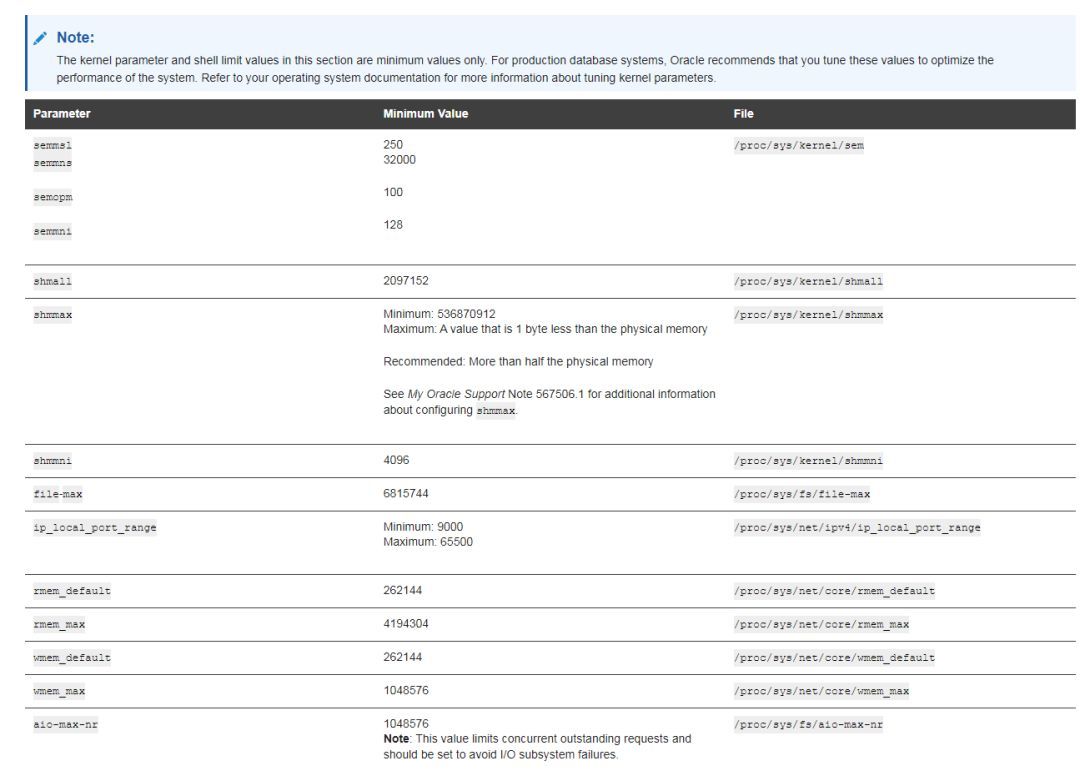
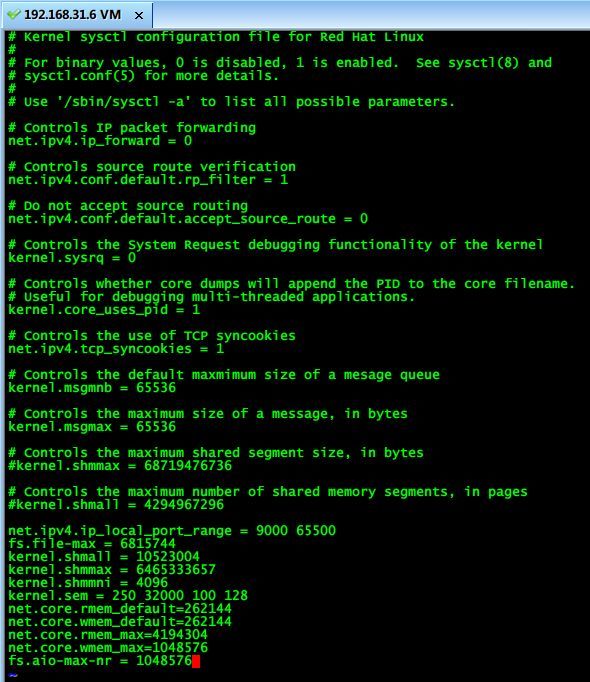
Add the following parameters at the bottom of the vi /etc/sysctl.conf configuration file
net.ipv4.ip_local_port_range = 9000 65500
fs.file-max = 6815744
kernel.shmall = 10523004
kernel.shmmax = 6465333657
kernel.shmmni = 4096
kernel.sem = 250 32000 100 128
net.core.rmem_default=262144
net.core.wmem_default=262144
net.core.rmem_max=4194304
net.core.wmem_max=1048576
fs.aio-max-nr = 1048576
sysctl -p makes the kernel parameters take effect

3) Create users and user groups
[ root@localhost ~]# groupadd -g 200 oinstall
[ root@localhost ~]# groupadd -g 201 dba

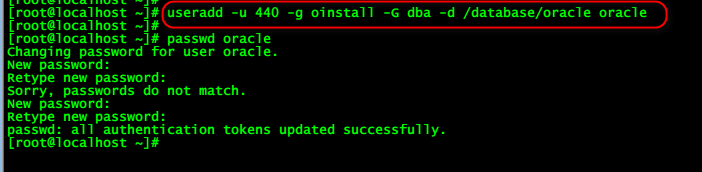
[ root@localhost ~]#useradd -u 440 -g oinstall -G dba -d /database/oracle oracle
[ root@localhost ~]# passwd oracle
4) Modify user's SHELL limit
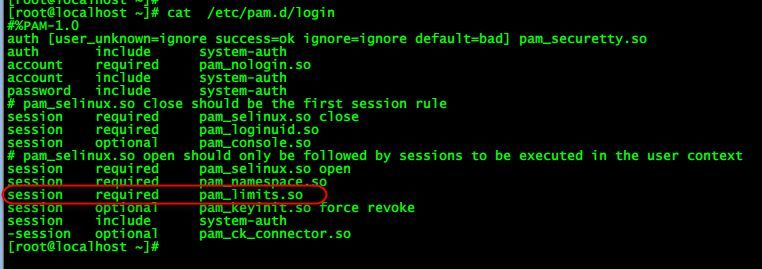
[ root@localhost ~]# vi /etc/pam.d/login
Add session required pam_limits.so line
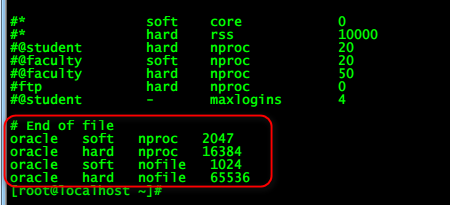
vi /etc/security/limits.conf
Add
oracle soft nproc 2047
oracle hard nproc 16384
oracle soft nofile 1024
oracle hard nofile 65536
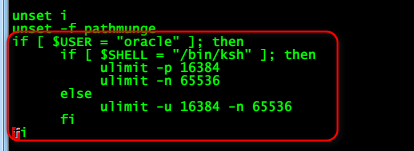
vi /etc/profile
Add the following at the end
if [ $USER = "oracle" ]; then
if [ $SHELL = "/bin/ksh" ]; then
ulimit -p 16384
ulimit -n 65536
else
ulimit -u 16384 -n 65536
fi
fi
5) Log in with the oracle user just created and create the relevant directory, modify the directory permissions
[ oracle@localhost ~]$ chmod 755 /database/oracle
[ oracle@localhost ~]$ mkdir /database/oracle/app
[ oracle@localhost ~]$ chmod 755 /database/oracle/app
[ oracle@localhost ~]$ mkdir /database/oracle/oradata
[ oracle@localhost ~]$ chmod 755 /database/oracle/oradata
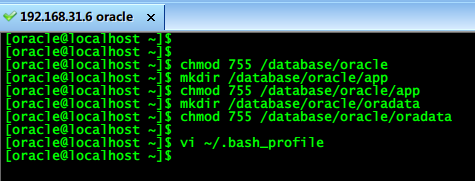
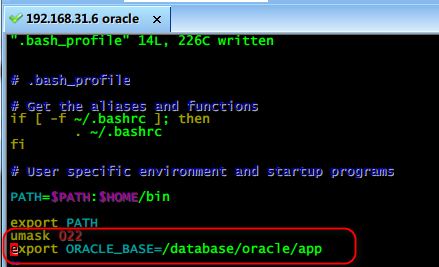
vi ~/.bash_profile
umask 022
export ORACLE_BASE=/database/oracle/app
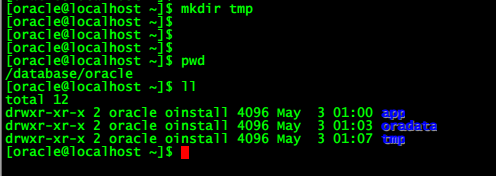
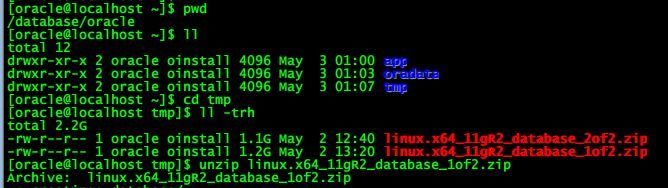
6) mkdir tmp is used to upload the installation package
cd tmp
ll -trh
unzip linux.x64_11gR2_database_1of2.zip
unzip linux.x64_11gR2_database_2of2.zip
7) Because Oracle installation requires a graphical interface
**yum groupinstall "X Window System" **
yum groupinstall "Desktop"
You can refer to the previous article [PXE+Kickstart to realize unattended automatic installation of CentOS system] (http://mp.weixin.qq.com/s?__biz=MzU2MjU1OTE0MA==&mid=2247485106&idx=1&sn=b4939cb6c9c95a2438f386a4b4de6c71&chksm=fc66e779cb116e6ff1b318a75c6698891a611eb7854891ab6ad4616aa726aa84095712483331&scene=21#wechat_redirect) for the steps to install the graphical interface, which is omitted here
8) In a remote environment, you can install Xmanager, open Xmanager-Passive under Xmanager, and the user will receive and display the graphical interface from ssh
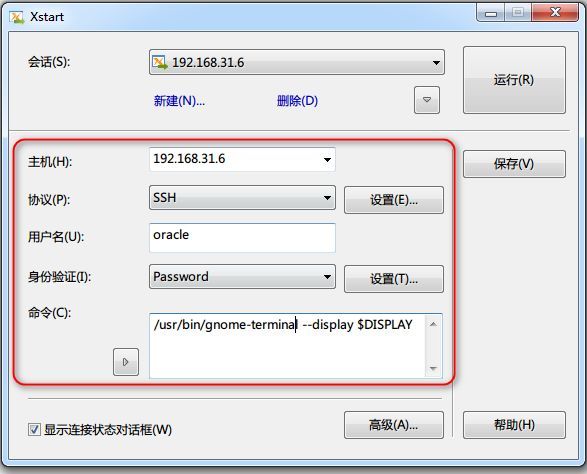
Then open the xstart session, connect to the server and use gnome-terminal first
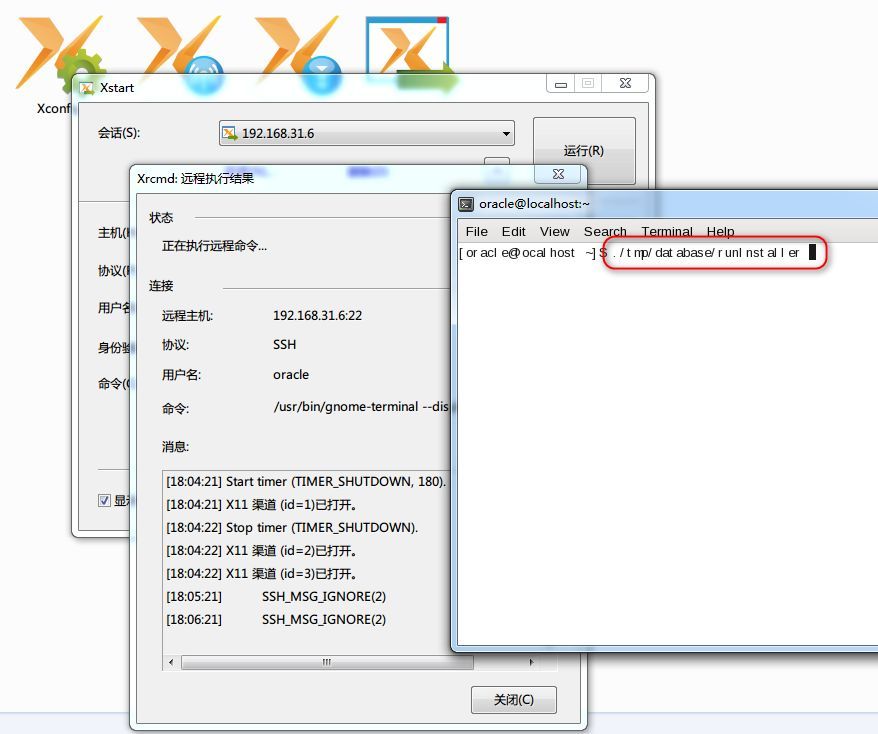
9 ) After running, enter ./tmp/database/runInstaller in the pop-up graphical terminal to start the installation wizard
3、 Next, proceed to the steps of Oracle graphical installation
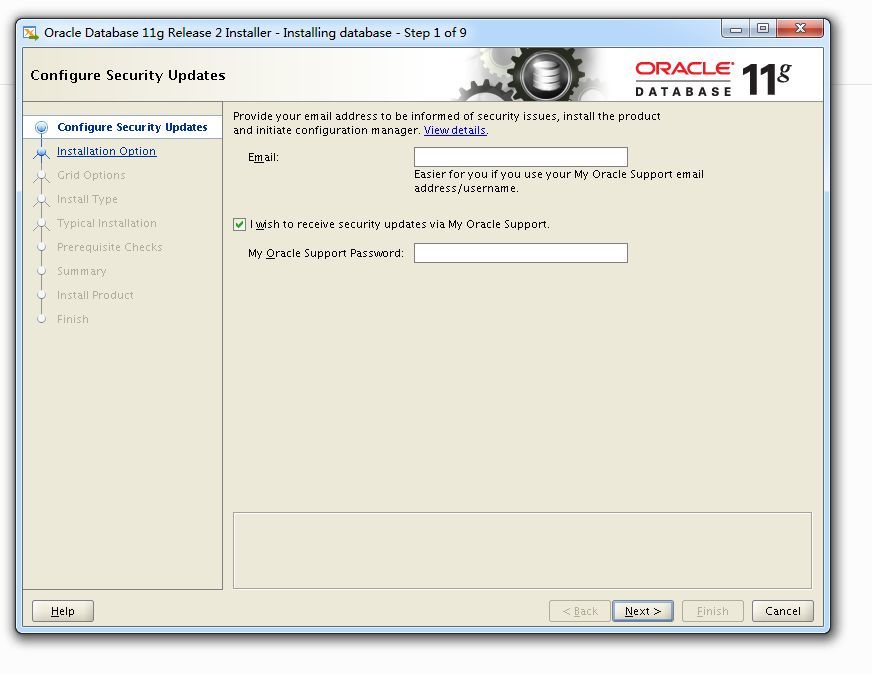
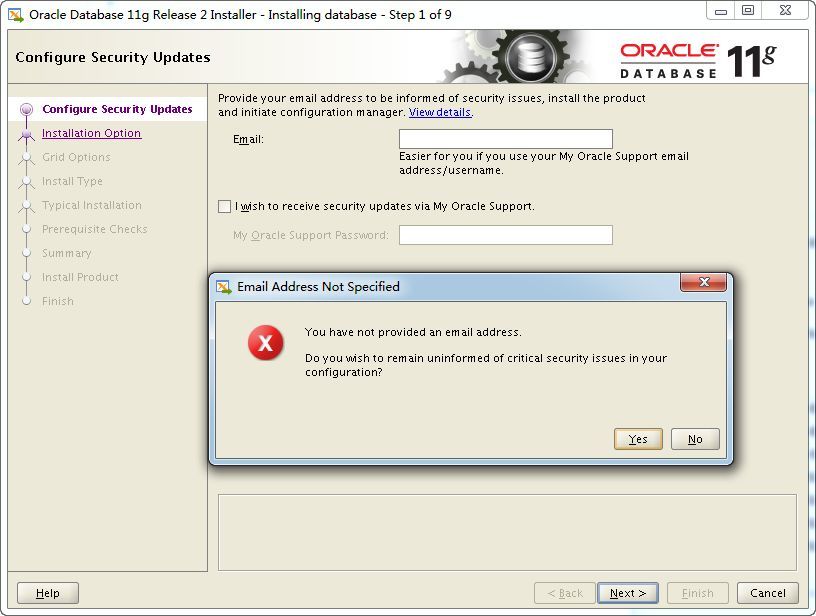
The installation steps are as follows
- The first step does not fill in the email address to continue
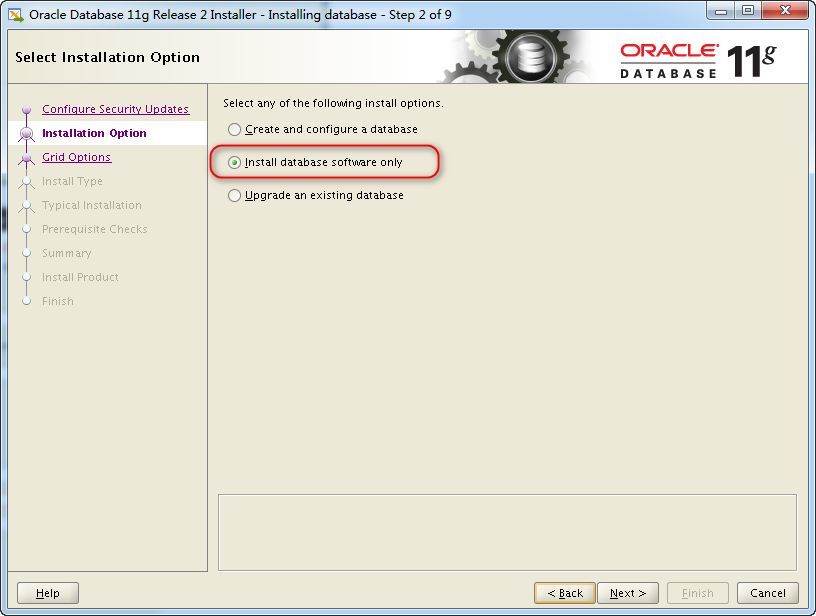
- Install database software only
- Select Single Instance Database Installation

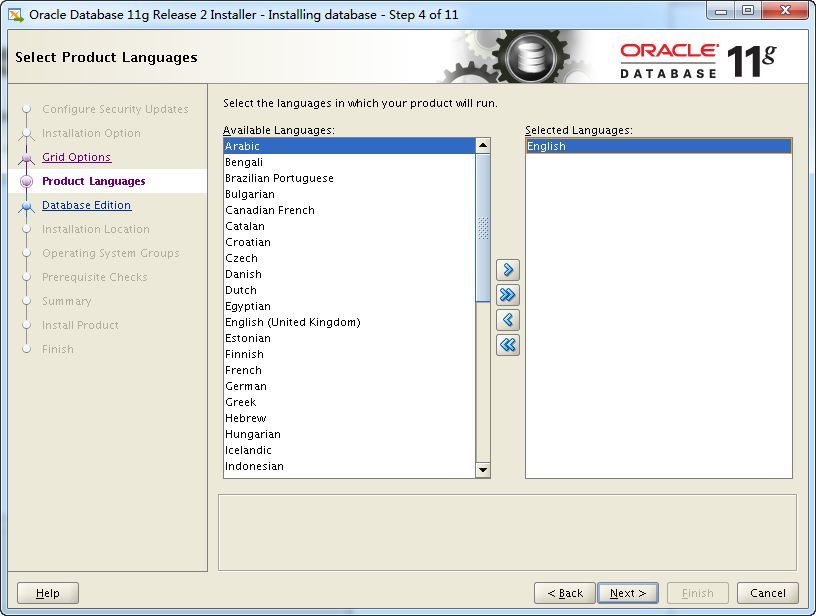
- Choose your language
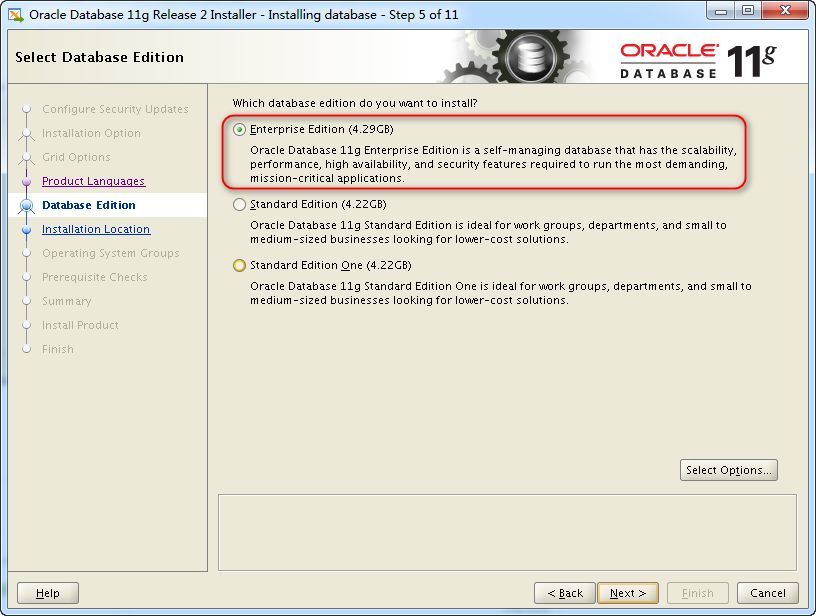
- Select the version to install Enterprise Edtion
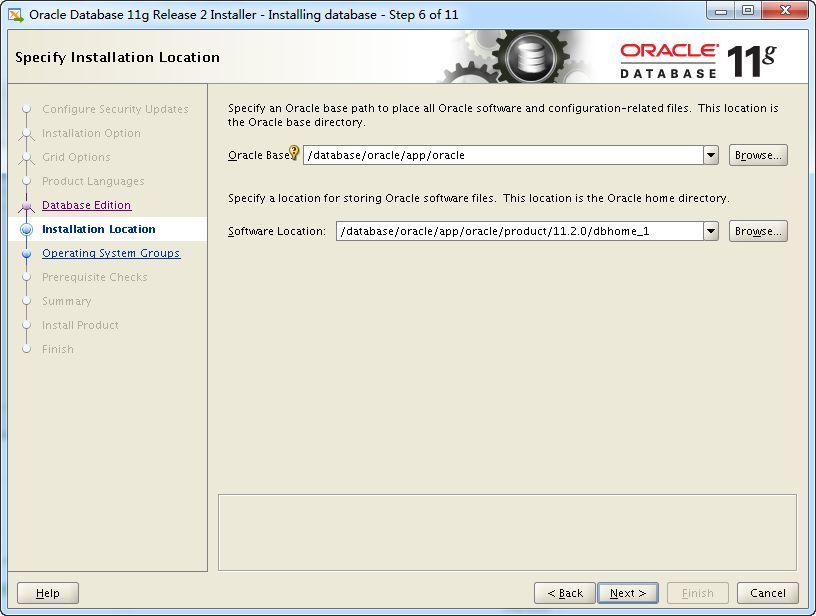
- Specify the Oracle base directory and files. In this example, keep the default values and proceed to the next step
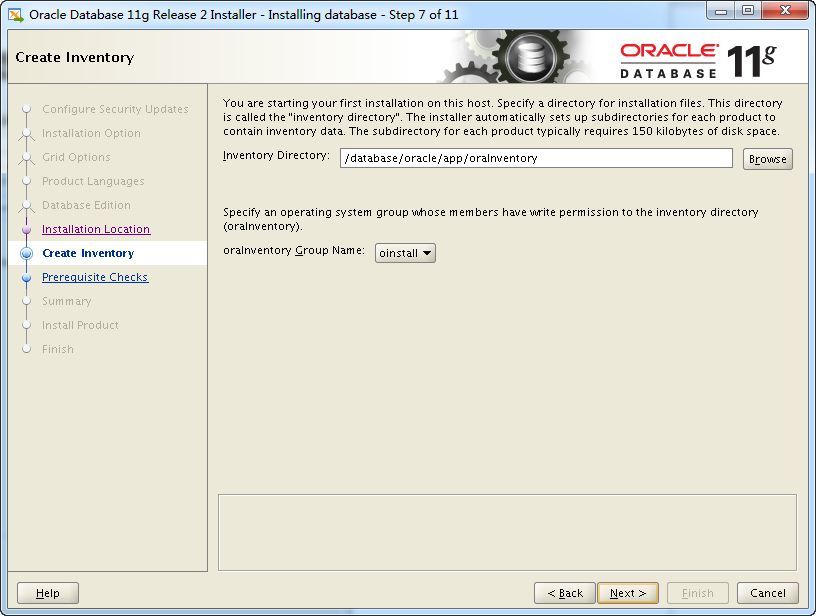
- Specify Inventory directory
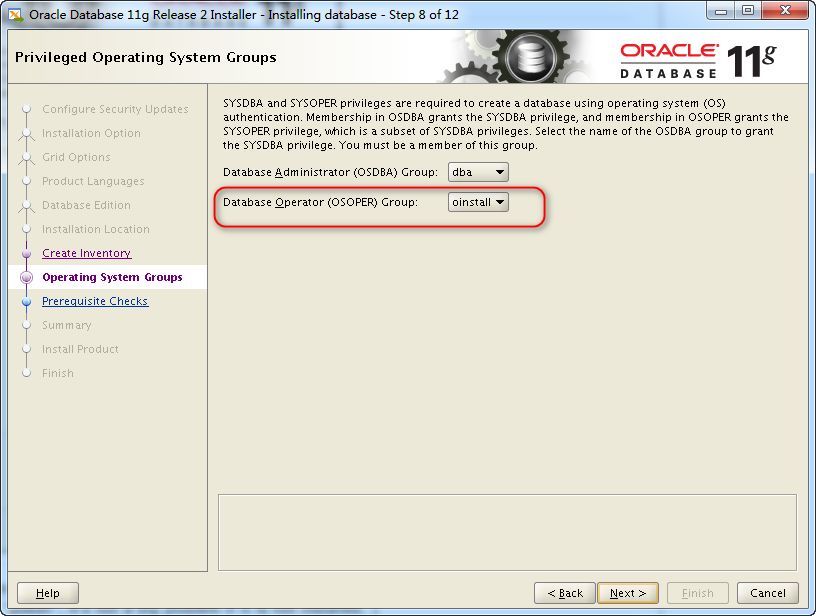
- Specify a privilege group
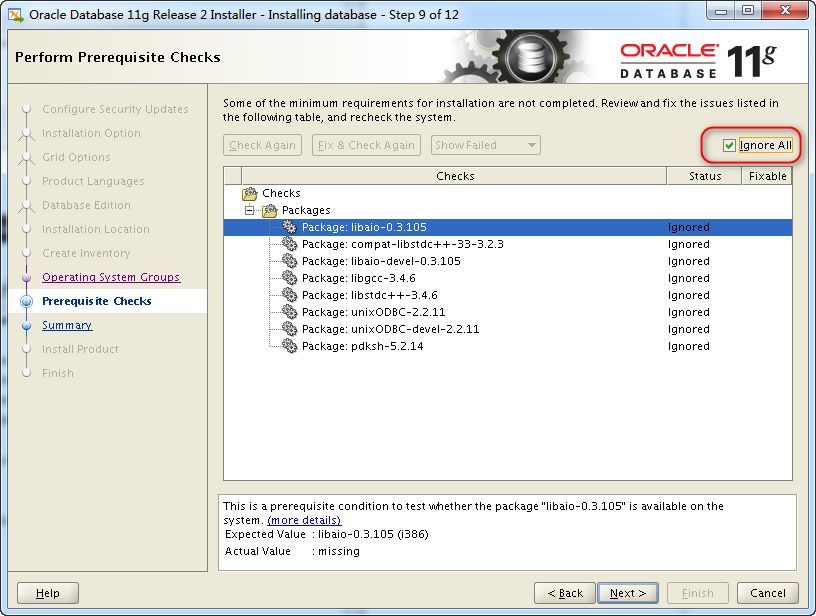
- Part of the basic package check chooses to ignore all
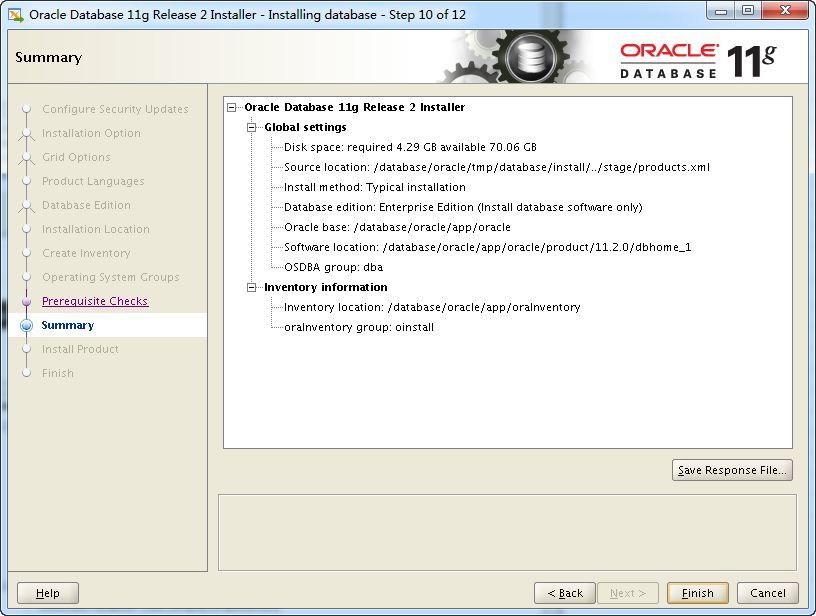
- Display the overall installation configuration summary, select Finish to install
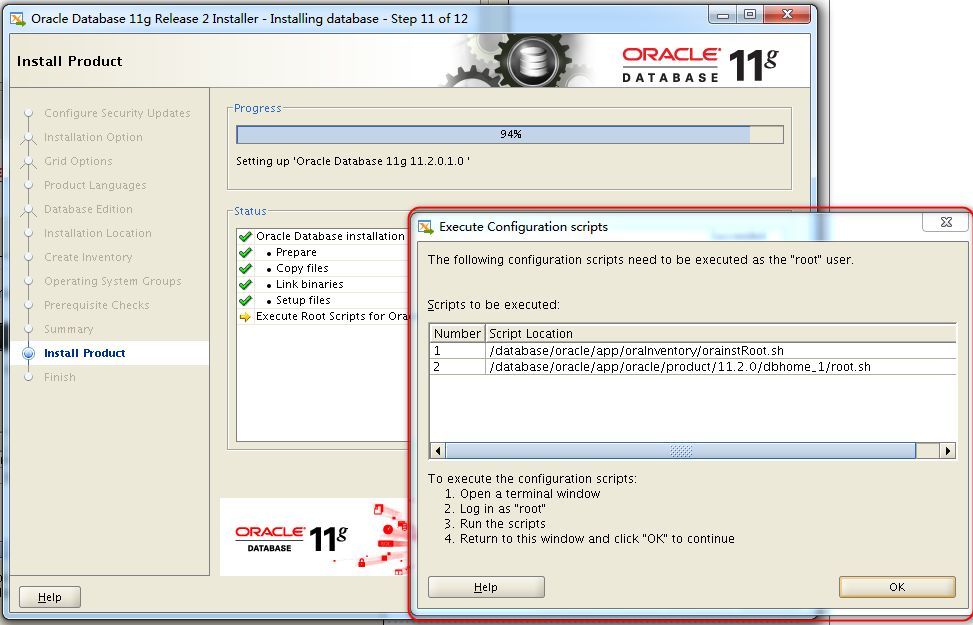
- The installation progress bar will be displayed next

- When the following window is displayed, then open a terminal and execute two scripts as root user
- Create a new Terminal window, and then switch to the root user to execute these two script files
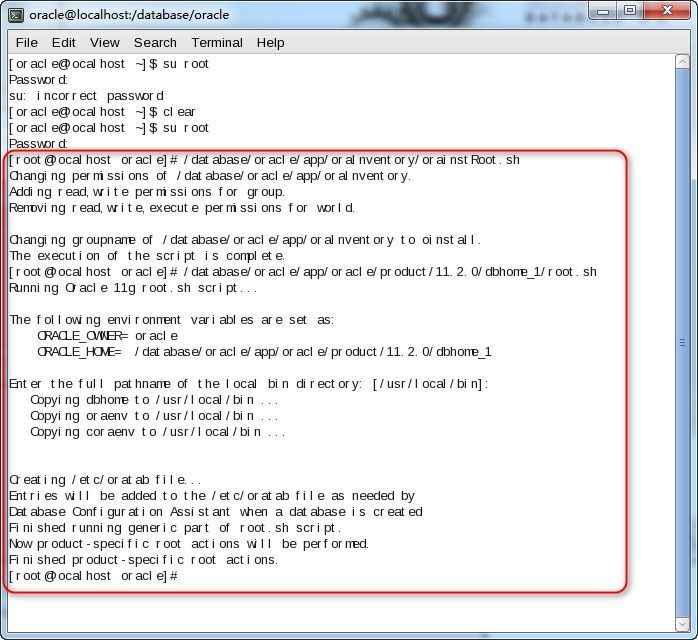
- Then the installation is complete
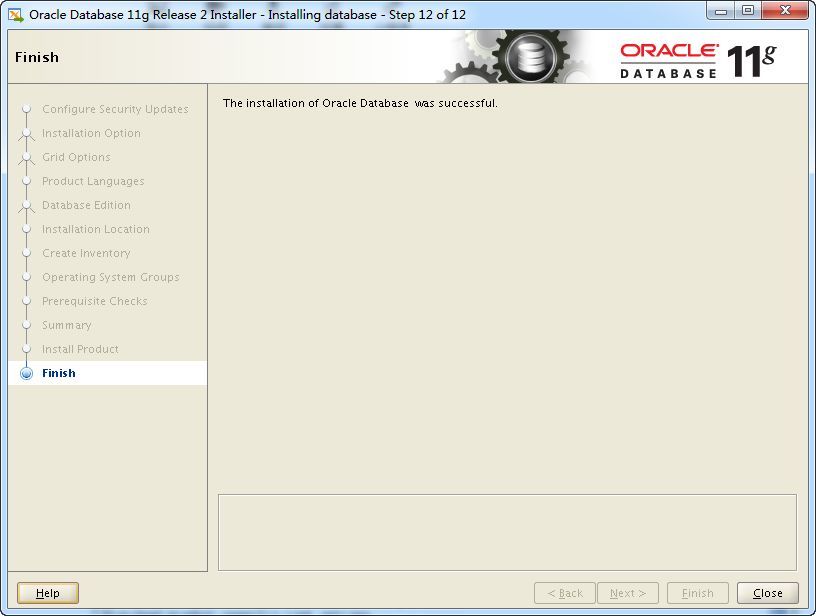
4、 Configuration work after installation
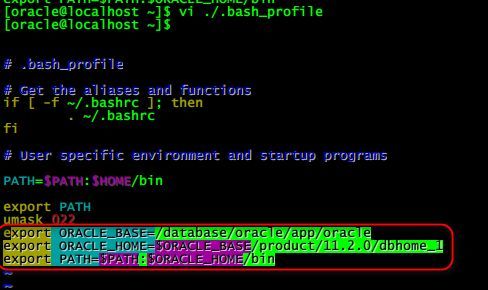
- Re-modify the environment variable vi ./.bash_profile
export ORACLE_BASE=/database/oracle/app/oracle
export ORACLE_HOME=$ORACLE_BASE/product/11.2.0/dbhome_1
export PATH=
User variables will take effect after re-login, verify

- After confirming that there is no problem with the environment variables, enter the netca command to add the network monitoring configuration wizard, and keep the default options in the next step. The screenshots of the steps are omitted
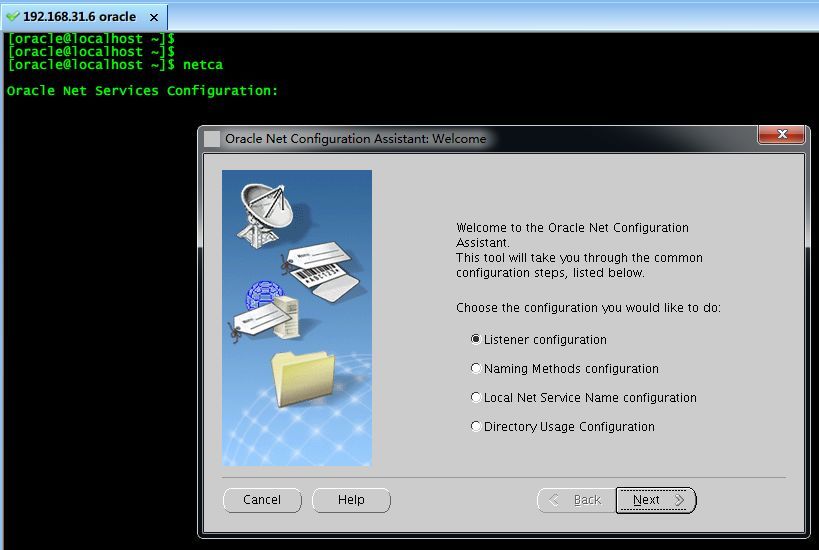
Tips: SecureCRT login server and enter the netca command to pop up a graphical wizard interface. Make sure that Xmanager Xmanager-Passive is turned on
Here the Oracle database is all installed
Recommended Posts