Ubuntu18.04 Server version installation and use (graphic)
1 System installation steps
OS Version:1804
Mirror download: http://cdimage.ubuntu.com/releases/
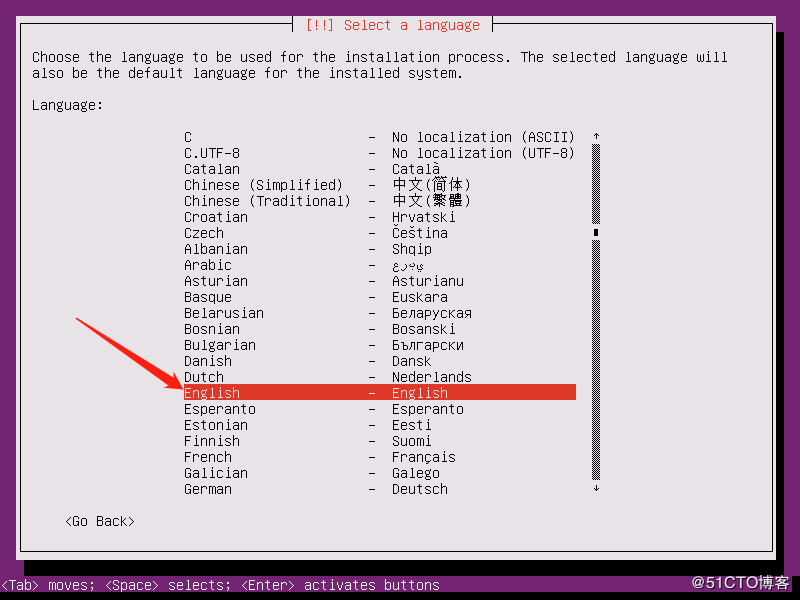
1.1 Choose installation language:

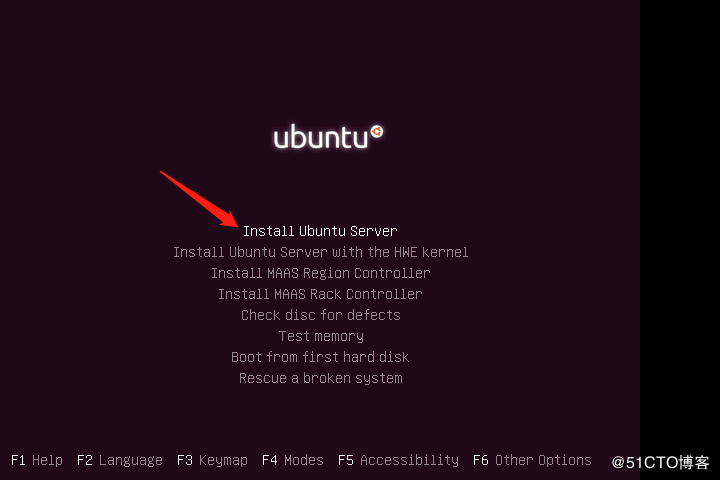
1.2 Select the first item in the installation interface to install the system
1.3 Select the language used during the installation process, which is also the default language used after the system is installed
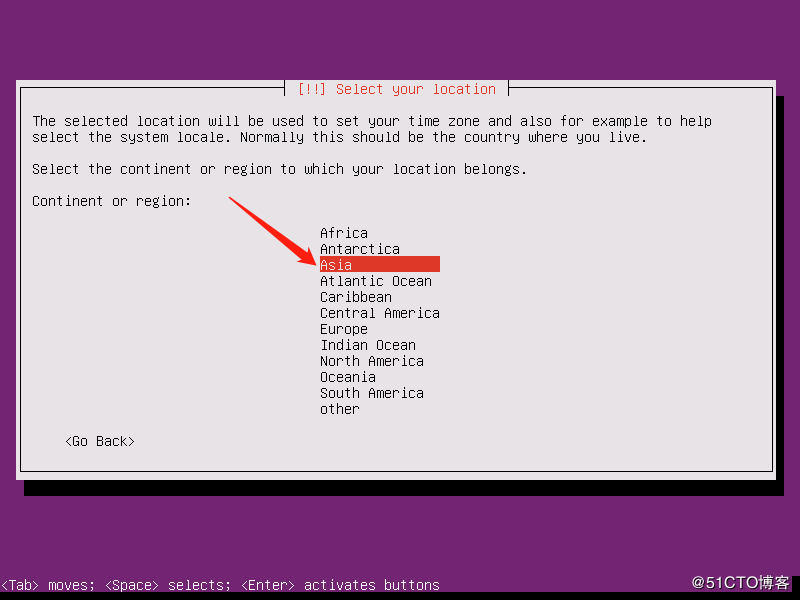
1.4 Select the region, here first select the last item other, then press Enter and then select Asia, and finally select China


1.5 Choose locale

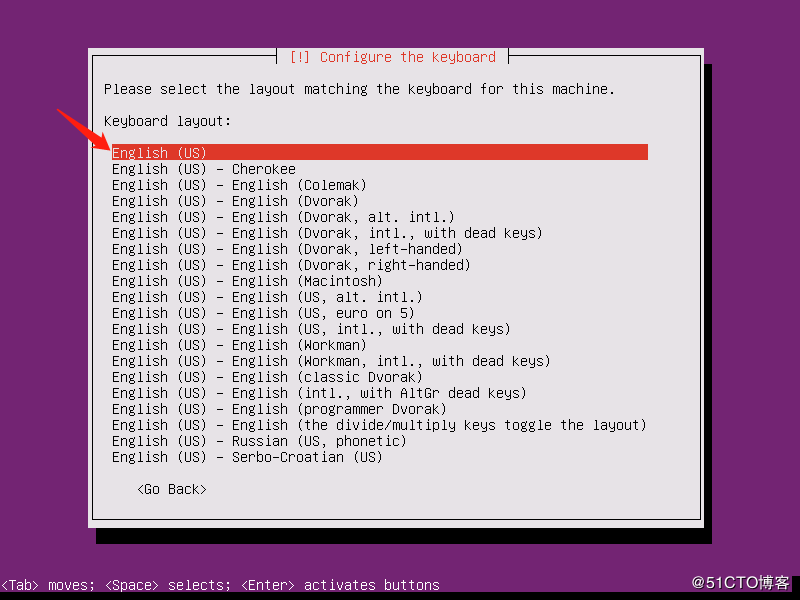
1.6 Keyboard layout check, select NO

1.7 Choose an American keyboard

1.8 Confirm to use US keyboard
1.9 Configure hostname

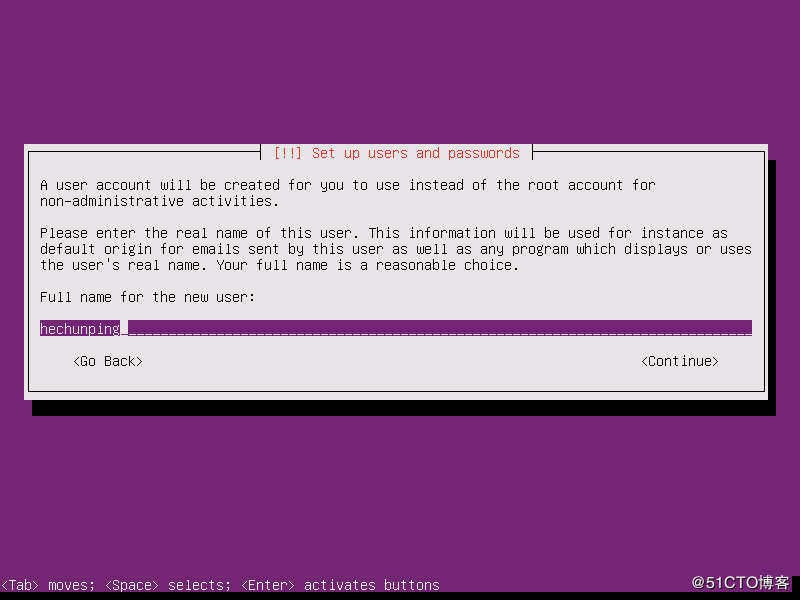
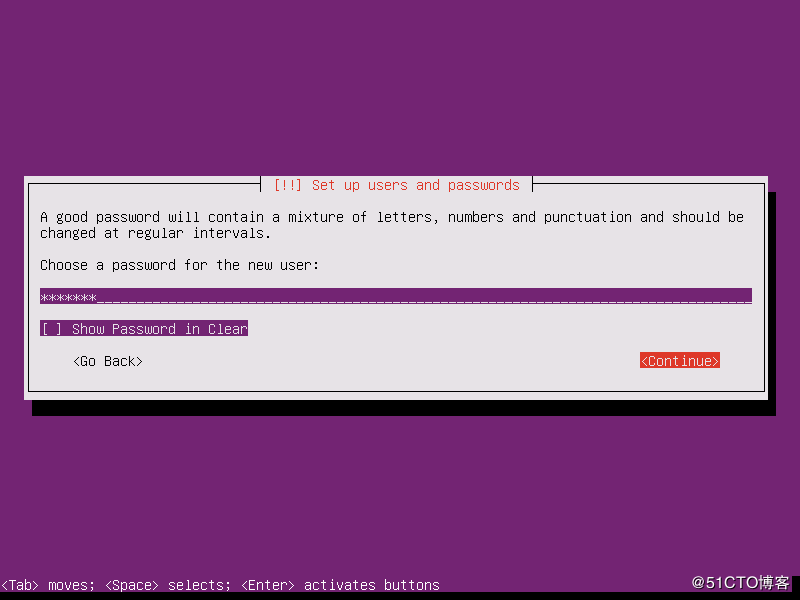
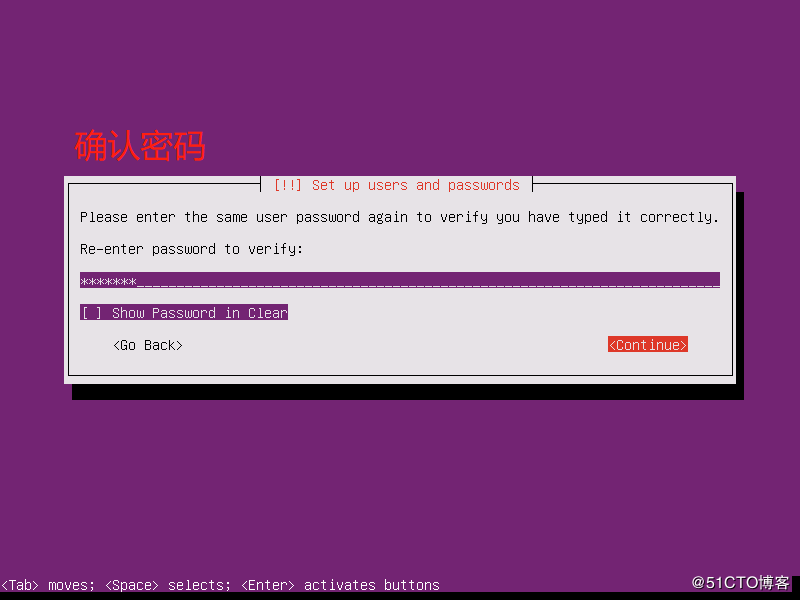
1.10 Create a normal user and set a password for it


1.11 Confirm time zone

1.12 Choose the method of disk partitioning, here select manual partition

1.13 Select disk

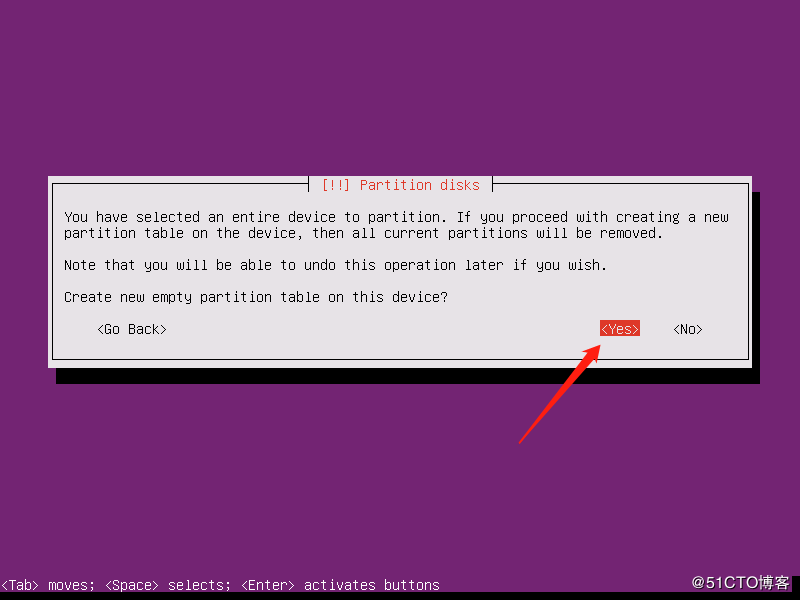
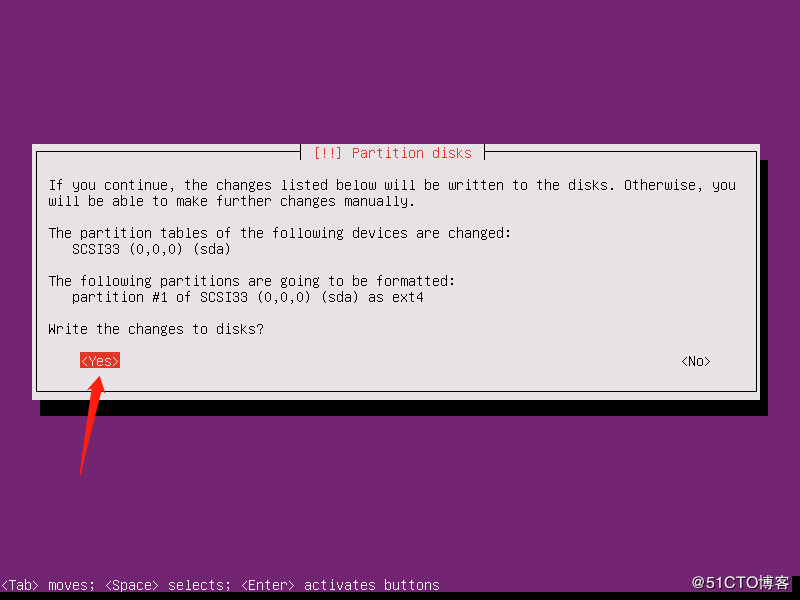
1.14 Confirm to partition the disk
1.15 Partition the disk
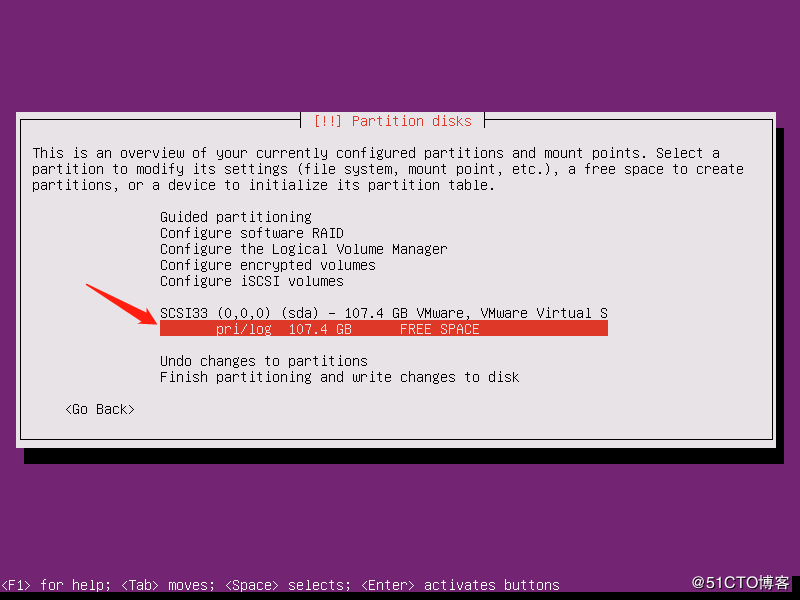
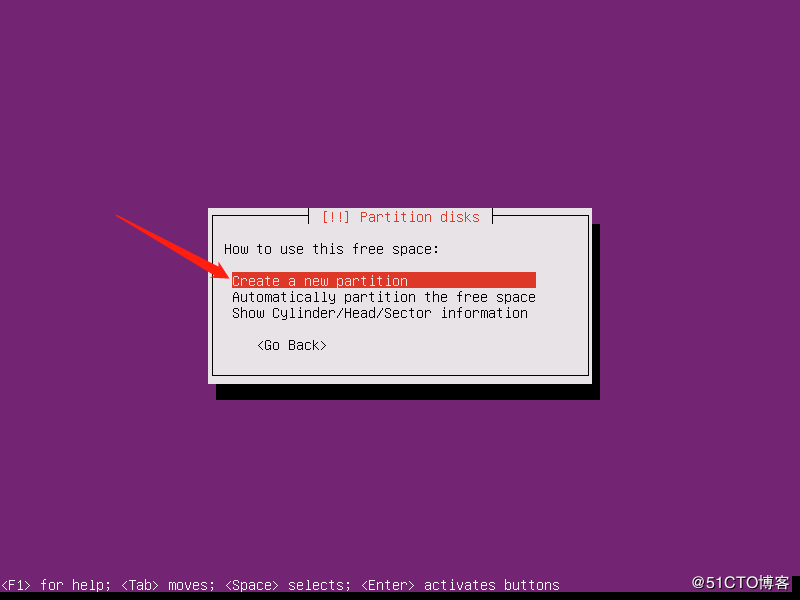
1.16 Create new partition
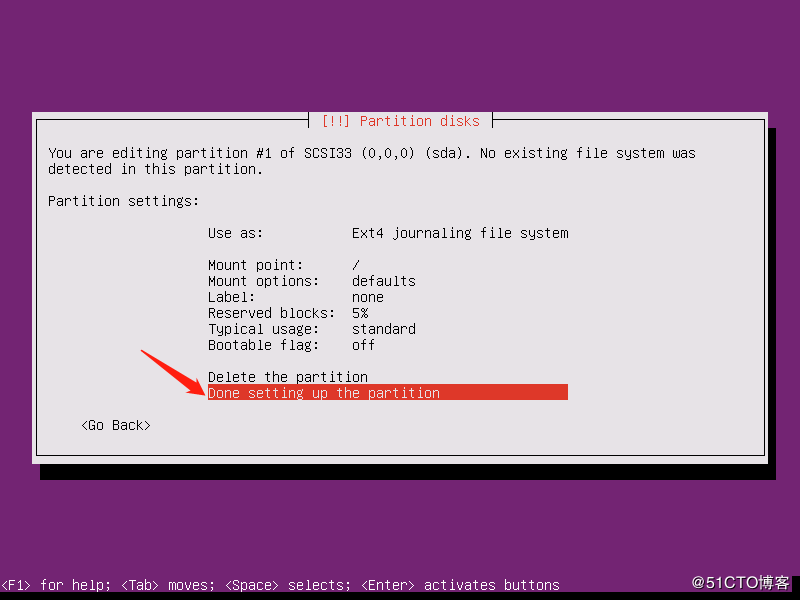
1.17 Specify the partition size, where the entire size of the disk is divided into the partition

1.18 Select the partition type, here select the primary partition

1.19 Partition complete
1.20 Complete partition and write data
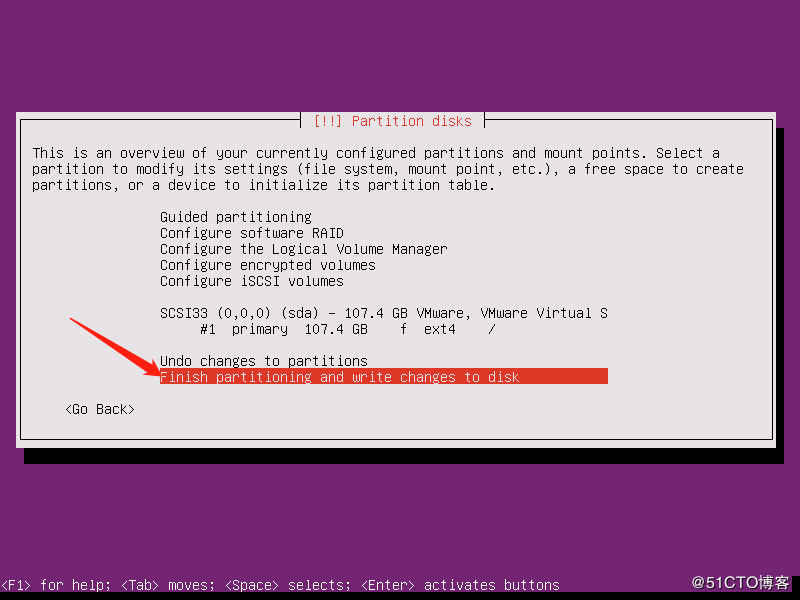
1.21 Confirm write to disk
1.22 Whether to use a proxy, leave it alone

1.23 Whether to update automatically, select the default here, do not update automatically

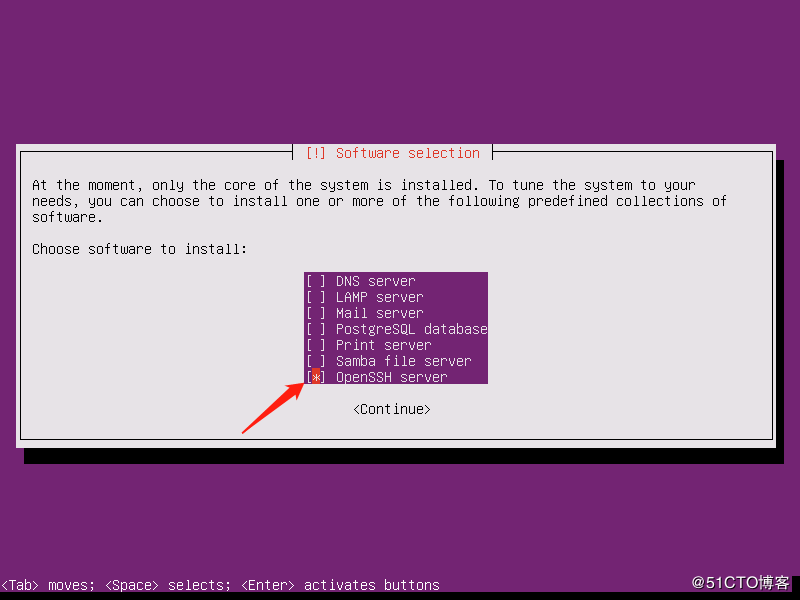
1.24 Select the installation component, select the corresponding component that needs to be installed, and then press the space bar, here select OpenSSH Server
1.25 Install the GRUB boot loader to the master boot record

1.26 Complete the installation, confirm to restart the server

1.27 log in system

2 Basic system configuration
Official document: https://help.ubuntu.com/
2.1 Change hostname
# cat /etc/hostname
hechunping
2.2 Change the network card name to eth*
# sed -i '/GRUB_CMDLINE_LINUX=/s/"$/net.ifnames=0 biosdevname=0"/'/etc/default/grub
# update-grub
Sourcing file `/etc/default/grub'
Generating grub configuration file ...
Found linux image:/boot/vmlinuz-4.15.0-55-generic
Found initrd image:/boot/initrd.img-4.15.0-55-generic
done
# reboot
# sed -i 's/ens33/eth0/'/etc/netplan/01-netcfg.yaml
2.3 Configure root remote login
# By default, ubuntu does not allow root to use remote ssh. If there are actual scenarios that need to allow root to use remote ssh, you need to set the root password and edit/etc/ssh/sshd_The config file is modified as follows:
~ $ sudo vim /etc/ssh/sshd_config
32 # PermitRootLogin prohibit-password #Login is disabled by default
33 PermitRootLogin yes #Allow login instead

57 # PasswordAuthentication yes
58 PasswordAuthentication yes #Turn on password authentication, in fact, the default is to allow login through password authentication

~ $ sudo su - root #Switch to root environment
~# passwd #set password
Enter newUNIX password:
Retype newUNIX password:
passwd: password updated successfully
~# systemctl restart sshd #Restart the ssh service and test the root connection with remote ssh
2.4 Network Configuration
Official document: https://netplan.io/

Ubuntu from 17.10 started, has given up on/etc/network/The configuration of interfaces is a fixed IP, but changed to netplan mode, the configuration file is:/etc/netplan/01-netcfg.yaml

# ubuntu 17.The static IP configuration method of 04 and before:
~# cat /etc/network/interfaces
root@hechunping:~# cat /etc/network/interfaces
# interfaces(5) file used by ifup(8) and ifdown(8)
auto lo
iface lo inet loopback
auto eth0 #The card starts automatically, write the actual name of the card whose IP you want to configure
iface eth0 inet static #Configure static IP, write the actual card name to configure IP
address 172.18.3.12 #IP address
netmask 255.255.0.0 #Mask
gateway 172.18.0.1 #Close
dns-nameservers 223.6.6.6 #DNS
dns-nameservers 223.5.5.5
# Restart the network service
~# /etc/init.d/networking restart
~# systemctl restart networking.service
2.4.1 Single network card static IP address
root@hechunping:~# cat /etc/netplan/01-netcfg.yaml
# This file describes the network interfaces available on your system
# For more information, see netplan(5).
network:
 version:2
 renderer: networkd
 ethernets:
 eth0:
 dhcp4: no
 addresses:[192.168.7.132/24]
 gateway4:192.168.7.2
 nameservers:
 addresses:[223.6.6.6]
root@hechunping:~# netplan apply
2.4.2 Configure static IP for multiple network cards
# cat /etc/netplan/01-netcfg.yaml
# This file describes the network interfaces available on your system
# For more information, see netplan(5).
network:
 version:2
 renderer: networkd
 ethernets:
 eth0:
 dhcp4: no
 addresses:[172.20.7.34/16]
 gateway4:172.20.0.1
 nameservers:
 addresses:[223.6.6.6]
 eth1:
 dhcp4: no
 addresses:[192.168.7.34/24]
 routes:- to:172.20.0.0/16
  via:192.168.7.2
# netplan apply
2.4.3 Single network card bridge
# cat /etc/netplan/01-netcfg.yaml
# This file describes the network interfaces available on your system
# For more information, see netplan(5).
network:
 version:2
 renderer: networkd
 ethernets:
 eth0:
 dhcp4: no
 bridges:
 br0:
 dhcp4: no
 addresses:[172.20.7.34/16]
 gateway4:172.20.0.1
 nameservers:
 addresses:[223.6.6.6]
 interfaces:- eth0
# netplan apply
2.4.4 Multi-NIC bridge
Bridge br0 and br1 to eth0 and eth1, respectively.
# cat /etc/netplan/01-netcfg.yaml
# This file describes the network interfaces available on your system
# For more information, see netplan(5).
network:
 version:2
 renderer: networkd
 ethernets:
 eth0:
 dhcp4: no
 eth1:
 dhcp4: no
 bridges:
 br0:
 dhcp4: no
 addresses:[172.20.7.34/16]
 gateway4:172.20.0.1
 nameservers:
 addresses:[223.6.6.6]
 interfaces:- eth0
 br1:
 dhcp4: no
 addresses:[192.168.7.34/24]
 routes:- to:172.20.0.0/16
  via:192.168.7.2
 interfaces:- eth1
root@hechunping:~# netplan apply
2.4.5 Dual network card bonding
The bridge command needs to be installed in advance, and the two network cards use the same network mode
# cat /etc/netplan/01-netcfg.yaml
# This file describes the network interfaces available on your system
# For more information, see netplan(5).
network:
 version:2
 renderer: networkd
 ethernets:
 eth0:
 dhcp4: no
 eth1:
 dhcp4: no
 bonds:
 bond0:
 interfaces:- eth0
 - eth1
 addresses:[172.20.7.34/16]
 gateway4:172.20.0.1
 nameservers:
 addresses:[223.6.6.6,223.5.5.5]
 parameters:
 mode: active-backup
 mii-monitor-interval:100
# poweroff
# netplan apply
2.4.6 Dual network card binding + bridge
Card binding is used to provide card interface redundancy, high availability and port aggregation functions, bridge the card and then use it for services that need to bridge the device.

# cat /etc/netplan/01-netcfg.yaml
# This file describes the network interfaces available on your system
# For more information, see netplan(5).
network:
 version:2
 renderer: networkd
 ethernets:
 eth0:
 dhcp4: no
 eth1:
 dhcp4: no
 bonds:
 bond0:
 interfaces:- eth0
 - eth1
 parameters:
 mode: active-backup
 mii-monitor-interval:100
 bridges:
 br0:
 dhcp4: no
 addresses:[172.20.7.34/16]
 gateway4:172.20.0.1
 nameservers:
 addresses:[223.6.6.6,223.5.5.5]
 interfaces:- bond0
# netplan apply
2.4.7 Internal and external multi-network card binding
Realize card binding under multiple network conditions. Bridging(eth0,eth1)And NAT(eth2,eth3)Two network modes
# cat /etc/netplan/01-netcfg.yaml
# This file describes the network interfaces available on your system
# For more information, see netplan(5).
network:
 version:2
 renderer: networkd
 ethernets:
 eth0:
 dhcp4: no
 eth1:
 dhcp4: no
 eth2:
 dhcp4: no
 eth3:
 dhcp4: no
 bonds:
 bond0:
 interfaces:- eth0
 - eth1
 addresses:[172.20.7.34/16]
 gateway4:172.20.0.1
 nameservers:
 addresses:[223.6.6.6,223.5.5.5]
 parameters:
 mode: active-backup
 mii-monitor-interval:100

 bond1:
 interfaces:- eth2
 - eth3
 addresses:[192.168.7.34/24]
 parameters:
 mode: active-backup
 mii-monitor-interval:100
 routes:- to:172.20.0.0/16
  via:192.168.7.2
# netplan apply
2.4.8 Internal and external multi-NIC binding + bridging
# cat /etc/netplan/01-netcfg.yaml
# This file describes the network interfaces available on your system
# For more information, see netplan(5).
network:
 version:2
 renderer: networkd
 ethernets:
 eth0:
 dhcp4: no
 eth1:
 dhcp4: no
 eth2:
 dhcp4: no
 eth3:
 dhcp4: no
 bonds:
 bond0:
 interfaces:- eth0
 - eth1
 parameters:
 mode: active-backup
 mii-monitor-interval:100

 bond1:
 interfaces:- eth2
 - eth3
 parameters:
 mode: active-backup
 mii-monitor-interval:100
 bridges:
 br0:
 dhcp4: no
 addresses:[172.20.7.34/16]
 gateway4:172.20.0.1
 nameservers:
 addresses:[223.6.6.6,223.5.5.5]
 interfaces:- bond0
 br1:
 dhcp4: no
 addresses:[192.168.7.34/24]
 routes:- to:172.20.0.0/16
  via:192.168.7.2
 interfaces:- bond1
# netplan apply
3 Package management
3.1 Modify software warehouse address
Arab cloud warehouse address: https://developer.aliyun.com/mirror
Zhongke ⤤: http://mirrors.ustc.edu.cn/help/ubuntu.html
Tsinghua University: https://mirror.tuna.tsinghua.edu.cn/help/ubuntu/
Huawei: https://mirrors.huaweicloud.com/

###### Tsinghua source configuration######
Ubuntu's software source configuration file is/etc/apt/sources.list. Make a backup of the file that comes with the system, replace the file with the following content, you can use the TUNA software source mirroring.
# cd /etc/apt/
# cp -p sources.list sources.list.bak
# vim sources.list
# The source image is annotated by default to improve the speed of apt update, you can uncomment yourself if necessary
deb https://mirrors.tuna.tsinghua.edu.cn/ubuntu/ bionic main restricted universe multiverse
# deb-src https://mirrors.tuna.tsinghua.edu.cn/ubuntu/ bionic main restricted universe multiverse
deb https://mirrors.tuna.tsinghua.edu.cn/ubuntu/ bionic-updates main restricted universe multiverse
# deb-src https://mirrors.tuna.tsinghua.edu.cn/ubuntu/ bionic-updates main restricted universe multiverse
deb https://mirrors.tuna.tsinghua.edu.cn/ubuntu/ bionic-backports main restricted universe multiverse
# deb-src https://mirrors.tuna.tsinghua.edu.cn/ubuntu/ bionic-backports main restricted universe multiverse
deb https://mirrors.tuna.tsinghua.edu.cn/ubuntu/ bionic-security main restricted universe multiverse
# deb-src https://mirrors.tuna.tsinghua.edu.cn/ubuntu/ bionic-security main restricted universe multiverse

# Pre-release software source, not recommended
# deb https://mirrors.tuna.tsinghua.edu.cn/ubuntu/ bionic-proposed main restricted universe multiverse
# deb-src https://mirrors.tuna.tsinghua.edu.cn/ubuntu/ bionic-proposed main restricted universe multiverse
# apt update #Update the local package list index, must be executed after modifying the apt repository

###### Ali source configuration######
# sed -i 's/cn.archive.ubuntu/mirrors.aliyun/'/etc/apt/sources.list
# apt update #Update the local package list index, must be executed after modifying the apt repository
3.2 apt tool use
apt list #apt lists warehouse software packages, equal to yum list
apt search NAME #Search installation package
apt show apache2 #View the details of an installation package
apt install apache2 #Install the software package online
apt remove apache2 #Uninstall a single package but keep the configuration file
apt autoremove apache2 #Delete the installation package and resolve dependencies
apt update #Update the local package list index, must be executed after modifying the apt repository
apt purge apache2 #Uninstall a single software package to delete configuration files
apt upgrade #Upgrade all installed packages that can be upgraded to new versions
apt full-upgrade #Upgrade the entire system and remove old packages if necessary.
apt edit-sources #Edit source files
apt-cache madison nginx #Check which versions of packages in the warehouse can be installed
apt install nginx=1.14.0-0ubuntu1.6 #Specify the specific version to install when installing the package
3.3 dpkg installation package management
rpm:RPM(Red Hat Package Manager), Is a package management system based on Red Hat’s Linux Distribution. It also refers to the rpm package itself. RPM is used for rpm package management (such as installation, uninstallation, upgrade, etc.)
" dpkg "Yes"Debian Packager "Shorthand for,for"Debian"The specially developed package management system facilitates software installation, update and removal. All "Linux" releases from "Debian" use "dpkg", such as "Ubuntu", "Knoppix", etc.

dpkg -i gitlab-ce_11.9.8-ce.0_amd64.deb #Install a package
dpkg -r gitlab-ce #Delete a certain package to retain configuration files
dpkg -r -P gitlab-ce #Deleting a software package does not retain configuration files
dpkg -I gitlab-ce_11.9.8-ce.0_amd64.deb #View package information
dpkg -c gitlab-ce_11.9.8-ce.0_amd64.deb #View the files and contents in the package
dpkg -l #List all the software installed on this machine
3.4 Set up the oracle JDK environment
# pwd
/usr/local/src
Decompress binary files and set up soft connections:
# tar xf jdk-8u212-linux-x64.tar.gz
# ln -sv /usr/local/src/jdk1.8.0_212 /usr/local/jdk
Configure environment variables:
# vim /etc/profile
export JAVA_HOME=/usr/local/jdk
export PATH=$JAVA_HOME/bin:$JAVA_HOME/jre/bin:$PATH
export CLASSPATH=.$CLASSPATH:$JAVA_HOME/lib:$JAVA_HOME/jre/lib:$JAVA_HOME/lib/tools.jar
Re-import the environment variables and verify:
# source /etc/profile
# java -version
java version "1.8.0_212"Java(TM) SE Runtime Environment(build 1.8.0_212-b10)
Java HotSpot(TM)64-Bit Server VM(build 25.212-b10, mixed mode)
3.5 Install OpenJDK
# apt install openjdk-8-jdk
3.6 Install common system commands
# apt purge ufw lxd lxd-client lxcfs lxc-common
# apt install iproute2 ntpdate tcpdump telnet traceroute nfs-kernel-server nfs-common lrzsz tree openssl libssl-dev libpcre3 libpcre3-dev zlib1g-dev ntpdate tcpdump telnet traceroute gcc openssh-server lrzsz tree openssl libssl-dev libpcre3 libpcre3-dev zlib1g-dev ntpdate tcpdump telnet traceroute iotop unzip zip
3.7 System resource limit optimization
# cat /etc/security/limits.conf
# The soft and hard resource limits of the root account
root soft core unlimited
root hard core unlimited
root soft nproc 1000000
root hard nproc 1000000
root soft nofile 1000000
root hard nofile 1000000
root soft memlock 32000
root hard memlock 32000
root soft msgqueue 8192000
root hard msgqueue 8192000
# Soft and hard resource limits for other accounts
* soft core unlimited
* hard core unlimited
* soft nproc 1000000* hard nproc 1000000* soft nofile 1000000* hard nofile 1000000* soft memlock 32000* hard memlock 32000* soft msgqueue 8192000* hard msgqueue 8192000
3.8 e Kernel parameter optimization
# Controls source route verification
net.ipv4.conf.default.rp_filter =1
net.ipv4.ip_nonlocal_bind =1
net.ipv4.ip_forward =1
# Do not accept source routing
net.ipv4.conf.default.accept_source_route =0
# Controls the System Request debugging functionality of the kernel
kernel.sysrq =0
# Controls whether core dumps will append the PID to the core filename.
# Useful for debugging multi-threaded applications.
kernel.core_uses_pid =1
# Controls the use of TCP syncookies
net.ipv4.tcp_syncookies =1
# Disable netfilter on bridges.
net.bridge.bridge-nf-call-ip6tables =0
net.bridge.bridge-nf-call-iptables =0
net.bridge.bridge-nf-call-arptables =0
# Controls the default maxmimum size of a mesage queue
kernel.msgmnb =65536
# # Controls the maximum size of a message,in bytes
kernel.msgmax =65536
# Controls the maximum shared segment size,in bytes
kernel.shmmax =68719476736
# # Controls the maximum number of shared memory segments,in pages
kernel.shmall =4294967296
# TCP kernel paramater
net.ipv4.tcp_mem =78643210485761572864
net.ipv4.tcp_rmem =4096873804194304
net.ipv4.tcp_wmem =4096163844194304
net.ipv4.tcp_window_scaling =1
net.ipv4.tcp_sack =1
# socket buffer
net.core.wmem_default =8388608
net.core.rmem_default =8388608
net.core.rmem_max =16777216
net.core.wmem_max =16777216
net.core.netdev_max_backlog =262144
net.core.somaxconn =20480
net.core.optmem_max =81920
# TCP conn
net.ipv4.tcp_max_syn_backlog =262144
net.ipv4.tcp_syn_retries =3
net.ipv4.tcp_retries1 =3
net.ipv4.tcp_retries2 =15
# tcp conn reuse
net.ipv4.tcp_timestamps =0
net.ipv4.tcp_tw_reuse =0
net.ipv4.tcp_tw_recycle =0
net.ipv4.tcp_fin_timeout =1
net.ipv4.tcp_max_tw_buckets =20000
net.ipv4.tcp_max_orphans =3276800
net.ipv4.tcp_synack_retries =1
net.ipv4.tcp_syncookies =1
# keepalive conn
net.ipv4.tcp_keepalive_time =300
net.ipv4.tcp_keepalive_intvl =30
net.ipv4.tcp_keepalive_probes =3
net.ipv4.ip_local_port_range =1000165000
# swap
vm.overcommit_memory =0
vm.swappiness =10
# net.ipv4.conf.eth1.rp_filter =0
# net.ipv4.conf.lo.arp_ignore =1
# net.ipv4.conf.lo.arp_announce =2
# net.ipv4.conf.all.arp_ignore =1
# net.ipv4.conf.all.arp_announce =2
The above is the whole content of this article, I hope it will be helpful to everyone's study.
Recommended Posts