ubuntu 1804 installation details
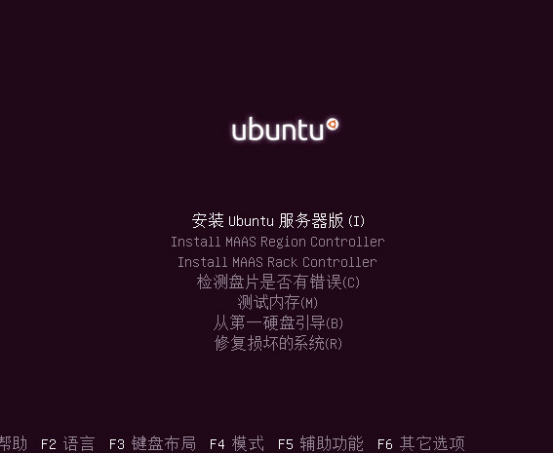
What I installed here is the ubuntu server version, you can refer to this file for installation when installing.
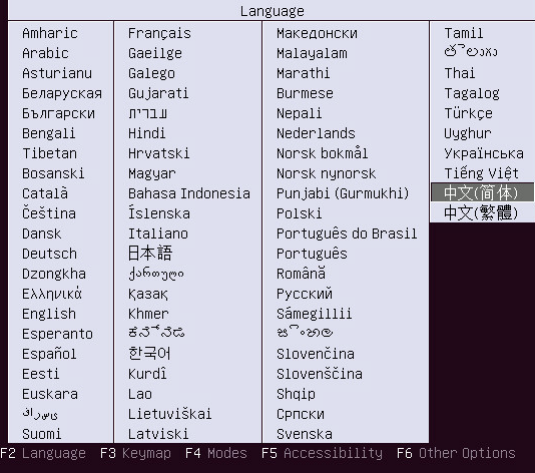
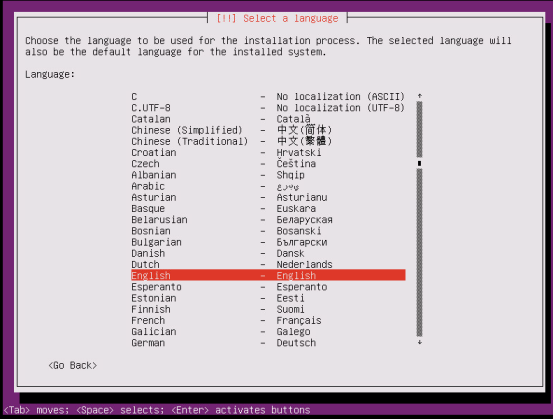
- Choose installation language:
Here you can choose the default "English" and "Chinese (Simplified)".
- Select "Install Ubuntu Server Edition"
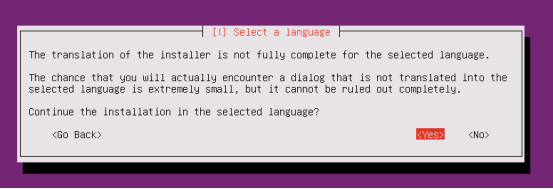
- Confirm selected language
- Whether to perform keyboard matching, select "Yes"

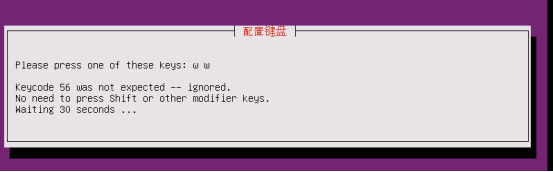
- enter

Any of the characters in your keyboard
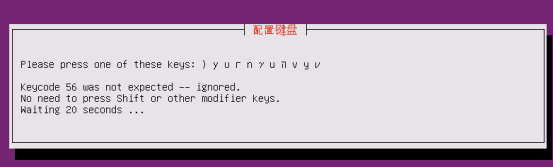
- Type w
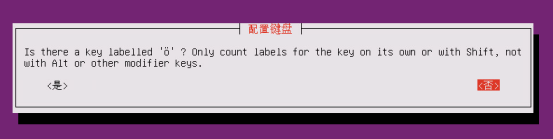
- Select "Yes" when the input is the characters contained in your keyboard, the following characters are not available on my keyboard, so now "No"
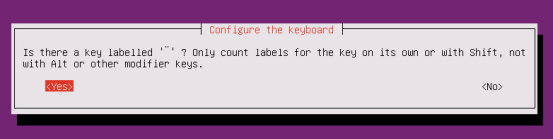
- Select "Yes" when inputting the characters contained in your keyboard, the following characters are not available on my keyboard, so now "Yes"
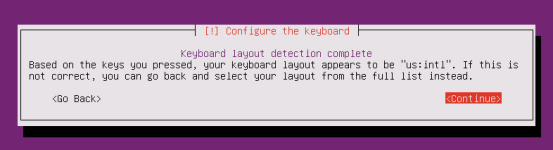
- Select "continue"
- Select "English"
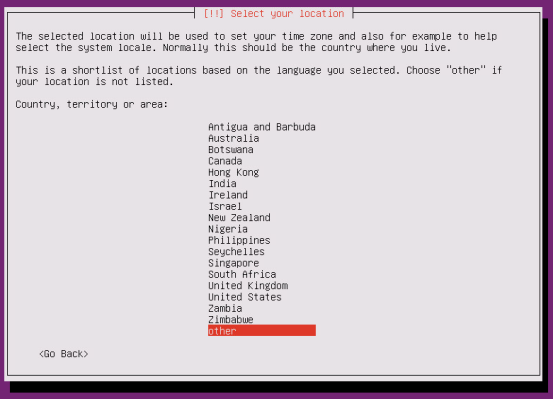
- Select the area as "other"
- Select "Asia"
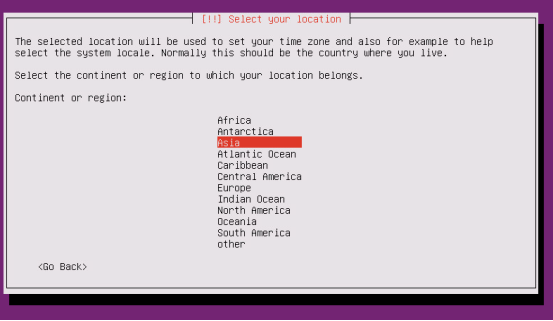
- Select "china"

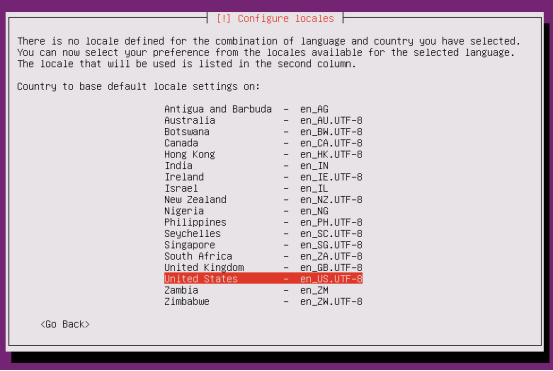
- Select "United States"
- Fill in the hostname

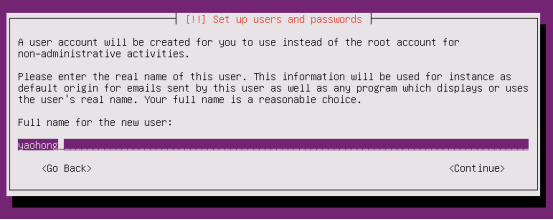
- Fill in the user you want to add
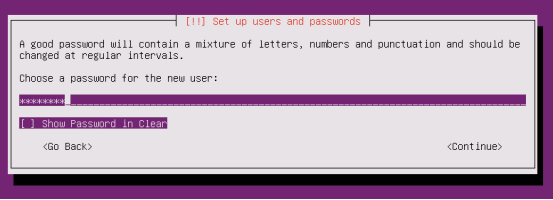
- Fill in the password you set for this user
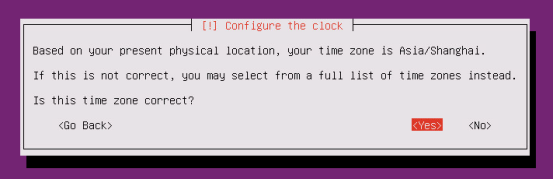
- Confirm the clock is Asia/shanghai
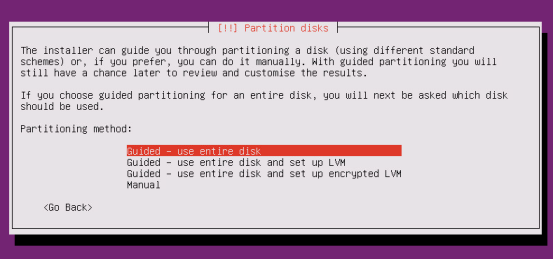
- Disk partition method, I chose to use the entire disk here, you can choose whether to use LVM according to your needs
- Select the disk you want to partition

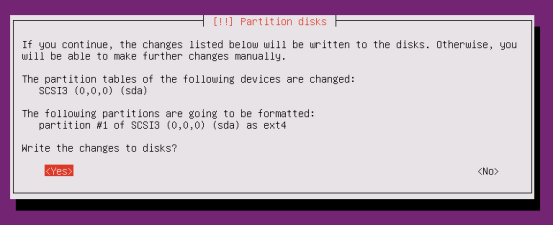
- Whether to write the selected disk partition method, now yes
- Whether to set up proxy, generally not set, select "continue"

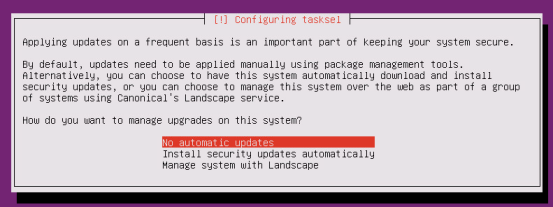
- Choose not to automatically upgrade the system
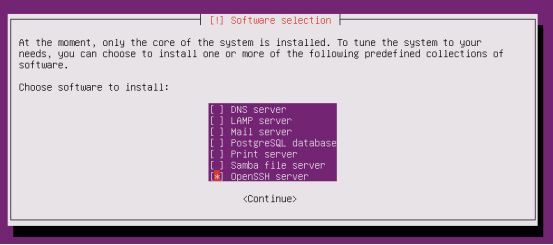
- Choose the software to install, I only chose to install "OpenSSH" for system streamlining
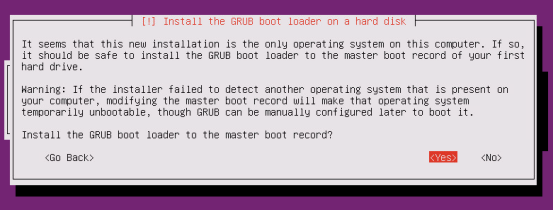
- Install system boot, select yes
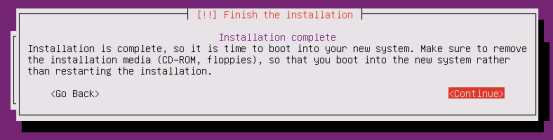
- Whether to end the installation, select "continue"
At this point, the basic system installation is complete.