Ubuntu 14.04 16.04 Linux nvidia driver download and installation
Ubuntu 14.04 16.04 nvidia driver installation
The simplest and most intuitive way is to directly select the driver installation in the following dialog box

But sometimes, the driver is not new enough. For example, 14.04 uses version 340.98. If you install the driver manually, you can refer to the official website guide.

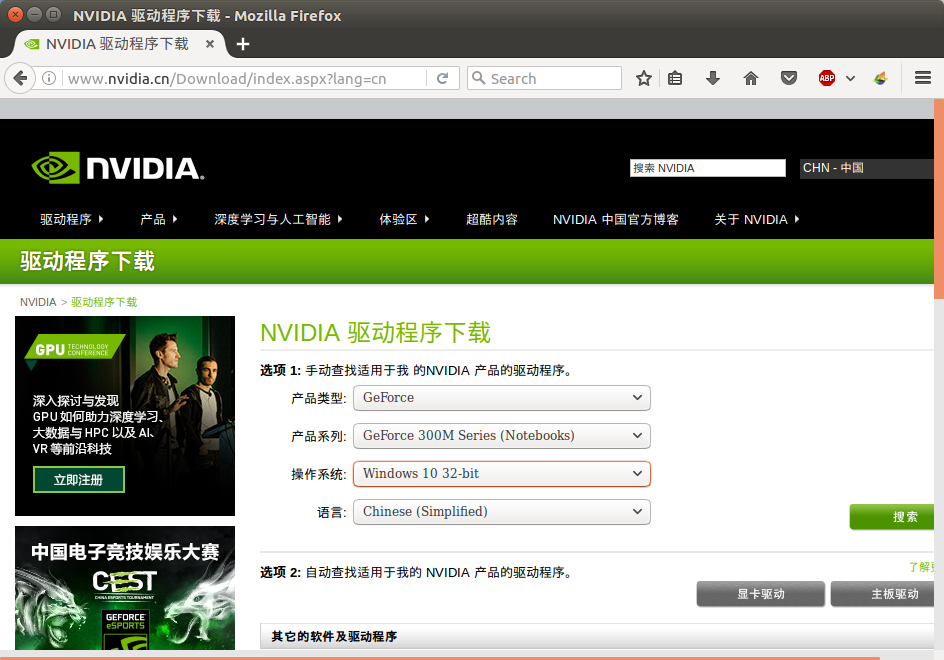
Download the driver at this URL: http://www.nvidia.cn/Download/index.aspx?lang=cn
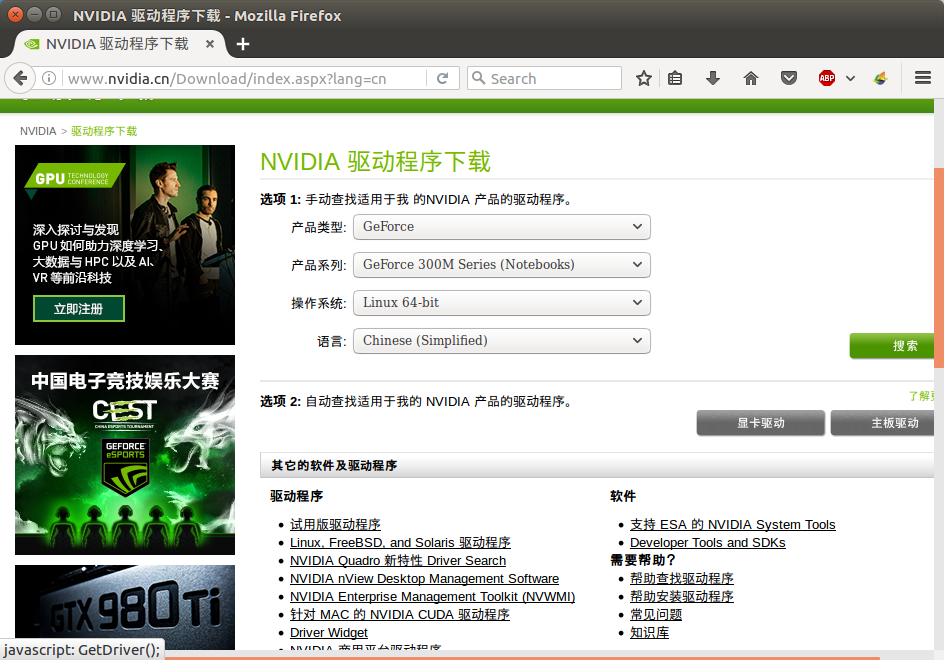
Note that the Linux version driver is not visible by default, and you need to click to display all drivers!
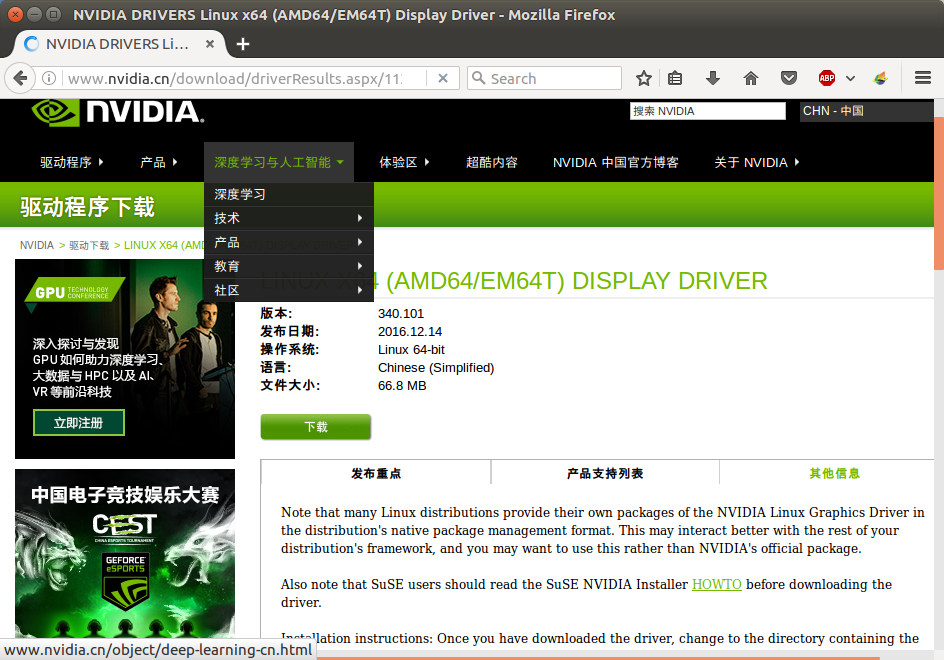
Click download at this time, and you can install it after completion.
You can view the detailed installation instructions at this website: http://us.download.nvidia.com/XFree86/Linux-x86_64/340.101/README/index.html
The following are detailed installation instructions:
Install NVIDIA Driver##
table of Contents
Before you startStart the installerInstall the kernel interface Use DKMS to register NVIDIA kernel moduleSignature NVIDIA kernel moduleAdd the pre-compiled kernel interface to the installer packageOther functions of the installer
This chapter provides instructions for installing the NVIDIA driver. Note that after installing, but before using the driver, you must complete the steps described Chapter 6, Configure X NVIDIA Driver. Other details provided in may be helpful for new Linux users Appendix I, Tips for new Linux users.
Before you start##
Before starting the installation, exit the X server and terminate all OpenGL applications (note that some OpenGL applications may remain even after the X server is stopped). You should also set the default runlevel on the system so that it will boot to the VGA console instead of directly to X. Doing so will make it easier to recover from problems during the installation process. See Appendix I, New Linux User Tips for details.
If you want to install on a system that is set to use the Nouveau driver, you should disable it first, and then try to install the NVIDIA driver. See [Q&A 8.1 "Interaction with nouveau driver"] (http://us.download.nvidia.com/XFree86/Linux-x86_64/340.101/README/commonproblems.html#nouveau) for details.
Start the installer##
After you download the file NVIDIA-Linux-x86_64-340.101.run, change it to the directory containing the downloaded file and run it as an executable file for the root user:
 #CD yourdirectory
 #SH NVIDIA-Linux-x86_64-340.101.run
The .run file is a self-extracting archive. During execution, it extracts the contents of the archive file and runs the included nvidia-installer tool, which provides a human-computer interaction interface to guide you through the installation.
nvidia-installer also installs itself to /usr/bin/nvidia-installer, which may be used to uninstall the driver after a period of time, automatically download updated drivers, etc. The use of this tool is detailed later in this chapter Introduction.
You can also provide a .run file with command line options. Some of the more common options are listed below.
**Common .run**Options
- - info
Print information about embedded .run file and exit.
- - check
Check the integrity of the archive and exit.
- - extract-only
The extracted content is ./NVIDIA-Linux-x86_64-340.101.run, but nvidia-installer is not run.
- - help
Print the usage information of common command line options and exit.
- - advanced-options
Print the usage information and advanced options of common command line options, and then exit.
Install Kernel Interface##
The NVIDIA kernel module has a kernel interface layer, which must be compiled specifically for each kernel. NVIDIA distributes the source code to this kernel interface layer.
When the installer runs, it will check the kernel source code required by the system and compile the kernel interface. You must compile the source code installed for your kernel to work. On most systems, this means you will need to find and install the correct kernel-source, kernel-header, or kernel-devel package; on some distributions, no additional packages are required.
After compiling the correct kernel interface, the kernel interface will be linked with the closed source part of the NVIDIA kernel module. This requires that you have a linker installed on your system. The linker, usually /usr/bin/ld, is part of the binutils package. You must install the linker before installing the NVIDIA driver.
Register NVIDIA kernel module with DKMS##
The installer will check if DKMS exists on the system. If you find DKMS, you will have the option to register the kernel module with DKMS, and use the DKMS infrastructure to build and install the kernel module. On most systems with DKMS, DKMS will automatically rebuild the registered kernel modules when a different Linux kernel is installed.
If nvidia-installer cannot install kernel modules through DKMS, the installation will be aborted and no kernel modules will be installed. If this happens, you should try the installation again without using the DKMS option.
It should be noted that the version nvidia-installer and the driver release 304 before shipment do not interact with DKMS. If you choose to register the NVIDIA kernel module with DKMS, please make sure that the module deletes the old driver installed by nvidia-installer from the non-DKMS aware version used in the DKMS database; otherwise, the module source files may be deleted without first unregistering the module , Which may cause the DKMS database to be in an inconsistent state. Run nvidia-uninstall to install using the old installer before calling the correct driver, **dkms remove** command to clean up the installation.
Due to the lack of secure storage space for private keys that can be utilized by automated methods such as DKMS, it is impossible to combine DKMS with the built-in module signature support nvidia-installer.
Sign NVIDIA Kernel Module##
Some kernels may require kernel modules to be encrypted and signed by a key trusted by the kernel in order to be loaded. In particular, many distributions require modules to be signed when loaded into a kernel running on a UEFI system with secure boot enabled. nvidia-installer includes support for signing kernel modules before installation to ensure they can be loaded on such systems. Please note that not all UEFI systems have secure boot enabled, and not all kernels running on UEFI secure boot systems require signed kernel modules, so if you are not sure whether your system requires signed kernel modules, you can try Install the driver and kernel module to see if the unsigned kernel module can be loaded.
In order to sign the kernel module, you will need an X.509 certificate with a private signing key and the corresponding public key. Before loading the module, the kernel must trust the X.509 certificate: We recommend that the signing key is trusted before starting to install the driver so that the newly signed module can be used immediately. If you do not have a suitable key pair for module signing, you must generate a key pair. For details on the types of keys suitable for module signing and how to generate keys, please refer to your distribution documentation. nvidia-installer can generate a key pair for you during installation, but it is best to have a kernel-generated and trusted key pair before the installation starts.
Once you have a key pair ready, you can use the key passed by nvidia-installer in the key pair to install and use the command line --module-signing-secret-key and --module- signing-public-key option. As an example, a driver with a signed kernel module can be installed in silent mode (that is, non-interactively) by running:
#SH ./NVIDIA-Linux-x86_64-340.101.run -s \
- - module signature secret key=/path/want/ signing.key \
- - module signature, public key=/path/want/ signing.x509
In the above example, signing.key and signing.x509 are public/private key pairs, and the public key has been signed up to one of the main sources of trusted module signing in the kernel.
On UEFI systems with secure boot enabled, nvidia-installer will display a series of interactive prompts to guide users through the module signing process. As an alternative to setting the key path on the command line, the path can be provided interactively in response to prompts. These prompts will also appear when building the NVIDIA kernel module for a kernel with CONFIG_MODULE_SIG_FORCE enabled in its configuration, or if the installer is running in expert mode.
The key source of core trust###
In order to load a kernel module into a kernel that requires a module signature, the module must be signed with a key trusted by the kernel. There are several sources that the kernel can use to build its trusted key pool. If you have generated a key pair, but it is not yet trusted by the kernel, you must first add the public key certificate to the trusted key source before it can be used to verify the signature of the signed kernel module. These trusted sources include:
Certificate embedded in the kernel image
With the kernel CONFIG_MODULE_SIG set, the public key certificate is used to sign the tree embedded in the kernel module, along with any additional module signing certificates provided at the time of generation, to the kernel image. The module signed by the private key corresponding to the embedded public key certificate will be trusted by the kernel.
Since the key is embedded at build time, the only way to add a new public key is to build a new kernel. On UEFI systems with secure boot enabled, the kernel image will need to be signed by a key trusted by the bootloader, so users should have a plan to build their own kernel with a custom embedded key to ensure that the bootloader will load the new Core.
Certificates stored in the UEFI firmware database
The kernel and CONFIG_MODULE_SIG_UEFI, in addition to any certificate embedded in the kernel image, the kernel can use the UEFI firmware database stored in the certificate db, KEK or PK computer to verify the signature of the kernel module, as long as they are not In the UEFI dbx blacklist.
Any user who owns the secure boot private key PK or any key in the KEK list should be able to add a new key CONFIG_MODULE_SIG_UEFI that can be used with the kernel, and any user with physical access to the computer should be able to delete Any existing secure boot key and install his or her own key. For details on how to manage UEFI secure boot keys, please refer to the documentation of UEFI-based computer systems.
Certificate stored in the secondary key database
Some distributions include utilities that allow secure storage and management of keys in a database separate from the kernel's built-in key list and the key list in the UEFI firmware. A prominent example is the mo (machine owner key) database shim bootloader used in some versions, and related management tools, mokutil and MokManager.
Such a system allows users to register additional keys without the need to build a new kernel or manage UEFI secure boot keys. For details on whether such secondary key databases are available and how to manage their keys, please refer to the distributed documentation.
Generate signature key in nvidia-installer###
nvidia-installer can generate a key that can be used for module signing, if the existing key is not easily available. Note that the module signed by the newly generated key cannot be loaded into the kernel of the module that needs to be signed until its key is trusted, and when such a module is installed on such a system, the installed drive will not be immediately available , Even if the installation is successful.
When nvidia-installer generates a key pair and uses it to sign a kernel module, the X.509 certificate containing the public key will be installed on the disk, so it can be added to the kernel's main trusted source One. nvidia-installer will report the location of the installed certificate: write down this location and the SHA1 fingerprint of the certificate so that after the installation is complete, you can register the certificate and verify that it is correct.
By default, nvidia-installer will try to securely delete the generated private key after signing the shred -u module. This is to prevent the key from being used to sign malicious kernel modules, but it also means that the same key cannot be used again to install a different driver, or even install the same driver on a different kernel. nvidia-installer can choose to install the private key signing key to the disk, just like the public certificate, so that the key pair can be reused in the future.
If you choose to install the private key, make sure to take appropriate precautions to ensure that it cannot be stolen. Some examples of precautions you may wish to take:
Prevent keys from being read by anyone without physical access to the computer
Generally, physical access is required to install the Secure Boot key, including keys managed outside the standard UEFI key database, to prevent attackers who remotely attack the operating system from installing malicious boot code. If a remote user can use a trusted key, or even a root user, an attacker can sign arbitrary kernel modules without first having physical access, making the system less secure.
One way to ensure that the key is not available to remote users is to keep it on a removable storage medium, except when the module is signed, it is disconnected from the computer.
Do not store unencrypted private keys
Encrypting the private key can add an extra layer of security: unless the key can be successfully decrypted, the key will not be used to sign the module. When not in use (for example, using or using volatile memory (such as a RAM disk), or securely delete any unencrypted copy of the key: make sure not to store an encrypted copy of the key shred instead of rm in persistent storage ). Note that using shred may not be sufficient to completely clear data from some storage devices, especially certain types of solid state storage.
Alternatives to installer module signature support###
The NVIDIA kernel module can be loaded on the system that requires the signature module without using the module signature support of the installer. Depending on your specific usage, you may find that these alternatives are more suitable than the contracted module nvidia-installer:
Disable UEFI Secure Boot (if applicable)
On some kernels, a signed module is only required when booting on a UEFI system with secure boot enabled. Some users of this kernel may find it more convenient to disable secure boot; however, please note that this will reduce the security of the system by making it easier for malicious users to install potentially harmful boot code, kernel or kernel modules.
Use kernels that do not require signed modules
The kernel can be configured not to check module signatures, or to check module signatures, but allows modules without trusted signatures to be loaded. Installing a kernel configured in this way will allow the installation of unsigned modules. Please note that on a secure boot system, you still need to make sure that the kernel is signed with a key trusted by the bootloader and/or boot firmware, and the kernel that does not enforce module signature verification may be better than this.
Add the pre-compiled kernel interface to the installation package##
When nvidia-installer runs, it will search for the pre-compiled kernel interface layer of the target kernel: if found, the complete kernel module can be linked to the generated nv-kernel.o through the pre-compiled interface instead of needed Compile the kernel interface on the target system. nvidia-installer includes functions that allow users to add pre-compiled interfaces to the installation package. This is useful in many use cases; for example, administrators of large groups of similarly configured computers can prepare an installation package with a pre-compiled interface for the kernel running on those computers, and then deploy a custom installer, which will Ability to install NVIDIA kernel modules without the need for kernel development headers or compilers installed on the target system. (The linker is still required.)
To use this feature, just call the --add-this-kernel option of the .run installer package; for example
#sh ./NVIDIA-Linux-x86_64-340.101.run --add-this-kernel
This will unpack NVIDIA-Linux-x86_64-340.101.run, compile the kernel interface layer to the currently running kernel (use --kernel-source-path and --kernel-output-path options to specify the ratio Another target kernel currently running), and create a new installation package with the kernel interface layer added.
When a computer with the same configuration of a large group is configured to require a trusted signature to load the kernel module, you may find this feature is particularly useful. The built-in module of the administrator supports the signature nvidia-installer. To pack a pre-compiled kernel interface layer, plus link the module to separate the module signature .RUN file, just use the --module-signing-secret-key and --module-signing-public-key next to the options --add-this-kerneloption. In addition to the fact that there is no kernel header or compiler on the target system, the resulting software package also has the additional benefit of being able to generate a signed module without accessing the private key on the installation target system. Please note that separate signatures are only valid if the result of the pre-compiled interface connectionnv-kernel.o` is exactly the same on the target system. These two file links are used to create the result of a custom installation on the system. To ensure the best compatibility, the linker used on the package preparation system and the installation target system should be the same.
Other functions of the installer##
If there is no choice, the installation program will be executed after the .run file is decompressed. The installer can run as a separate step of the process, or can run at a later time to get updates and other important command line options nvidia-installer are:
** nvidia-installer**options
- - uninstall
During the installation process, the installation program will back up any conflicting files and record the installation of new files. The uninstall option will undo the installation and restore the system to its pre-installed state.
- - latest
Connect to the NVIDIA FTP site and report the latest driver version and url to the latest driver file.
- - update
Connect to NVIDIA's FTP site, download the latest driver file, and install it.
- - ui=none
If the installer can find the correct ncurses library, use the ncurses-based user interface. Otherwise, it will fall back to a simple command line user interface. This option disables the use of the ncurses library.
NVIDIA Accelerated Linux Graphics Driver Readme File and Installation Guide#
NVIDIA Corporation###
Copyright © 2006-2013 NVIDIA Corporation
All NVIDIA design specifications, reference boards, files, diagrams, diagnostics, lists and other documents (consolidated and independent, "materials") are provided "as is". NVIDIA does not make any express, implied, statutory or other guarantees for these materials, and expressly denies all implied guarantees for non-specific uses, merchantability and suitability. The information provided is believed to be accurate and reliable. However, NVIDIA is not responsible for the consequences of using such information or any infringements of third-party patents or other rights that may result from its use. License is implied or otherwise granted without any patents or patent rights of NVIDIA. The specifications mentioned in this publication are subject to change without notice. This publication supersedes and supersedes all previously provided information. NVIDIA Corporation products are not authorized to be used as critical components in life support equipment or systems without the express written approval of NVIDIA Corporation.
NVIDIA, the NVIDIA logo, NVIDIA nForce, GeForce, NVIDIA Quadro, Vanta, TNT2, TNT, RIVA, RIVA TNT and TwinView are registered trademarks or trademarks of NVIDIA Corporation in the United States and/or other countries.
Linux is a registered trademark of Linus Torvalds. Fedora and Red Hat are trademarks of Red Hat, Inc. SuSE is a registered trademark of SuSE AG. Mandriva is a registered trademark of Mandriva SA. Intel and Pentium are registered trademarks of Intel Corporation. Athlon is a registered trademark of Advanced Micro Devices. OpenGL is a registered trademark of Silicon Graphics Inc. PCI Express is a registered trademark and/or service mark of PCI-SIG. Windows is a registered trademark of Microsoft Corporation in the United States and other countries. ARM is a registered trademark of ARM Limited. Other company and product names may be trademarks or registered trademarks of their respective owners.
table of Contents
I. Installation and configuration instructions1. Introduction2. Minimum software requirements3. Select and download the NVIDIA software package for the system4. Install the NVIDIA driver5. List of installed components[6. Configure X for the NVIDIA driver.] (http://us.download.nvidia.com/XFree86/Linux-x86_64/340.101/README/editxconfig.html)7.Frequently asked questions8.Frequently asked questions9.Known issues10.Allocating DMA buffers on 64-bit platforms11. Specify OpenGL environment variable settings12. Configure multiple display devices on an X screen13. Configure GLX in Xinerama14. Configure multiple Xs on a card Screen15.Configure TV output16.Support X resizing and rotation extension17.Configure laptop18.Use NVIDIA driver on Optimus laptop Program19. Programming Mode20.Configuration flip and UBB21. Use Proc file system interface22.Configure power management support23 .Use X compound extension24.Use nvidia-settings utility25.Use nvidia-smi utility26. NVIDIA Management Library27.Use nvidia-debugdump utility28. Use nvidia-persistenced utility[29. Configure SLI and multi-GPU FrameRendering](PYTHON _XLGSY)30.Configure frame lock and genlock31.Configure SDI video output32.Configure depth 30 display33.Using RandR 1.4 to uninstall graphics display34. Resolution capability35. NVIDIA contact information and other resources36. AcknowledgementsII. AppendixA. Supported NVIDIA GPU productsB. X configuration optionsC. Display device nameD. GLX supportE. Each Inch pointsF. i2c bus supportG.VDPAU supportH.audio supporttips for new Linux users[J.application overview] (http://us.download.nvidia.com/XFree86/Linux-x86_64/340.101/README/profiles.html)K. GPU name
- End-
Recommended Posts