Discourse CentOS 8 new installation manual
For the new installation guide and process of Discourse on CentOS 8, please refer to this document.
Install Docker
Discourse is based on Docker, so you need to install Docker first.
For CentOS 8, you need to run the following two commands to register the Docker warehouse.
$ sudo yum install -y yum-utils

$ sudo yum-config-manager \
 - - add-repo \
 https://download.docker.com/linux/centos/docker-ce.repo
After completing the above configuration, run the following command to install:
sudo yum install docker-ce docker-ce-cli containerd.io
You may be asked to agree to the key in the middle. Enter Y and then agree.
Run the following command to start Docker
sudo systemctl start docker
Run the following command to make sure your Docker has been installed and started correctly.
sudo docker run hello-world
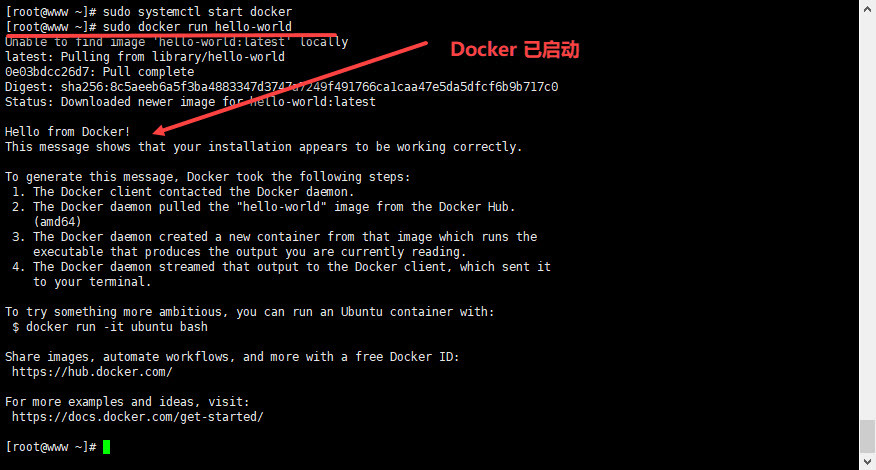
If you can see the above output, you can be sure that Docker has been installed successfully.
Install Discourse
Before installing Discourse, you must have a registered domain name, and the registered domain name has been pointed to the server address you need to install.
If you do not configure the above configuration, you will not be able to complete the Discourse installation.
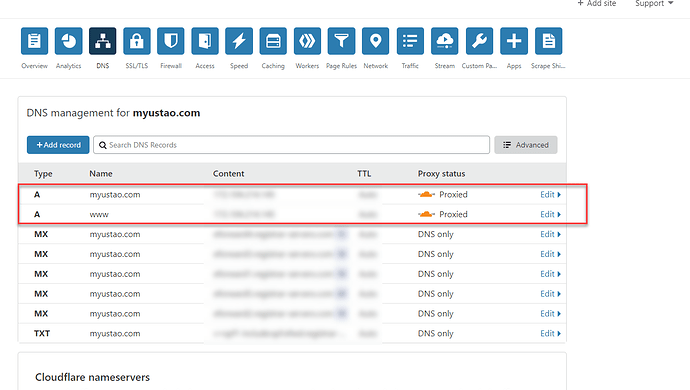
Set DNS
Assuming that the domain name we need to install now is myustao.com, then you need to modify your DNS to the server you need to install.
Best, you need to set the main domain name and www domain name to point to the same server address.
Set up mail server###
Discourse and mailgun are good friends, and they can be regarded as propaganda for mailgun. Therefore, you need to register a mailguan account. Or you can have other SMTP mail accounts.
If you do not configure your mail server, Discourse will not be able to send mail to your administrator account after installation, so you will not be able to log in and reactivate.
You can configure DNS according to the prompts on MailGun. After the configuration is completed, you can check DNS again to ensure that the configuration is successful.
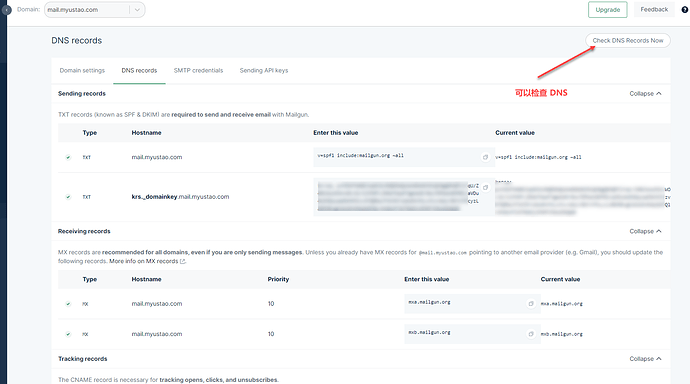
Then select the configuration part of SMTP to get your configuration parameters.
If you don’t know what your username and password are, you can choose to reset your password.
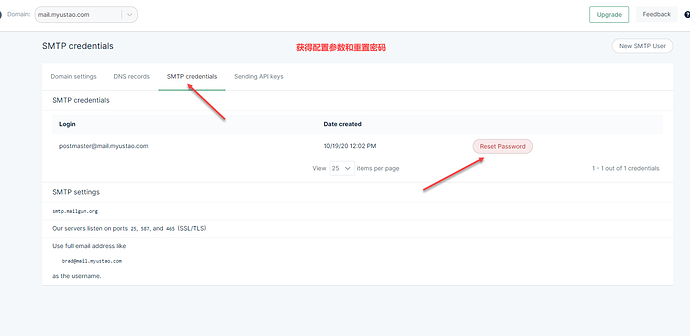
Copy the above configuration content to a text file for use.
The parameters you need to prepare are
- smtp address
- username
- password
Clone the code from GitHub###
Run the following command to clone the code of Discourse from GitHub to your server.
sudo -s
git clone https://github.com/discourse/discourse_docker.git /var/discourse
cd /var/discourse
Then enter the folder where you have cloned the successful code.
Of course, if your operating system does not have git installed, you need to install it first.
The command to install git is:
dnf install git
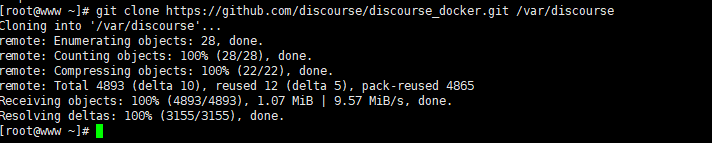
If you can see the following output, it means that the code clone was successful:
[ root@www ~]# git clone https://github.com/discourse/discourse_docker.git /var/discourse
Cloning into '/var/discourse'...
remote: Enumerating objects:28, done.
remote: Counting objects:100%(28/28), done.
remote: Compressing objects:100%(22/22), done.
remote: Total 4893(delta 10), reused 12(delta 5), pack-reused 4865
Receiving objects:100%(4893/4893),1.07 MiB |9.57 MiB/s, done.
Resolving deltas:100%(3155/3155), done.[root@www ~]#
Then you need to enter the folder of the code you cloned.
Run installation configuration###
Enter the cloned Discourse folder, execute the following command:
. /discourse-setup
You may also need to install netcat, which is used to check whether the port is occupied in ContOS.
If you haven't installed it yet, you can install it with the following command:
dnf install nmap
The system will return the following code:
[ root@vps263579 discourse]# dnf install nmap
Last metadata expiration check:0:12:58 ago on Mon 19 Oct 202002:09:31 PM EDT.
Dependencies resolved.======================================================================================================================================================================================================================================
 Package                                                Architecture                                        Version                                                      Repository                                              Size
======================================================================================================================================================================================================================================
Installing:
 nmap                                                   x86_64                                              2:7.70-5.el8                                                 AppStream                                              5.8 M
Installing dependencies:
 nmap-ncat                                              x86_64                                              2:7.70-5.el8                                                 AppStream                                              237 k

Transaction Summary
======================================================================================================================================================================================================================================
Install  2 Packages

Total download size:6.1 M
Installed size:25 M
Is this ok [y/N]: y
Downloading Packages:(1/2): nmap-ncat-7.70-5.el8.x86_64.rpm                                                                                                                                                                2.7 MB/s |237 kB     00:00(2/2): nmap-7.70-5.el8.x86_64.rpm                                                                                                                                                                     9.9 MB/s |5.8 MB     00:00--------------------------------------------------------------------------------------------------------------------------------------------------------------------------------------------------------------------------------------
Total                                                                                                                                                                                                 7.2 MB/s |6.1 MB     00:00
Running transaction check
Transaction check succeeded.
Running transaction test
Transaction test succeeded.
Running transaction
 Preparing        :1/1
 Installing       : nmap-ncat-2:7.70-5.el8.x86_64                                                                                                                                                                                1/2
 Running scriptlet: nmap-ncat-2:7.70-5.el8.x86_64                                                                                                                                                                                1/2
 Installing       : nmap-2:7.70-5.el8.x86_64                                                                                                                                                                                     2/2
 Running scriptlet: nmap-2:7.70-5.el8.x86_64                                                                                                                                                                                     2/2
 Verifying        : nmap-2:7.70-5.el8.x86_64                                                                                                                                                                                     1/2
 Verifying        : nmap-ncat-2:7.70-5.el8.x86_64                                                                                                                                                                                2/2

Installed:
 nmap-2:7.70-5.el8.x86_64                                                                                        nmap-ncat-2:7.70-5.el8.x86_64

Complete!
Depending on the DNS settings, you may encounter a situation where port 443 cannot be accessed.
In this case, you can edit your local hosts file. Under ContOS, this file is under the /etc/hosts path.
You add a record of your local IP address and the domain name address you need to install.
Then restart the installation. If everything goes well, you should see the following interface:
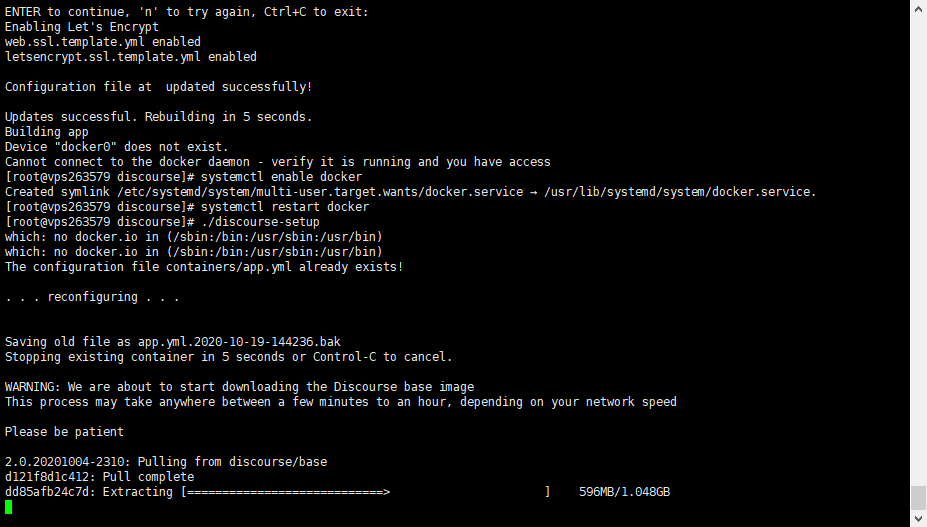
The above interface shows that you are downloading the Docker image.
If all goes well, your server will rebuild the installer.

The figure above shows that the server is refactoring the source code.
For your server's situation, you need to wait for a while for the reconstruction to complete. Once the reconstruction is complete, you should have no problem accessing your server through your domain name.
If you access your server through a domain name, you will see the following interface:
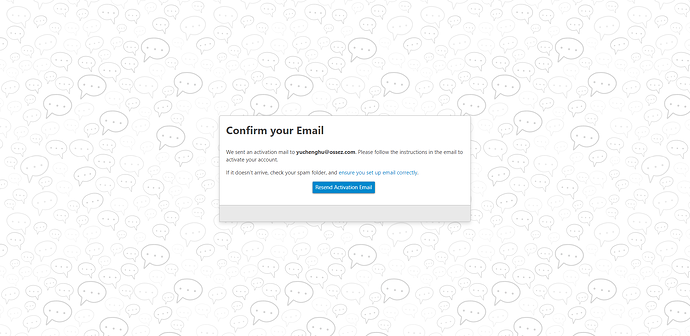
If you can see the above interface, it means that your Discourse has been installed successfully.
And the activation email has been sent.
At this point, your Discourse has been installed successfully.
https://www.ossez.com/t/discourse-centos-8/594
Recommended Posts