CentOS 6.8 virtual machine installation details
Step 1: Install VMware
Official website: www.vmware.com
Download link of Baidu Cloud: http://pan.baidu.com/s/1bphDOWv Password: 0zix
VMware is a virtual PC software that can virtualize a new hardware environment on the existing operating system, which is equivalent to simulating a new PC, so that two independent operations can be run on one machine at the same time. system.
The installation process all default to the next step and the next step is OK.
After the installation is complete, open VMware, the main page is displayed as follows:

Download CentOS image file
Baidu cloud disk download address: [http://pan.baidu.com/s/1mhGrdt2] (http://pan.baidu.com/s/1mhGrdt2%20) Password: i5f1
Next, we will install CentOS on VMware
Step 1: Open VMware and click to create a new virtual machine

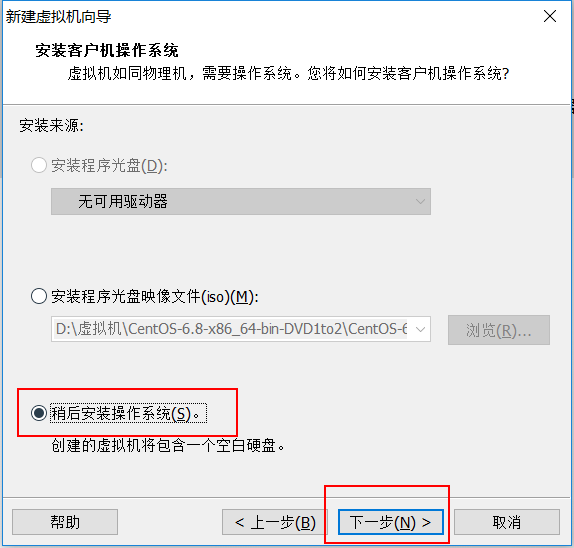
Step 2: Select typical and click Next. The following interface appears, and then select the third option: Install the operating system later, click Next
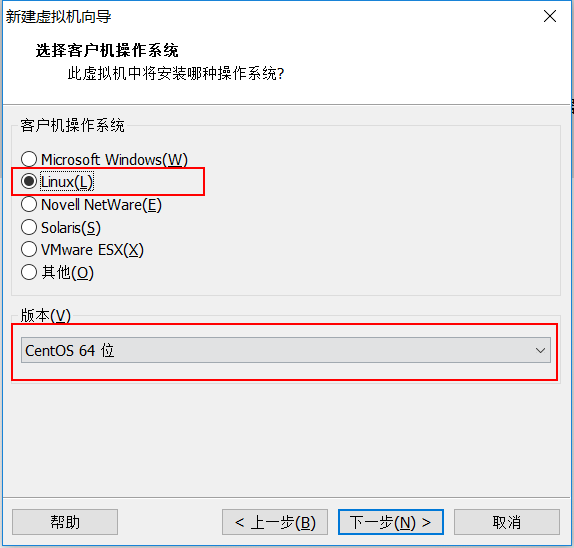
Step 3: Choose Linux as the operating system of the client computer. Choose the version according to the Linux image file you downloaded. Here we choose CentOS 64 bit. Then click Next
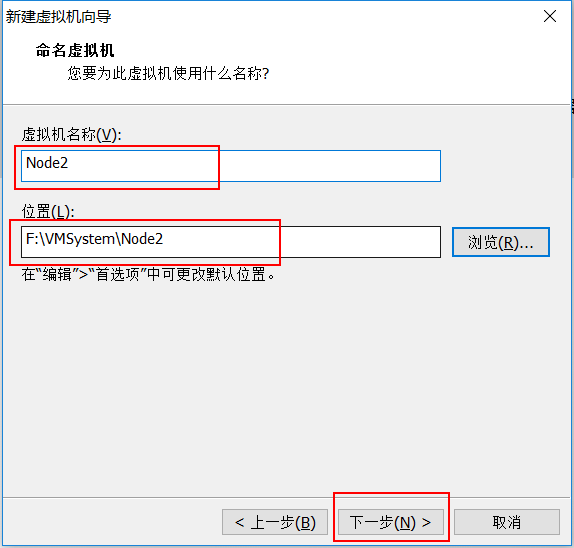
Step 4: Give the virtual machine a name and choose the location where the virtual machine is installed, preferably a non-Chinese address without spaces. Then click Next
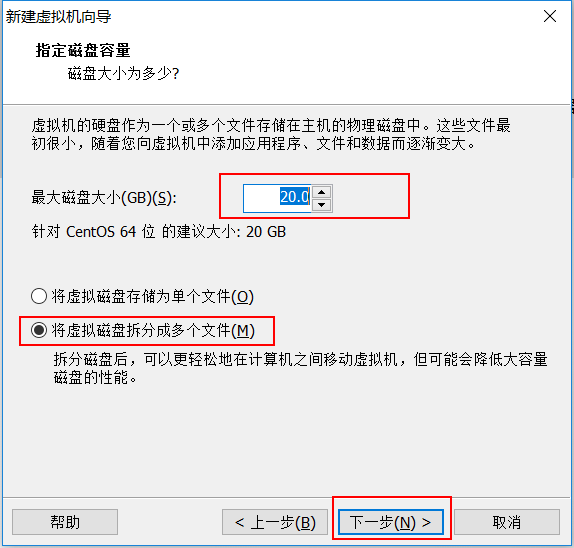
Step 5: By default, 20 GB disk size is sufficient. Then click Next
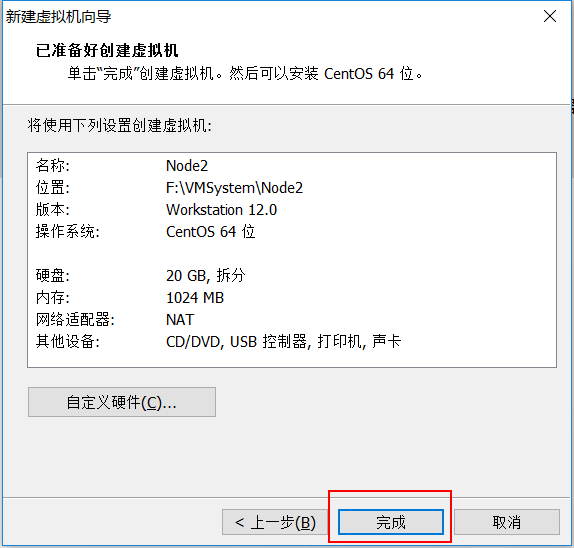
Step 6: Click the Finish button
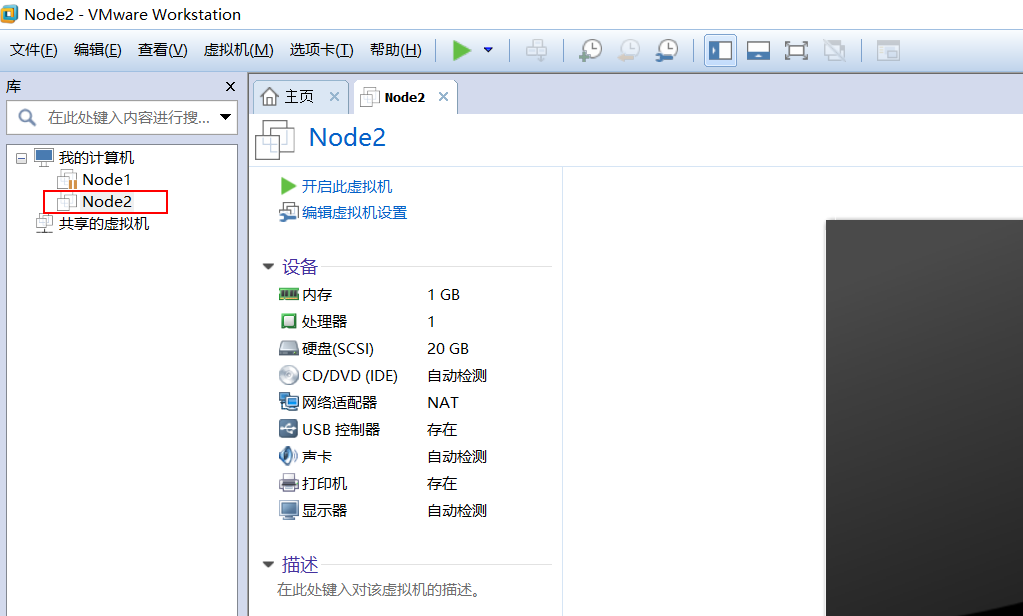
Then you will find the virtual machine Node2 we just created on the main VMware interface
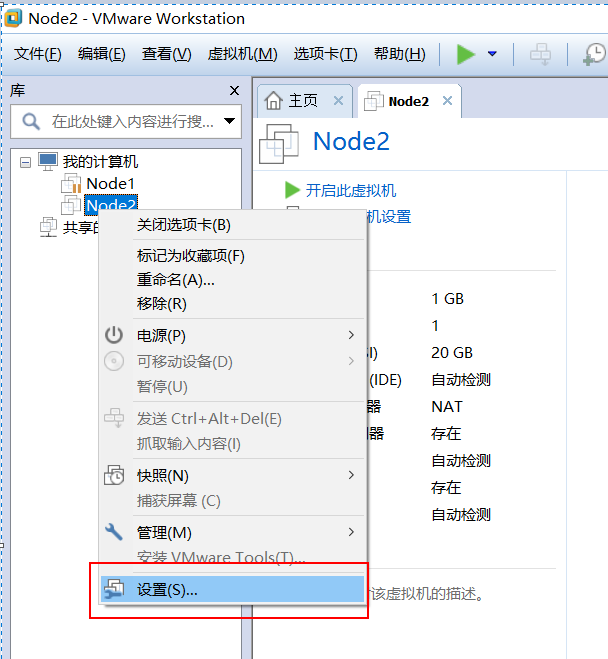
Step 7: Right-click the virtual machine name Node2, select Settings
The following interface pops up:
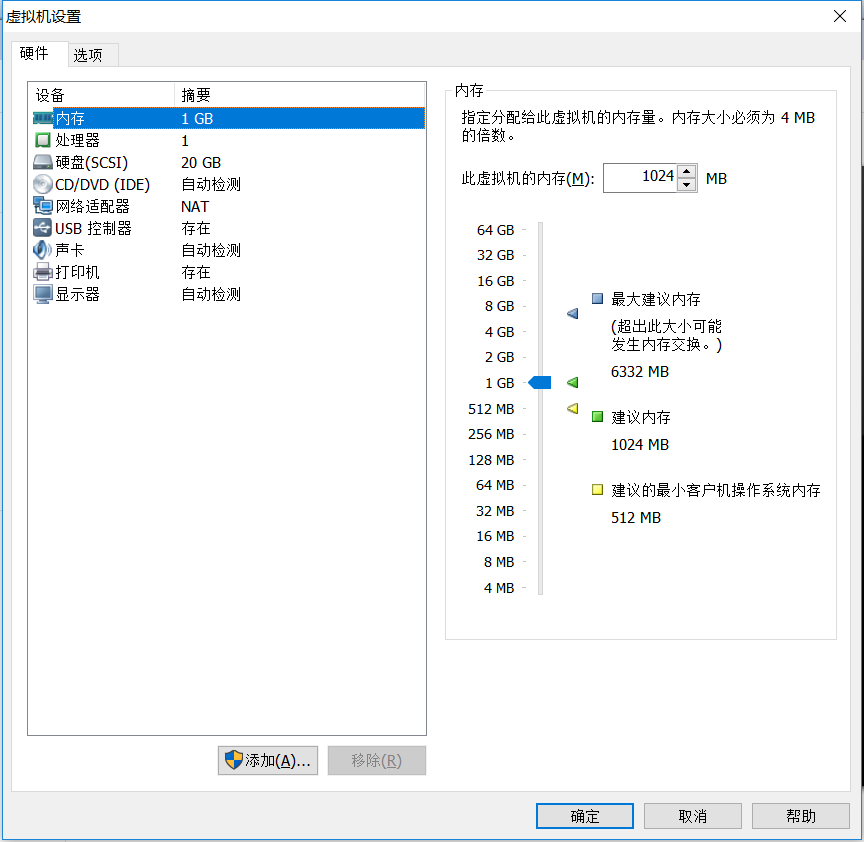
**Step 8: **
First adjust the memory size. Generally speaking, the minimum memory size cannot be less than 628 m, and the maximum size cannot exceed half of the real physical machine memory. We can choose 1024M memory size by default.**
Secondly, we can adjust the processor and the size of the hard disk, but here we all choose the default. Just jump to the CD/DVD (IDE) option, select the CentOS image file we downloaded, and click OK
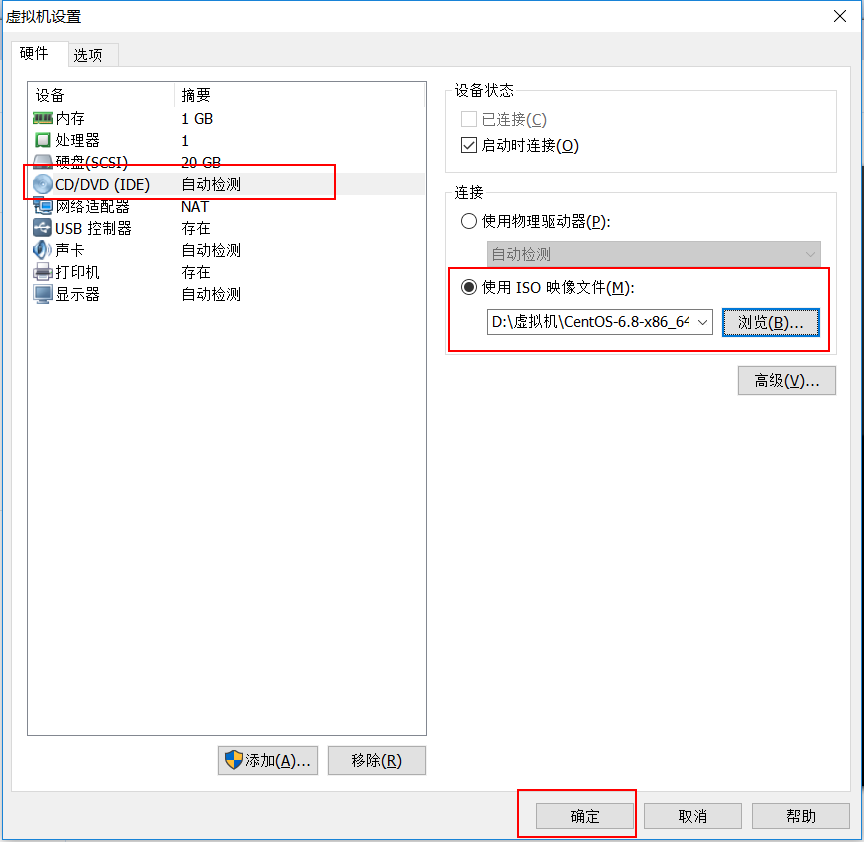
Note: The CentOS 6.8 we downloaded here has two ISO files. We choose the first one. The first one contains the main information of the CentOS system, while the second ISO file is just some uncommon software information.

Step 9: Go to the main VMware interface, select the Node2 virtual machine we installed, and click to start this virtual machine

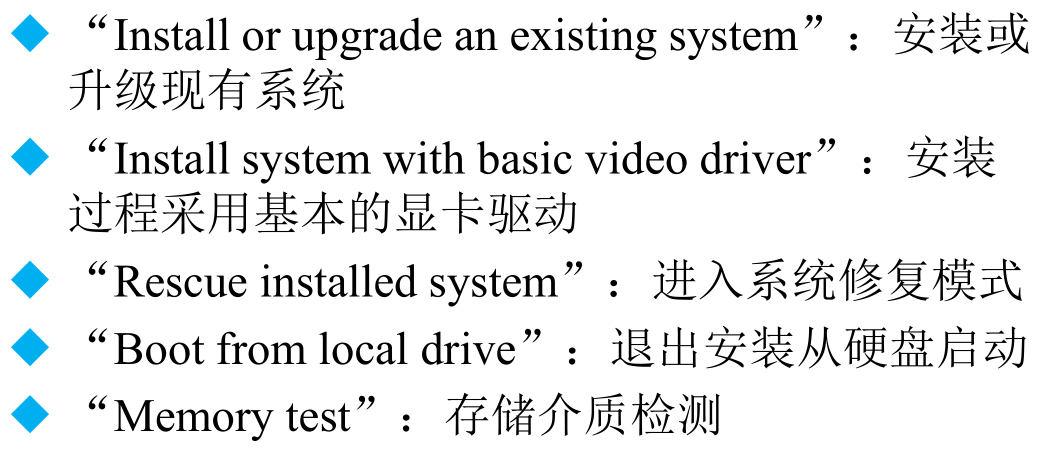
Step 10: After entering the welcome interface, select the first option: Install or upgrade an existing system, and then Enter
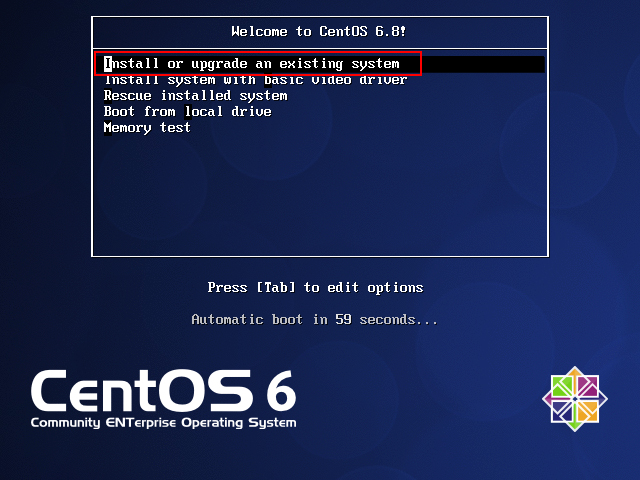
The remaining options mean:
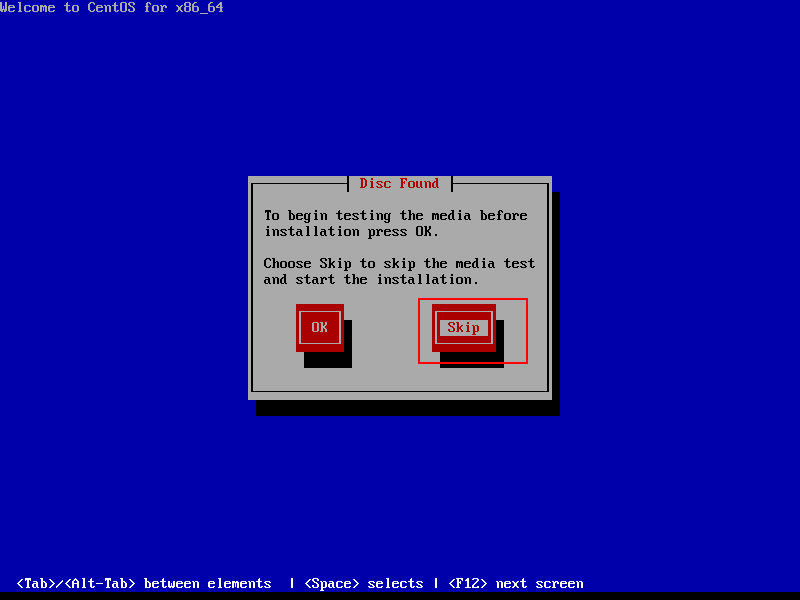
Step 11: Ask us if we need to check the disc, we press the right arrow, select the skip option (that is, no detection), Enter
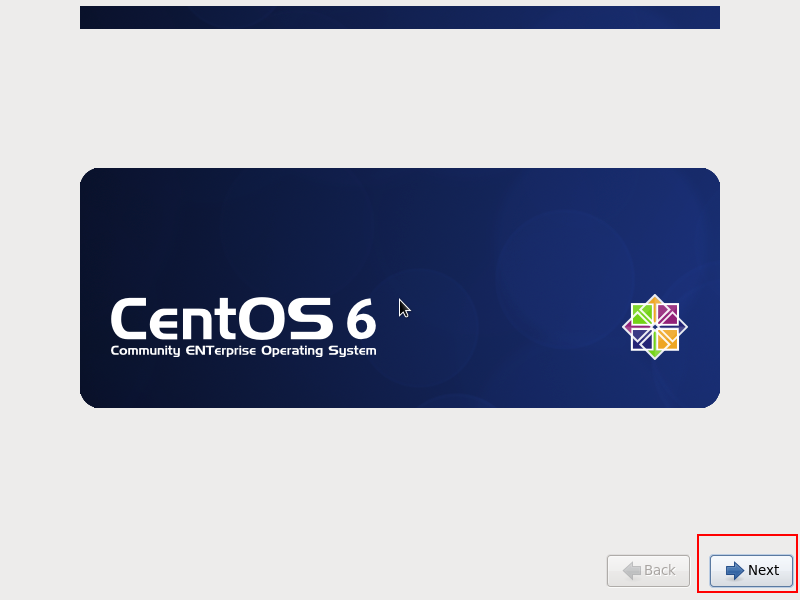
Step 12: Click next
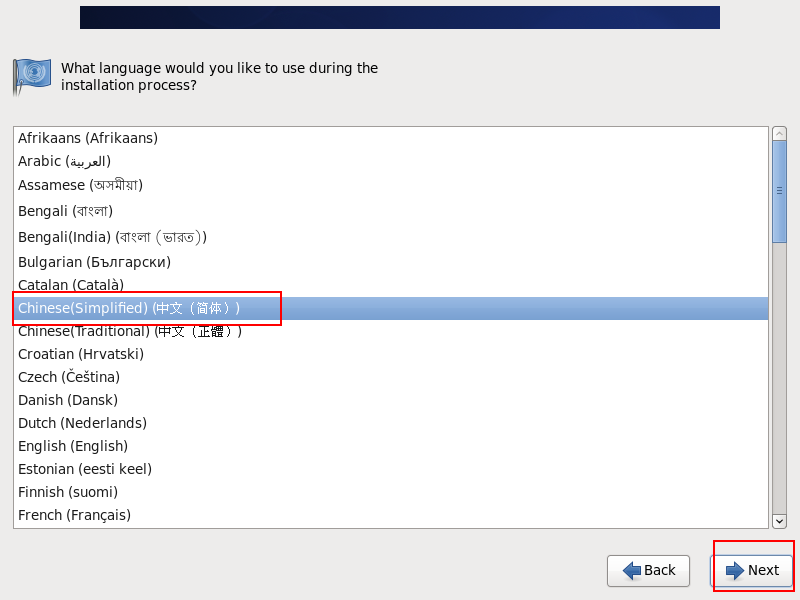
Step 13: Select Chinese Simplified, click Next
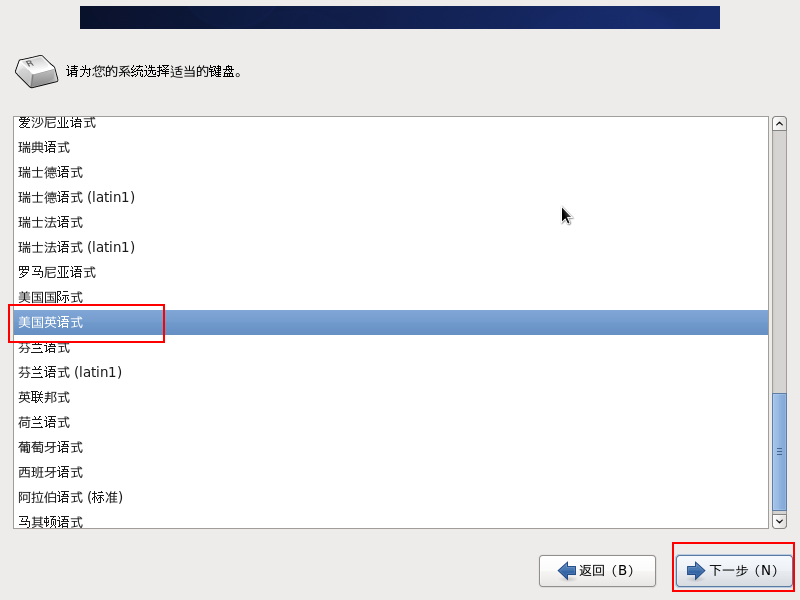
Step 14: Choose American English on the keyboard, and then click Next
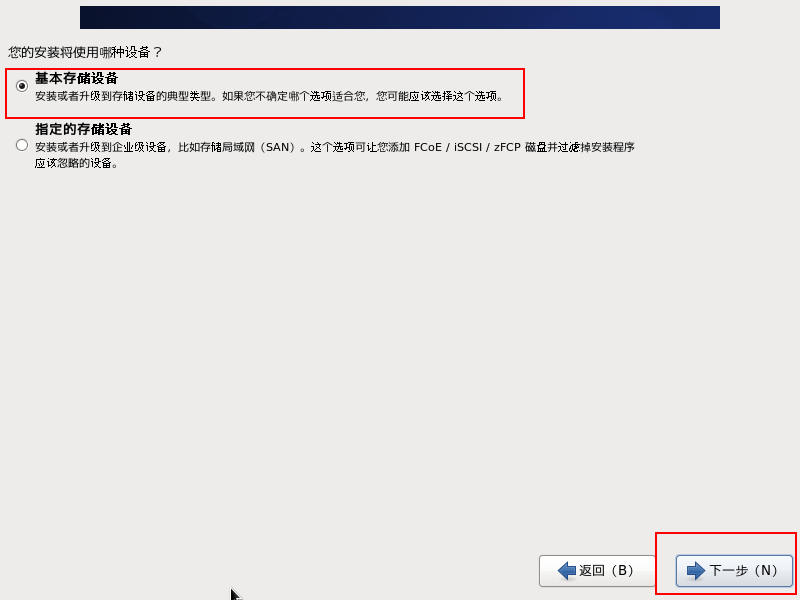
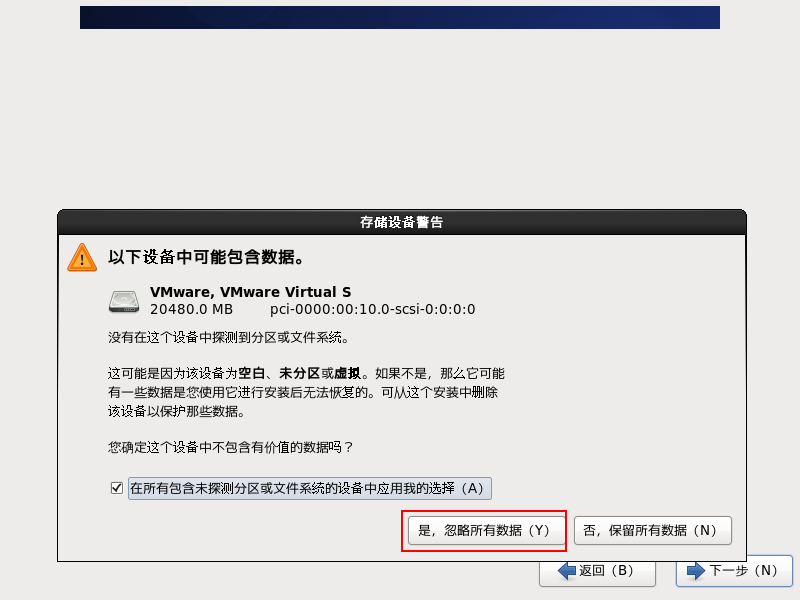
Step 15: Select the basic storage device, click Next
Step 16: Choose the first one, which is to ignore all data
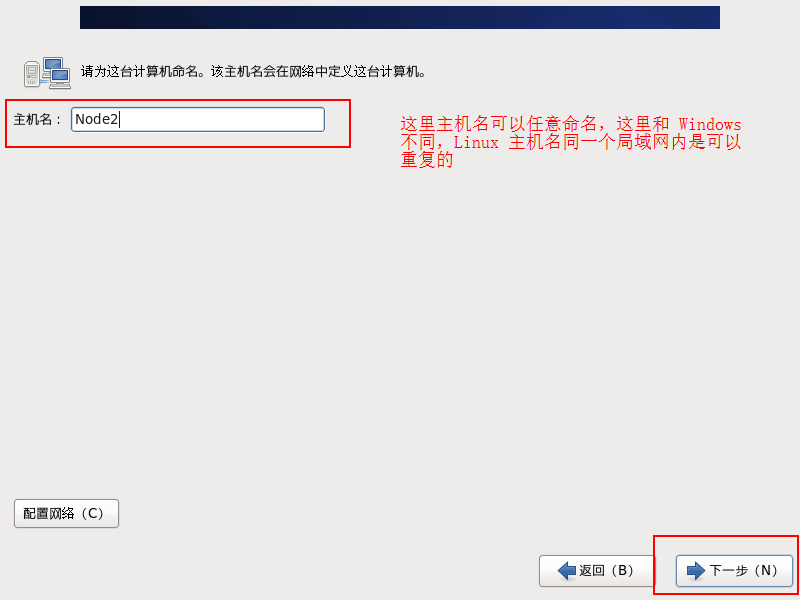
Step 17: Name the host
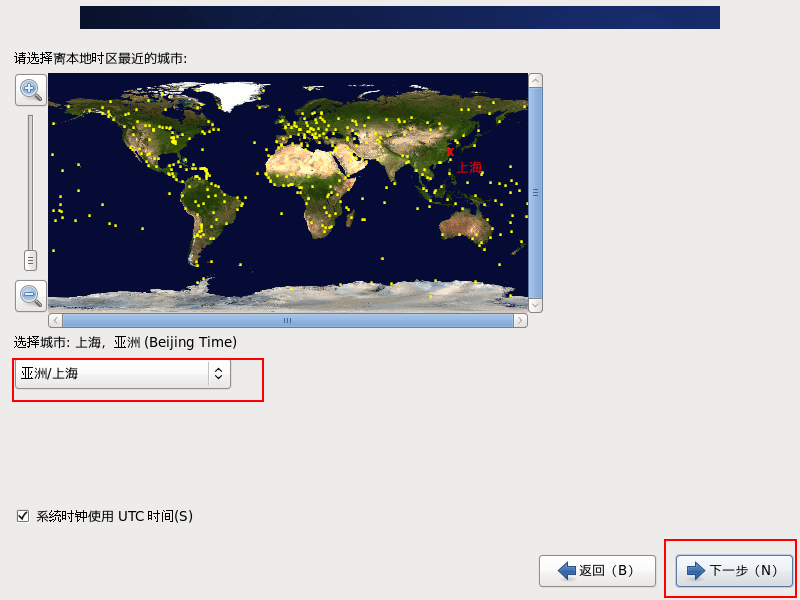
Step 18: Select the time zone, and then click Next (Note: The following system clock uses UTC time should be removed, my screenshot is wrong)
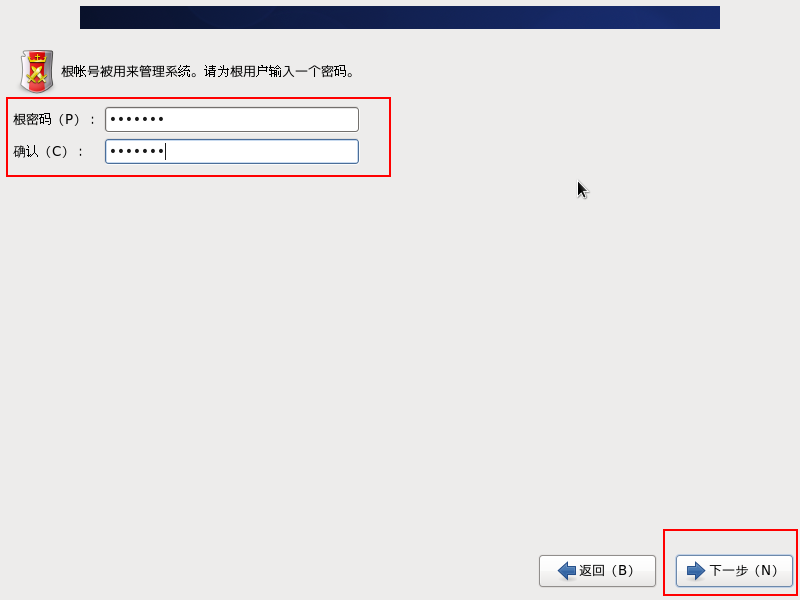
**Step 19: Set a password for the root user, and then click Next. **
Note: If the password setting is too simple, the system will pop up that your password is not secure enough, but you can choose to use it anyway, and then continue
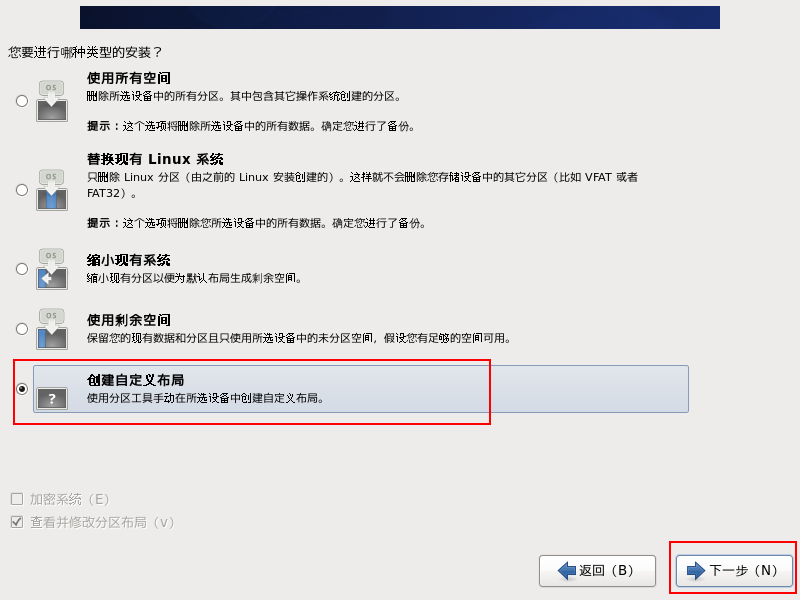
Step 20: Choose which type of installation to perform, we choose the last one to create a custom layout
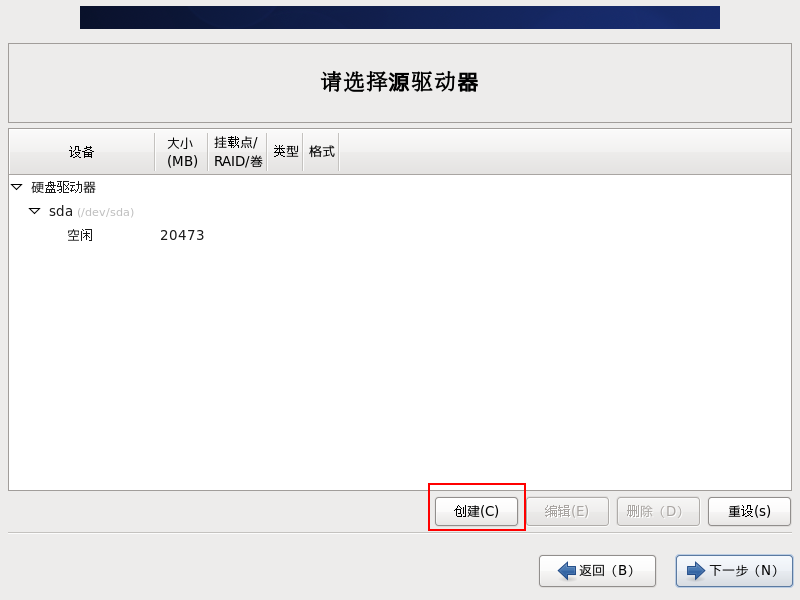
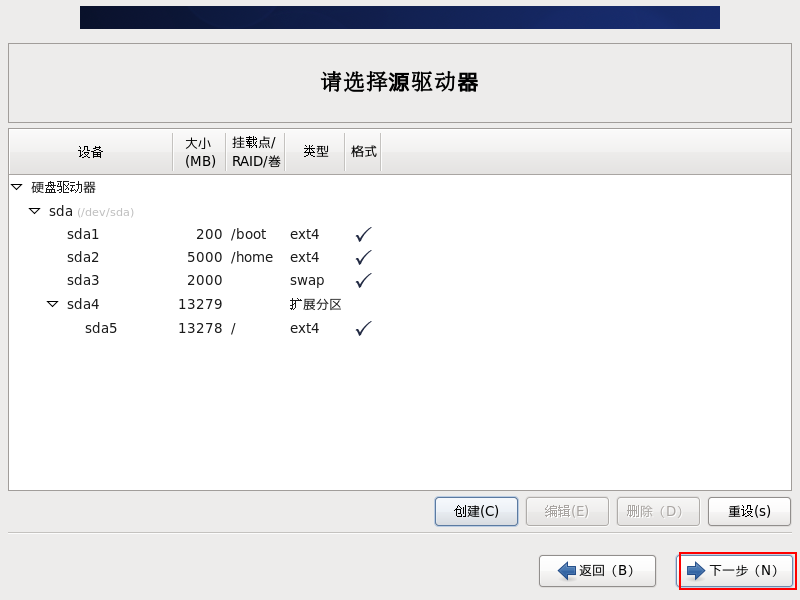
Step 21: Partition the hard disk, as shown in the interface, we click Create
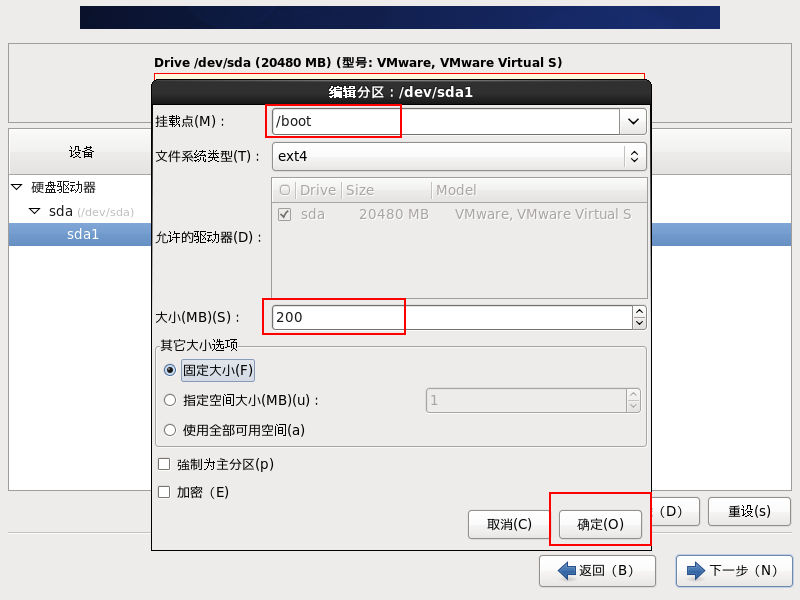
Linux system partition:
Must be partitioned:
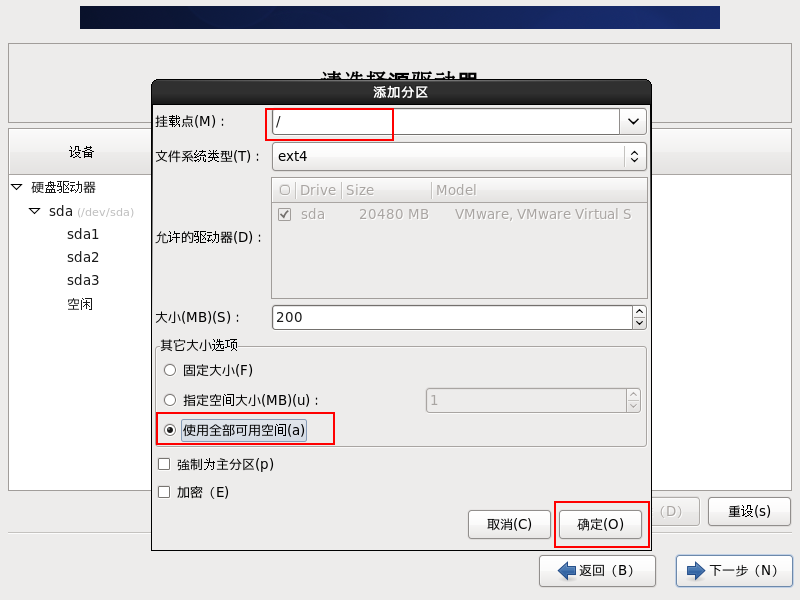
①, root partition /
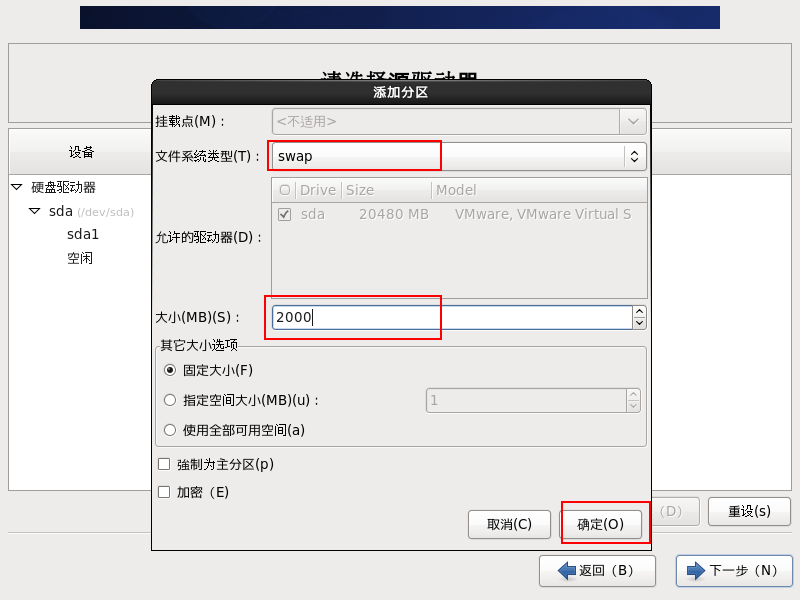
②, swap partition swap (can be understood as virtual memory, when the memory is not enough, you can temporarily use the swap partition, twice the memory, no more than 2GB)
Recommended partition:
③, boot partition boot (save the data when the system starts, generally not too big, 200 M is enough to prevent the system from failing to start after the root partition is filled with files)
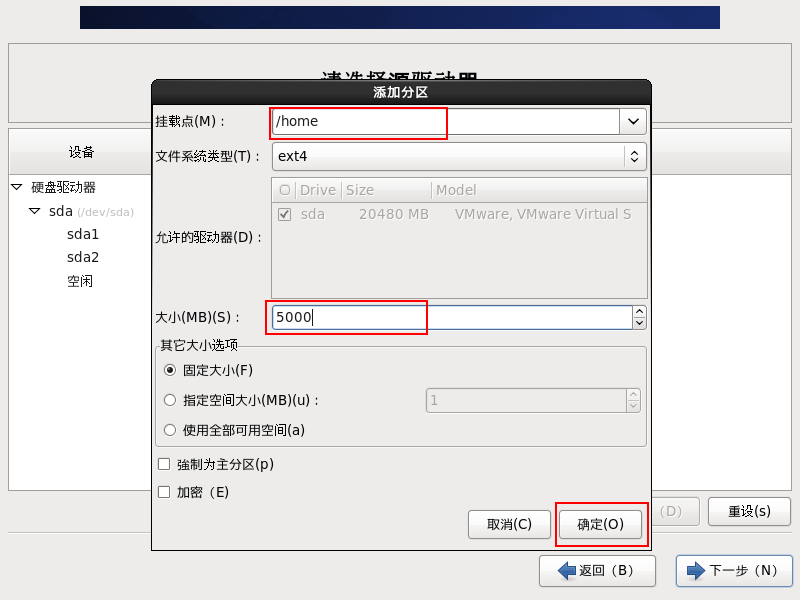
④, home partition, save user information
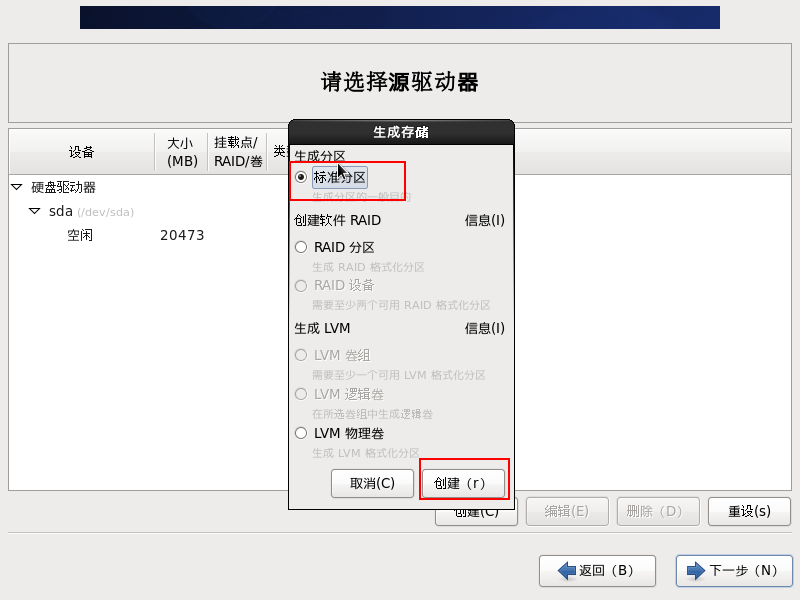
Select the standard partition and click Create
Step 1: Create a boot partition with a size of 200 m
Step 2: Give the swap partition, the size is 2000 M
The third step: partition home, the size is 5000 M
Step 4: Partition the root directory, the size is the remaining space
Then our partition is complete, click Next:
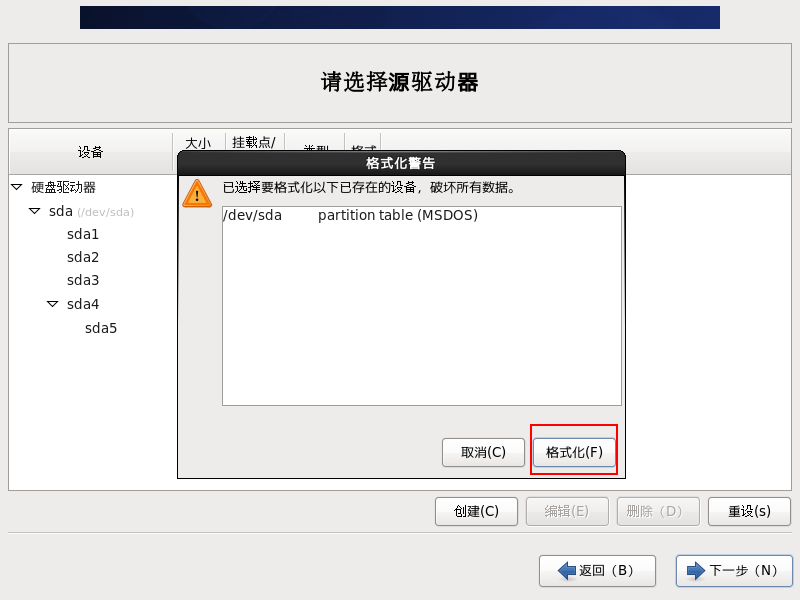
Step 22: Format the hard drive, select format
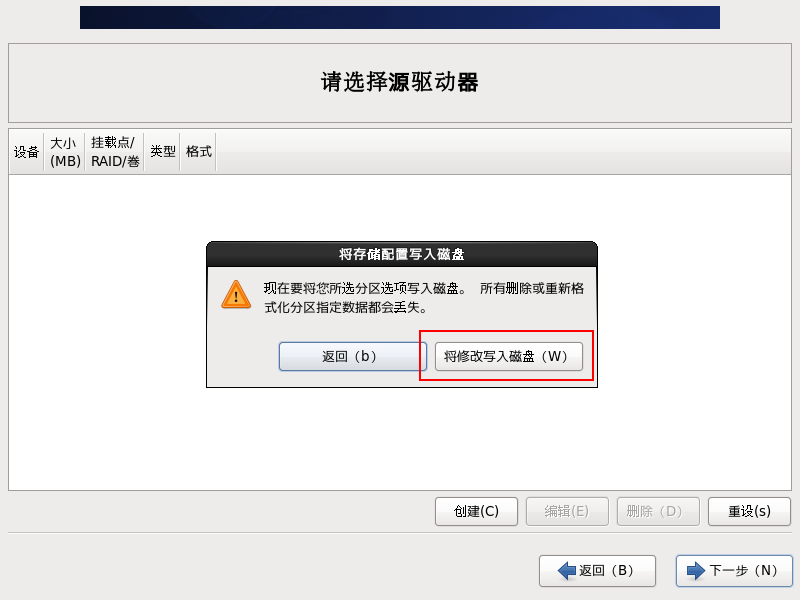
Step 23: Choose to write changes to disk, click Next
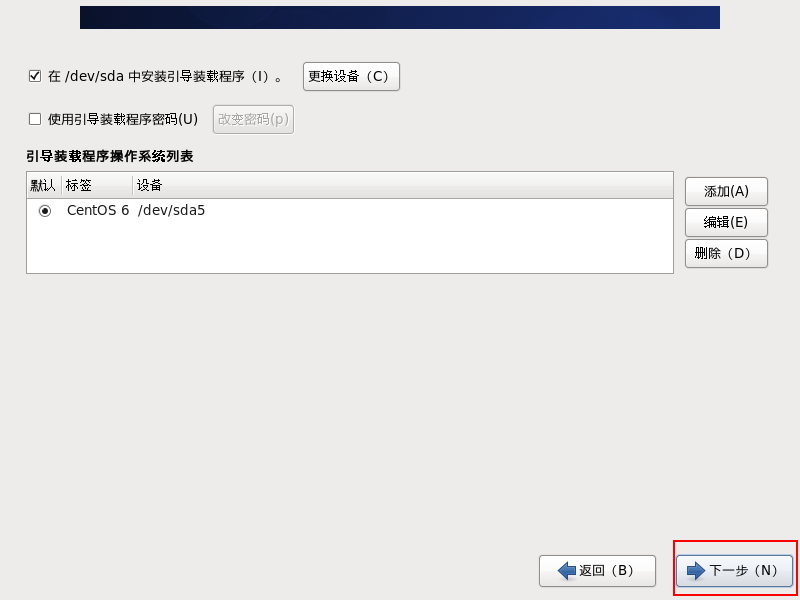
Step 24: By default, click Next
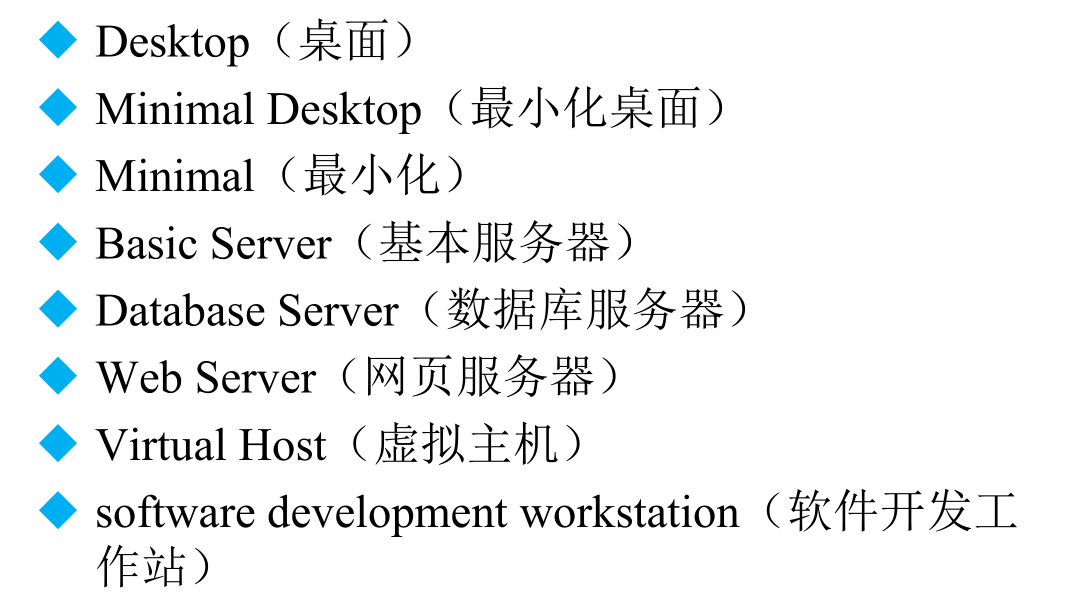
Step 25: Choose the type of installation. For beginners, if you want a graphical interface, you can choose the first two. Here we choose Basic Server (plain character interface), click Next, and then wait for the installation to complete
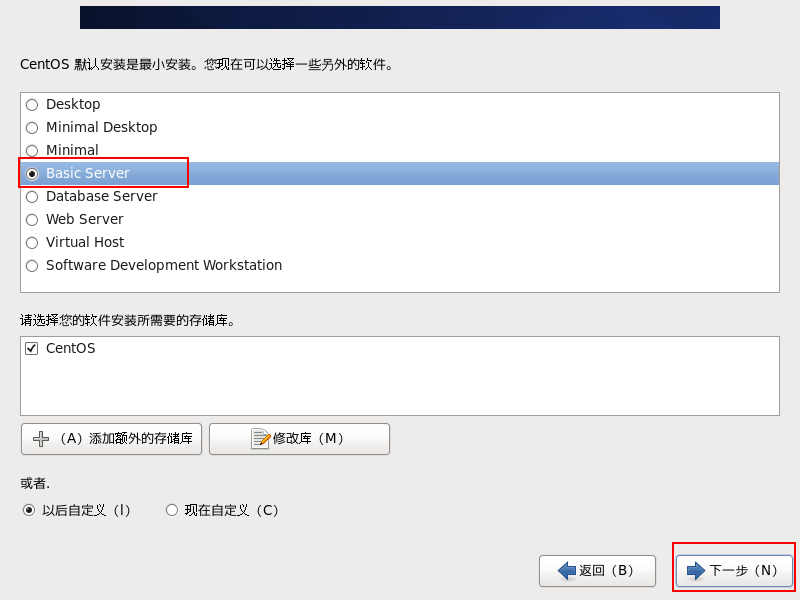
The above options are explained as follows:
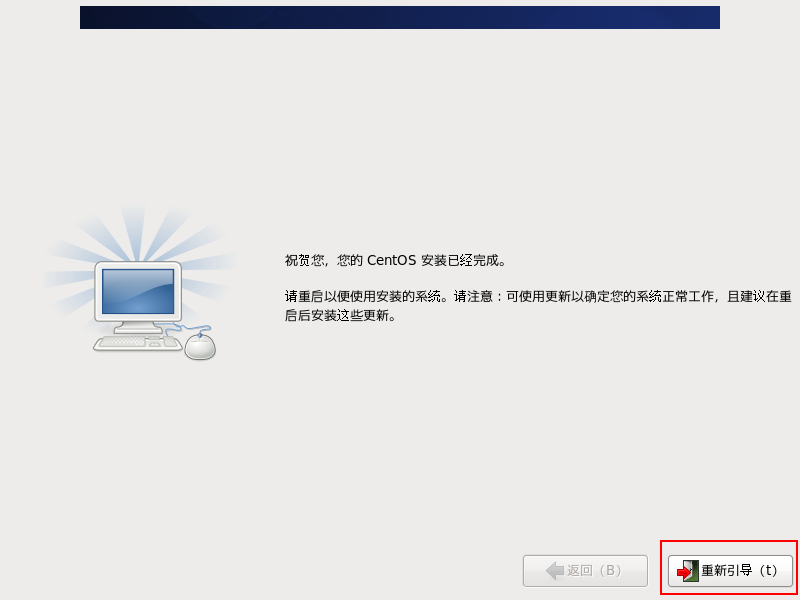
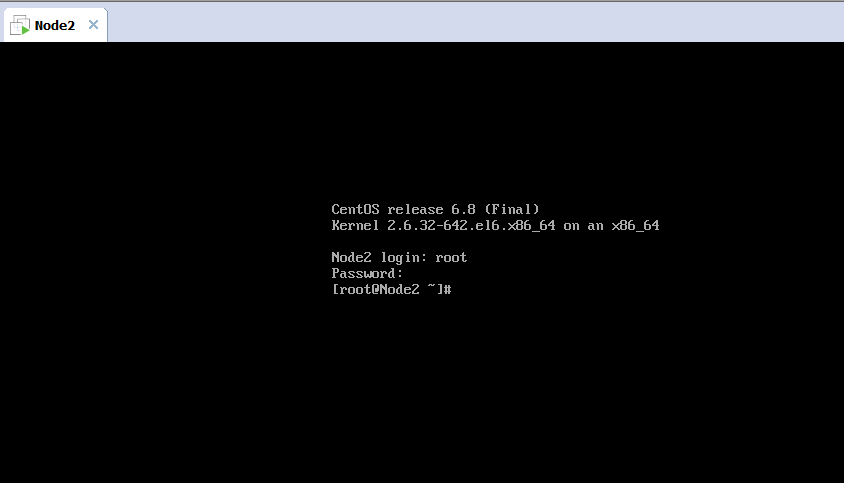
Step 26: After the installation is complete, we can choose to reboot, enter the username and password to log in to the Linux system we installed
Step 27: Enter the username and password to log in to the Linux system
Recommended Posts